

 133Likes
 LinkBack URL
 About LinkBacks
not sure why some of the photos came out sideways
Welcome guest, is this your first visit? Create Account now to join.
Welcome to the NZ Hunting and Shooting Forums.
Search Forums


User Tag List
+ Reply to Thread
Results 16 to 30 of 74
Thread: DIY Carbon Fiber Rifle Stock
-
25-02-2020, 05:11 PM #16Member

- Join Date
- Dec 2011
- Location
- North Island
- Posts
- 378
-
-
25-02-2020, 06:10 PM #17Member
- Join Date
- Oct 2018
- Location
- NI
- Posts
- 287
@Robojaz good effort mate and very informative post for the budding DIY-ers out there. I'm imagining a carbon fibre repro of a K98 stock will be a fun project.
-
25-02-2020, 06:22 PM #18Member
- Join Date
- Dec 2011
- Location
- North Island
- Posts
- 378
Well that would be challenge, all those intricate parts and potential traps.. trick would be to find a donor stock to mold off. Originally Posted by Trigger

-
25-02-2020, 06:35 PM #19Member
- Join Date
- Jun 2018
- Location
- Otago
- Posts
- 28
@Robojaz Looks great.
I have been considering laying up a carbon stock and its awesome to see how someone else is doing it step by step. Thanks.
-
25-02-2020, 08:28 PM #20Member

- Join Date
- Dec 2019
- Location
- Vanderbijlpark, South Africa
- Posts
- 35
<subscribe> ....
-
25-02-2020, 09:04 PM #21Member

- Join Date
- Apr 2015
- Location
- Geraldine
- Posts
- 22,621
heck I wouldve been more than happy with the plywood/laminate one you made to begin with.....great thread to be following.
viper likes this.
-
26-02-2020, 06:23 PM #22Member
- Join Date
- Dec 2011
- Location
- North Island
- Posts
- 378
Another long post...
Jaco Goosen and Stocky like this.
-
26-02-2020, 06:37 PM #23Member
- Join Date
- Dec 2011
- Location
- North Island
- Posts
- 378
FIRST GO AT A FIBERGLASS STOCK
With the mold complete it was now time to bite the bullet and have a go at making my first rifle stock. As I previously mentioned I had decided that I would make my first stock from Fibreglass as it is cheaper than Carbon Fiber, knowing I would probably make a few F ups along the way.
I still had enough 200g Fiberglass cloth leftover from the mold, so all I had to order was some epoxy resin, microfibre filler ( for the inletting) and some black epoxy tint. (I prefer black inletting to white)
I ordered the following:
1 litre West Systems 105 resin,
200ml 206 Hardener, and
4 litres of 413 Microfibre filler (more than I needed but I figure I would eventually use it)
The prep was the same for the mold making, lay out and precut all Fibreglass, have brushes, popsicle sticks and gloves all handy to reach...etc. (This time I did not use a respirator as epoxy resin does not smell as bad as Polyester resin.)
Once everything was laid out and ready, I applied 4 coats of carnuba car wax on both mold halves letting each layer dry to a haze before buffing off. I then applied a light mist coat of PVA release agent and let it dry before applying an additional two heavy coats allowing to dry between coats.
The next step was to mix up a batch of epoxy resin with a small blob of black epoxy tint. I have to admit I made my first F-up here in that I mixed up way too much resin, I thought I would be able to get through both mold halves within the 20-25 min tack off time. Well I was way wrong on that count and ended up having to waste a bit of resin as it tacked off before I could use it.
Back to the process, I painted a thick coat of resin onto the first mold half (only within the stock depression) ensuring I got into all areas. It was then a matter of laying down my first layer of Fiberglass cloth and wetting it out, ensuring it conformed to all the curves of the stock without any air gaps and bridging between high points. the Pistol grip area was particularly difficult and time consuming.
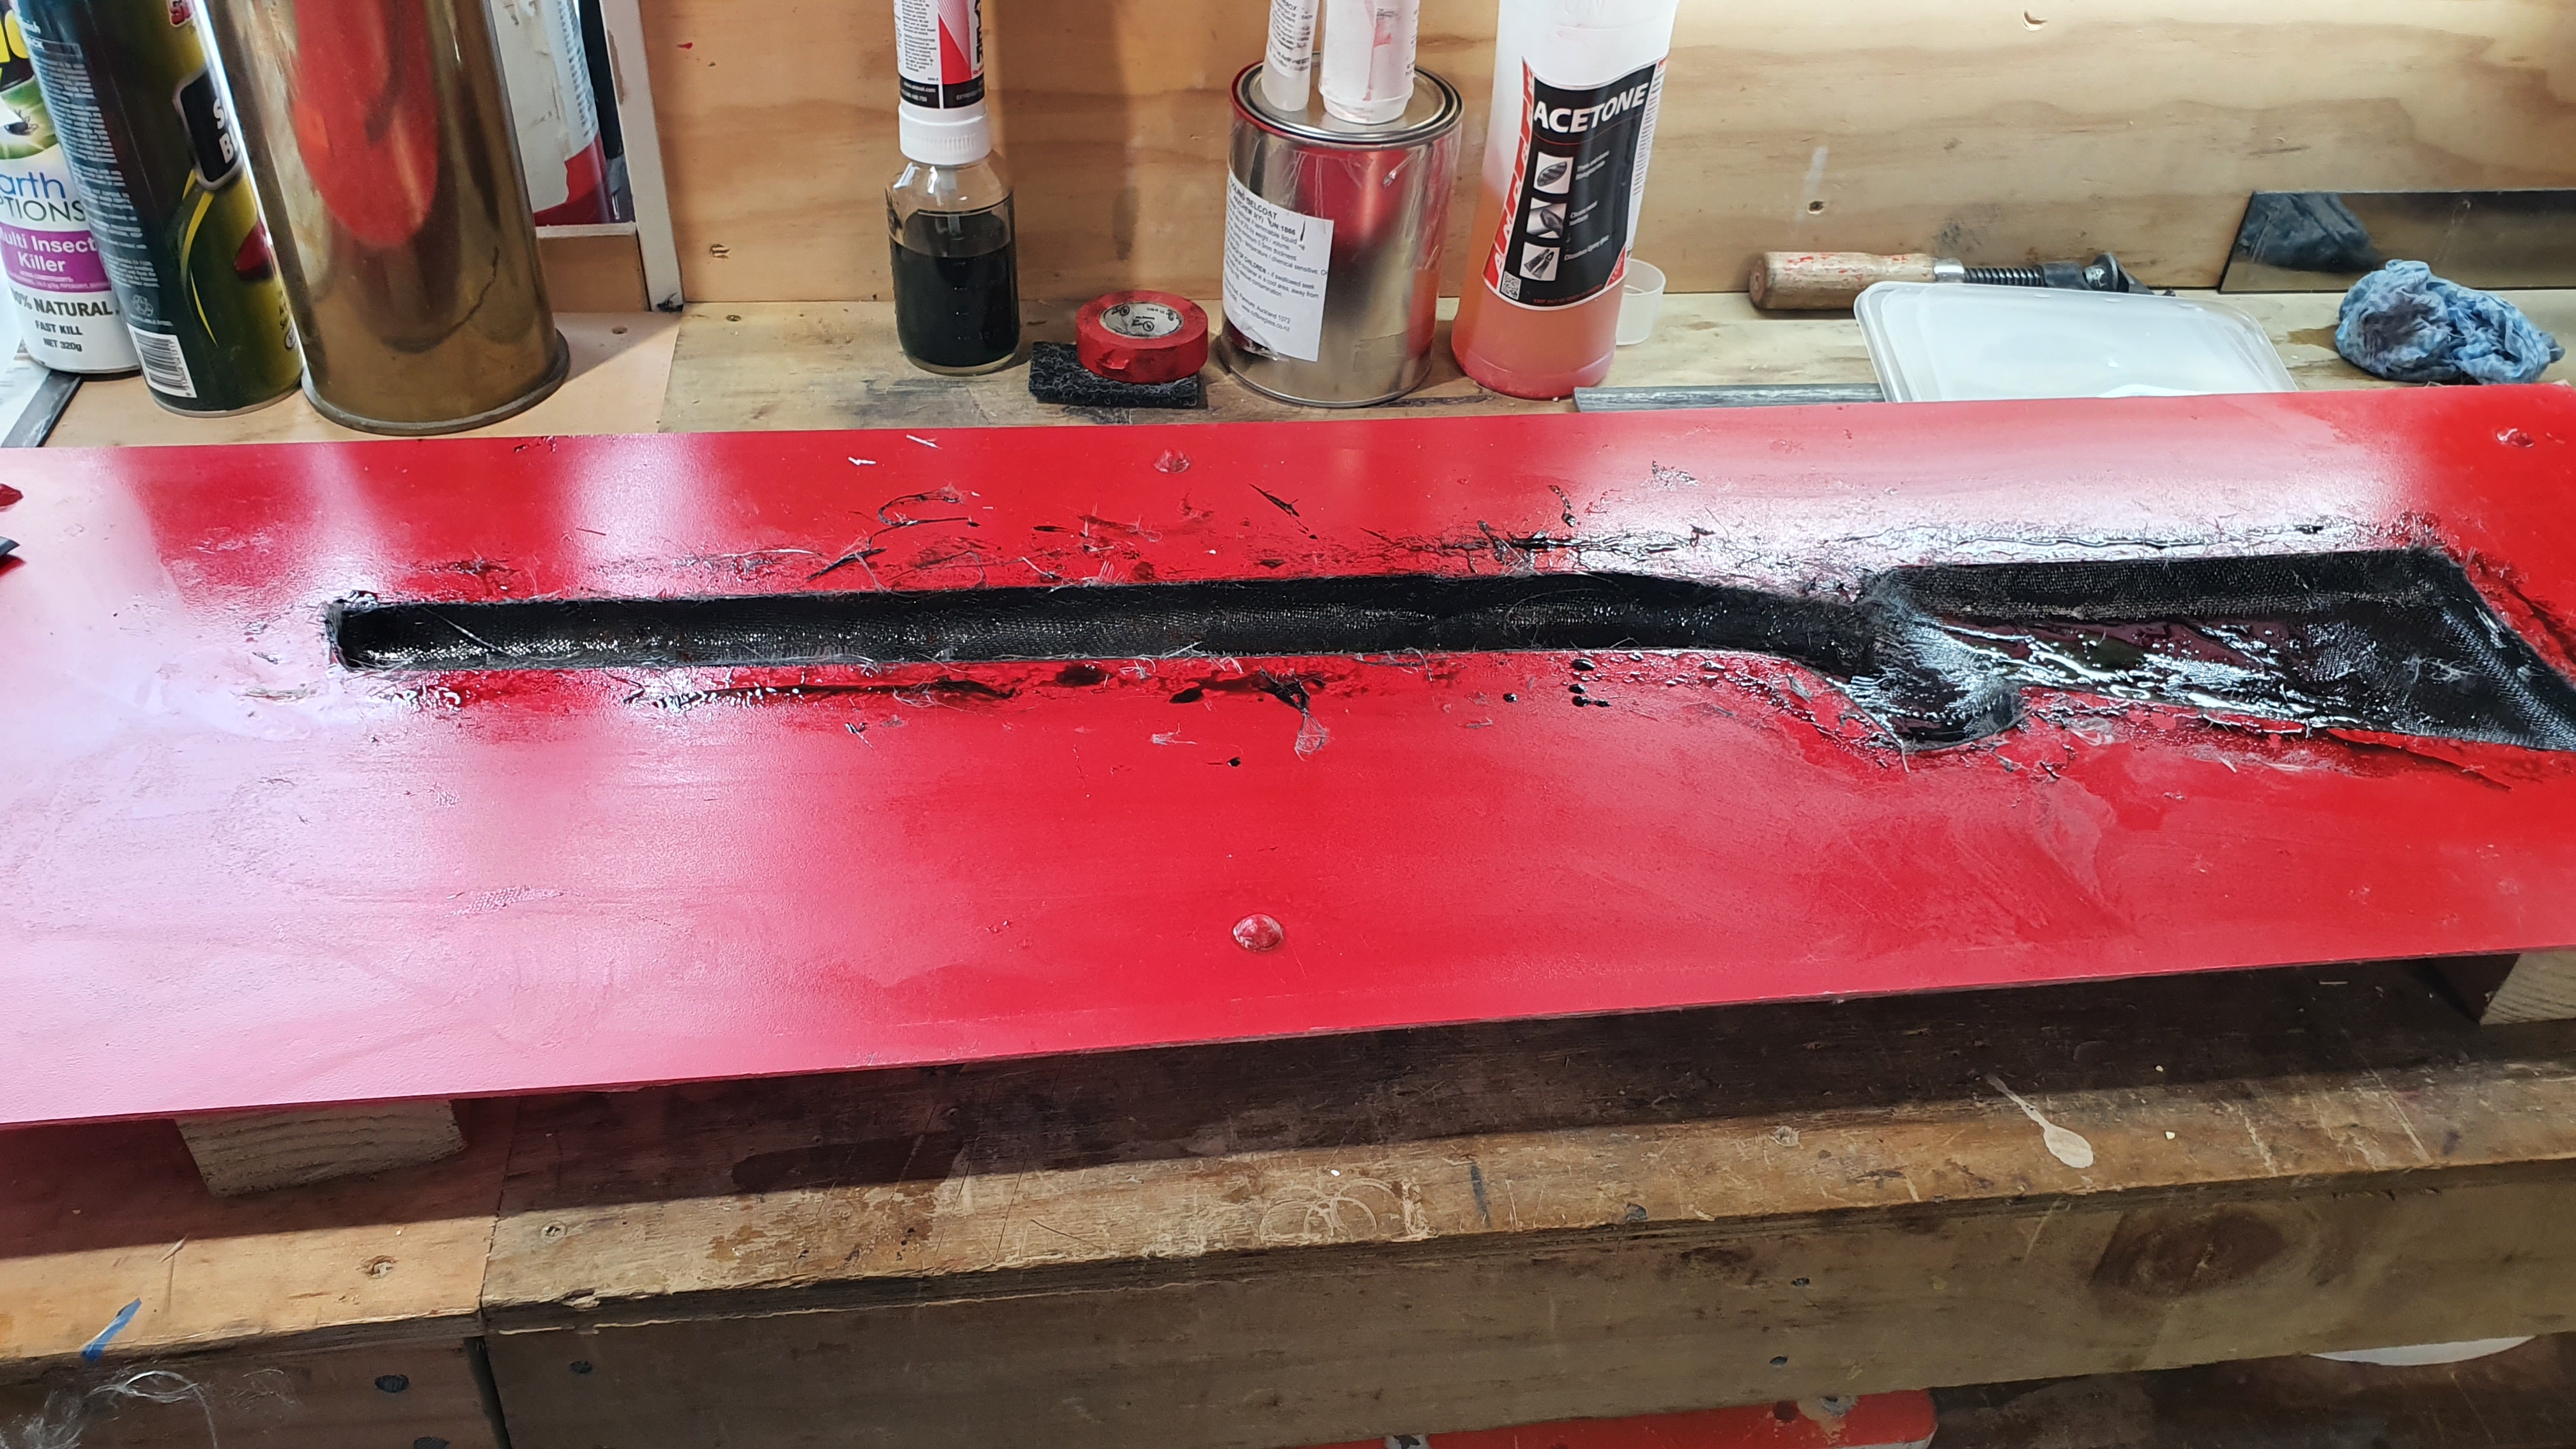
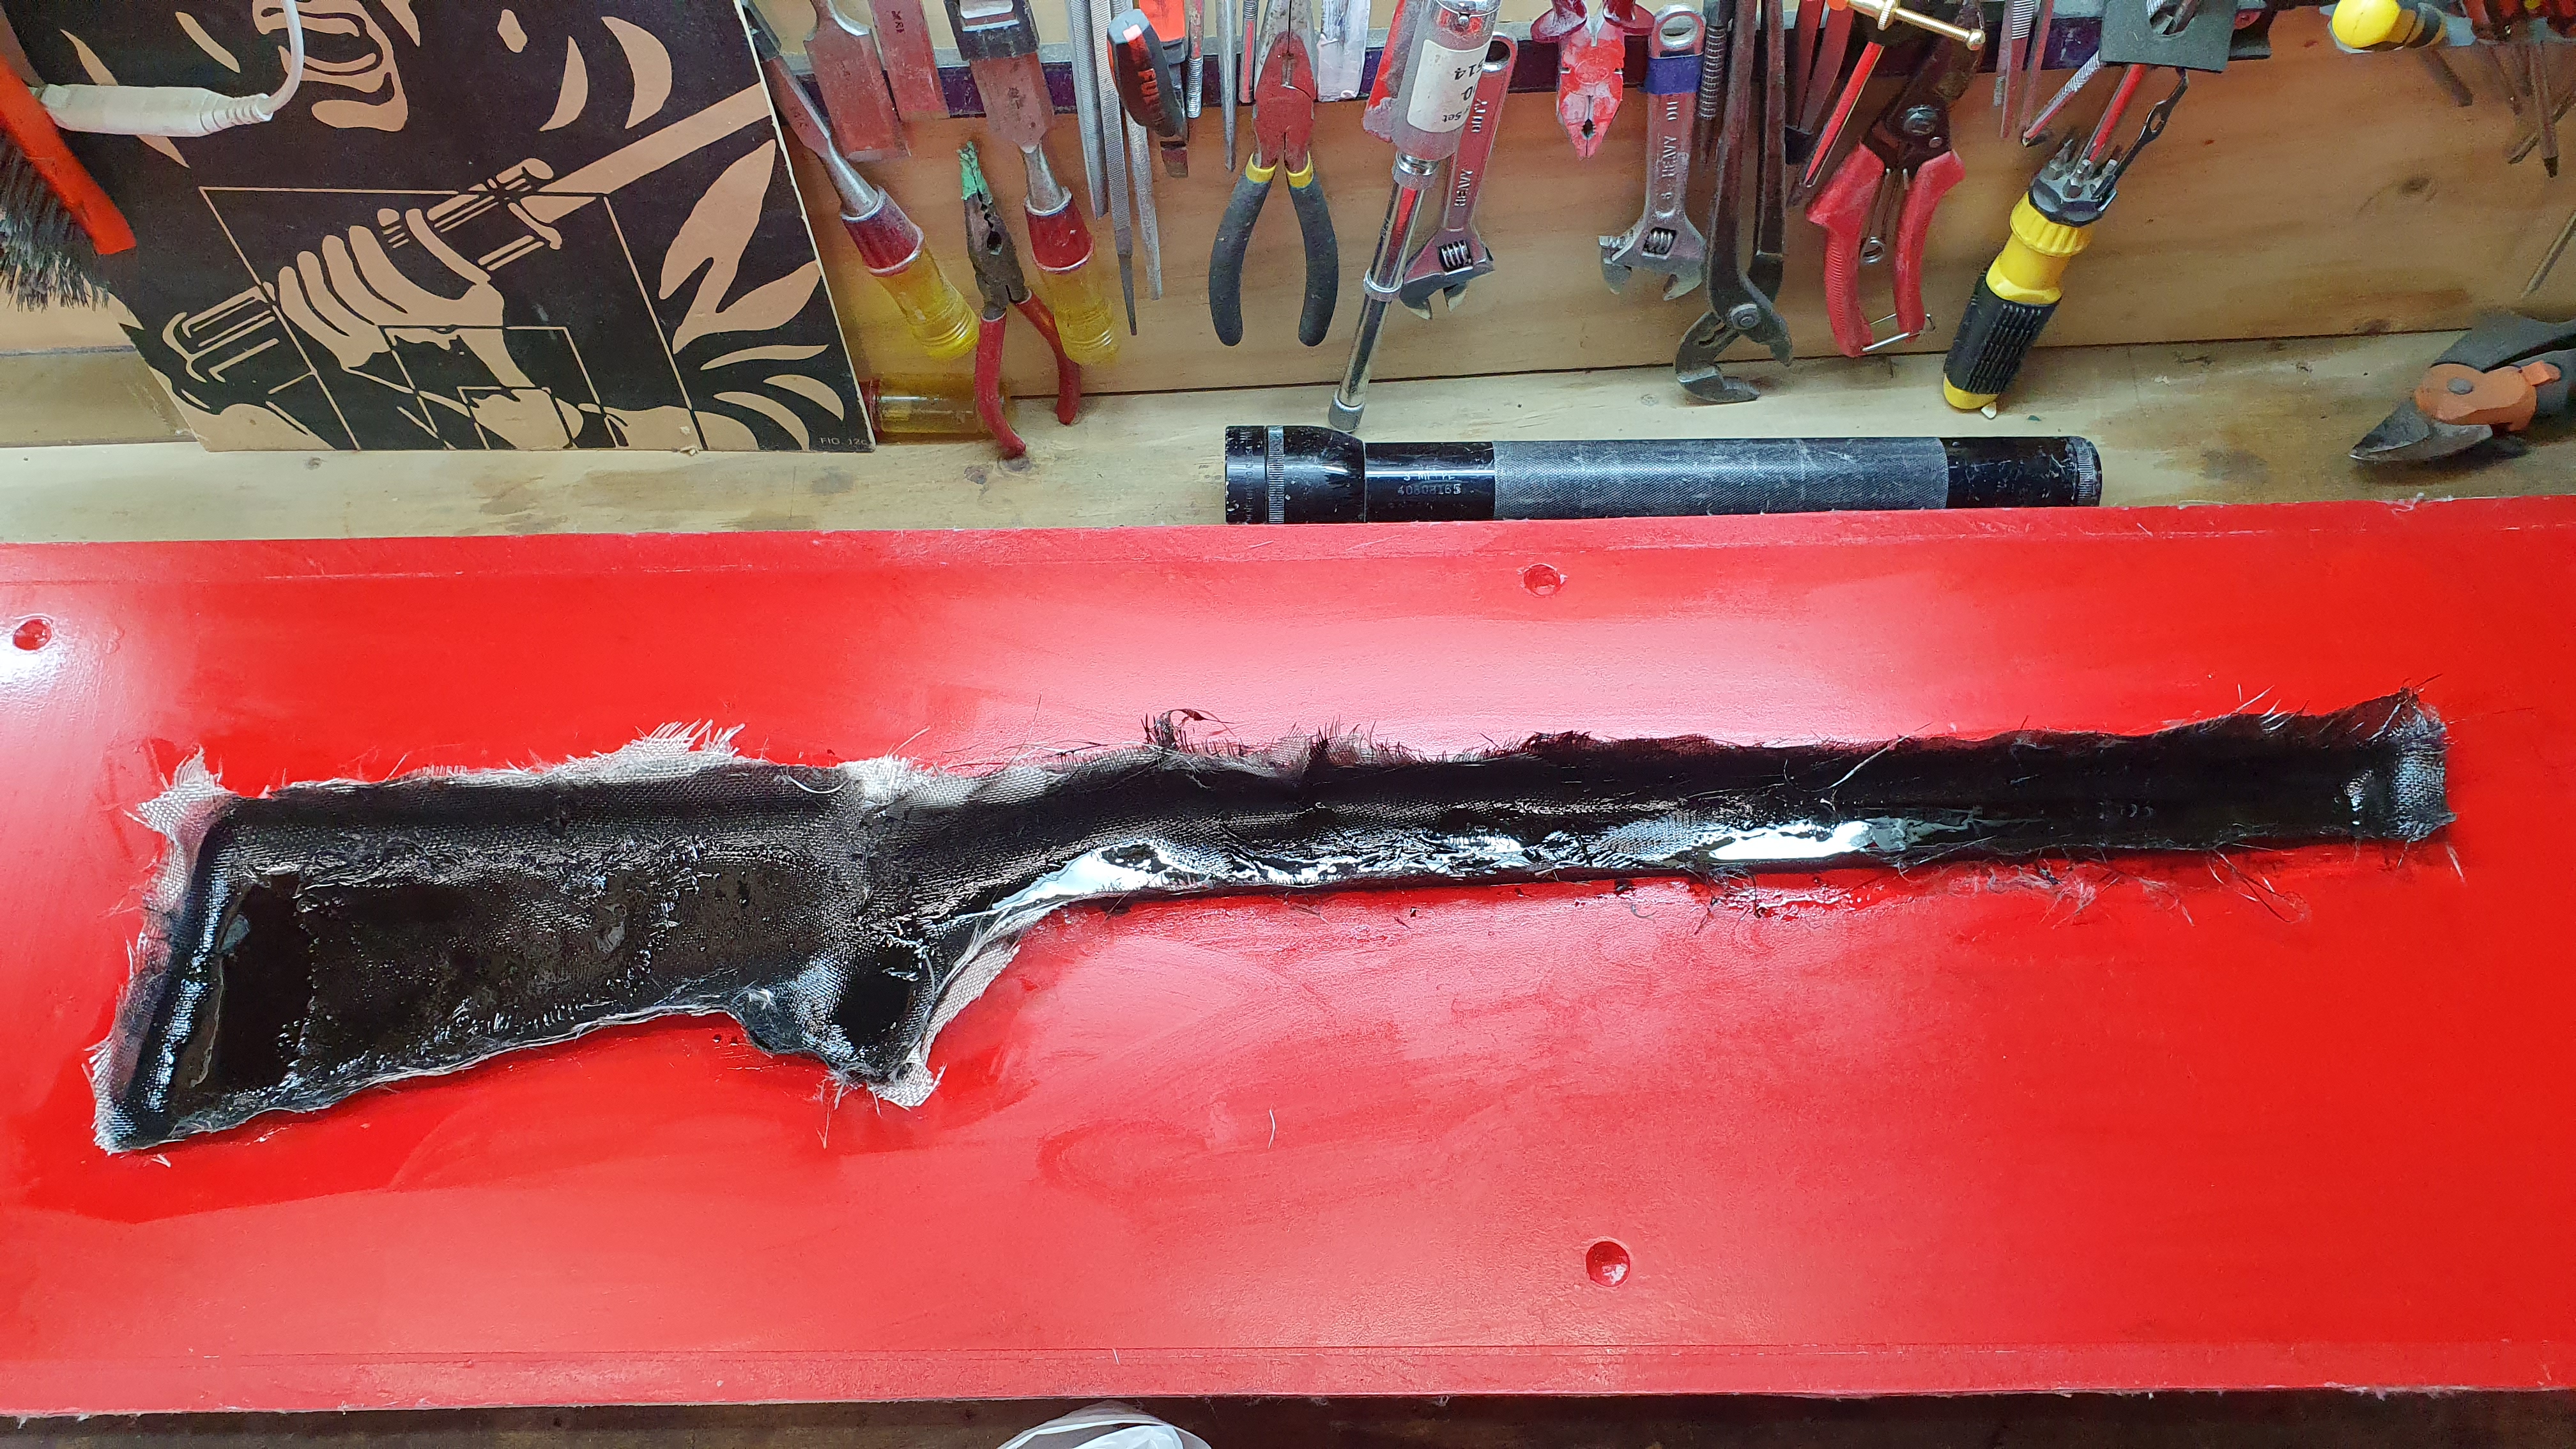
A point to note, my first layer was one piece covering the whole stock. I chose to do this as I wanted to practice in preparation for when I make a carbon fibre stock. Once I was satisfied that the first layer was down correctly and wetted out, I applied another coat of resin and a second layer of Fiberglass was applied in 3 pieces. Fore-end, pistol grip and butstock. I ensured that these all overlapped at least 50mm and were completely wetted out. (splitting the layer into 3 made it so much easier to manipulate)
Taking my time, mixing small batches of resin (with black tint) as I needed it, I completed another 2 layers for a total of 4. Note, I used a 25mm paint brush to apply the resin and a small metal roller to remove air bubbles.
Setting aside the first mold half I did the exact same with the second mold half.
Once the layups had tacked off and gone “green” I used a razor blade to trim the excess fiberglass sticking up from the mold back to the stock line. Now here I made my second F-up. In my haste to trim the excess I cut it too soon, before it had fully tacked off which I was to discover later introduced air bubbles (which became gaps) along the join line of the two mold halves. The timing here is critical to a good finish, too soon and you get air bubbles, too late when it is hardened, you have to cut with a dremel or similar which runs the risk of damaging your molds.
Both layups now trimmed, I made a mix of resin, tint and microfibre filler to a toothpaste consistency and made small reinforced built up tabs that I would later use to glue the two halves together. I also reinforce the pistol grip and rear tang area.
The layups were now left to harden for 48 hours.
The next step in the process was to clean/rough up the bonding surfaces with a fine grit sandpaper taking care to not damage the mold surfaces. (Note: the layups are left in the molds) It is also important to clean up any drips that may have landed on the flat mold surfaces as these will interfere when you join the two halves together. Ensure you wax/apply release agent to any spots you may have inadvertently exposed. (be careful not to get any on the layup itself)
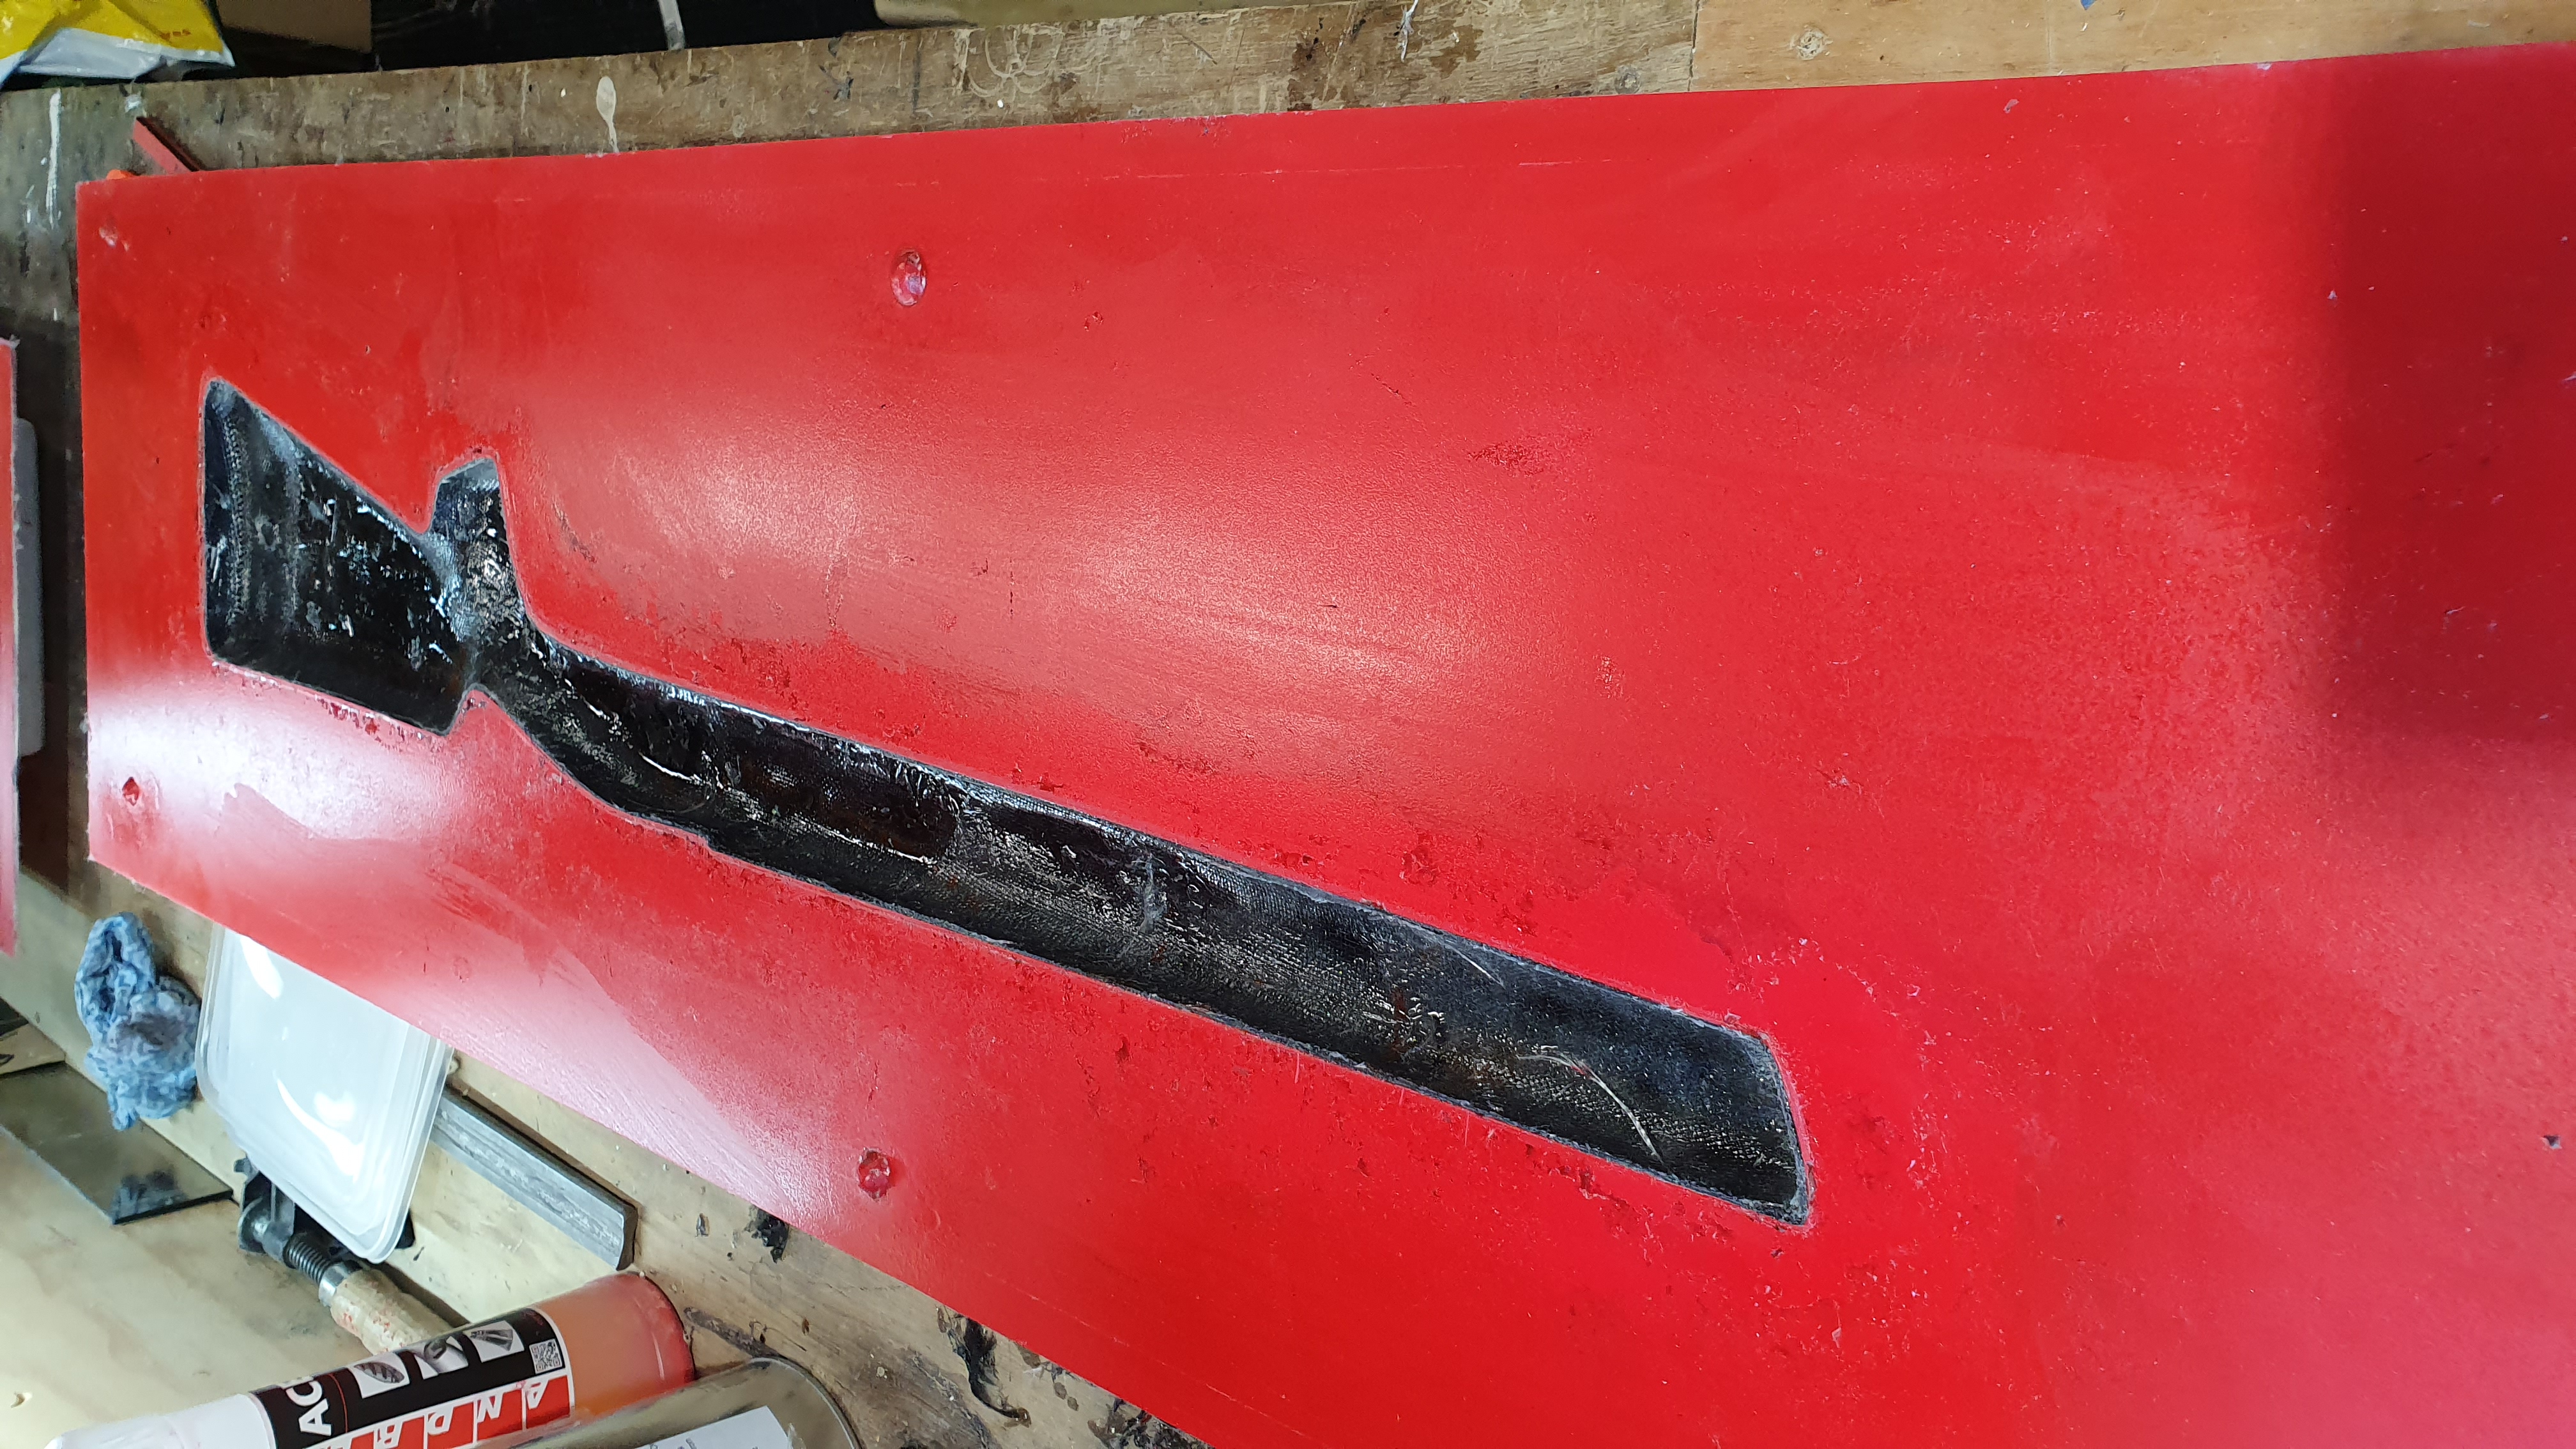
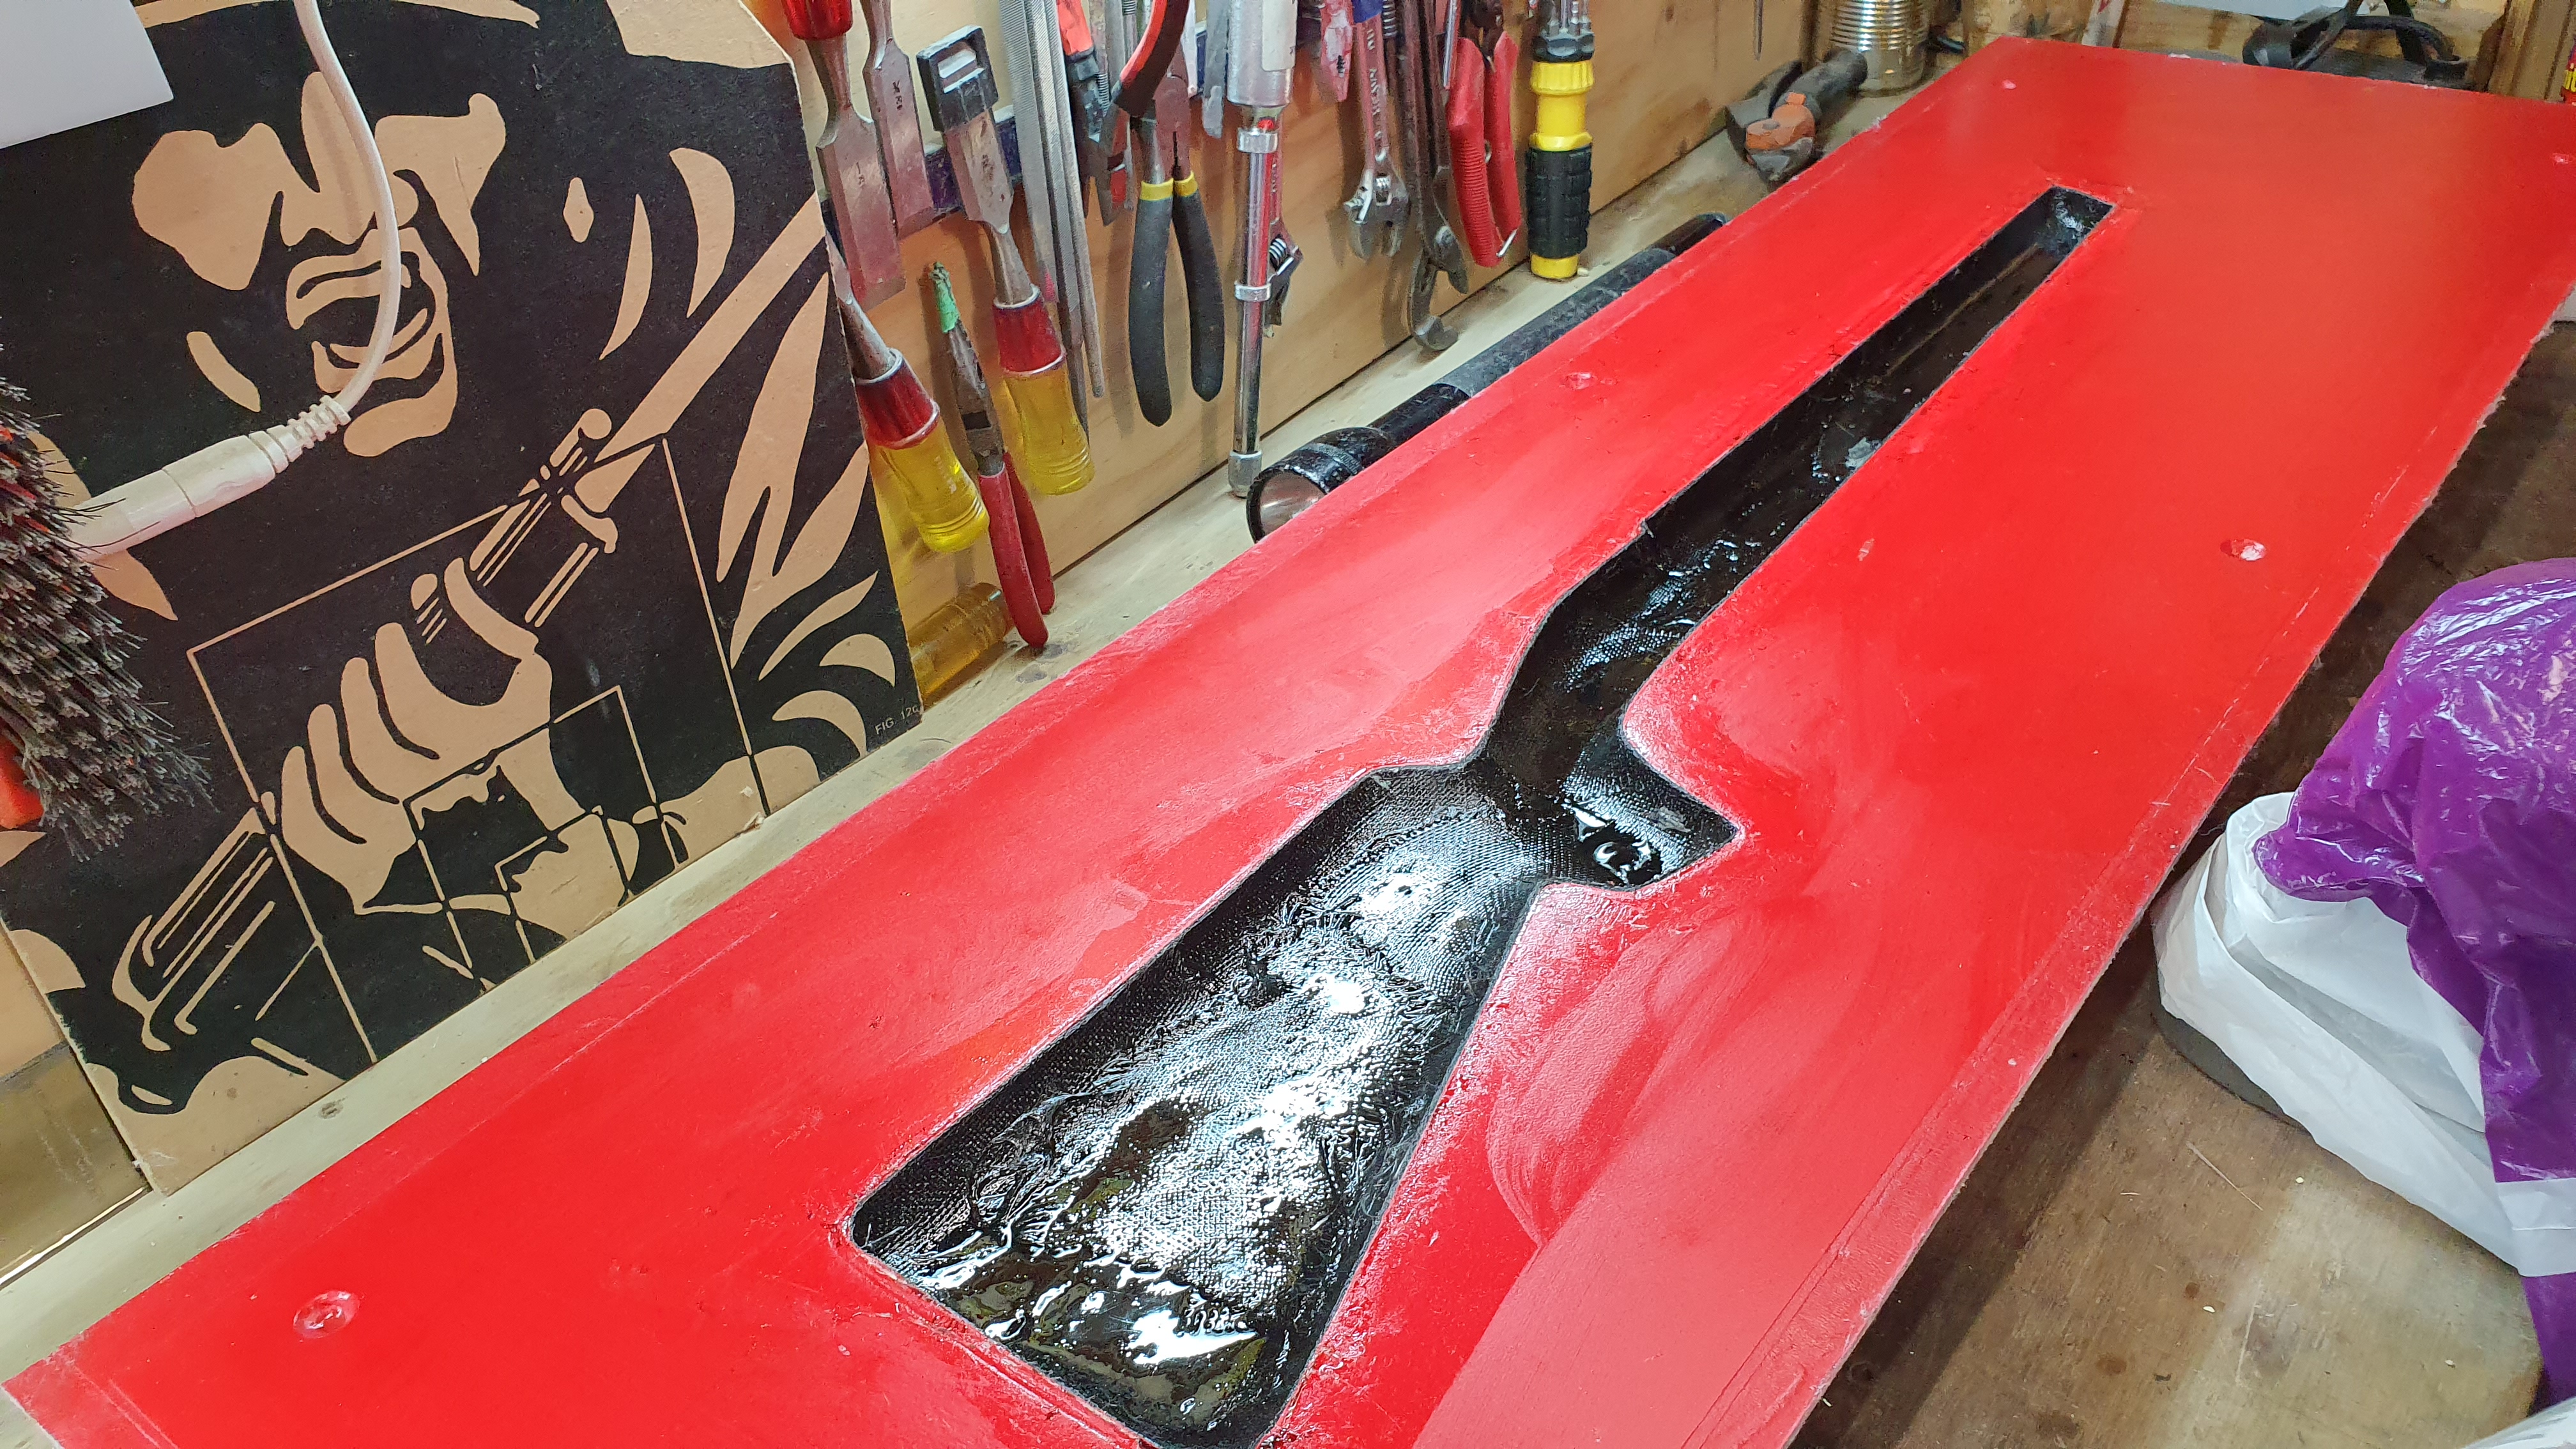
I then made a wet mix of resin, black tint and microfibre filler (similar consistency to honey). Using a 10ml syringe (no needle) I applied a fine bead of resin to the stock outline (joining edges) including the tabs I had made previously on both halves. I let the bead sit for about 10-15mins to slightly tack off and then carefully pressed the two halves together using the indexing studs on the mold. It is important that you are very accurate here so as to not smear the beads. Keep pressure on the halves to avoid any suck back and introduction of air and tightly clamp the mold halves together.
Now I did an extra step prior to joining the halves, which in retrospect was probably unnecessary. right before joining the two halves I mixed a runny resin/tint and poured it into the bottom layup. The idea being that when I clamped the two halves together and placed them upright the resin would flow down into the bottom join creating a better bond. it did just that but I wonder now if it was really necessary.
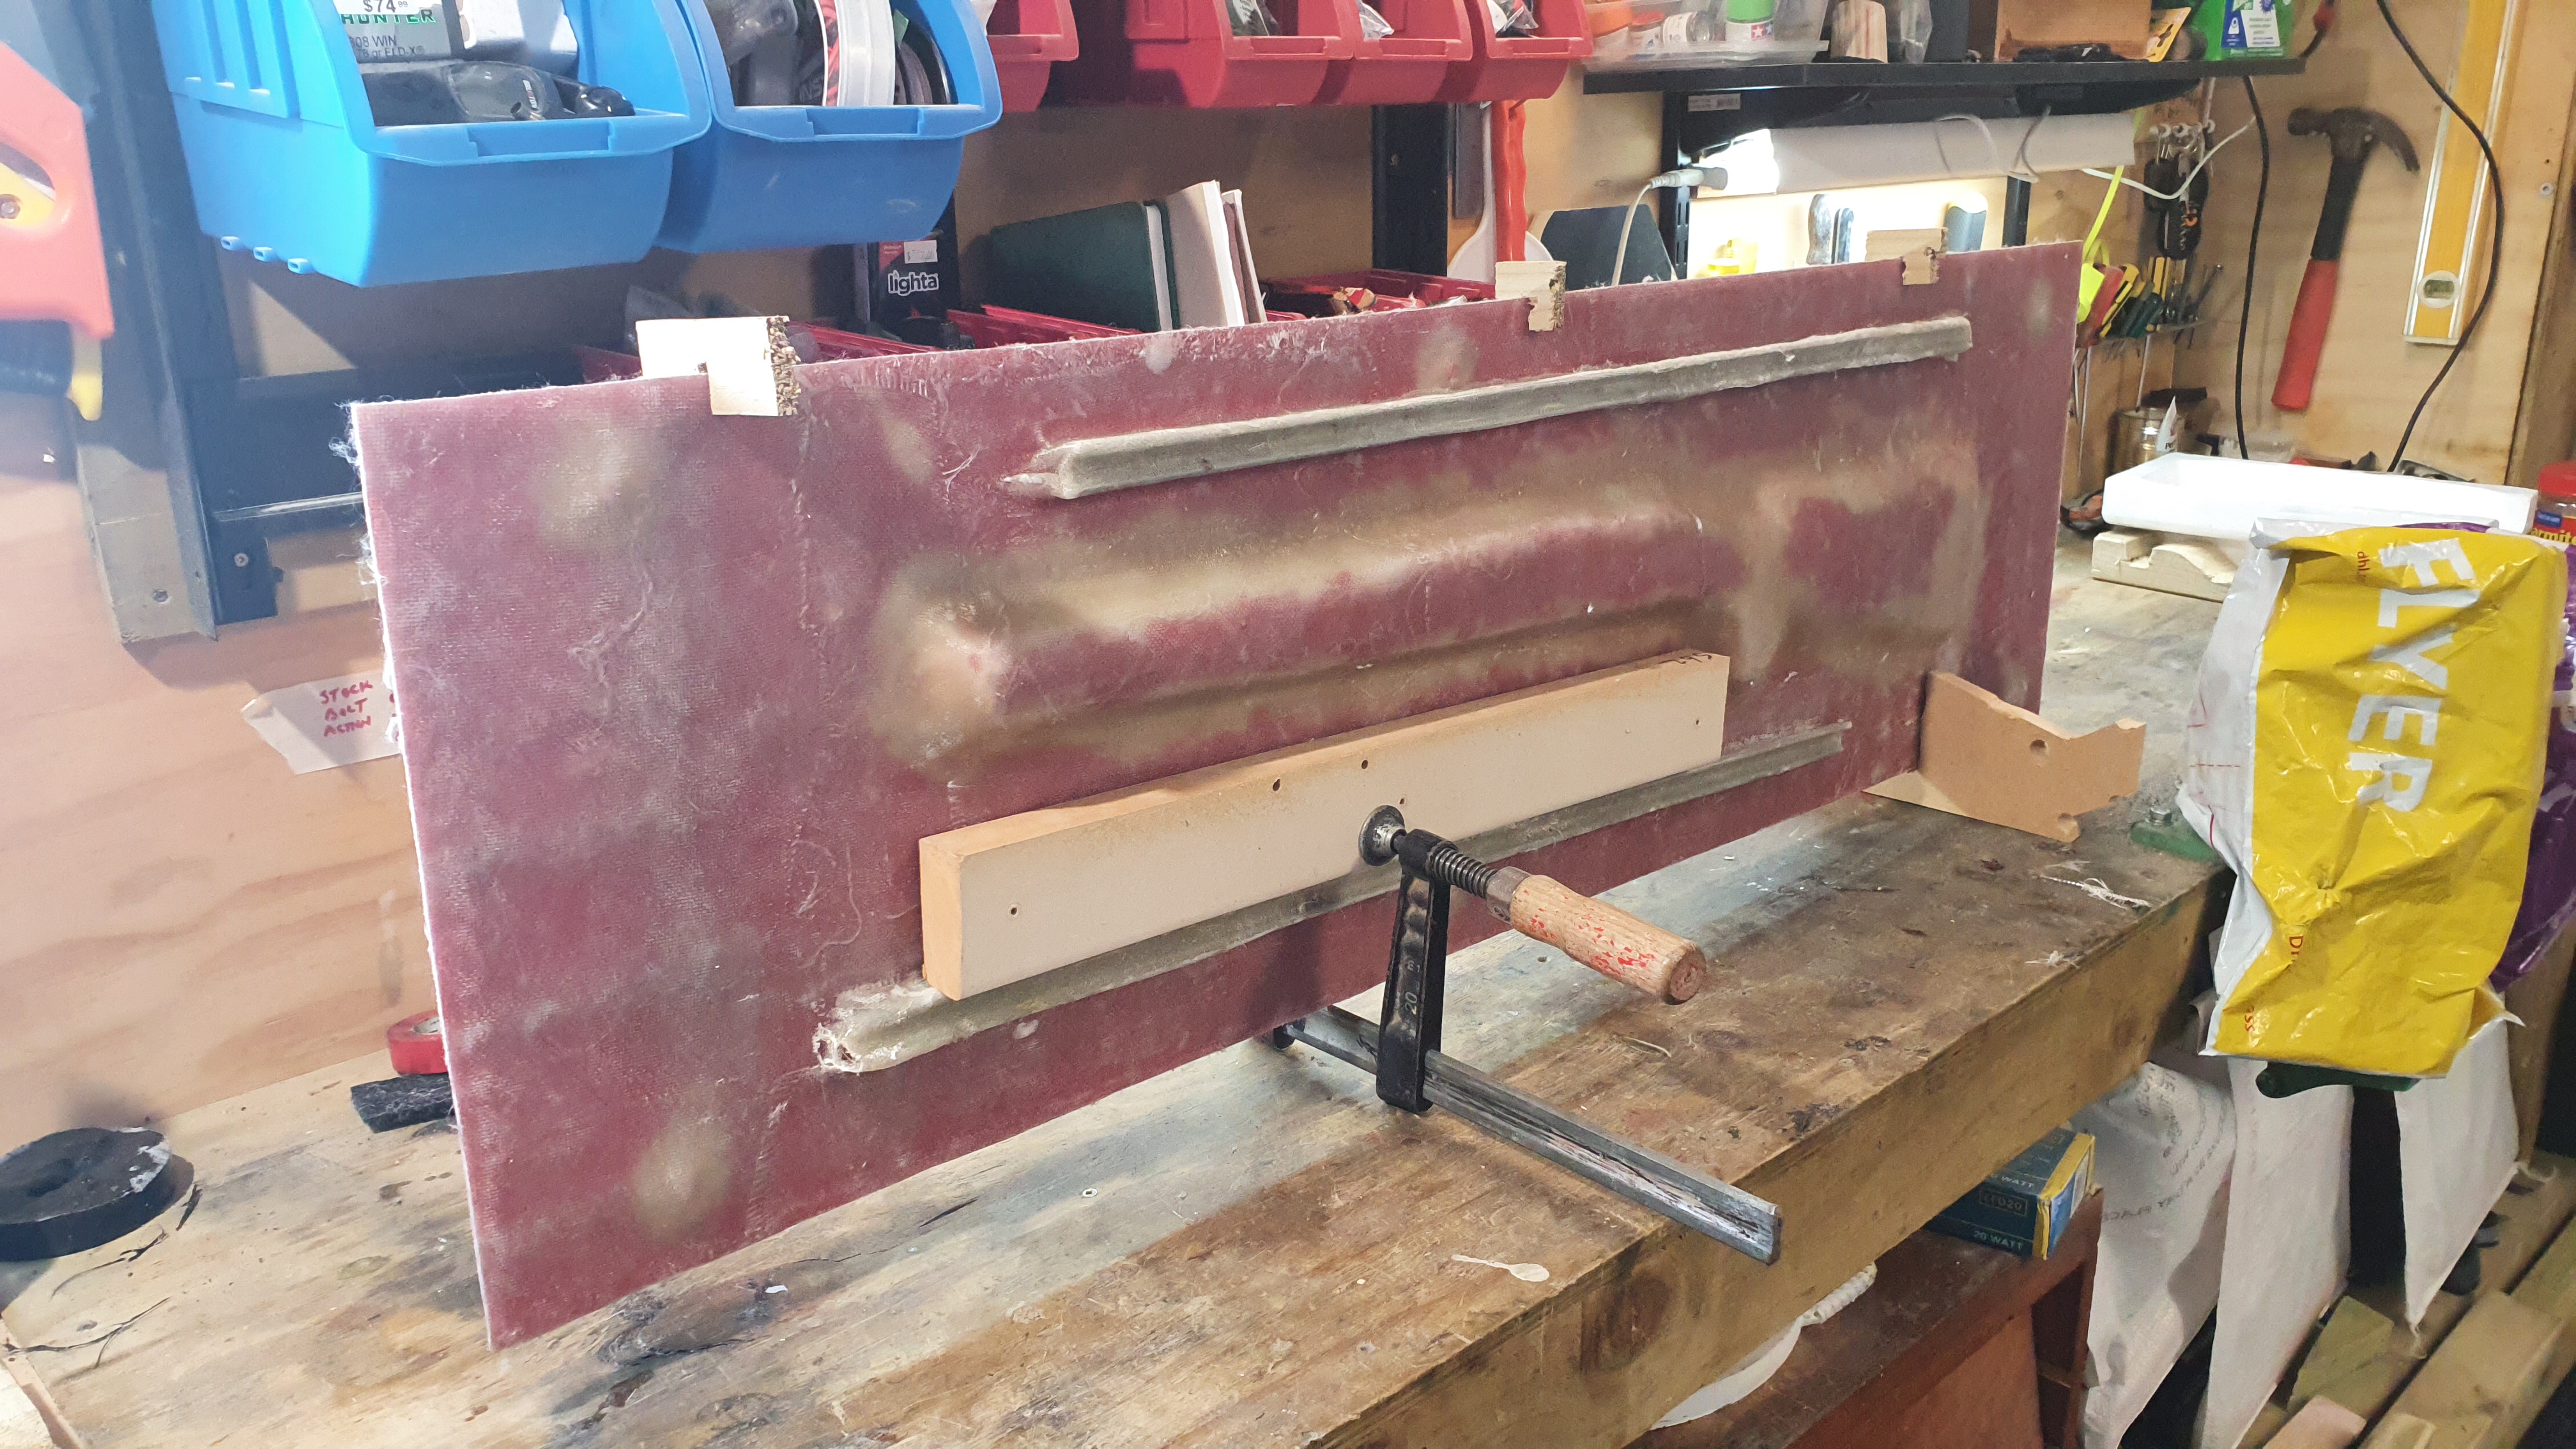
After another 48hs to harden, I carefully pulled the two mold halves apart using a plastic ruler and wedge. (This where the recess I created in the mold using masking tape helped) After a bit of gentle persuasion the Fibreglass rifle stock popped out of the molds.
As mentioned earlier, this is where I discovered the air bubbles I created during trimming. I was a bit disappointed, managed to rectify the problem with a bit of resin / filler and a light sanding. As my intent was to paint the stock I was ok with it.
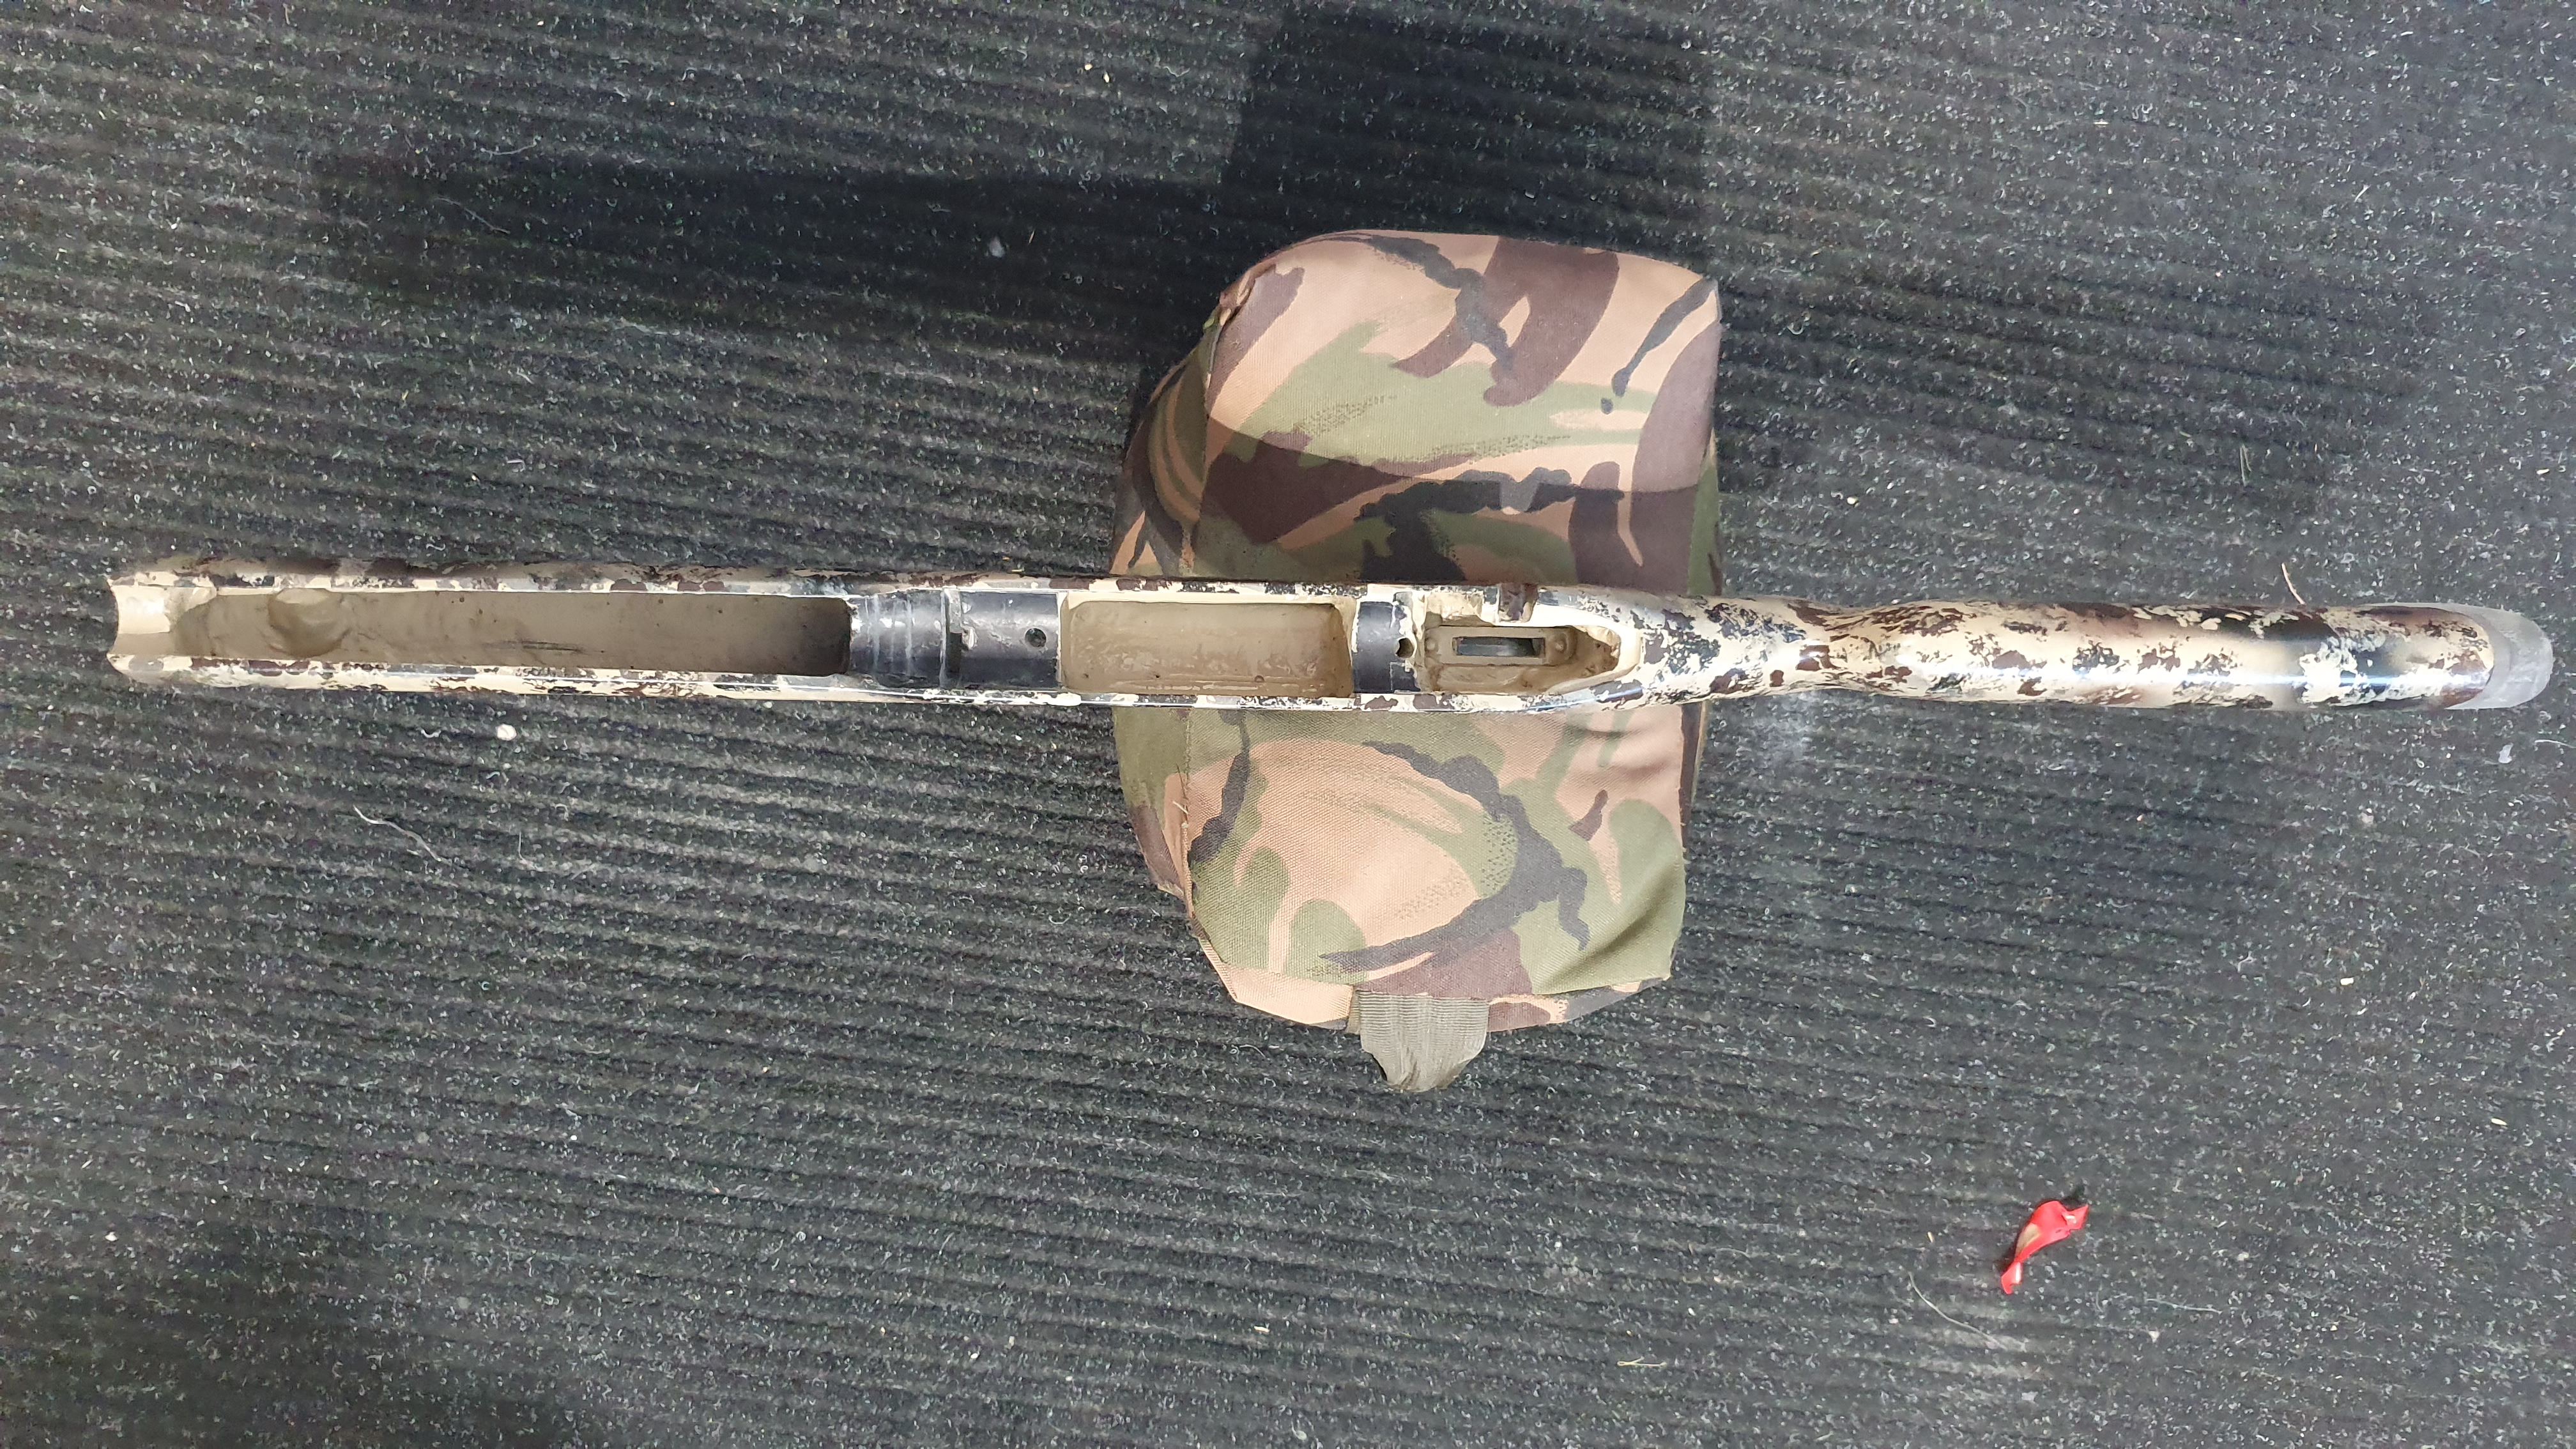
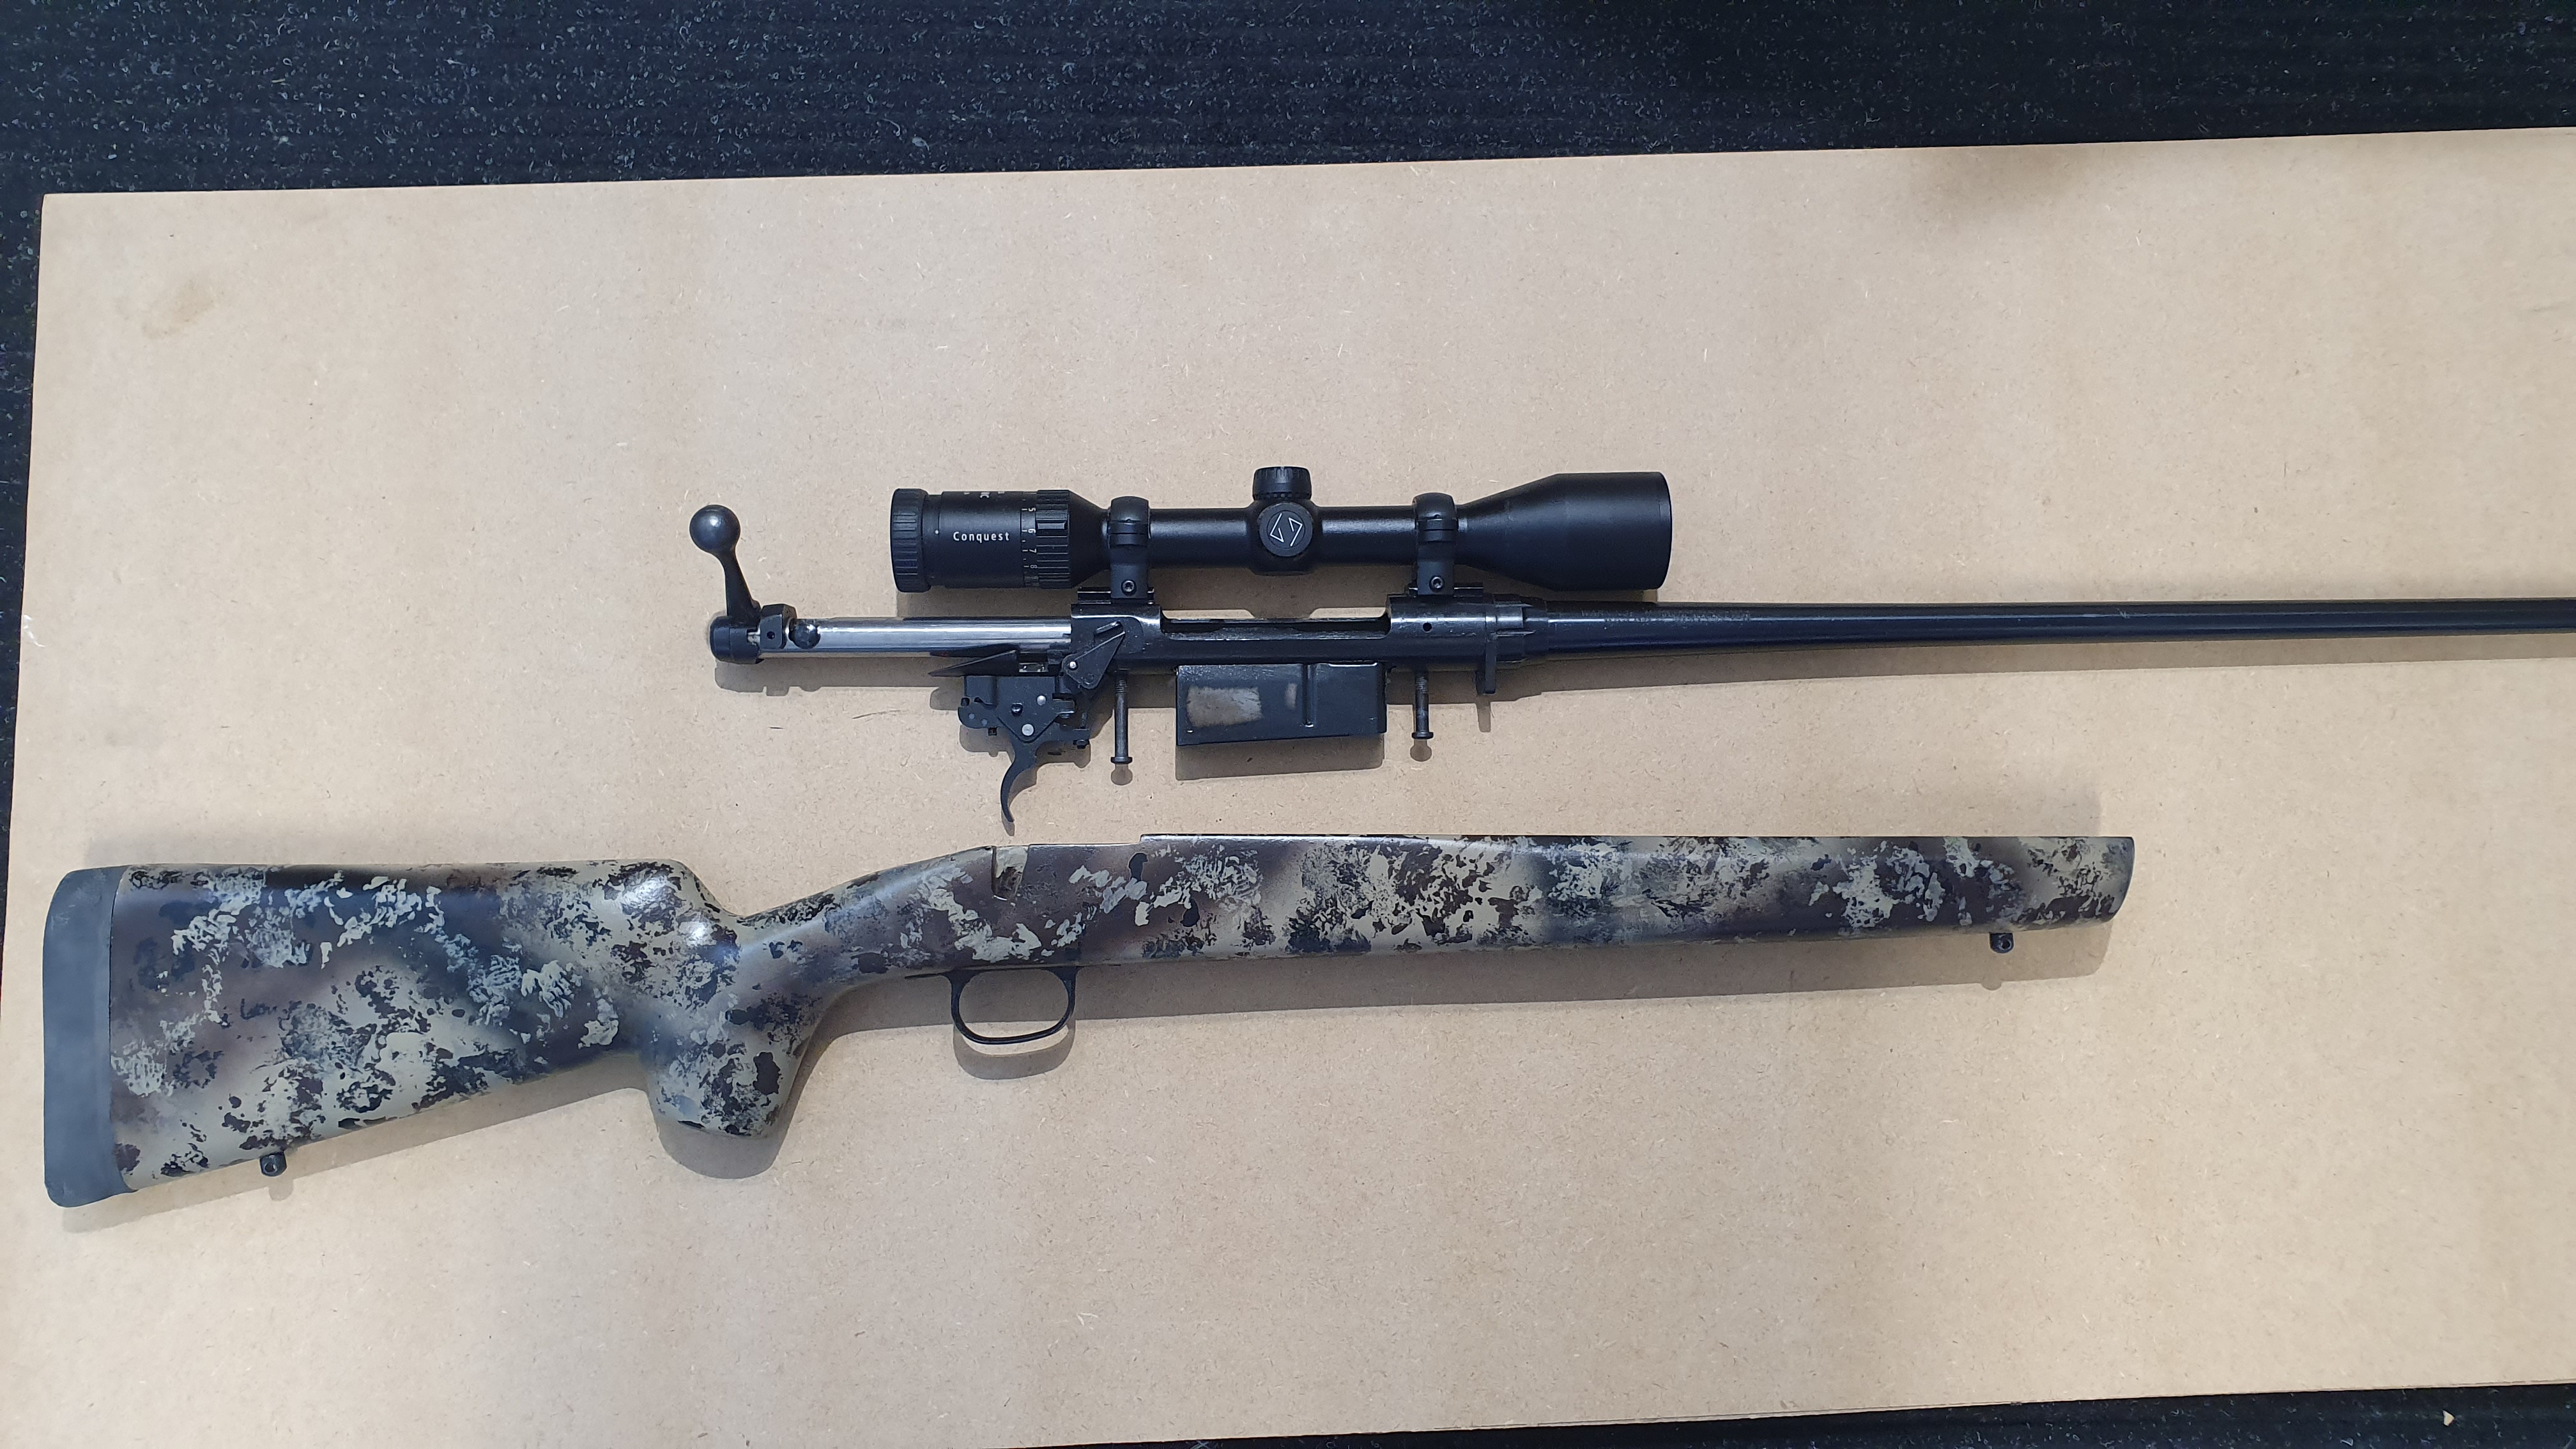
The next step was to cut out the barrel channel, action and rear tang areas, ensuring that I had a nice clean edge along the action, and clearance for the floated barrel. I also cut out the area for the bottom metal. The dremel with a cutting blade was perfect for this.
It was now time to figure out how to do the inletting. As there was little information out there on how others had done this, I decided to treat it like a full action bedding job. I have successfully bedded a fair few rifles in the past and was comfortable with how to do this. I wasn't until recently that I discovered that others have used a process of making a silicone mold of the action area of their original stocks to form the bedding.
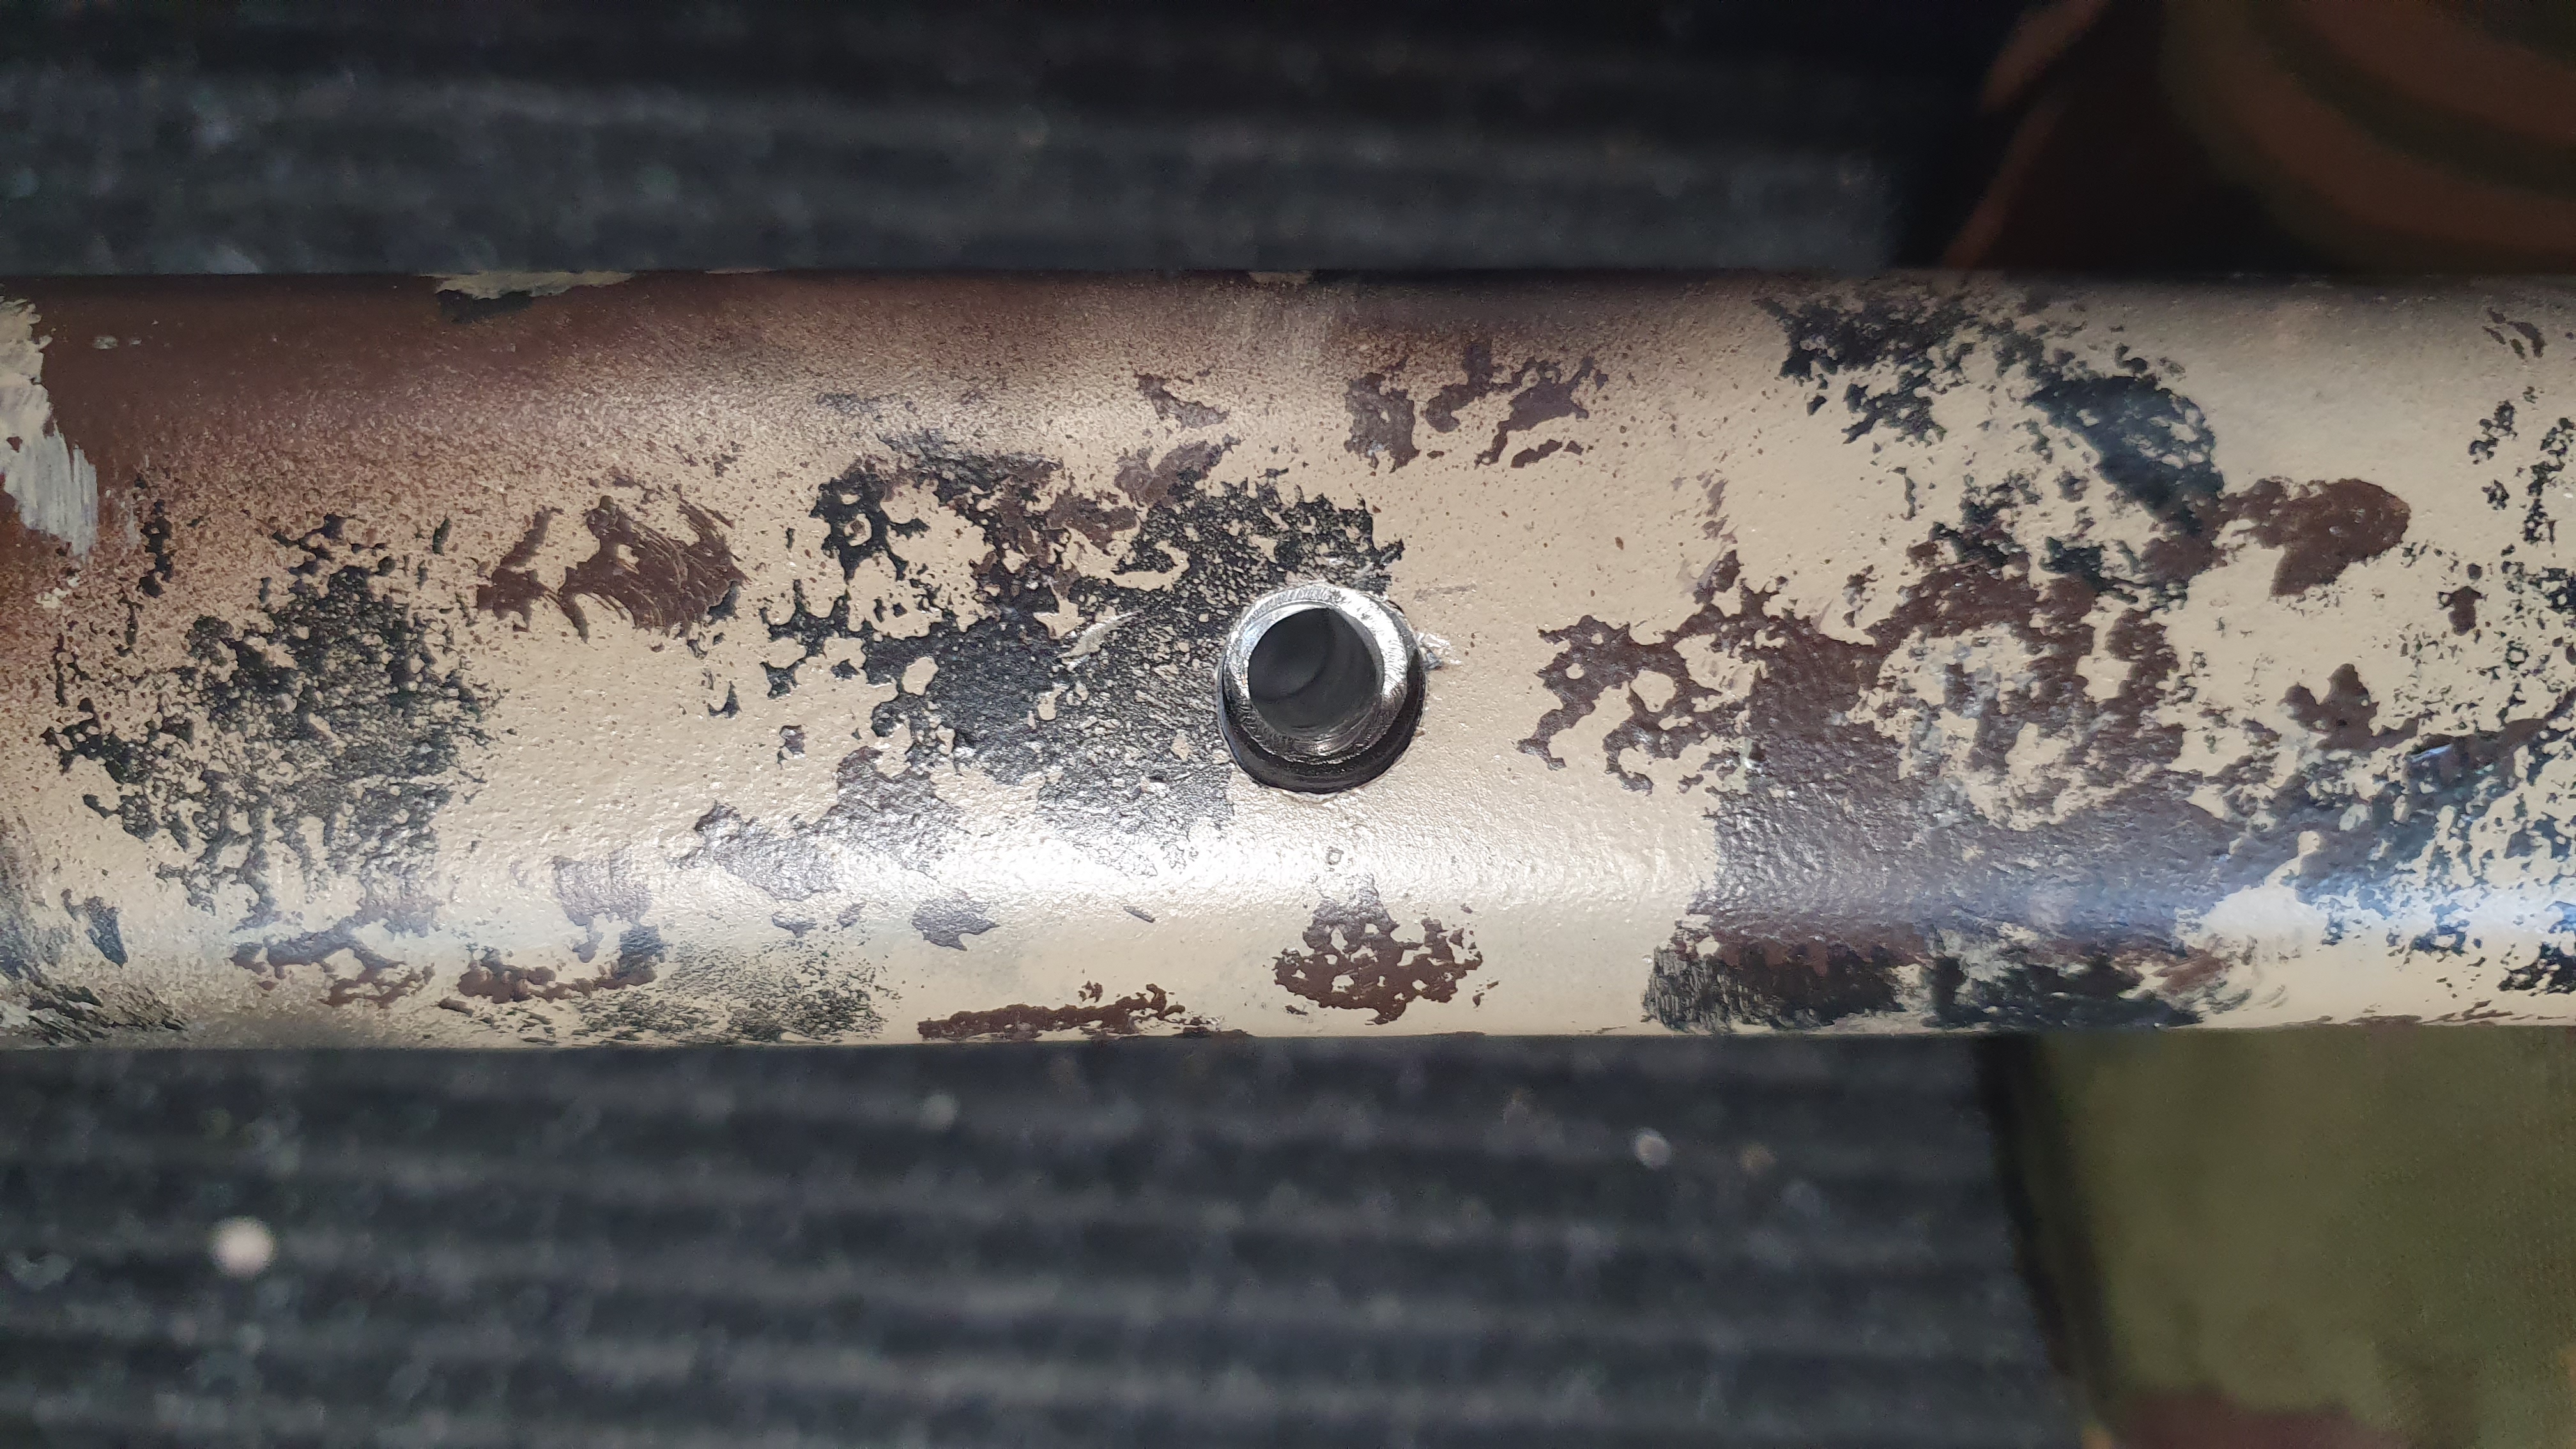
Anyway, I proceeded to plasticine off the areas I did not want to fill. I created aluminium pillars out of some 10mm tube, roughing up the outside to get a good mechanical bond. I also made up a small aluminum block out of some bent up channeling to provide reinforcing around the actions recoil lug. As for normal bedding jobs the action was stripped down and tape was applied to the non bedding surfaces. I used shoe polish as a release agent and set the prepped barreled action aside.
A mix of resin, tint and microfibre filler (to a honey consistency) was then pouring into the stock and the action was pressed down into the stock using cut-off threaded rod and tape ferrels as a guide. The action was tied down to the stock with some bicycle tube and left to set for 48 hours.
After the bedding had set the barreled action was removed from the stock and I used a dremel and fine sandpaper to clean up any sharp edges.
The next step was to fit a limbsaver recoil pad, and sling swivel studs. I used a thin piece of ply epoxied into the butt to fix the limbsaver to, and some epoxy to secure the sling swivel nuts on the inside of the stock.
I chose not to fill the barrel channel. the stock was extremely stiff and I deemed filling the barrel channel an unnecessary addition of weight. Due to my excessive overengineering of the stock it was heavy enough as it was.
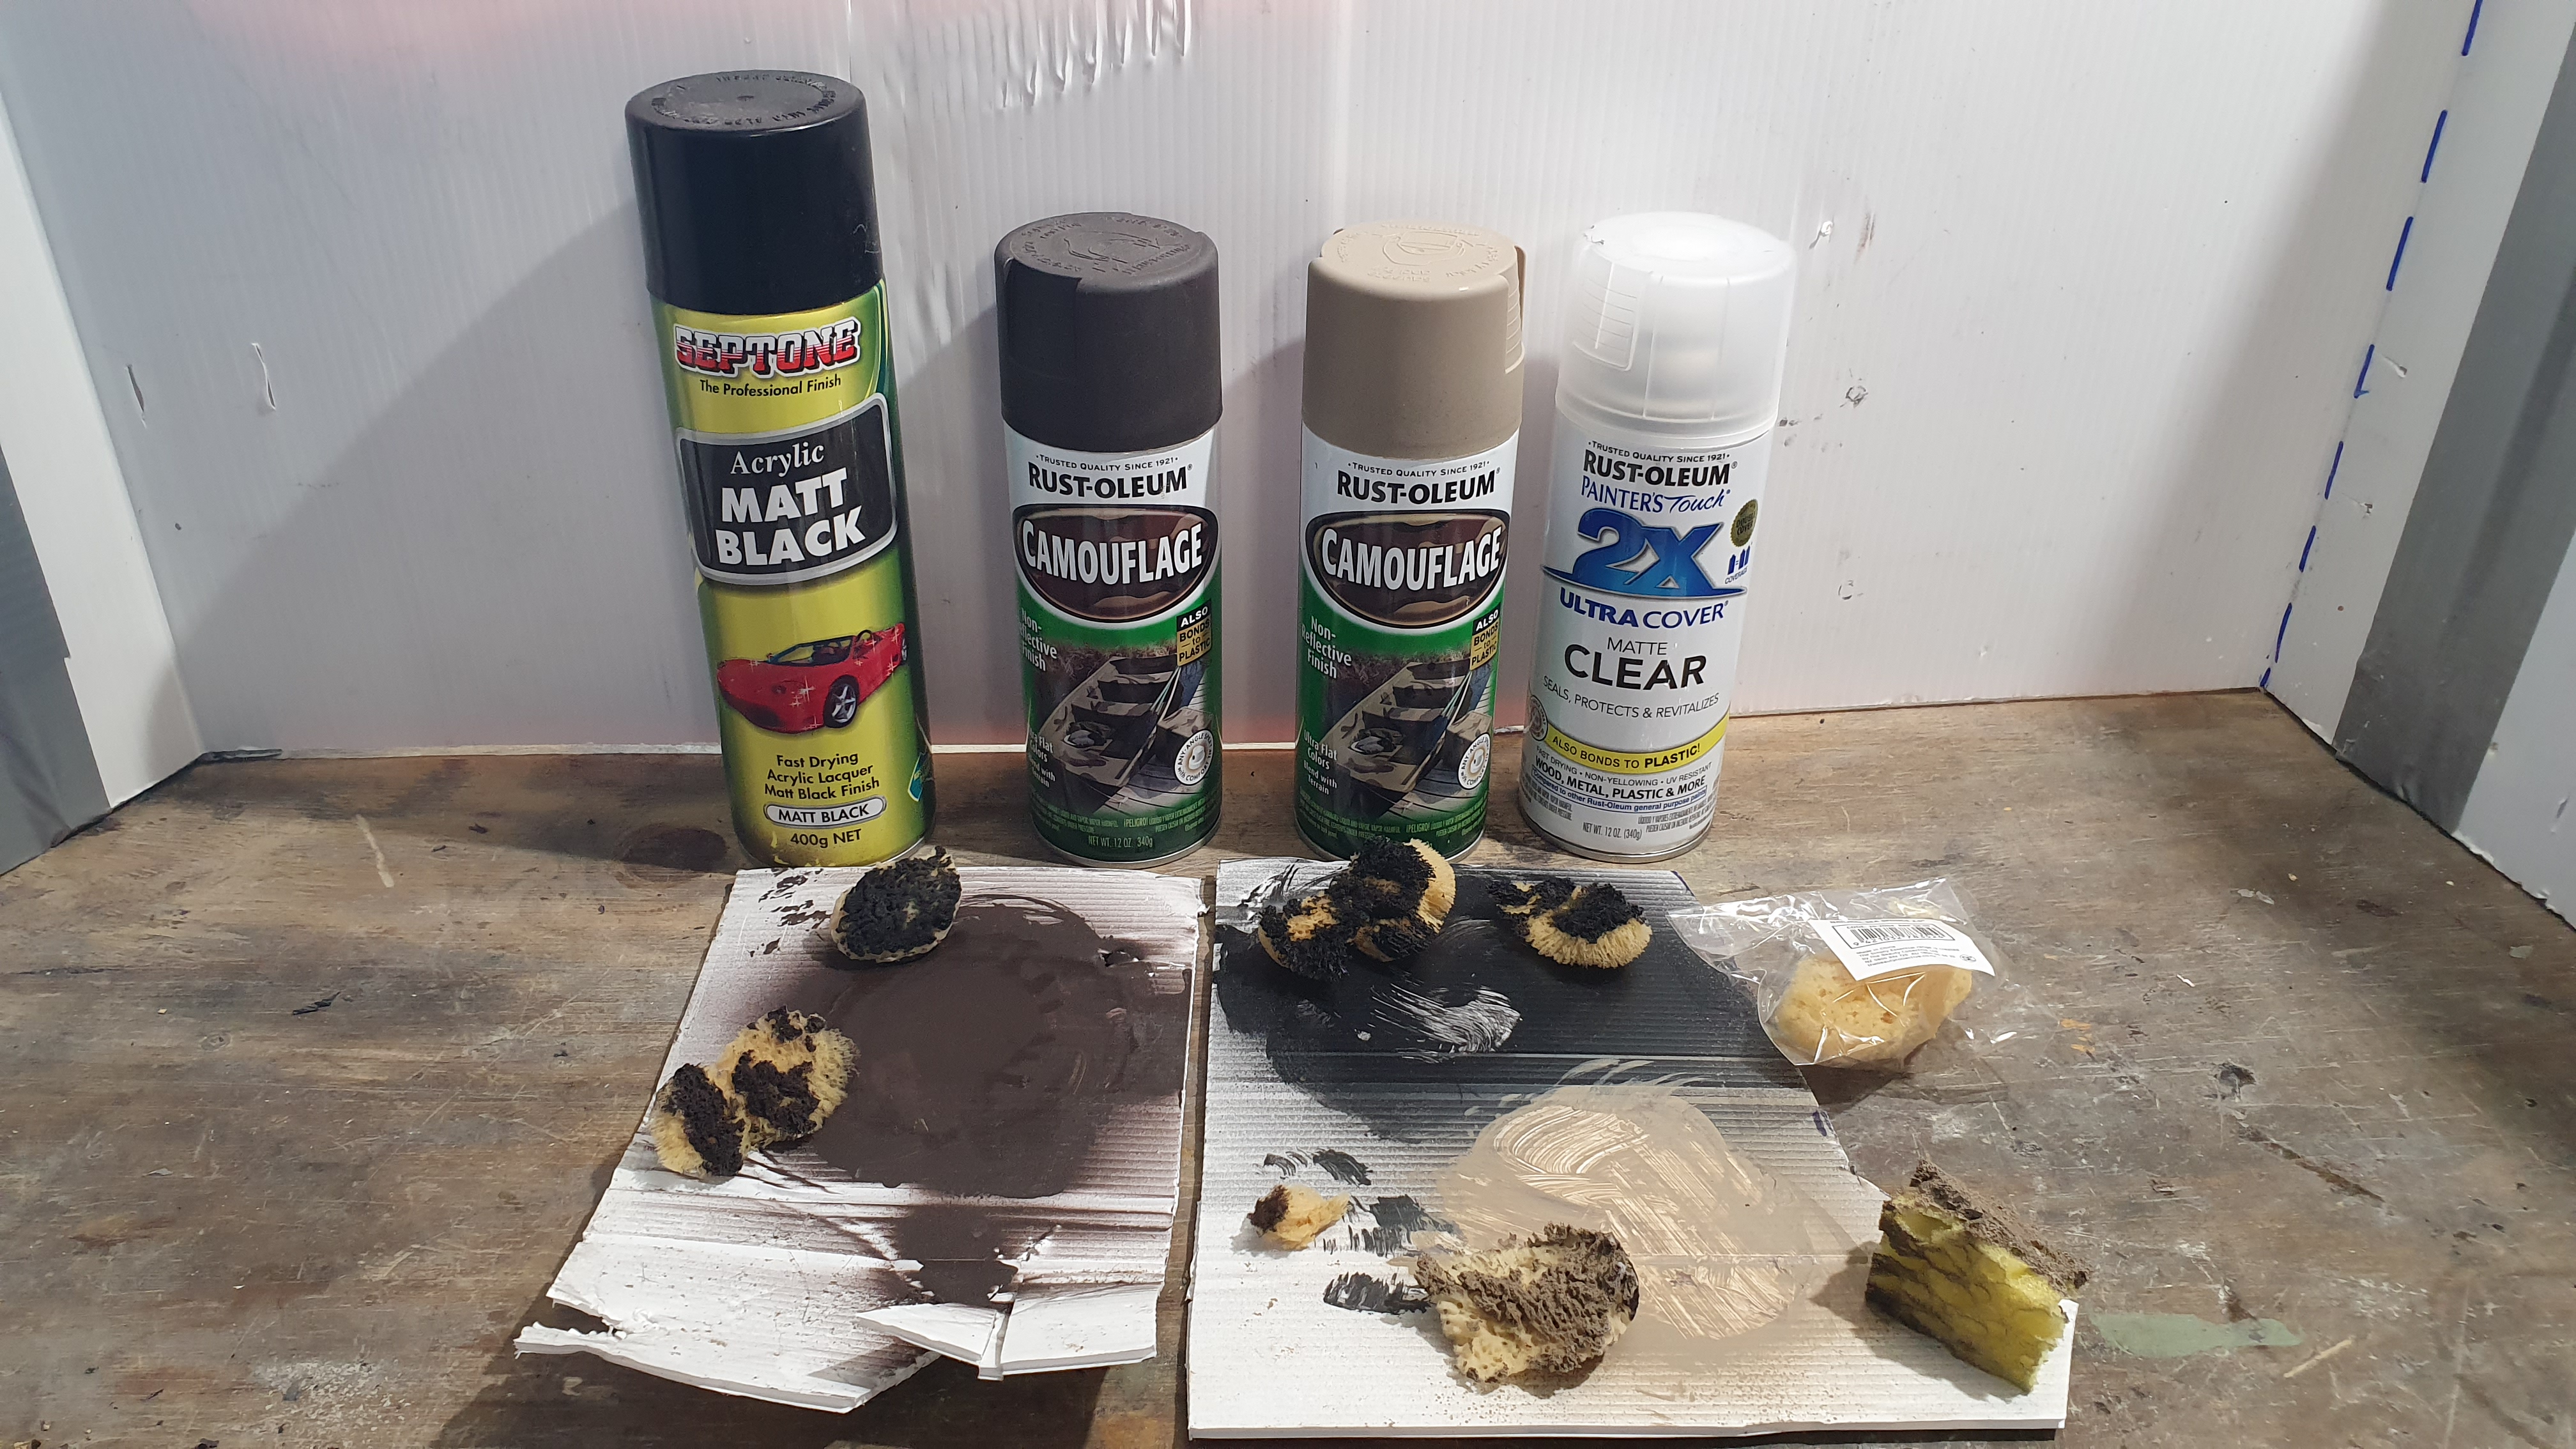
The final step was to paint the stock. I used an acrylic primer filler to coat the stock and then consecutive coats of Rustoleum matt paint to cover and seal the paint job.

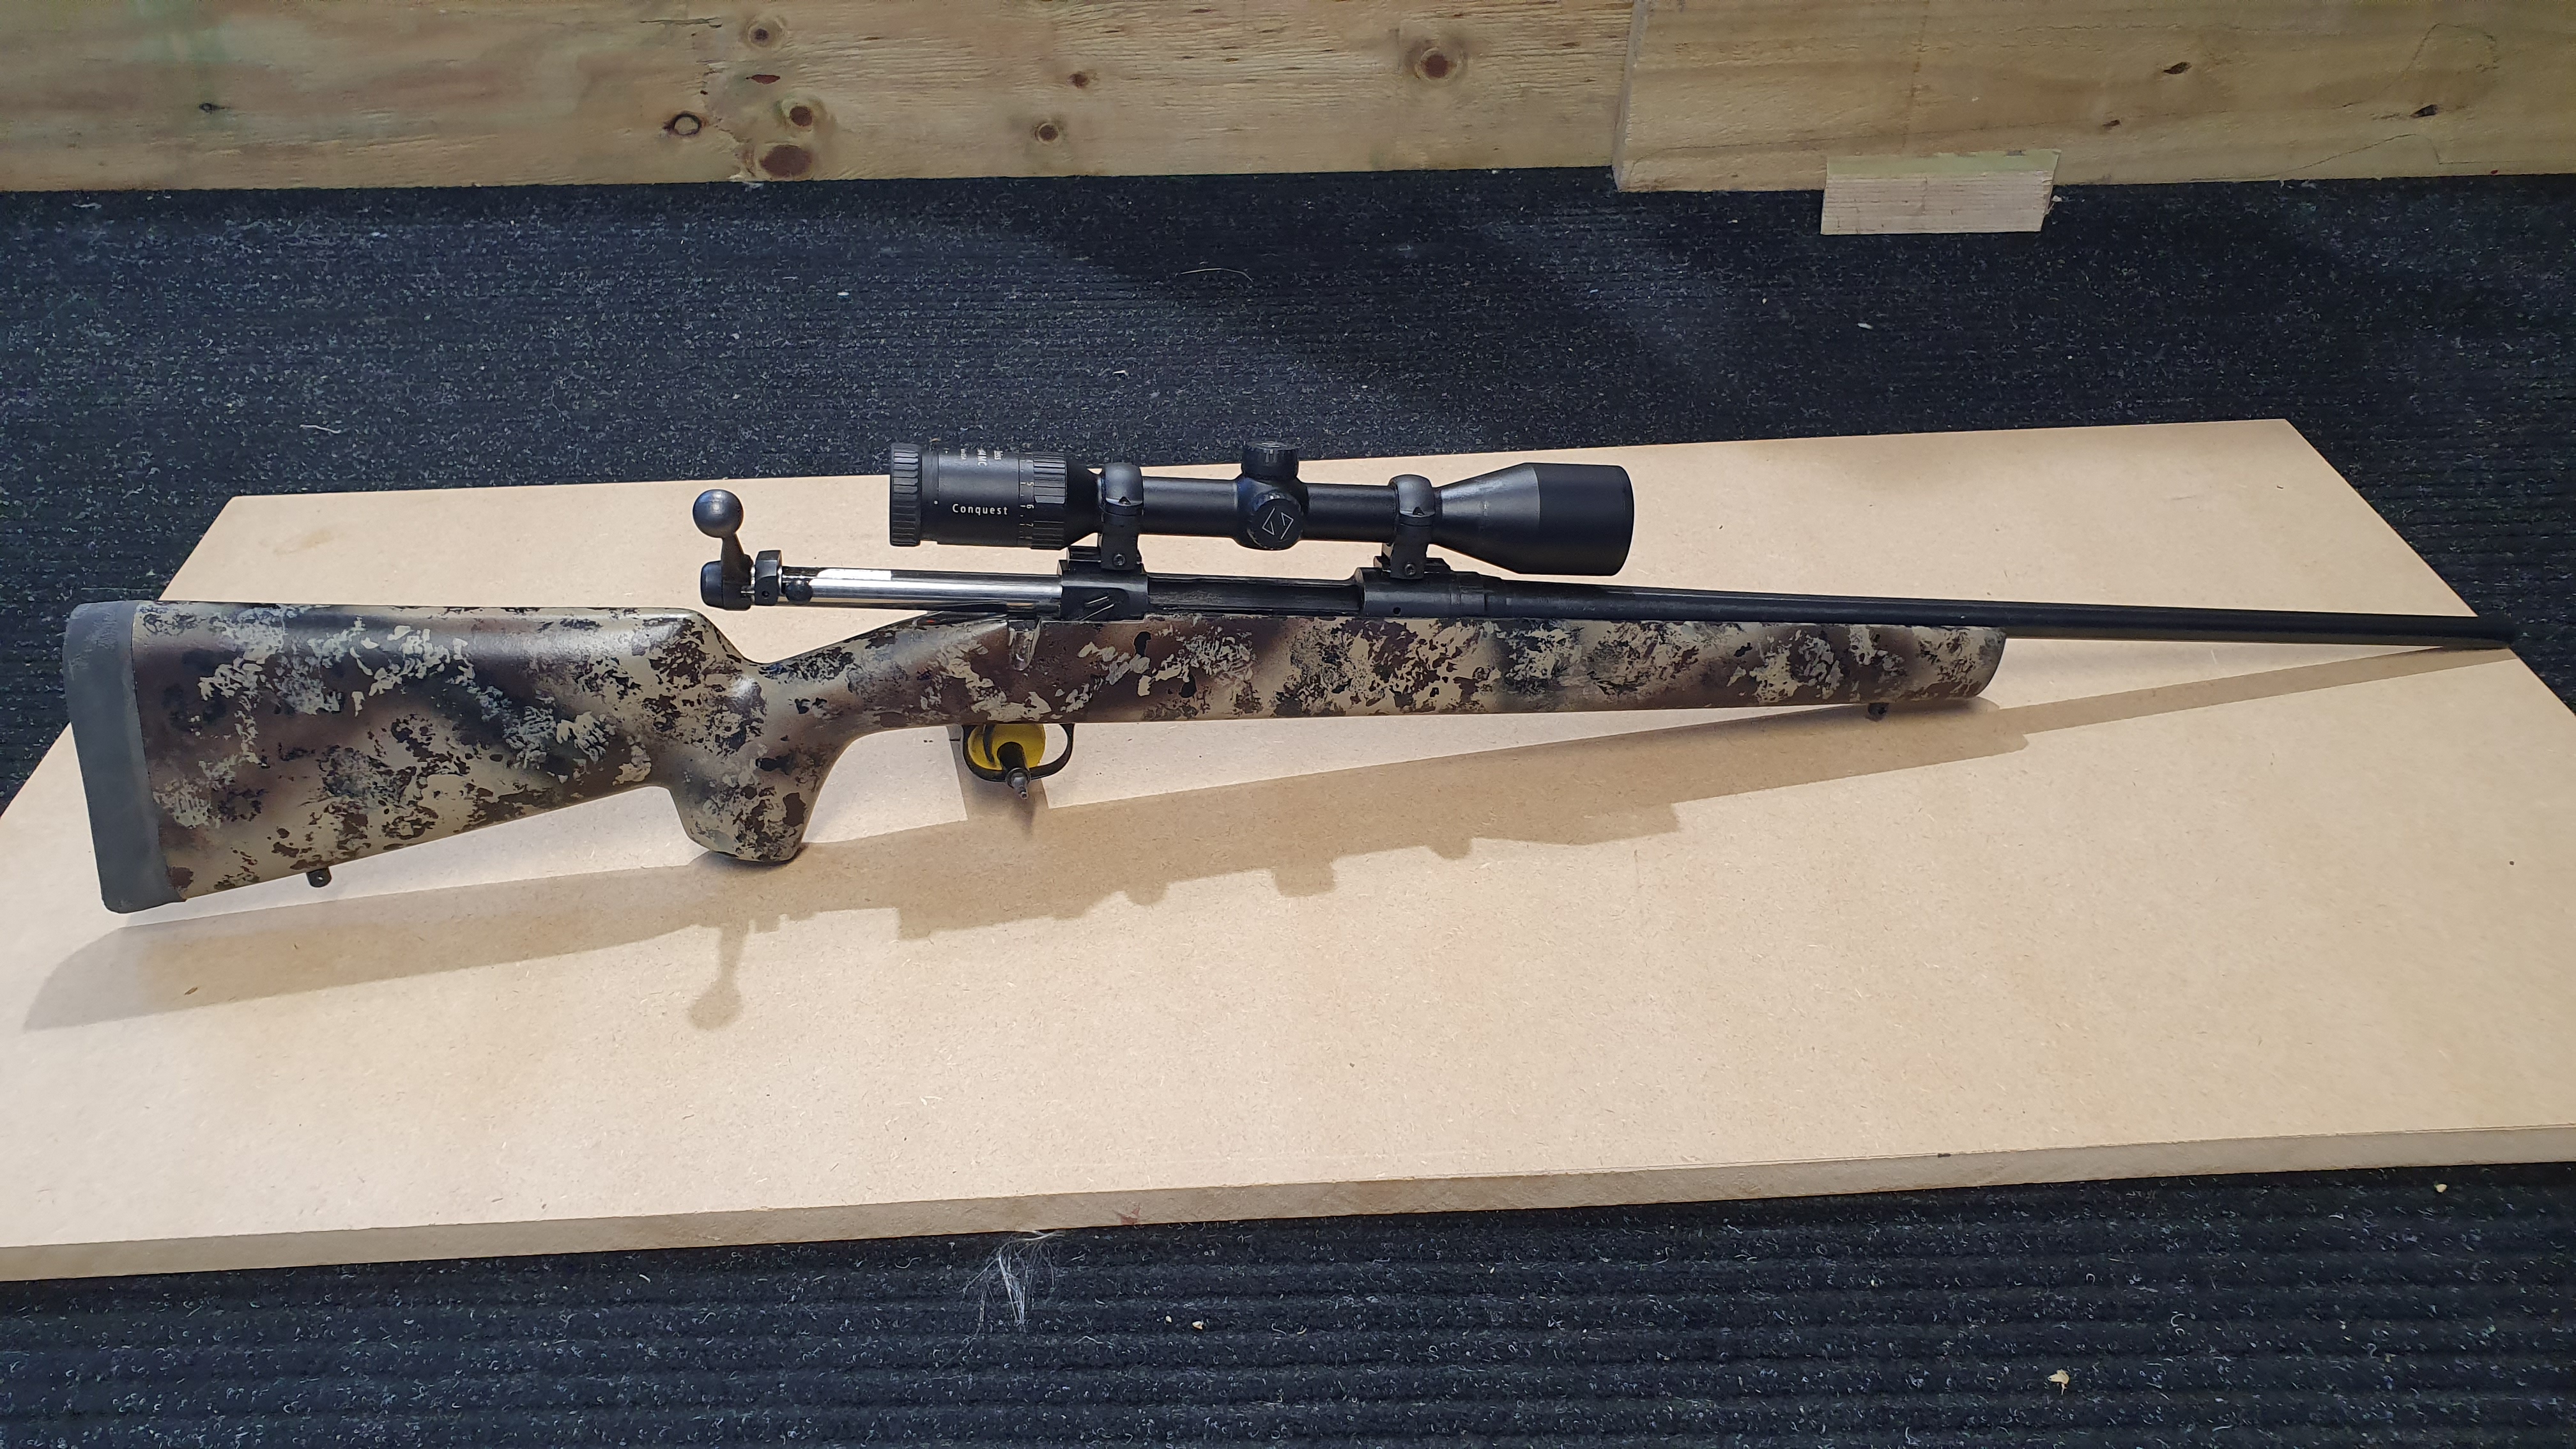
Well this is as far as I have gone to date. The stock is a bit heavier than I wanted but now I have a good ideas of how I will do things differently to save weight and make a stock from Carbon Fibre.
I hope to start my first carbon fiber stock within the next couple of weeks. I will document that here as well.
-
26-02-2020, 07:41 PM #24Member
- Join Date
- Apr 2015
- Location
- Geraldine
- Posts
- 22,621
plurry great job......pretty sure you will flick that fibreglass stock off no trouble to offset a few of your costs.
-
26-02-2020, 08:42 PM #25Member
- Join Date
- Dec 2011
- Location
- North Island
- Posts
- 378
Thanks, Originally Posted by Micky Duck
I doubt that there would be much demand for a long action Savage 110 stock .
-
26-02-2020, 09:19 PM #26Member
- Join Date
- May 2018
- Location
- Porirua
- Posts
- 1,308
I like your work, thanks for writing it up. I look forward to the carbon fibre one.
 Remember the 7 Ps; Pryor Preparation Prevents Piss Poor Performance.
-
27-02-2020, 10:02 AM #27Member
- Join Date
- Dec 2017
- Location
- Scotland
- Posts
- 116
Stock looks fantastic. Well done!
-
27-02-2020, 02:10 PM #28Member
- Join Date
- Feb 2013
- Location
- spreydon christcurch.
- Posts
- 6,699
bloody marvellous piece of DIY stockmaking. nowyour next task should you decide to accept it it to remake a proper politicians brain.leave it hollow and in clear so b..s can be rinsed out whever it appeares .nup a certain chappie doesnt have a pisspot for a brain ,altho evidence may tend to point to this.

-
27-02-2020, 02:10 PM #29Member
- Join Date
- Jan 2015
- Location
- Wellington
- Posts
- 2,412
Nice clean lines and great finish... Well done mate!
-
27-02-2020, 07:20 PM #30Member
- Join Date
- Dec 2017
- Location
- North Canterbury
- Posts
- 2,049
What is the barrel channel usually filled with in the available carbon stocks. I'm not sure what it is in my Ken Henderson.


 Reply With Quote
Similar Threads
-
Hardys Carbon fiber Bipod - Any thoughts?
By Larskramer in forum Firearms, Optics and AccessoriesReplies: 35Last Post: 07-11-2019, 11:28 AM -
Carbon Fiber Stocks
By Ham 7mm in forum Firearms, Optics and AccessoriesReplies: 13Last Post: 09-10-2018, 08:58 AM -
carbon fiber vs steel
By r87mm in forum Firearms, Optics and AccessoriesReplies: 14Last Post: 26-07-2017, 07:55 PM -
Carbon Fiber stock maker Morrinsville area
By 260rem in forum Firearms, Optics and AccessoriesReplies: 2Last Post: 24-05-2012, 07:34 AM
Tags for this Thread
 Posting Permissions
- You may not post new threads
- You may not post replies
- You may not post attachments
- You may not edit your posts
Welcome to NZ Hunting and Shooting Forums! We see you're new here, or arn't logged in. Create an account, and Login for full access including our FREE BUY and SELL section Register NOW!!
All times are GMT +13. The time now is 09:55 AM.

Bookmarks