


 LinkBack URL
 About LinkBacks
Bought a remington 700 tactical as I've always wanted one with a mcmillan style stock for long range. Found a stock on trademe for $470 which seemed like a good deal, but when it arrived it wasn't quite I was after.
Buy once, cry once right? Well I'm a slow learner so after buying a second, second hand stock, I found that it was bedded about 3mm too high (stopping it feeding properly from the atlasworks bottom metal) slightly to far forward, and 2mm off center at the foreend, and just wasn't the right shape for the action to fit properly. Could have bought a manners for the price of both and be done with it.
Anyway I decided that with my CNC router and some pillar bedding, I can make it work.
Welcome guest, is this your first visit? Create Account now to join.
Welcome to the NZ Hunting and Shooting Forums.
Search Forums


User Tag List
+ Reply to Thread
Results 1 to 12 of 12
 28Likes
Thread: First stock bedding Job
-
30-01-2021, 08:02 AM #1Member

- Join Date
- Jan 2021
- Location
- Methven
- Posts
- 134
First stock bedding Job
-
-
30-01-2021, 09:33 AM #2Member
- Join Date
- Jan 2021
- Location
- Methven
- Posts
- 134
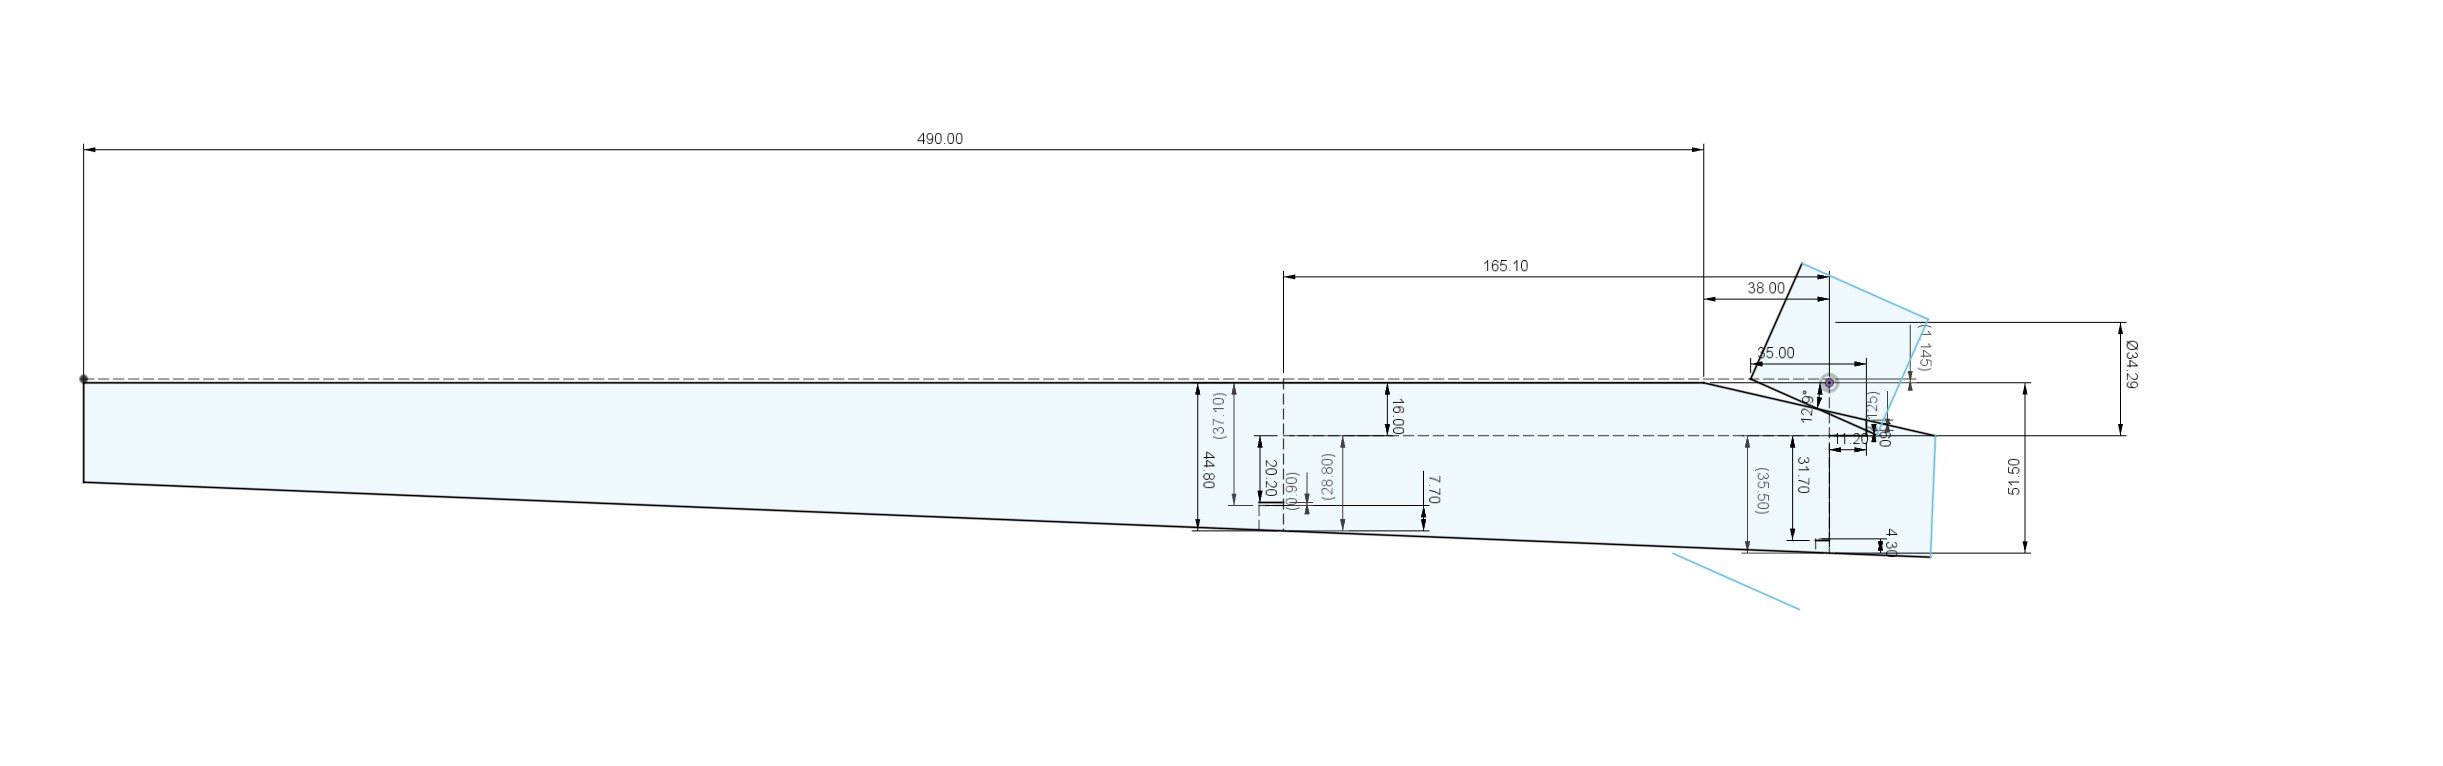
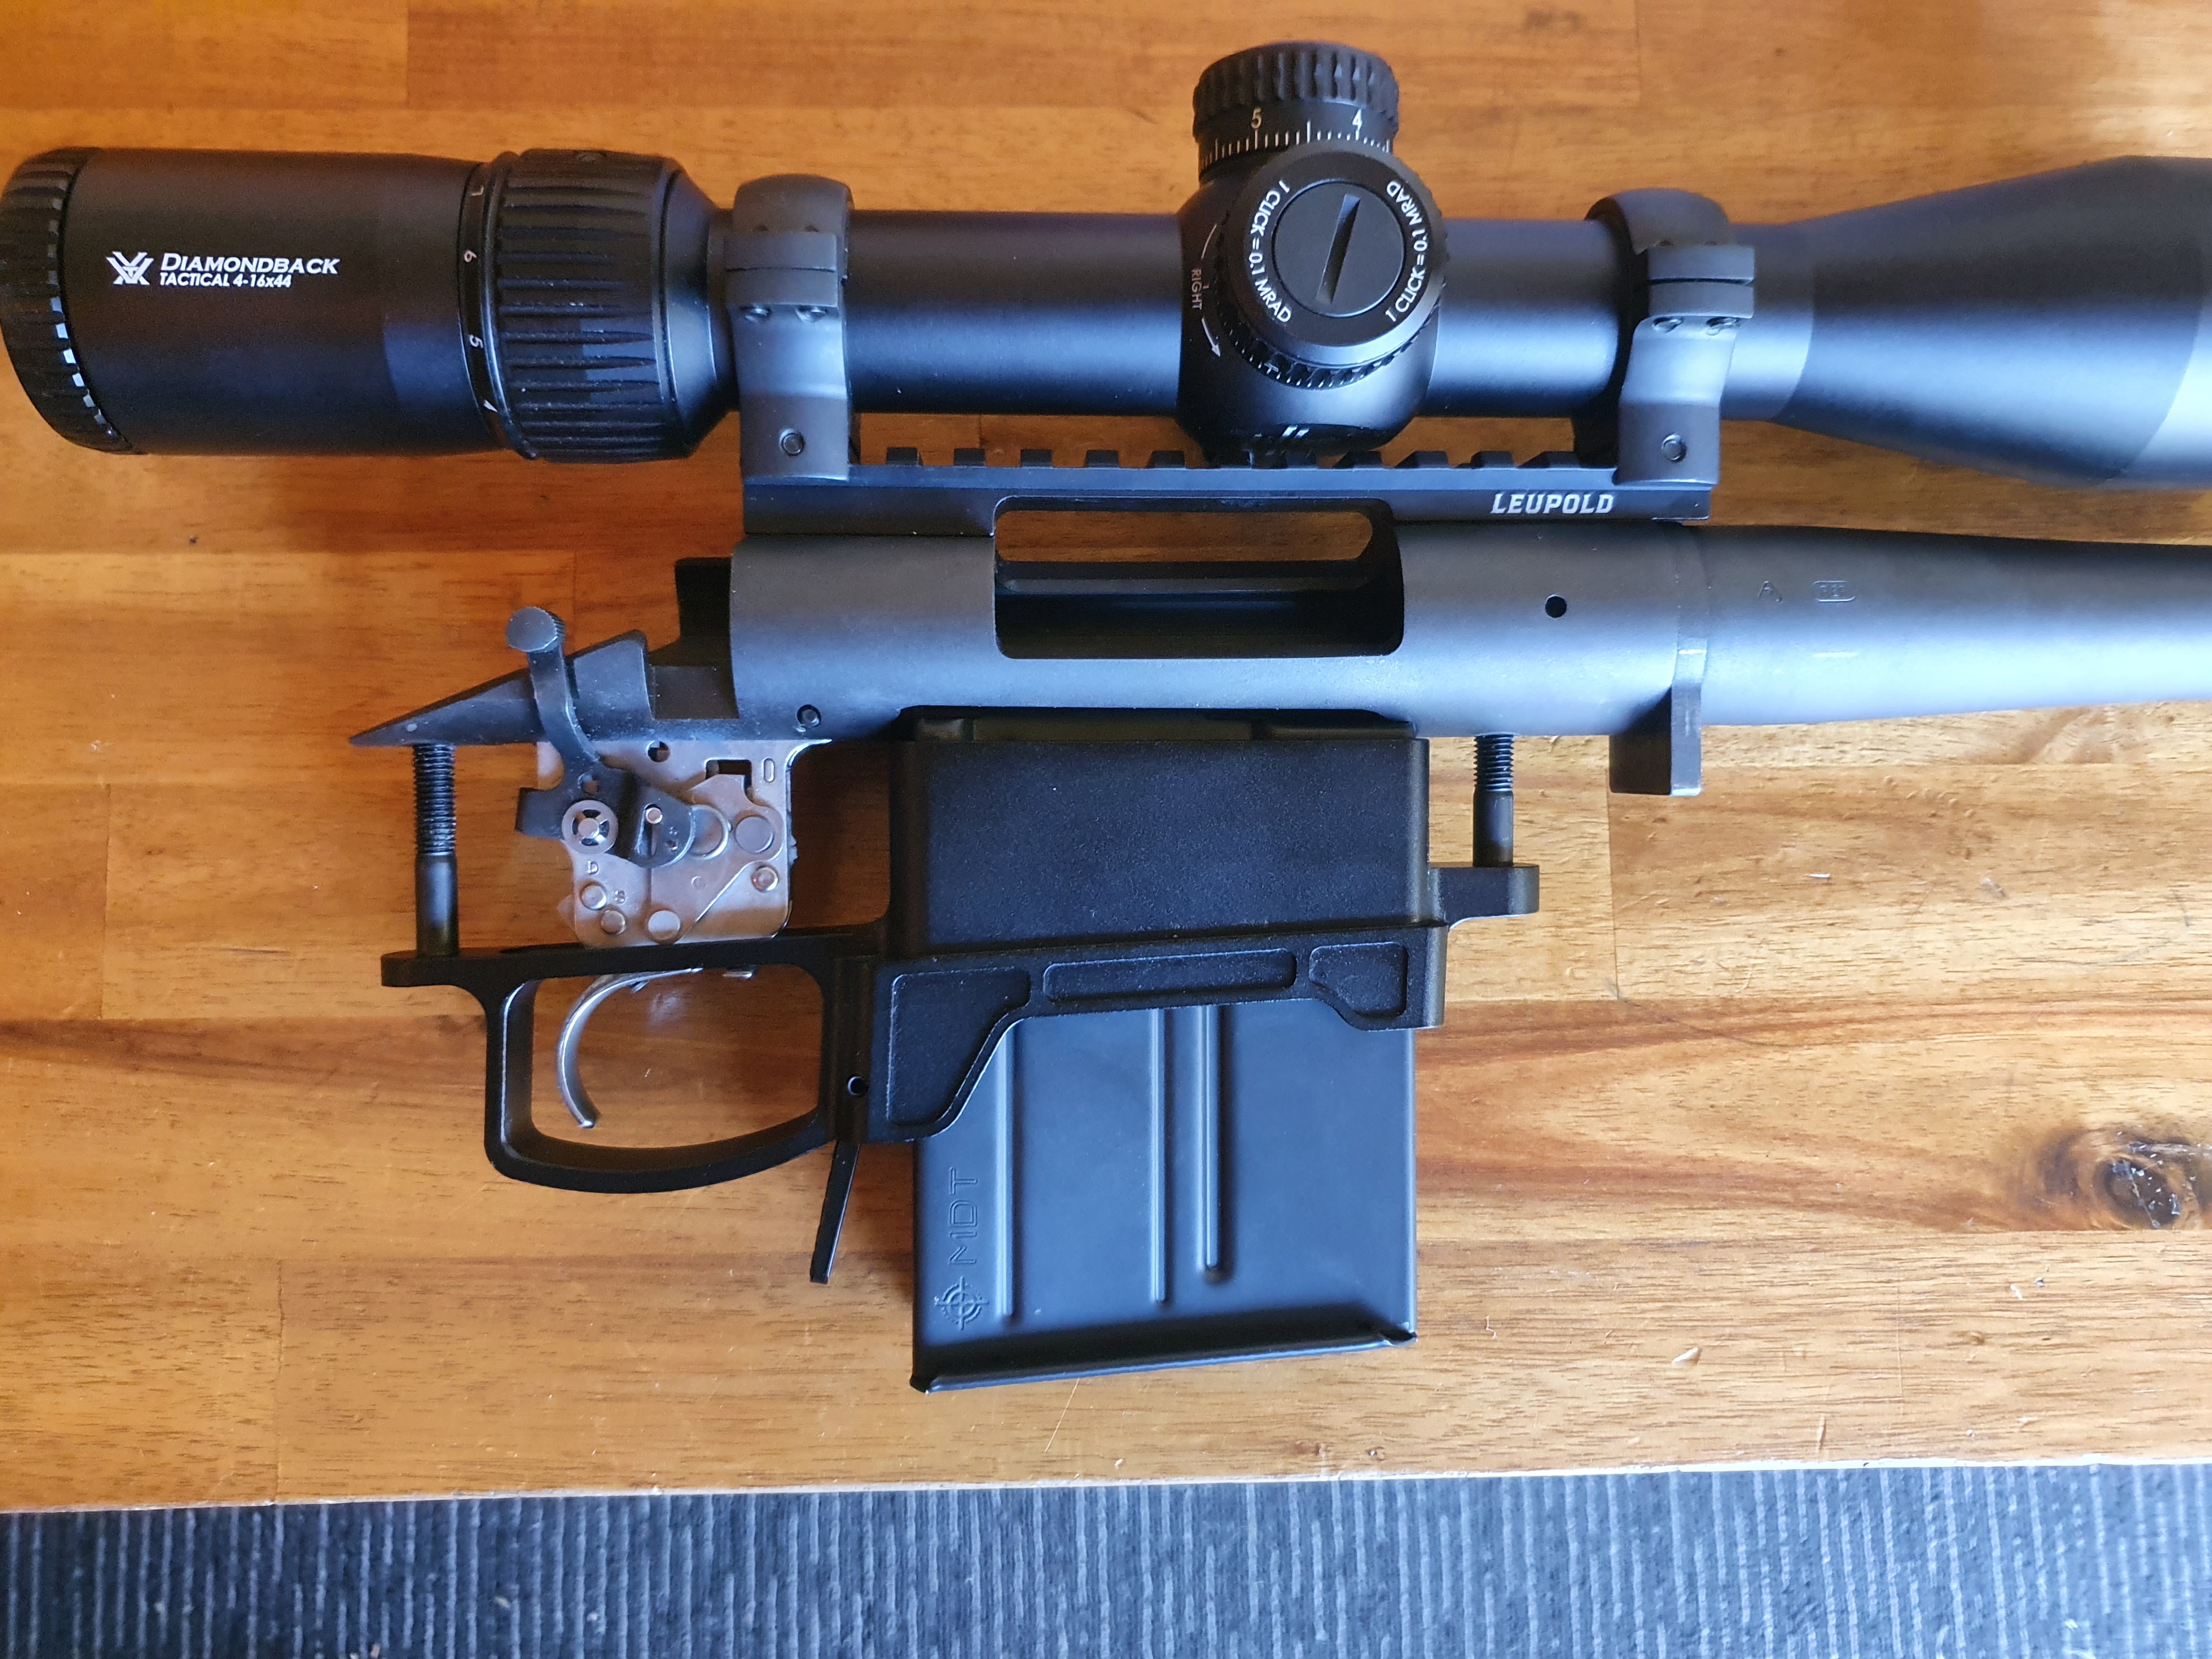
So I took a whole bunch of measurements and started drawing it up in CAD to see how low I needed to set the action into the stock to get the bottom metal close enough, and the action screws to actually reach. It took a while measuring the stock at both action bolt holes to get an accurate taper, then taking that and overlaying the action to bottom metal dimensions I needed and finding the right compromise of action height. Which ended up about .5mm above the top of the stock.
Once I had that sorted I modeled the 3d stock area with the inletting details I needed. Created the tool paths and started mounting the stock up in the CNC, which took a bit to get square and level.
Attachment 159174
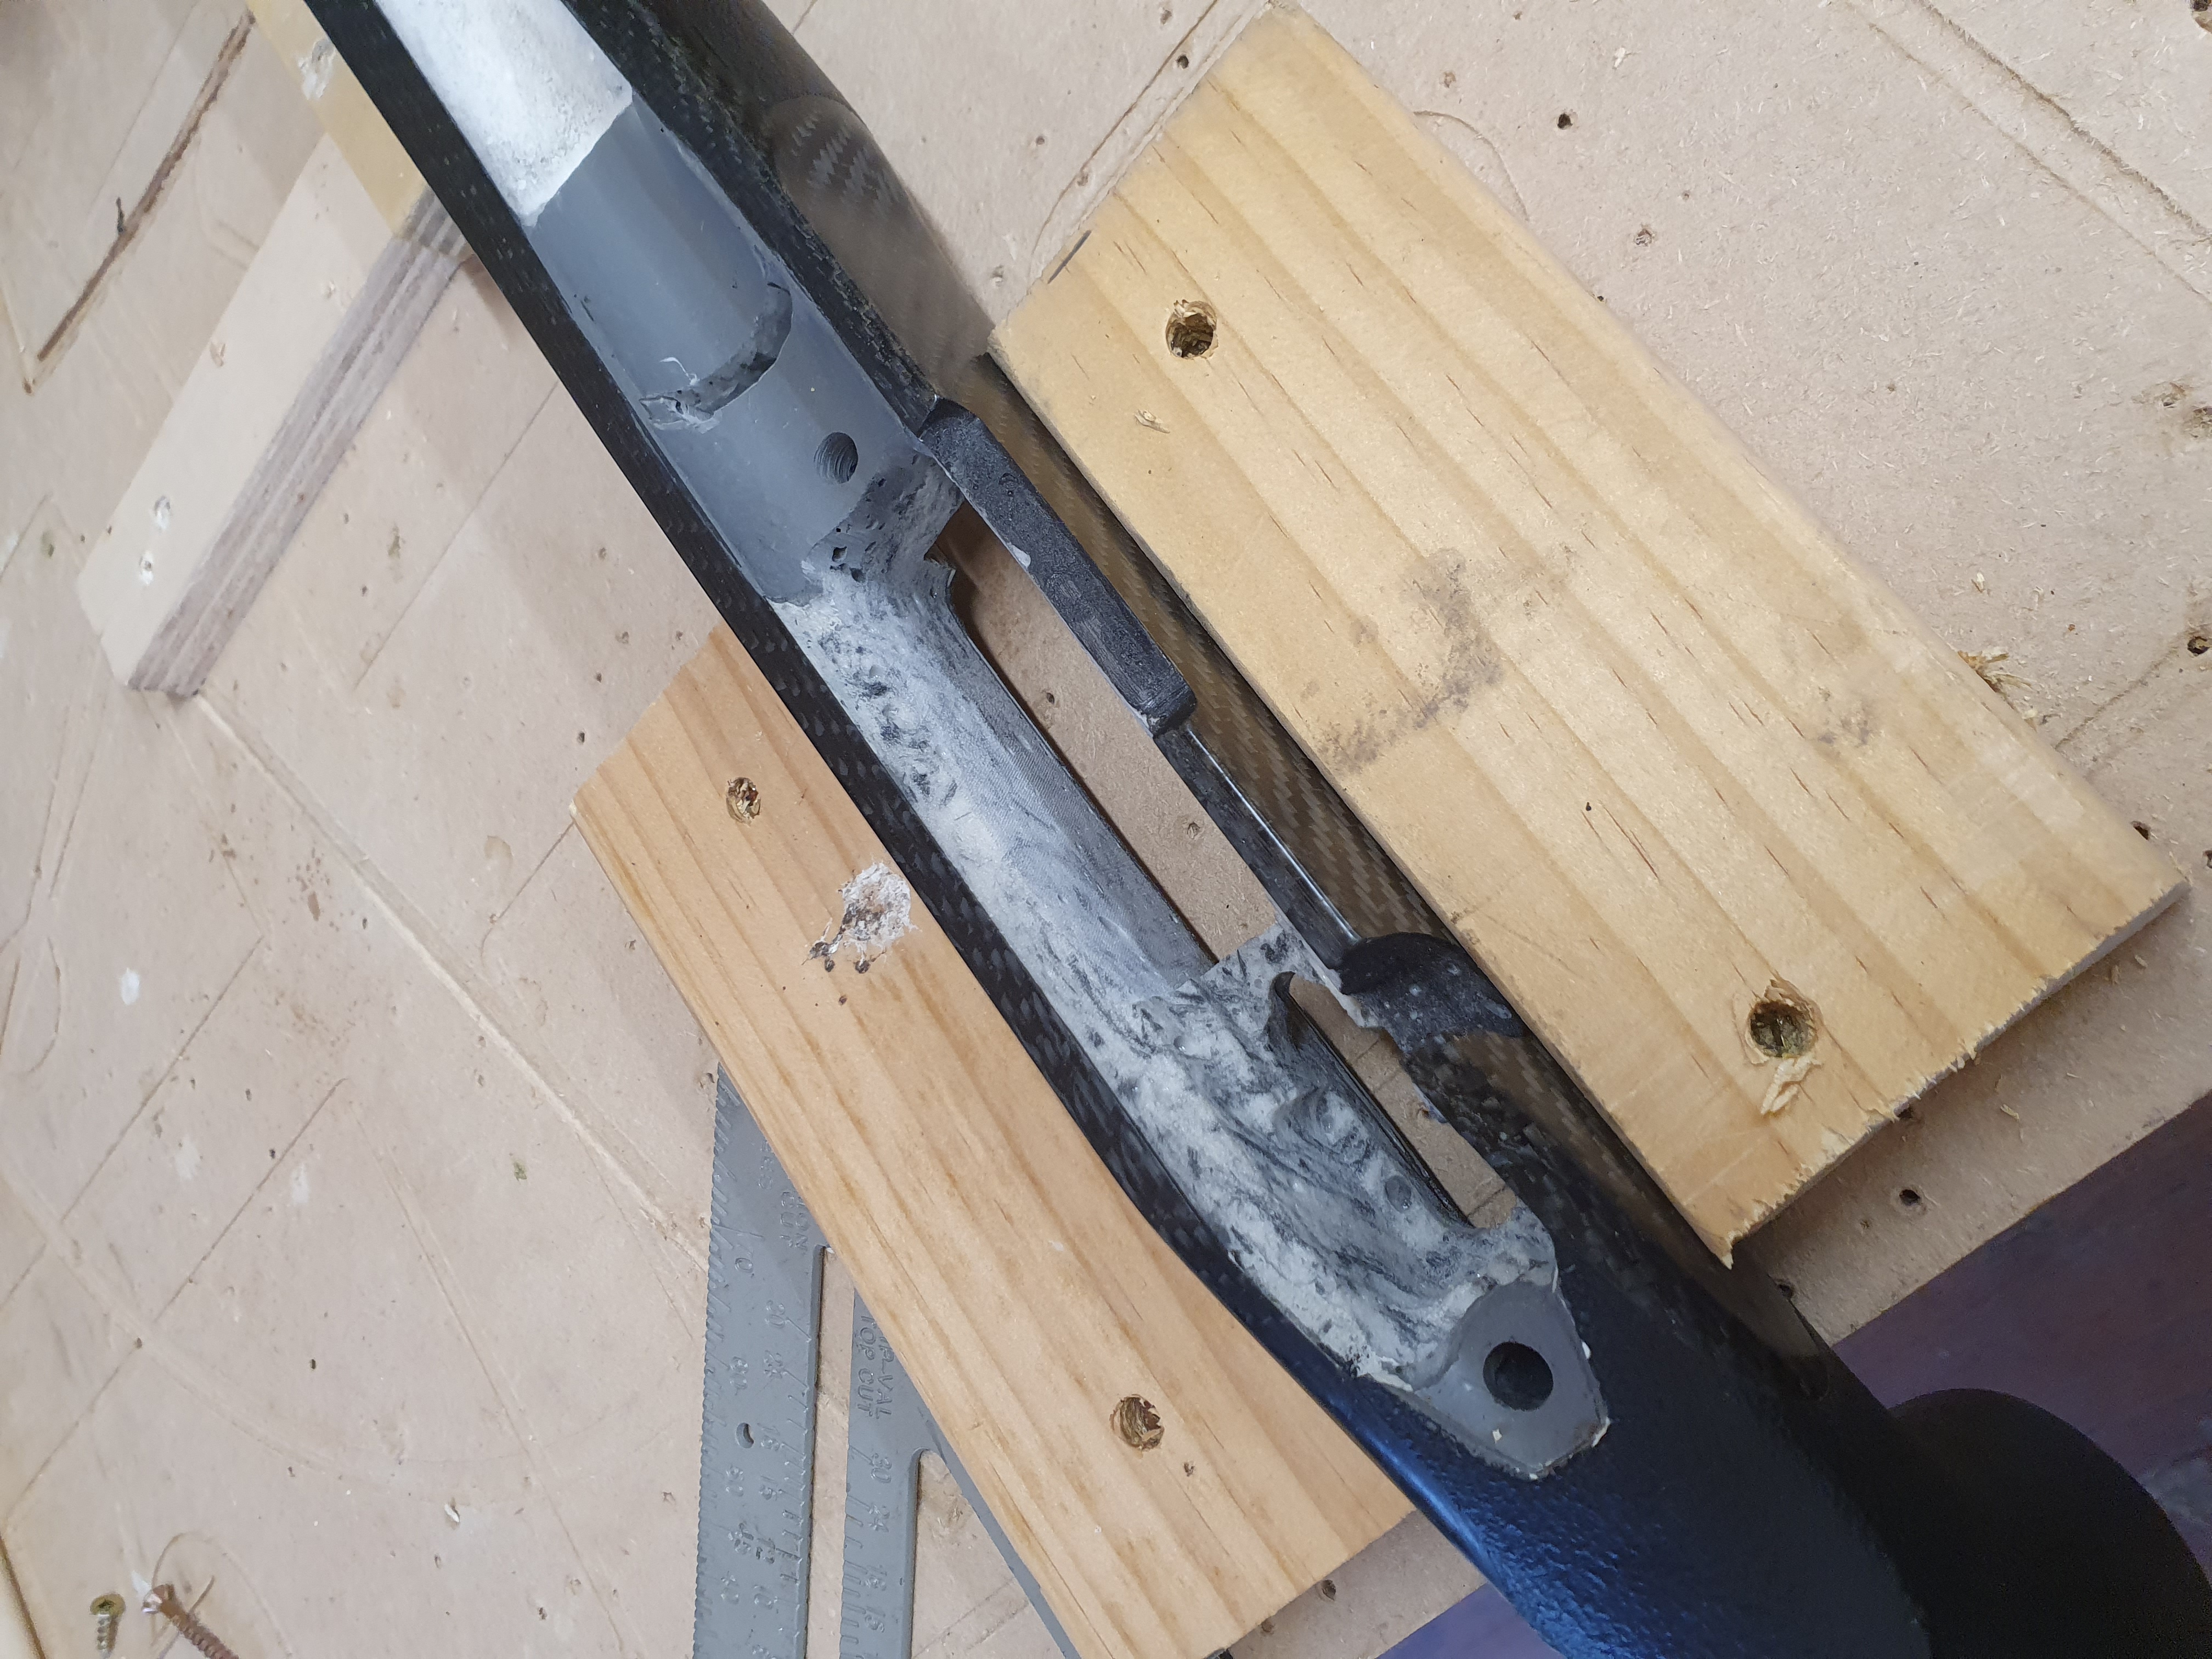
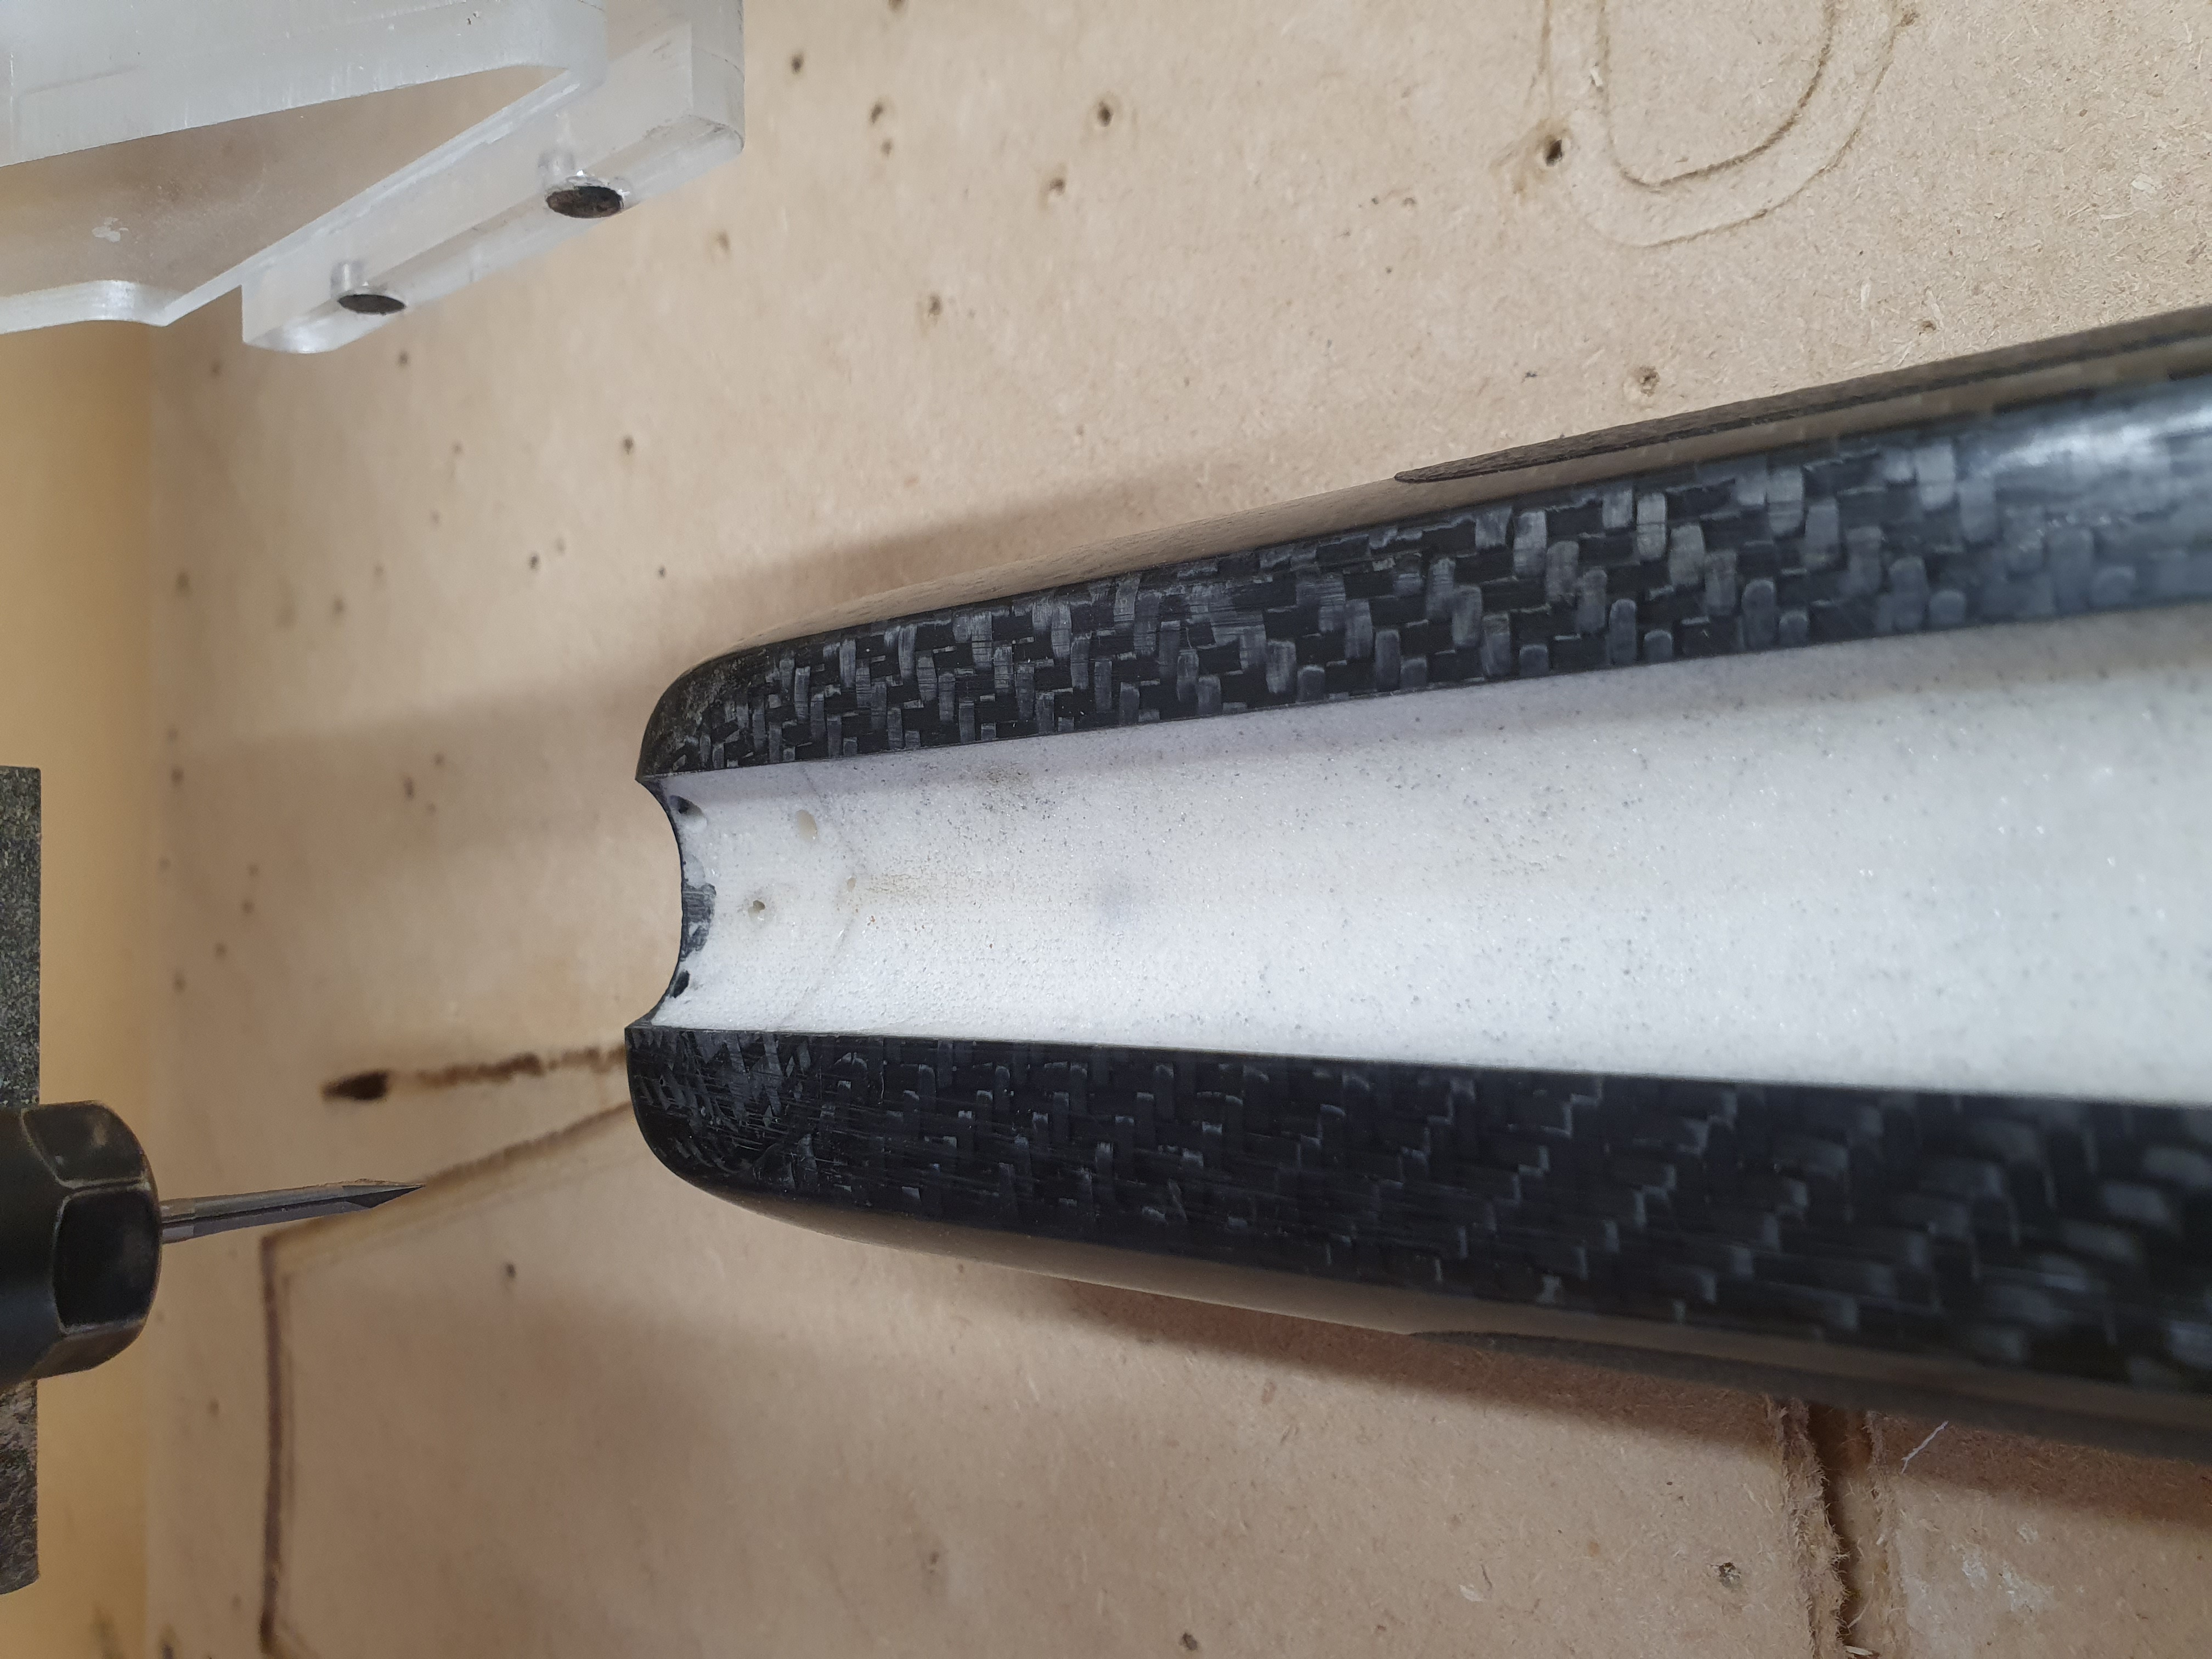
I then machined the inletting to fit, with no allowance for bedding, so I could test everything. Also opened up and centered the barrel channel.
It took a couple of goes to get the action area wide enough so it was clamping down to the bottom rather than the sides.
Attachment 159175
Attachment 159177
Attachment 159178
Attachment 159179
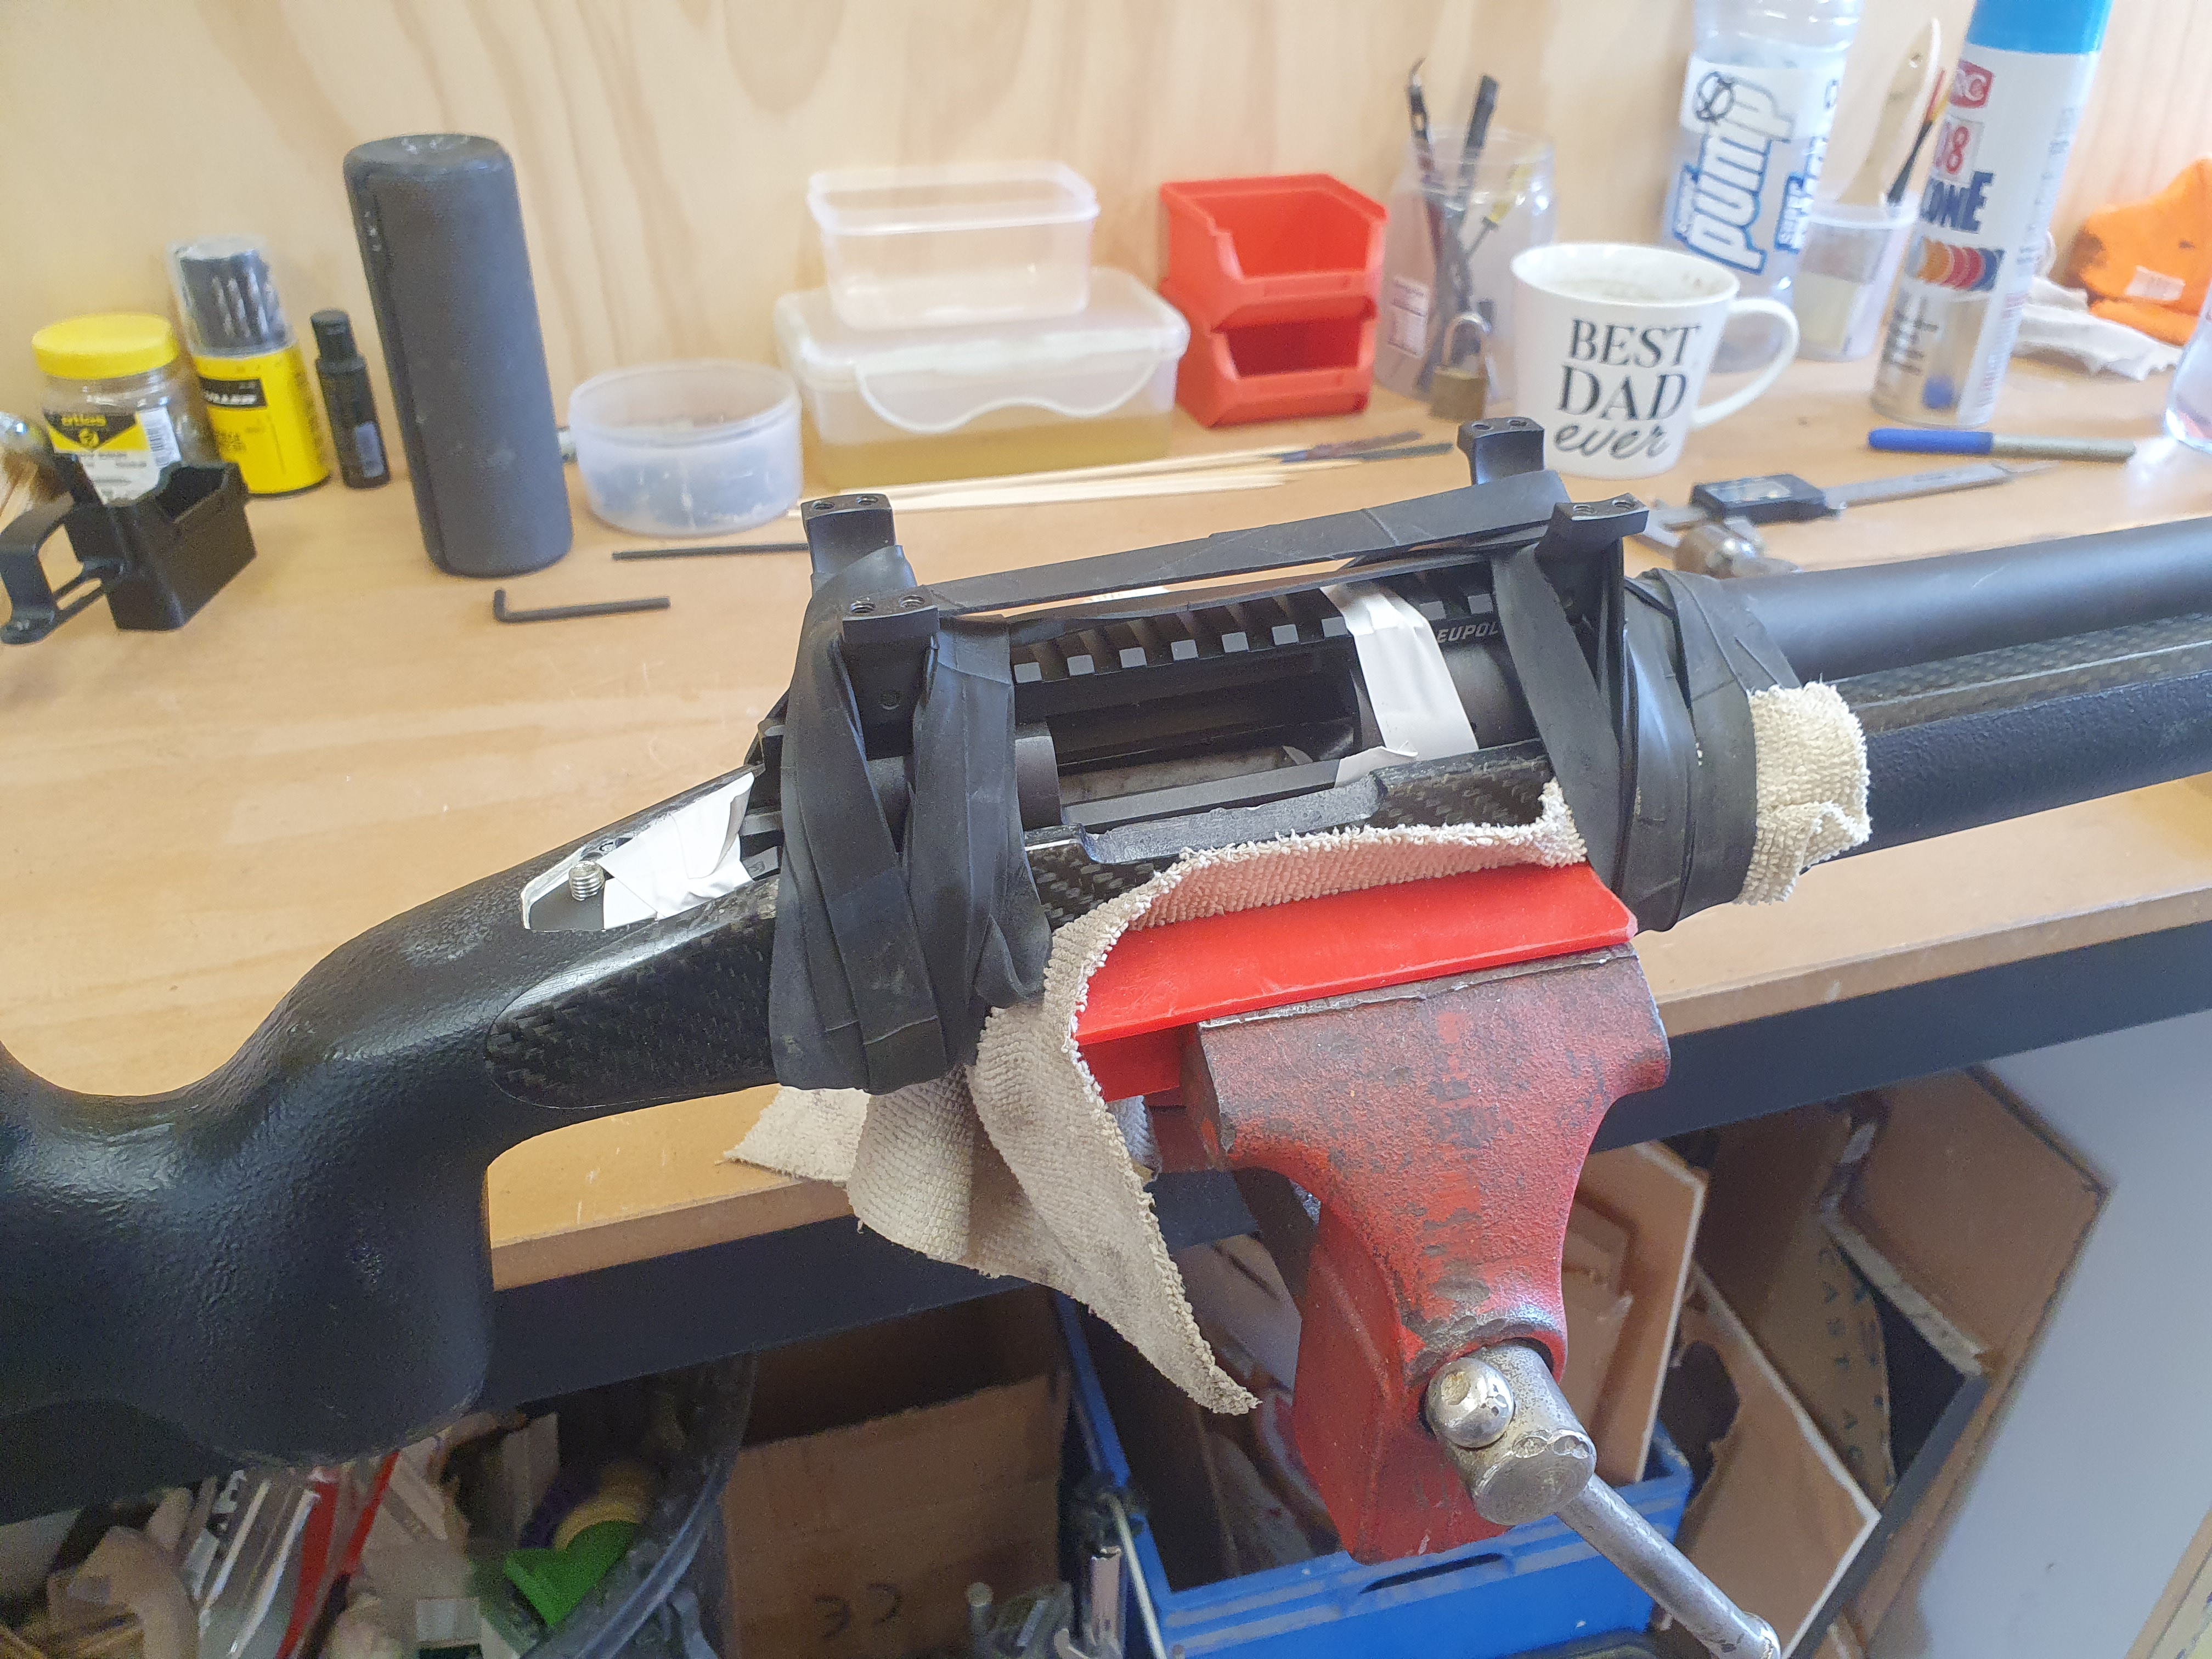
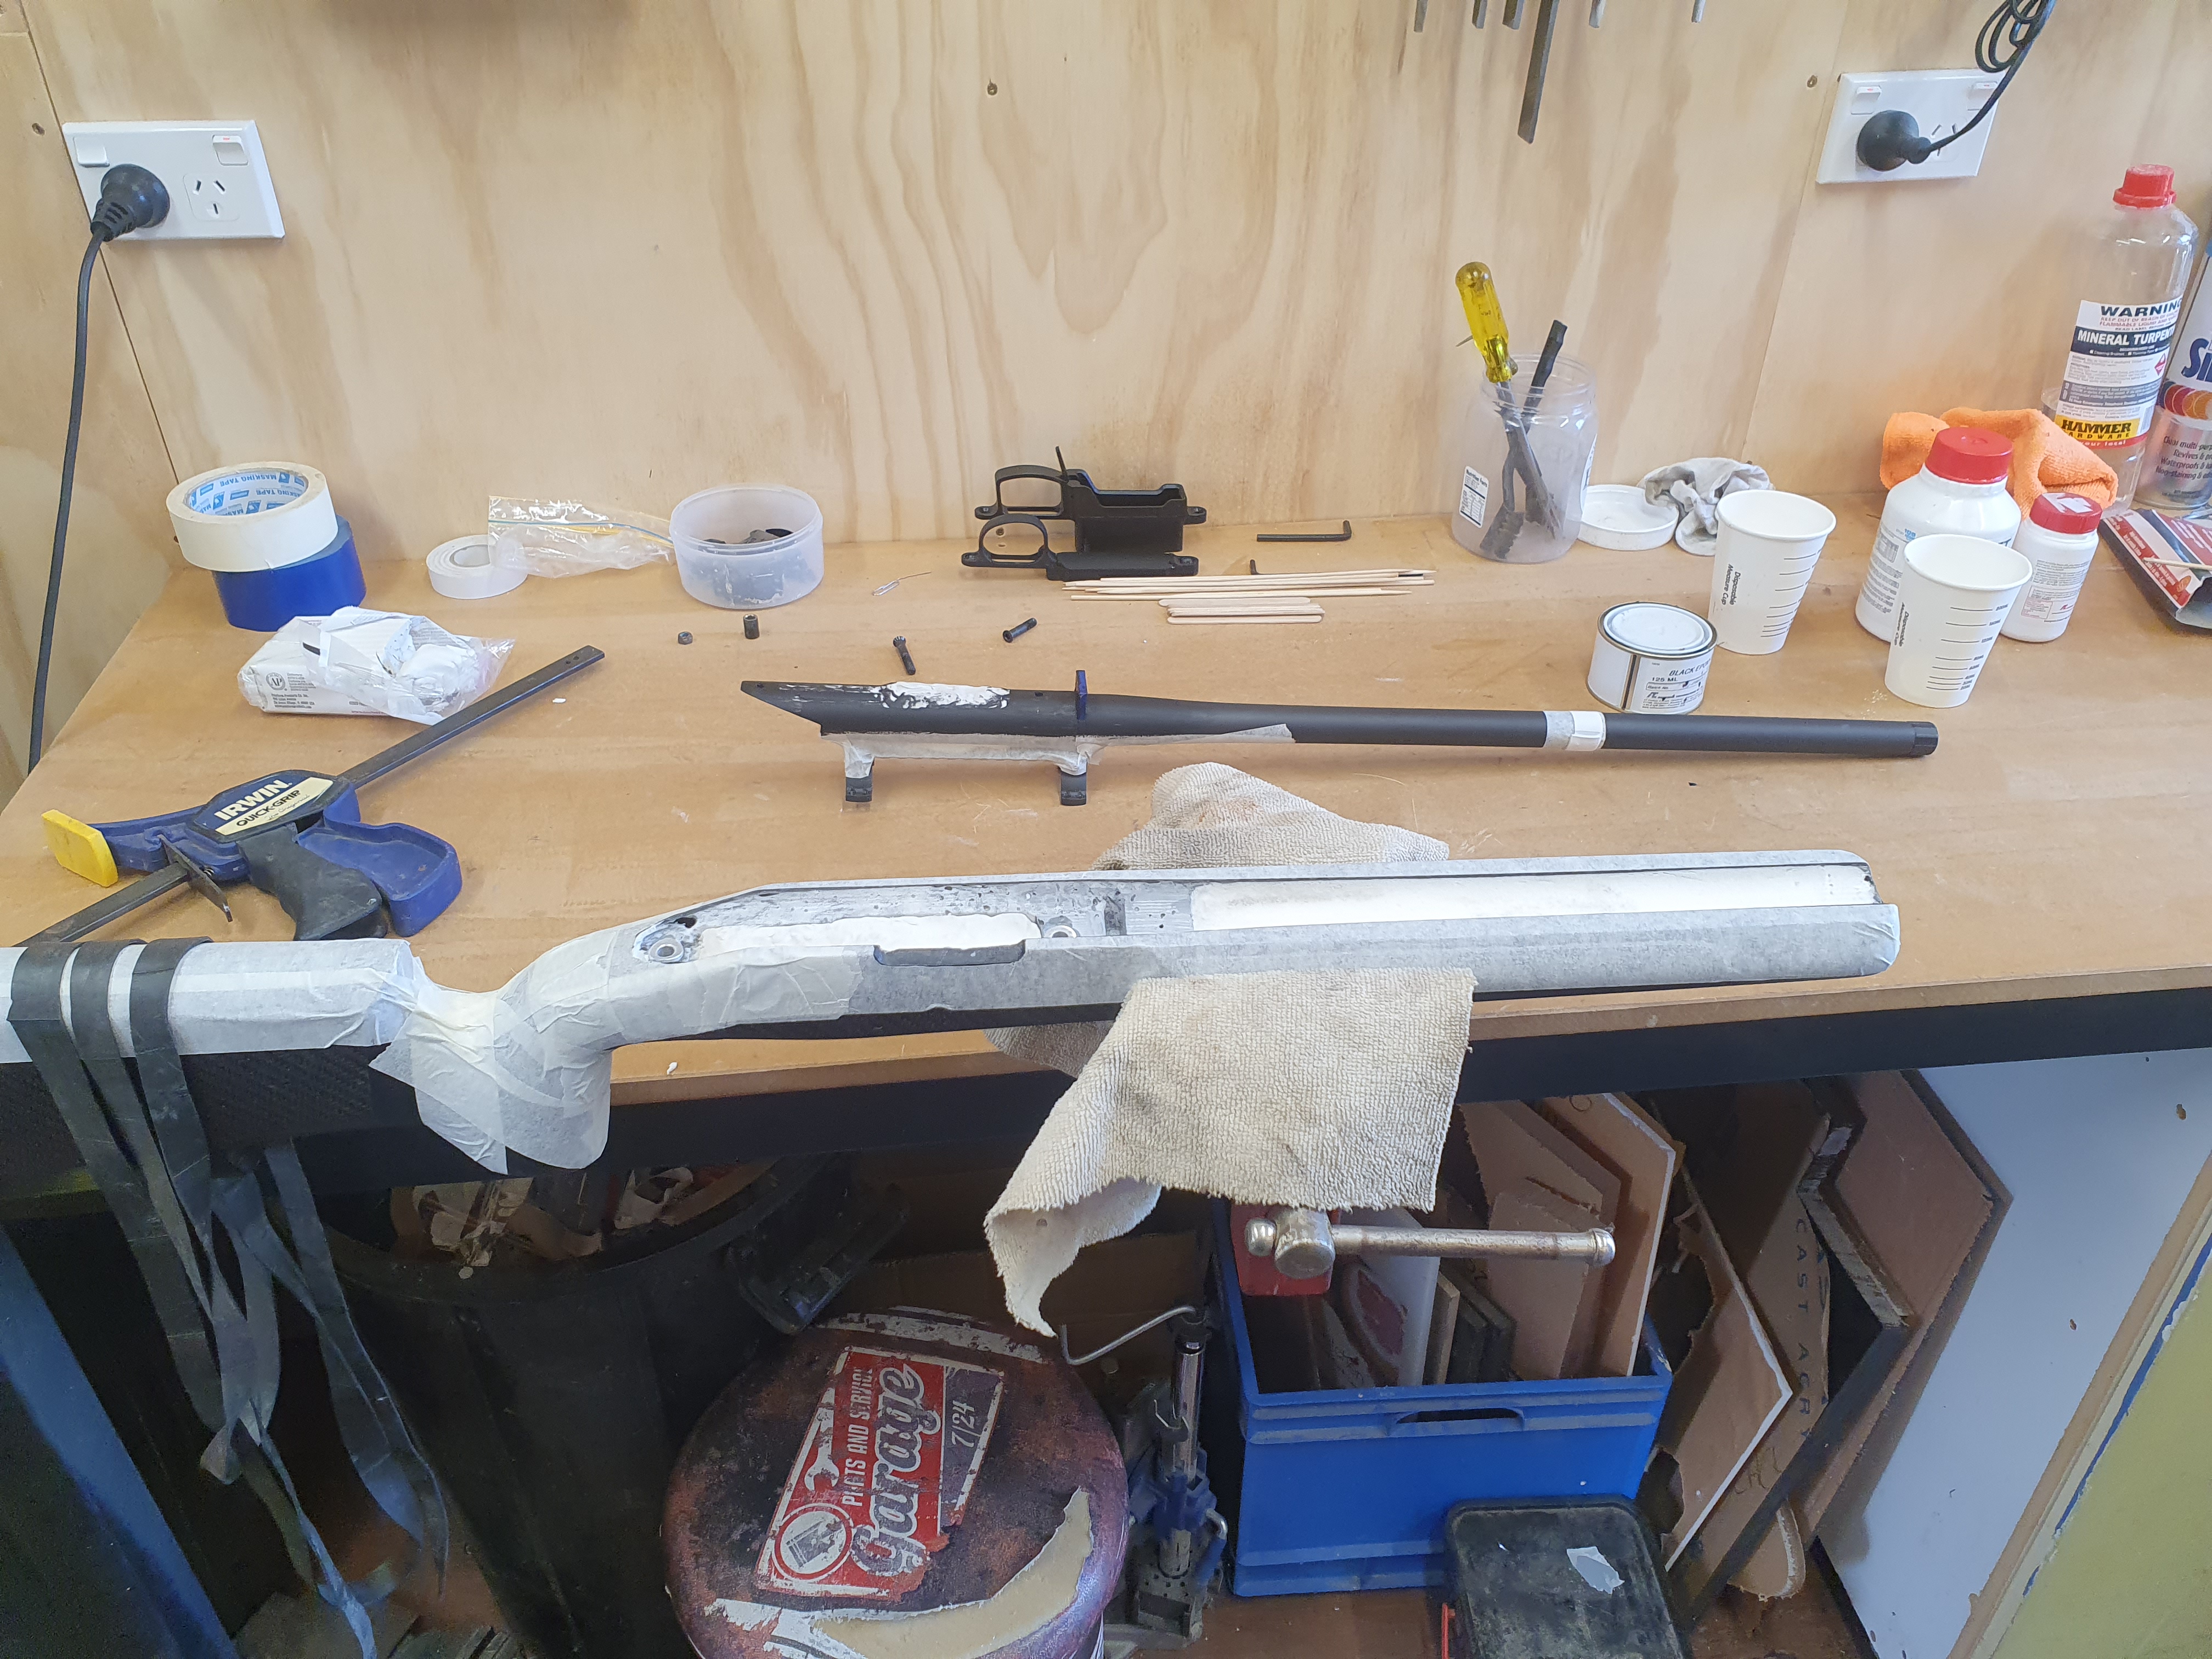
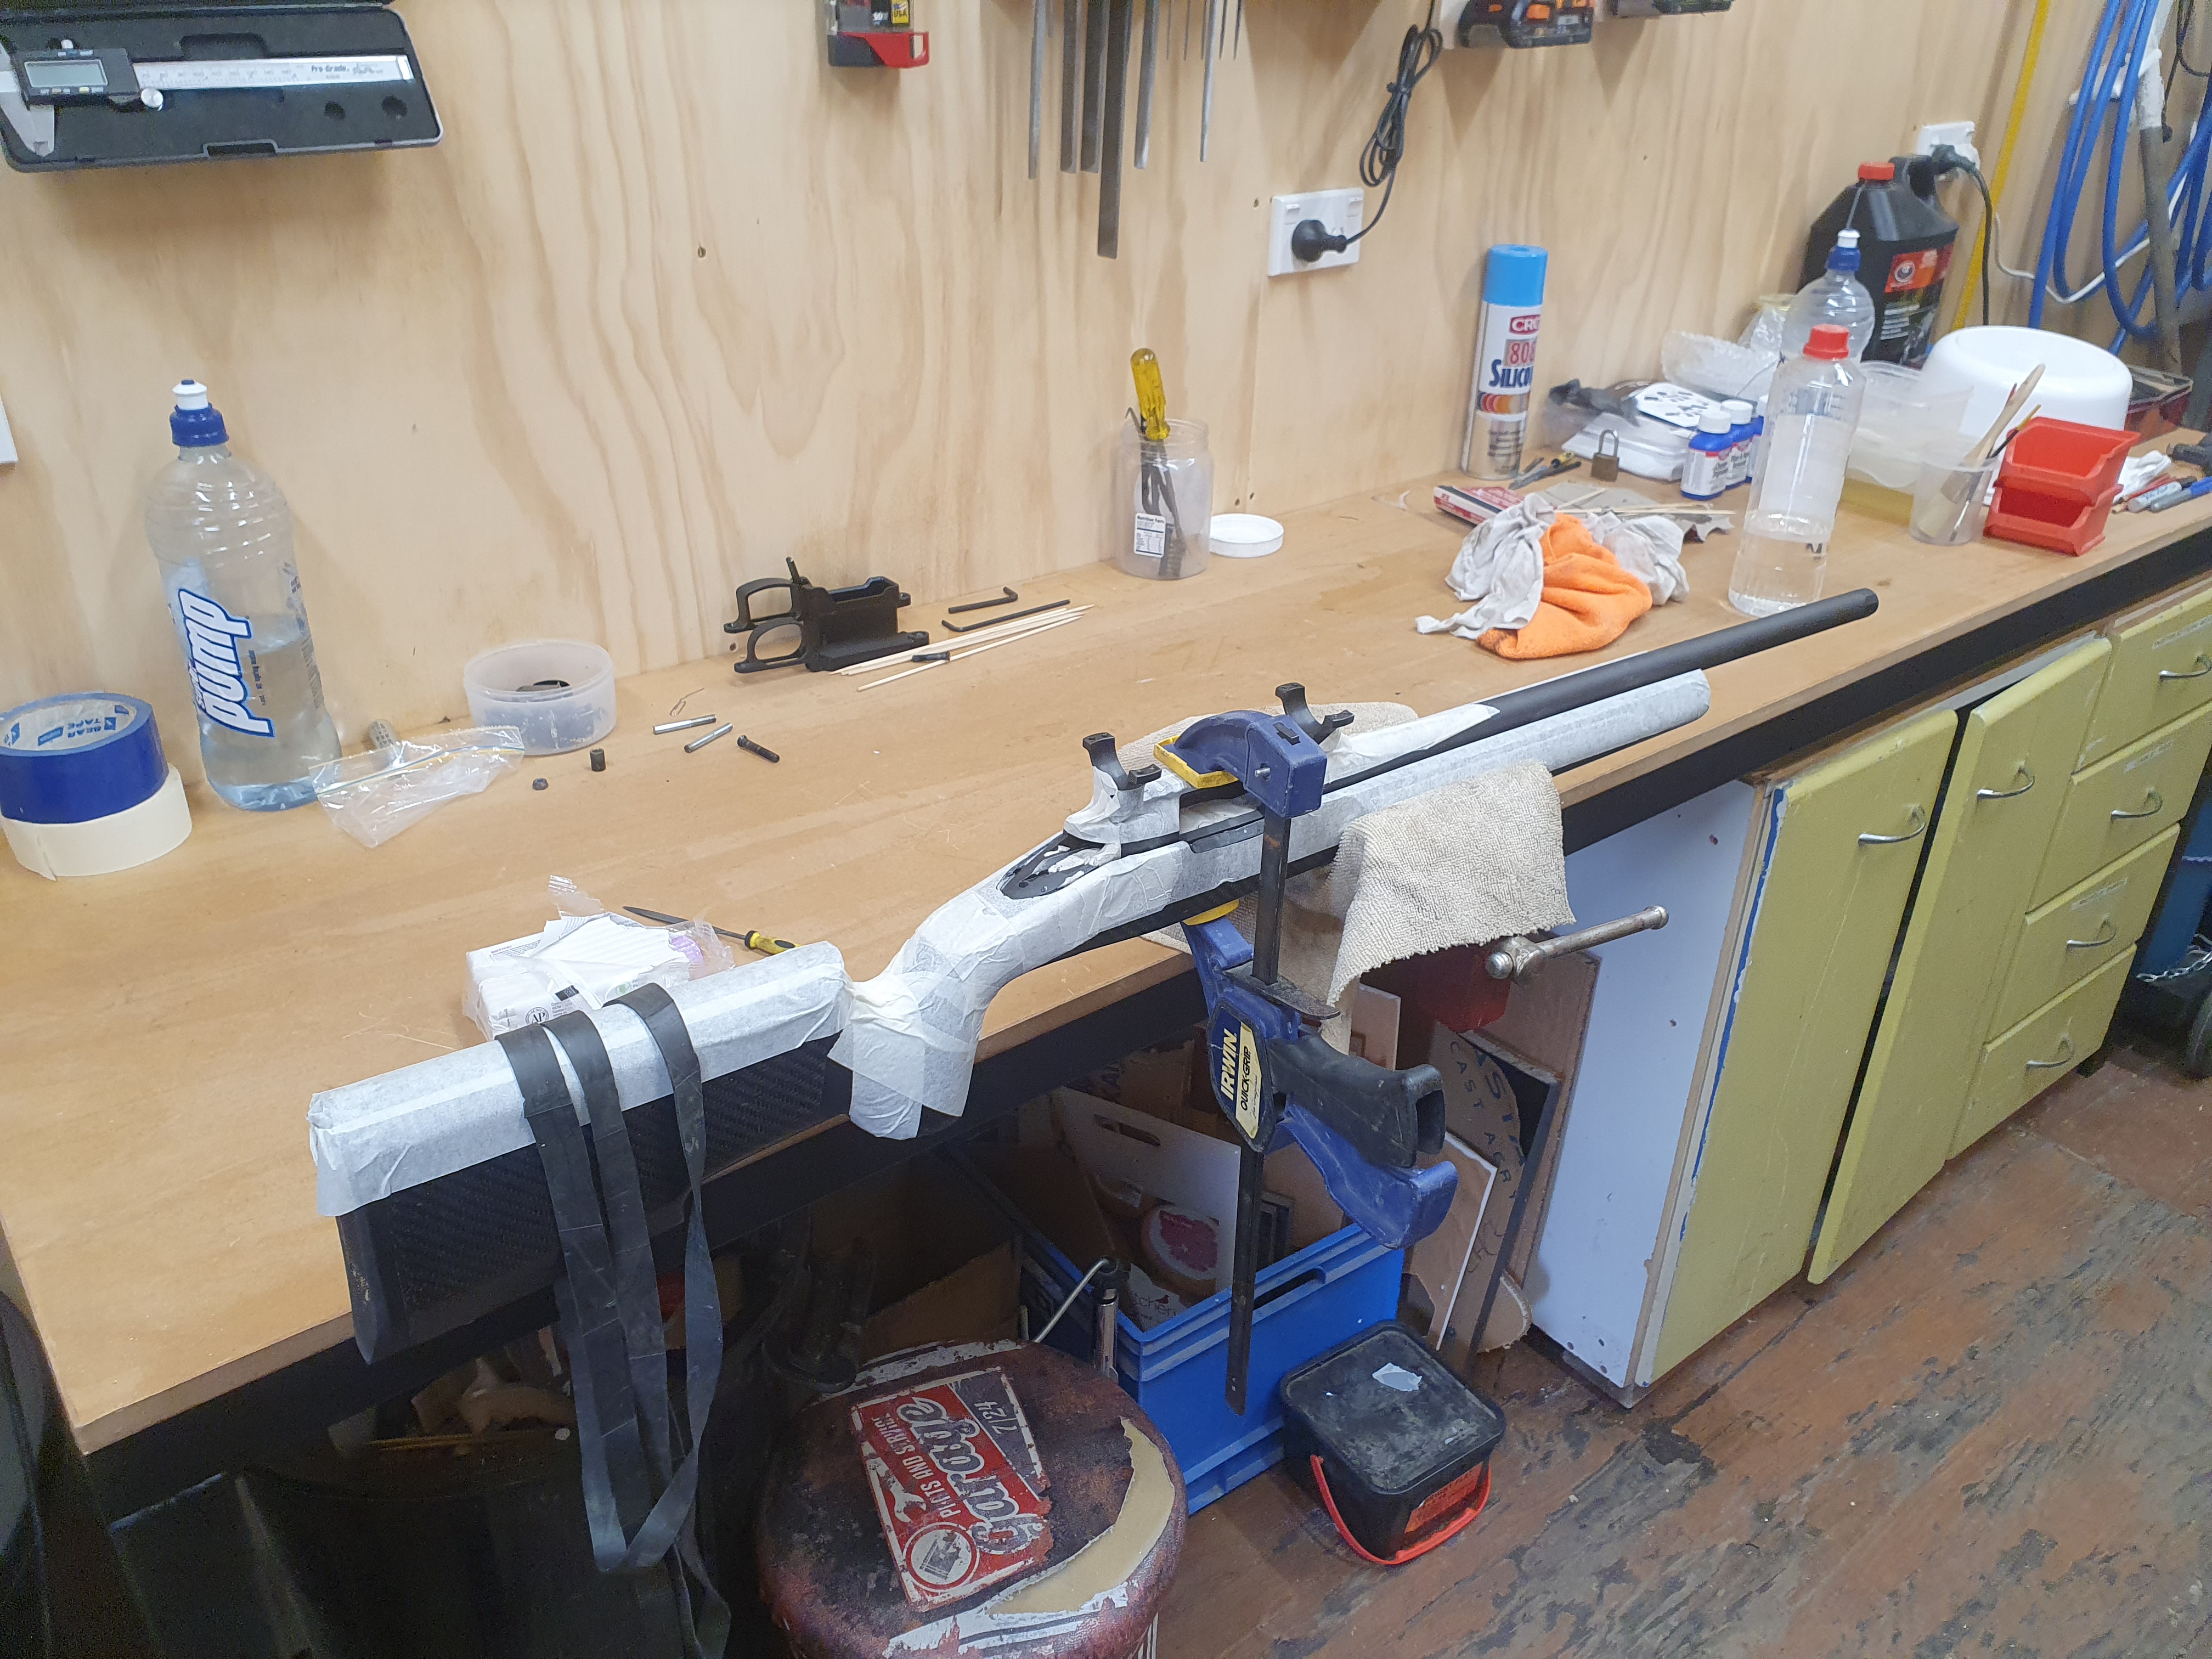
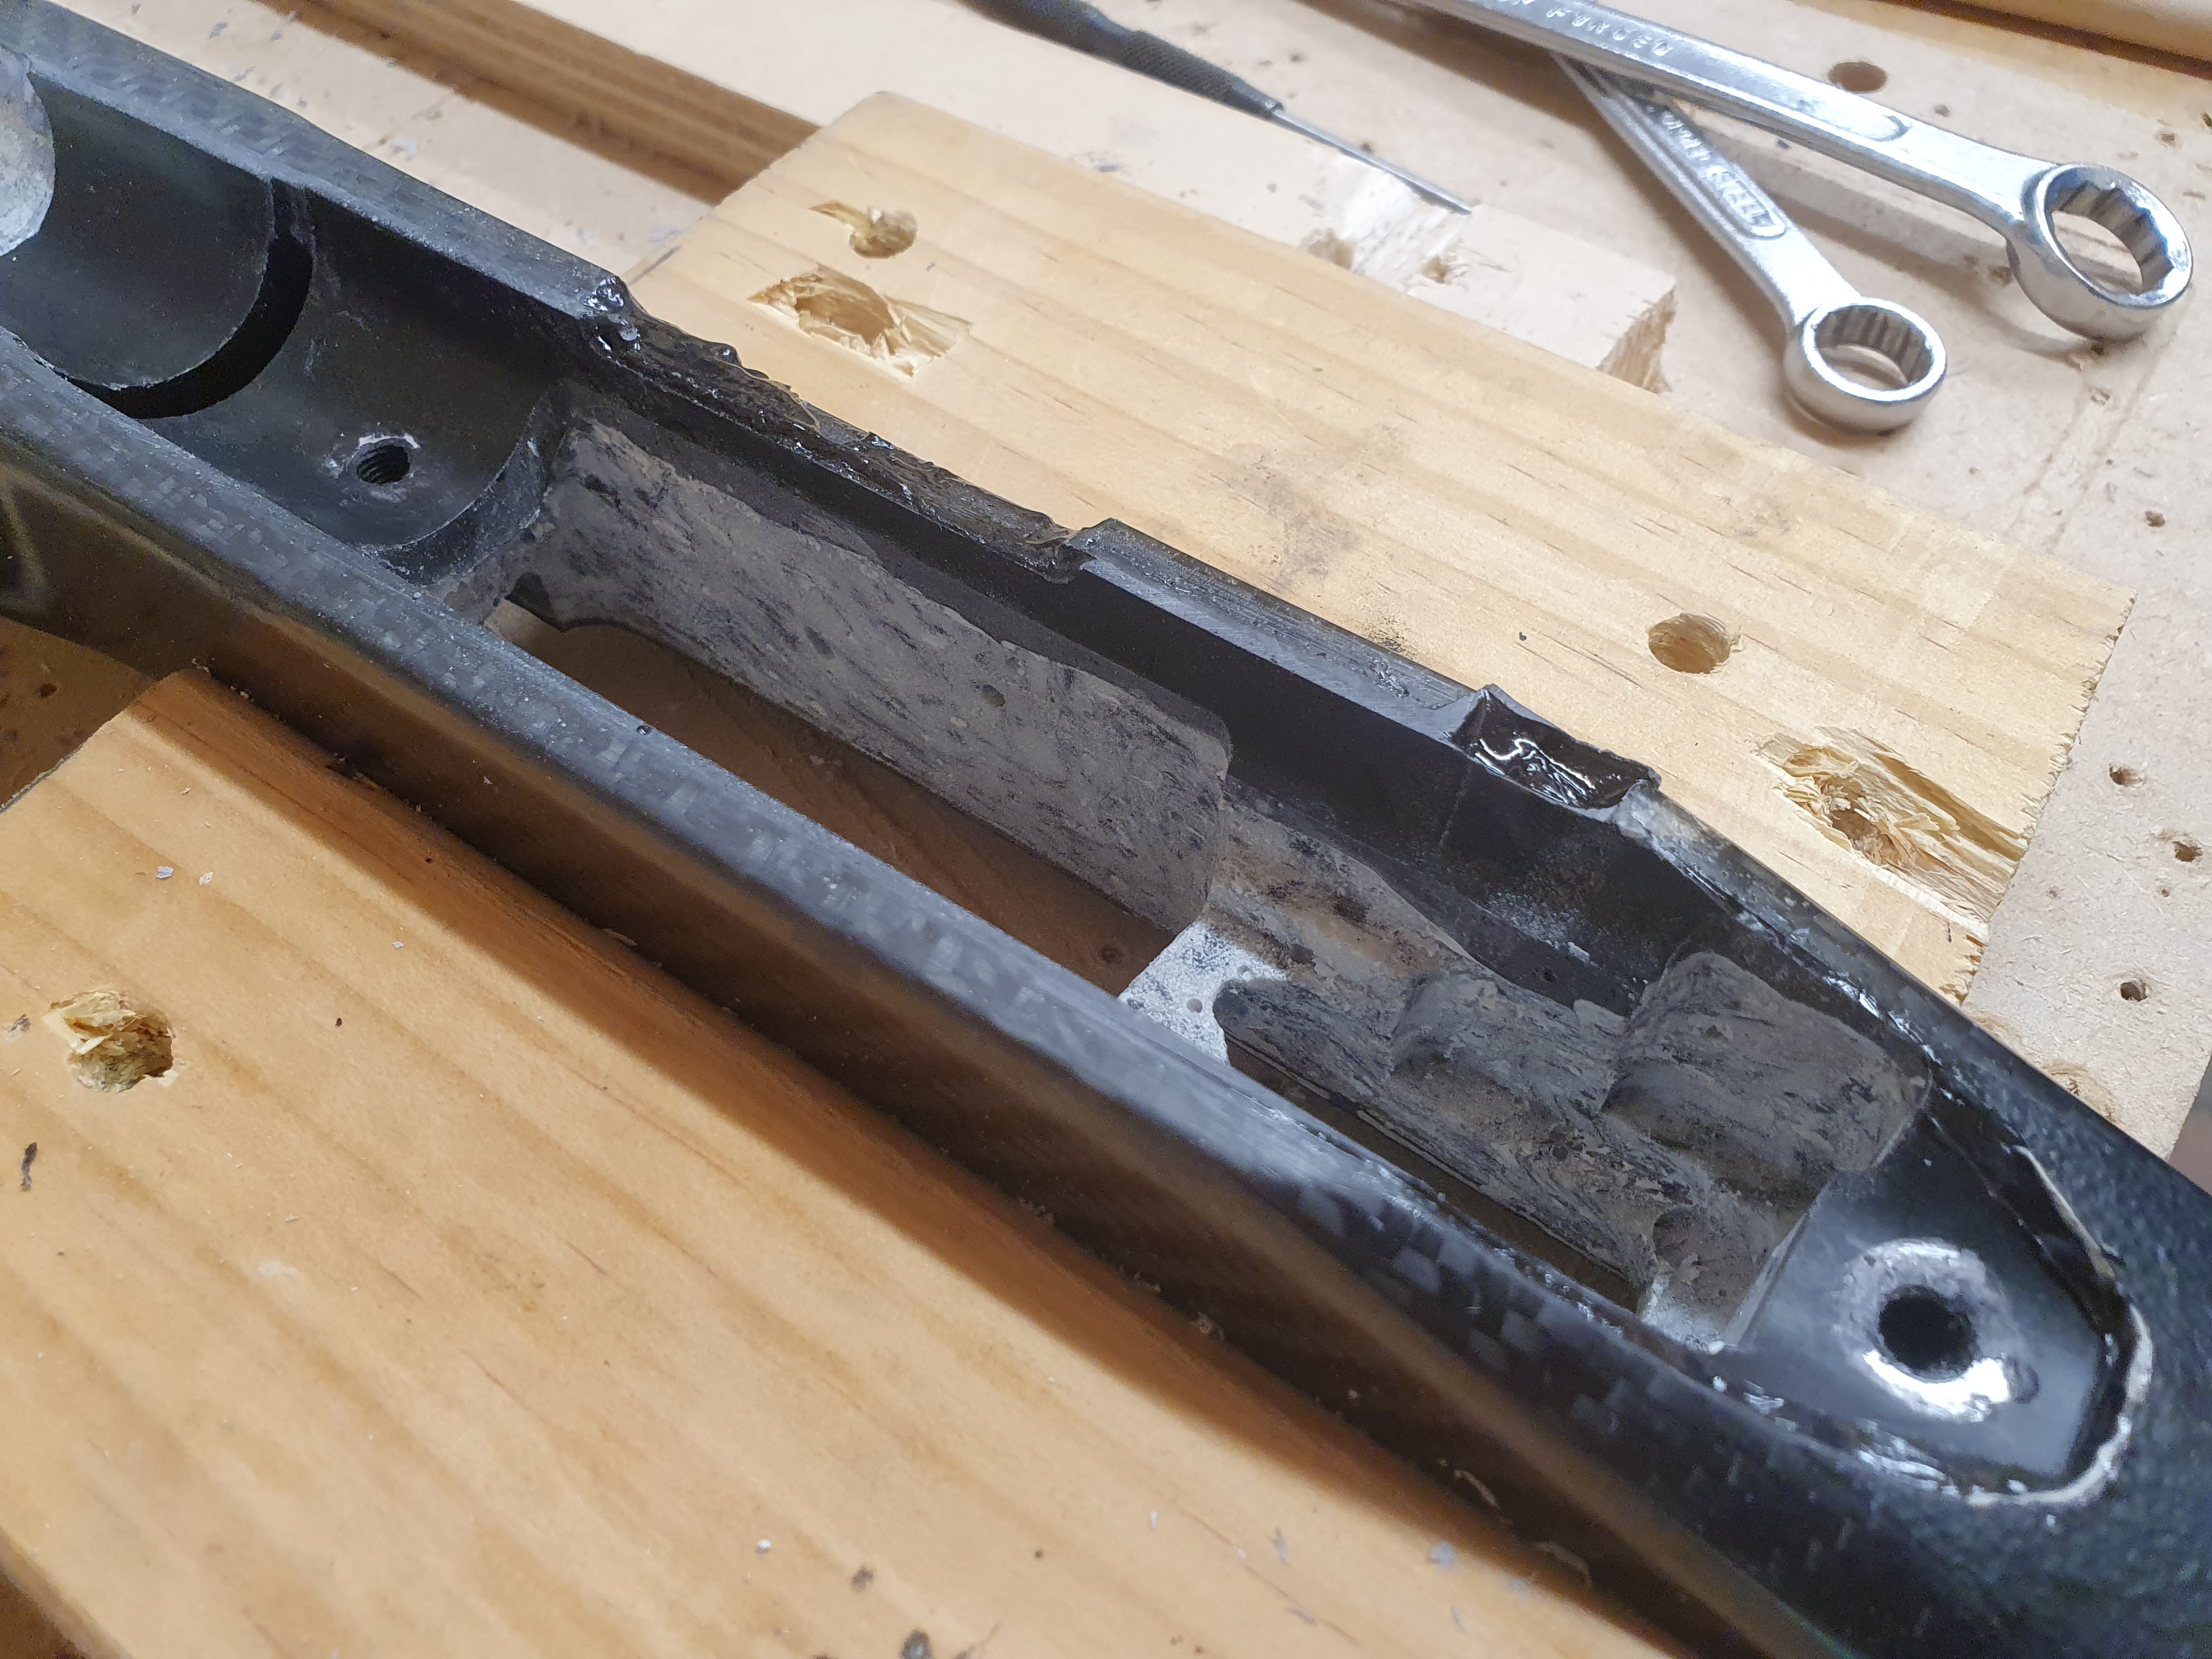
Then test fit, bit sloppy but everything was close enough that I was happy with the height.
Next to put it back in, bore holes for the pillars and machine a 2mm clearance in everything except two height references.
I also filed one pillar to legnth, and one was too short, so I drilled it out half way and epoxied in another small aluminum tube in. Not ideal, but I made do and glued it clamped together so it shouldn't have any crush.
Then apparently going slow enough to take a photo but not slow enough to notice id got the pillars around the wrong way, I got the action masked, and glued the pillars in at height, just clamping the action in and making sure the barrel was centered and at height.
Then I had a fun time extending one of the pillars in place and cutting them both to legnth....Micky Duck and Mathias like this.
-
30-01-2021, 10:25 AM #3Member
- Join Date
- Jan 2021
- Location
- Methven
- Posts
- 134
A snap of the machining toolpaths.
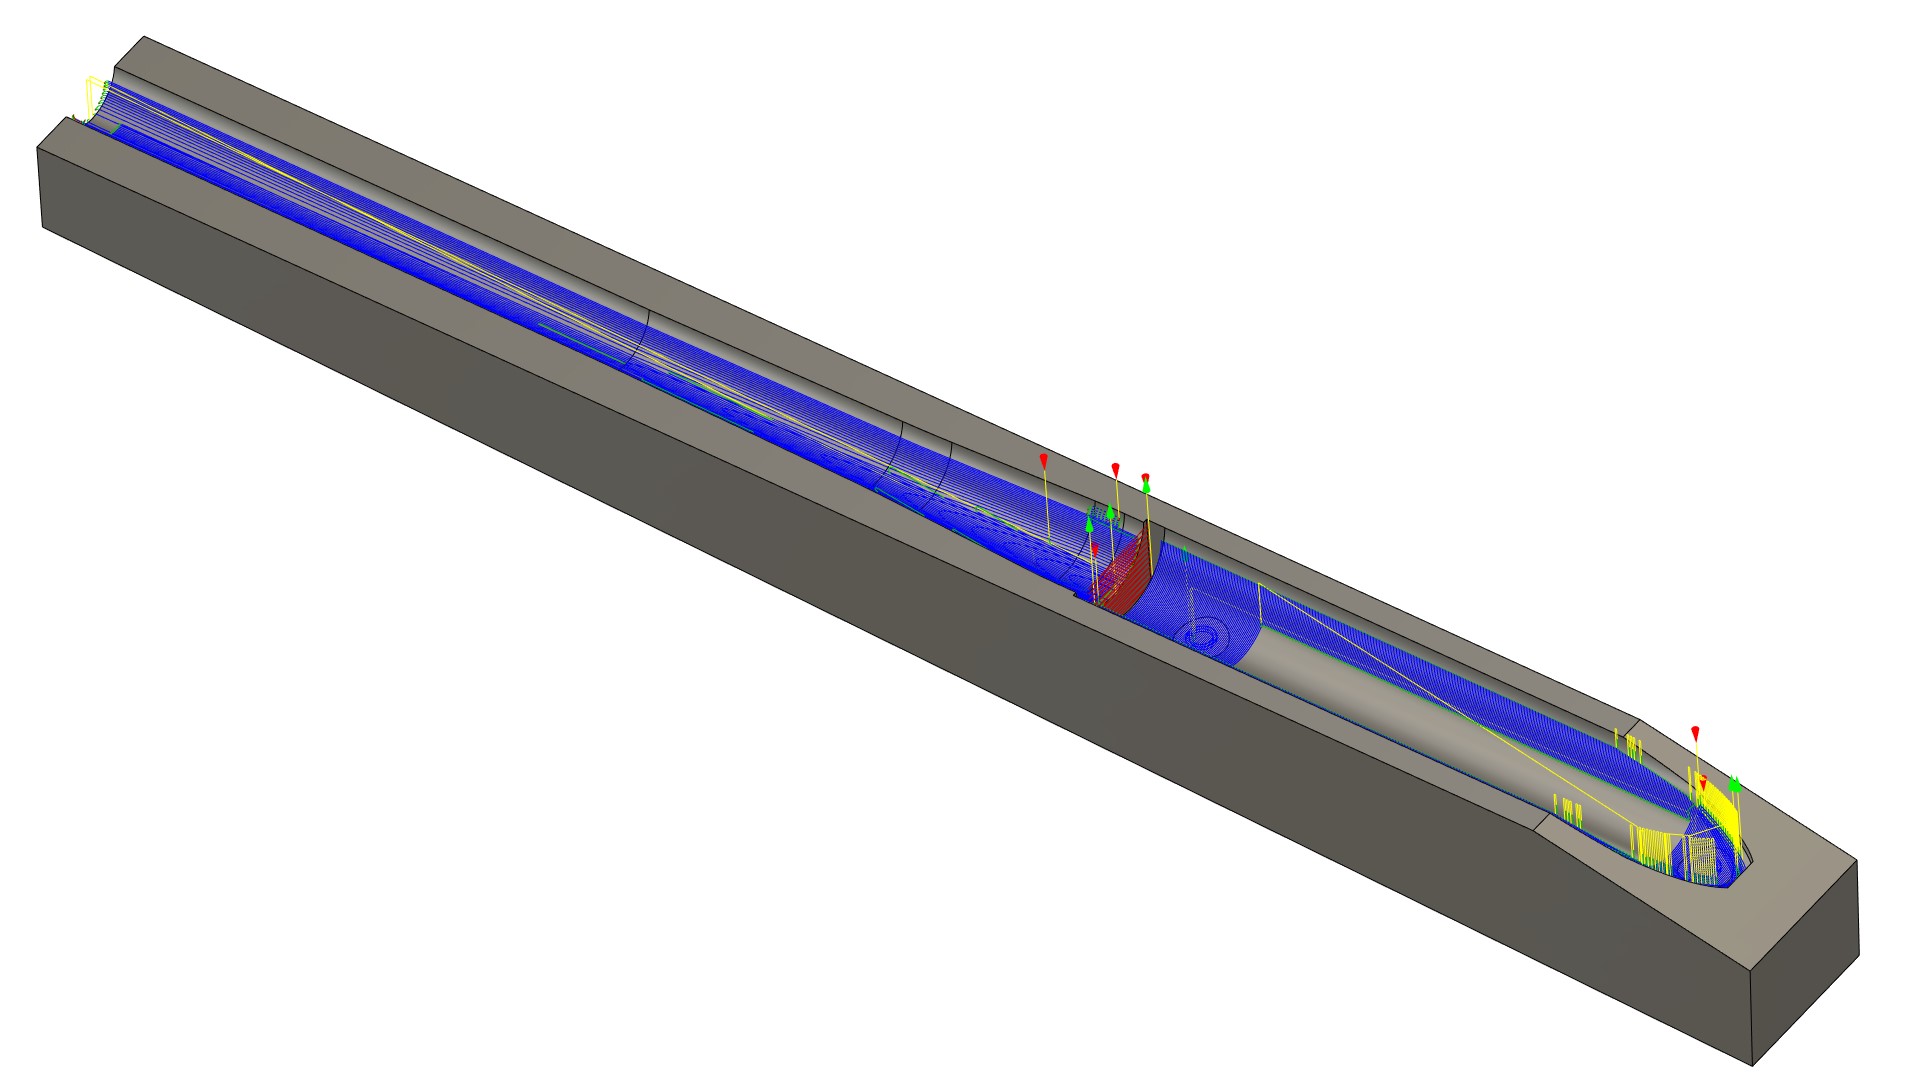
A snap of the sketch I used to get the heights correct.
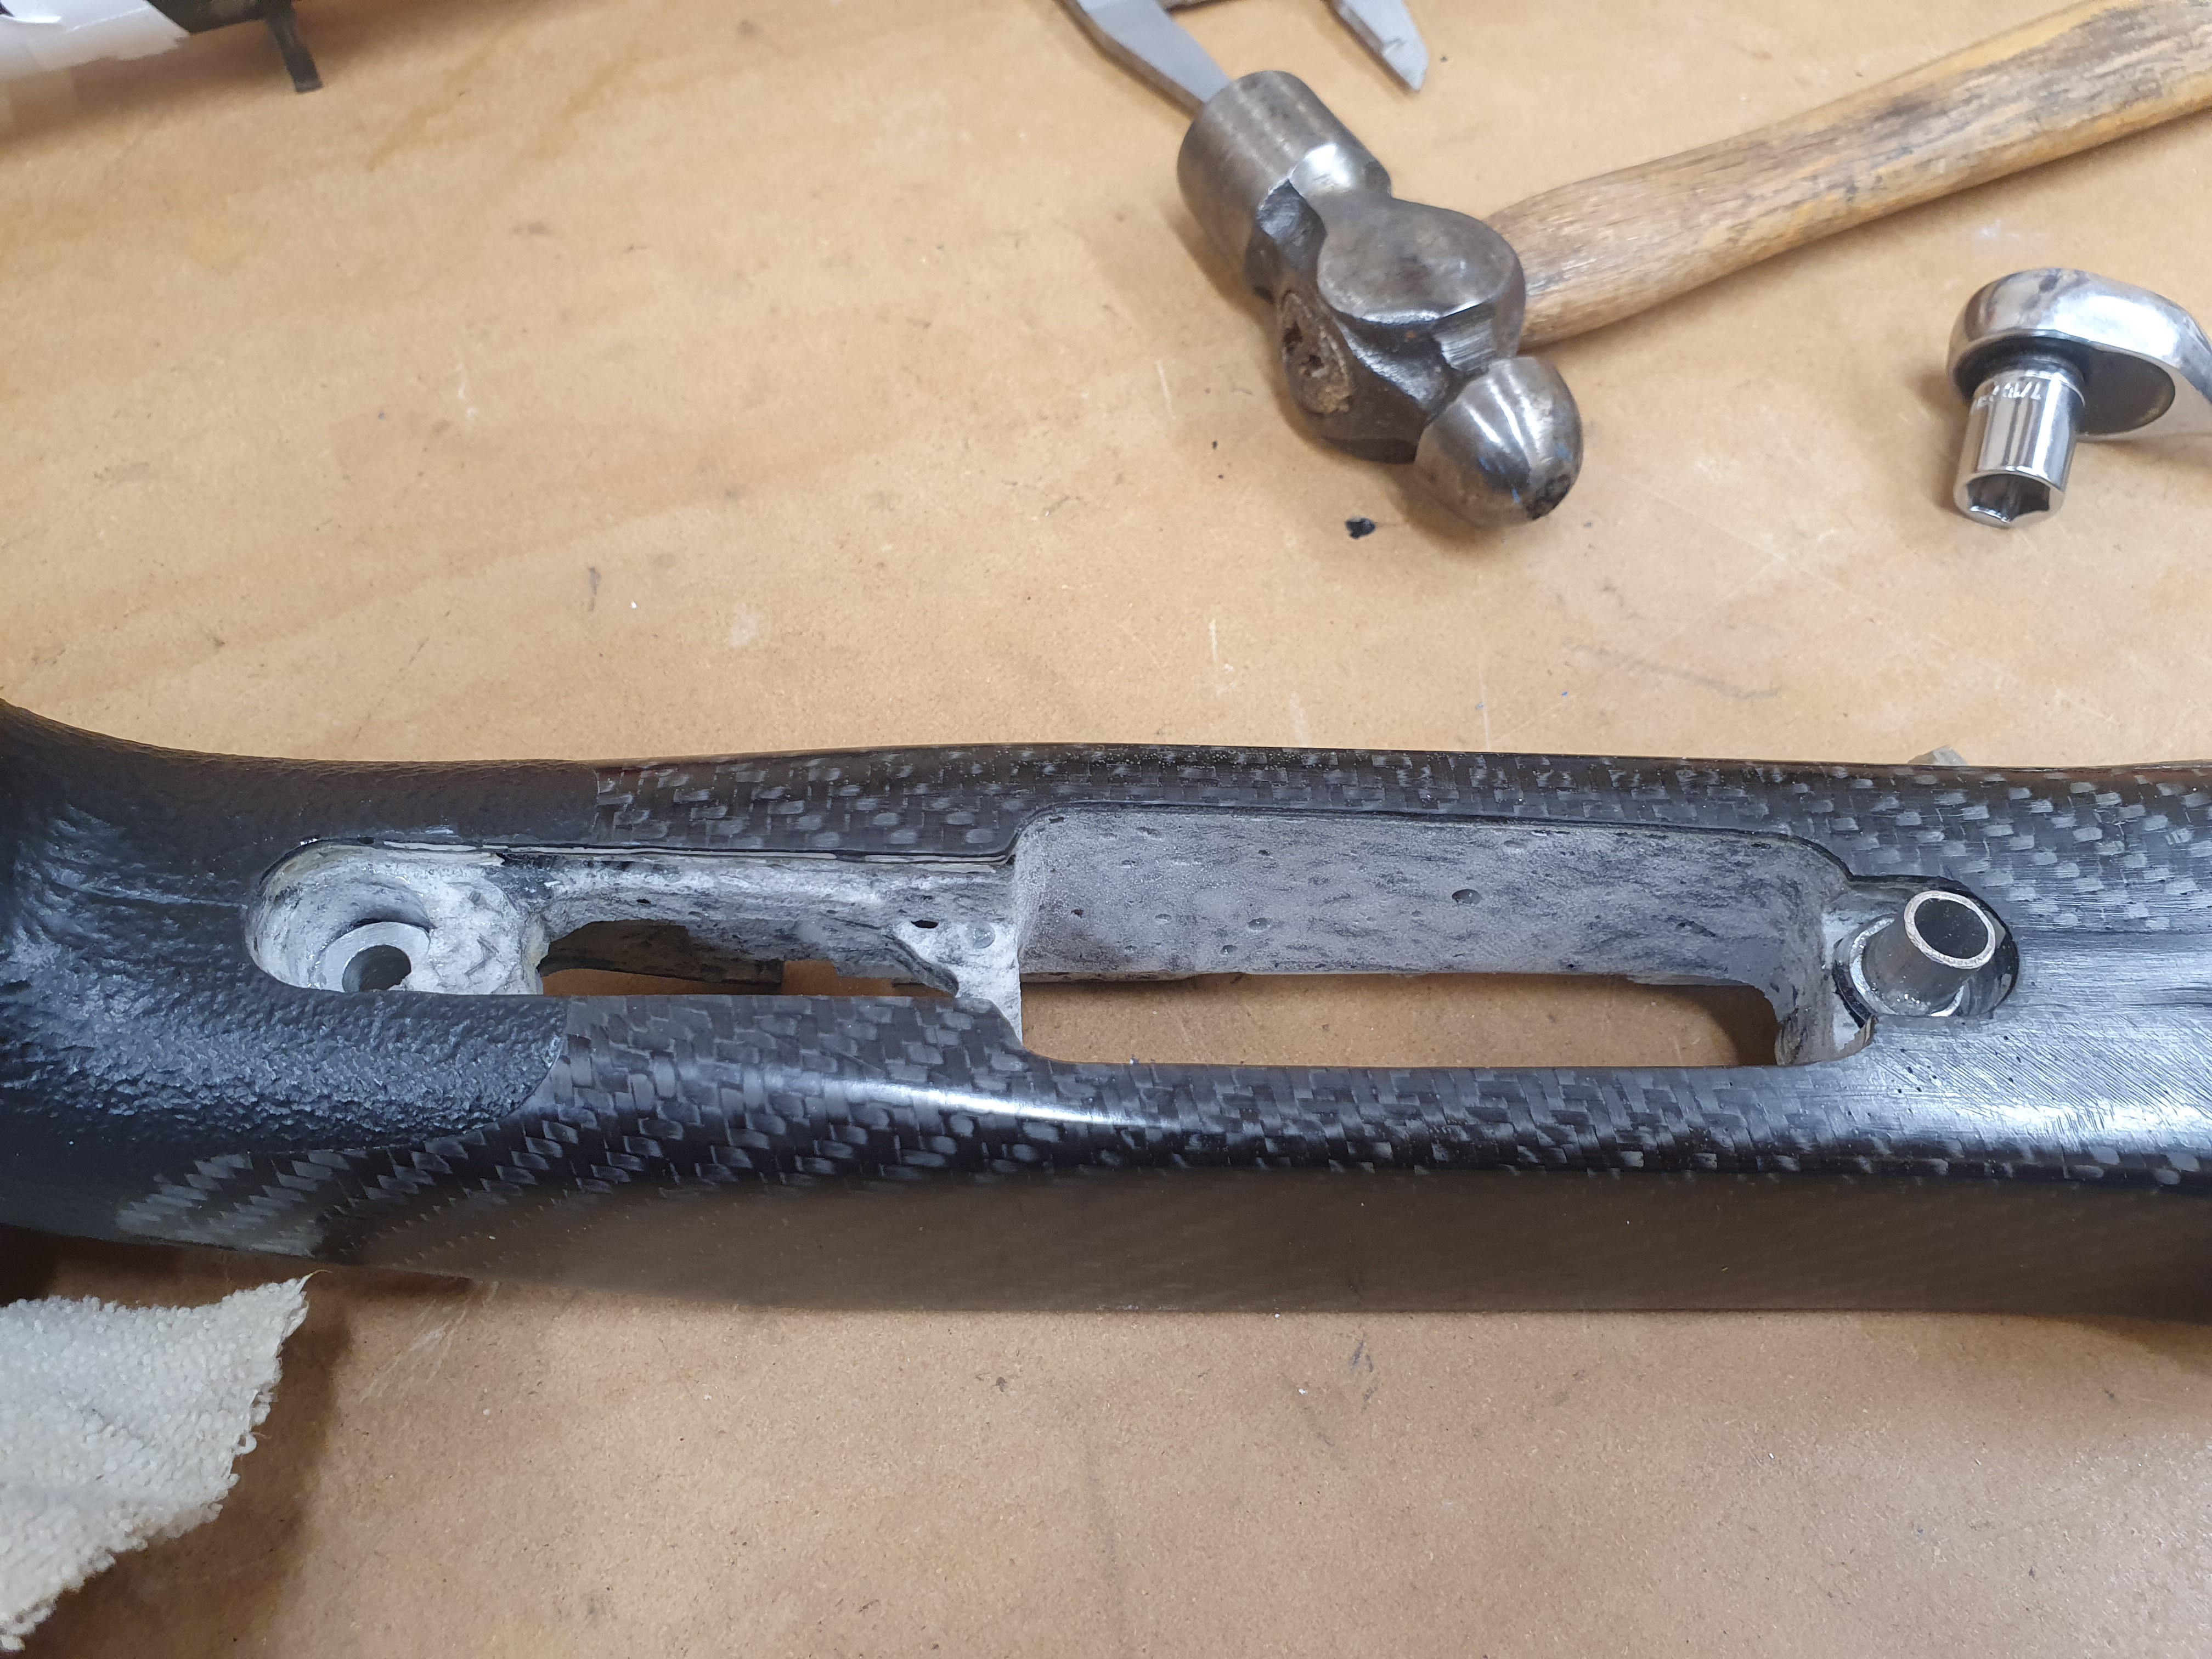
Next I cleaned out the height references I left in for gluing the pillars in place and started prepping for bedding.
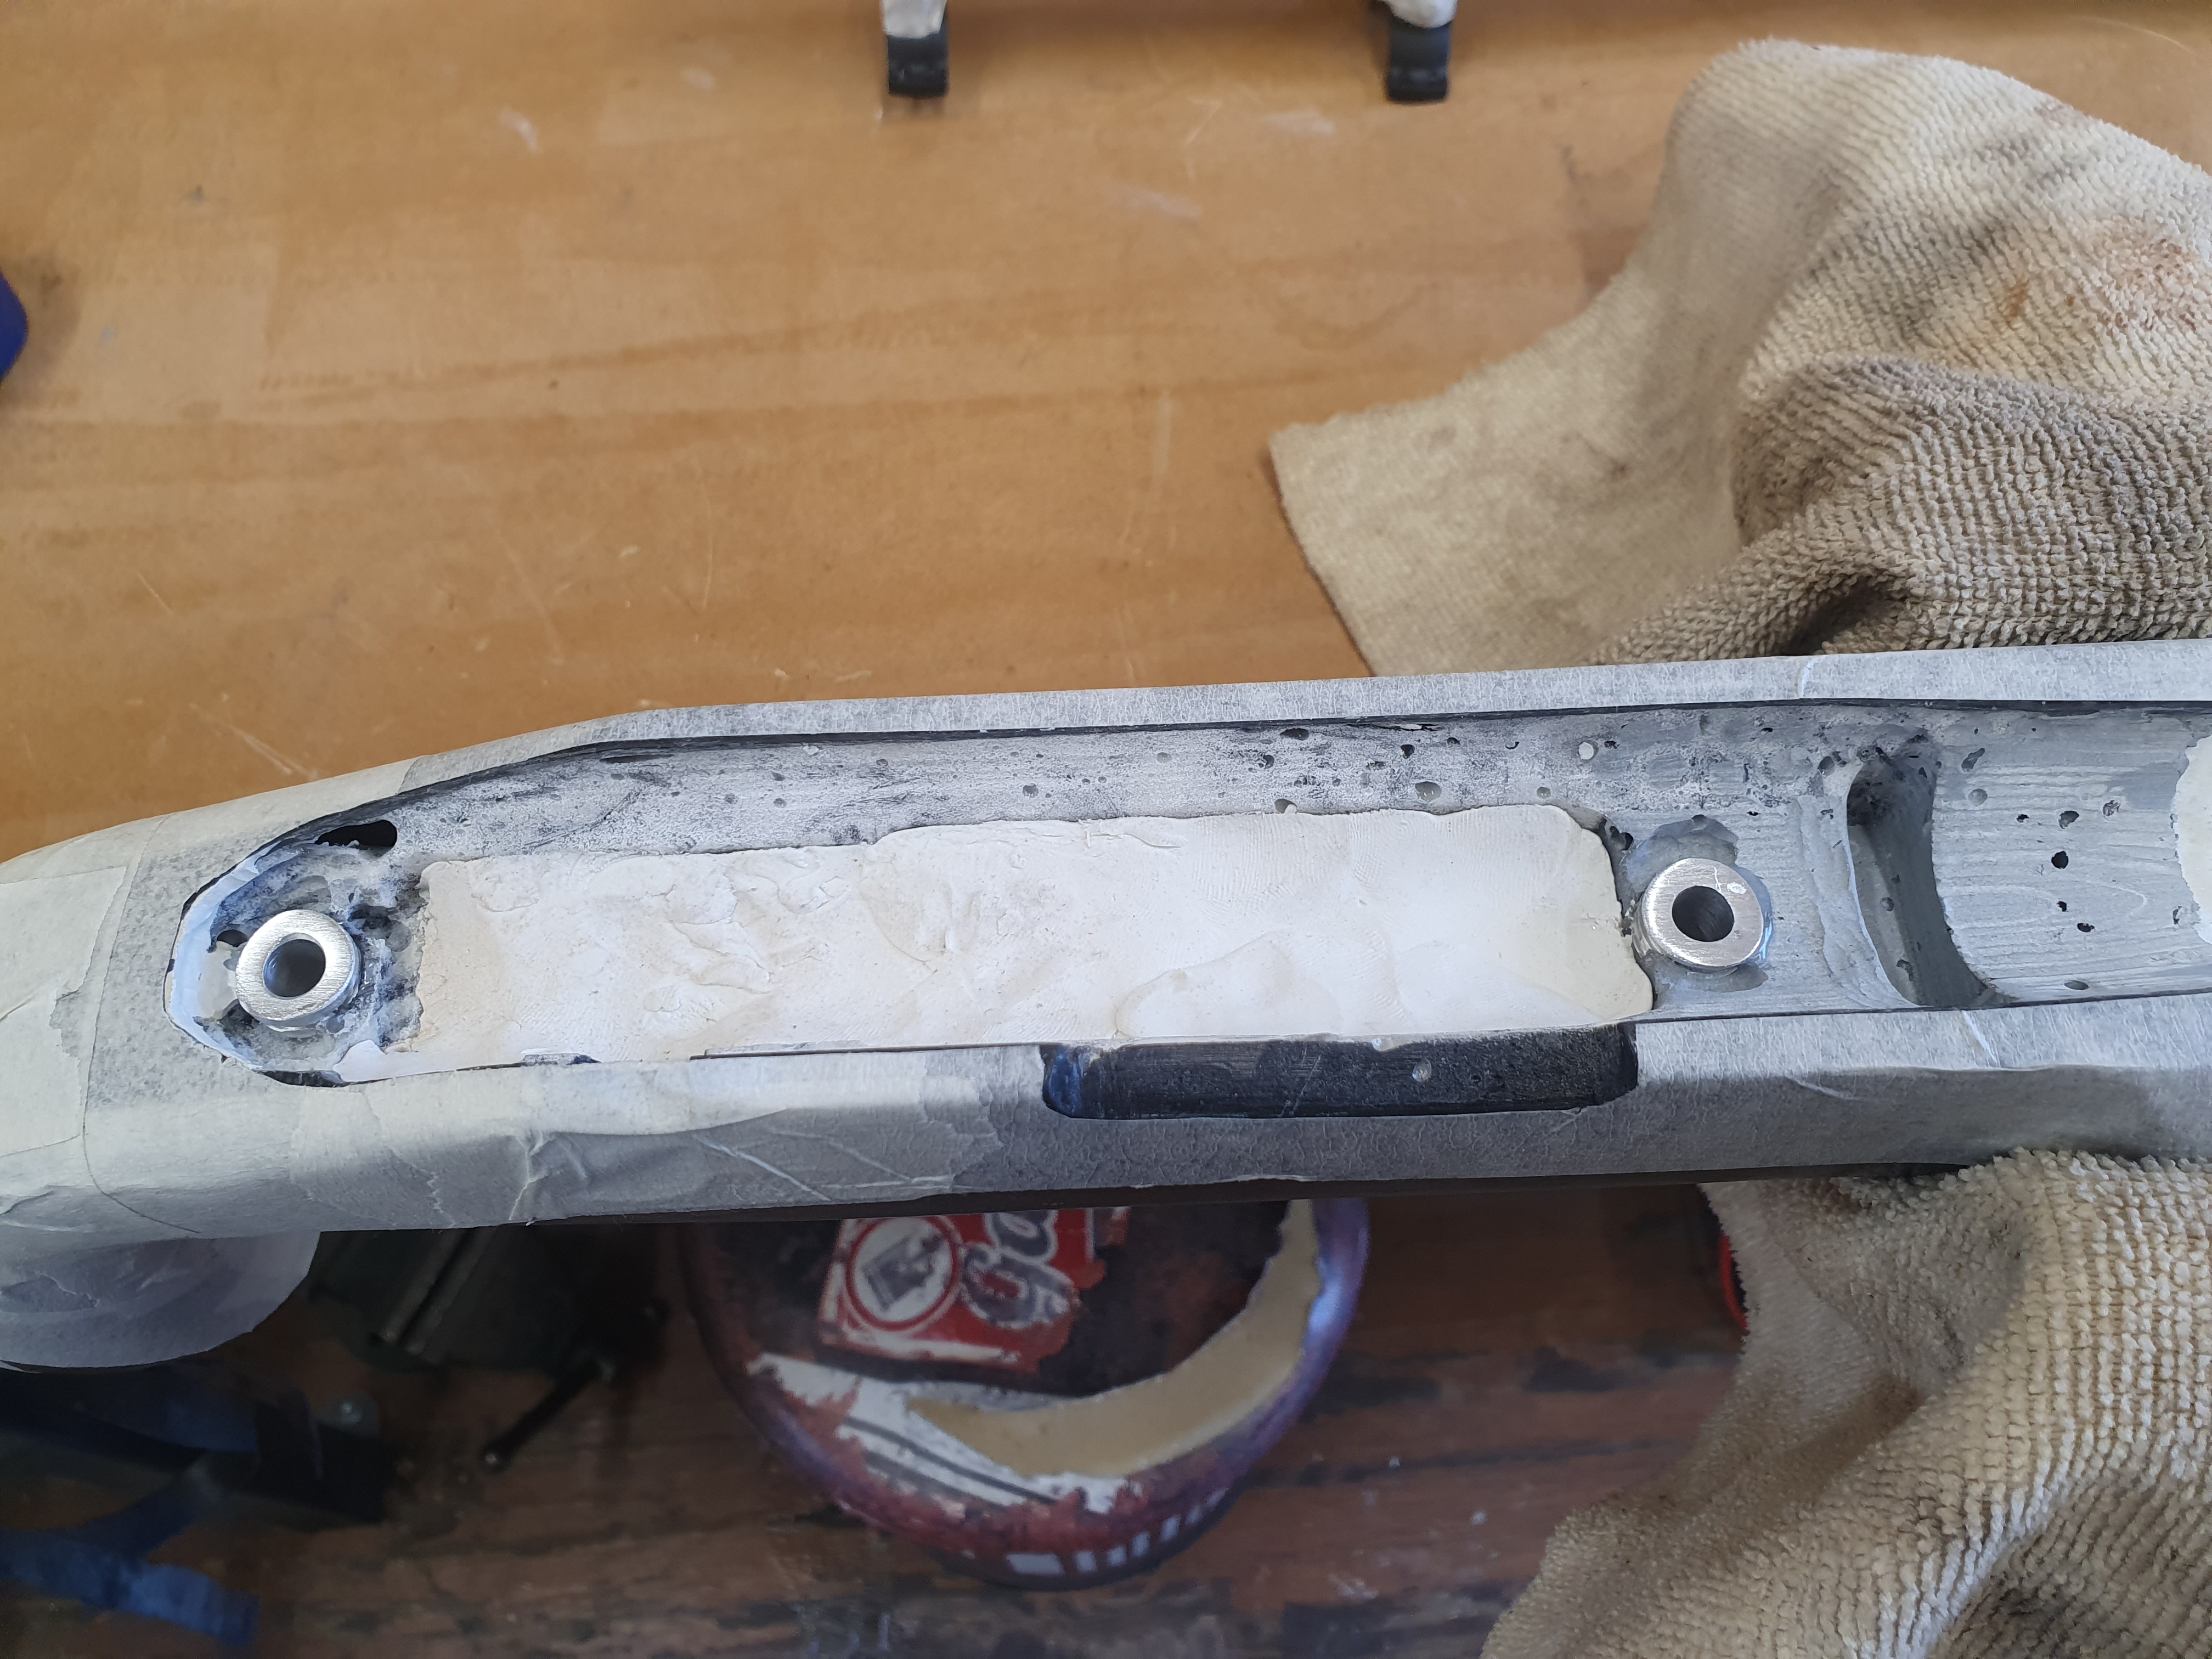
No photos, but I set to the stressful process of filling expensive parts with epoxy and hoping they don't stick.
-
30-01-2021, 10:31 AM #4#KnowsFuckAll


- Join Date
- Jul 2015
- Location
- Mangawhai
- Posts
- 1,310
Looks like a hell of a job. Good shit.
Great first 3 posts too BTW, adding value out of the box."I heard Jesus did cocaine on a night out. Eyes wide-open, dialated, but he's fine now. And if his father ever finds out, then he'd probably knock his lights out...
Gets a little messy in heaven "
- Venbee
-
30-01-2021, 11:00 AM #5Member
- Join Date
- Jan 2021
- Location
- Methven
- Posts
- 134
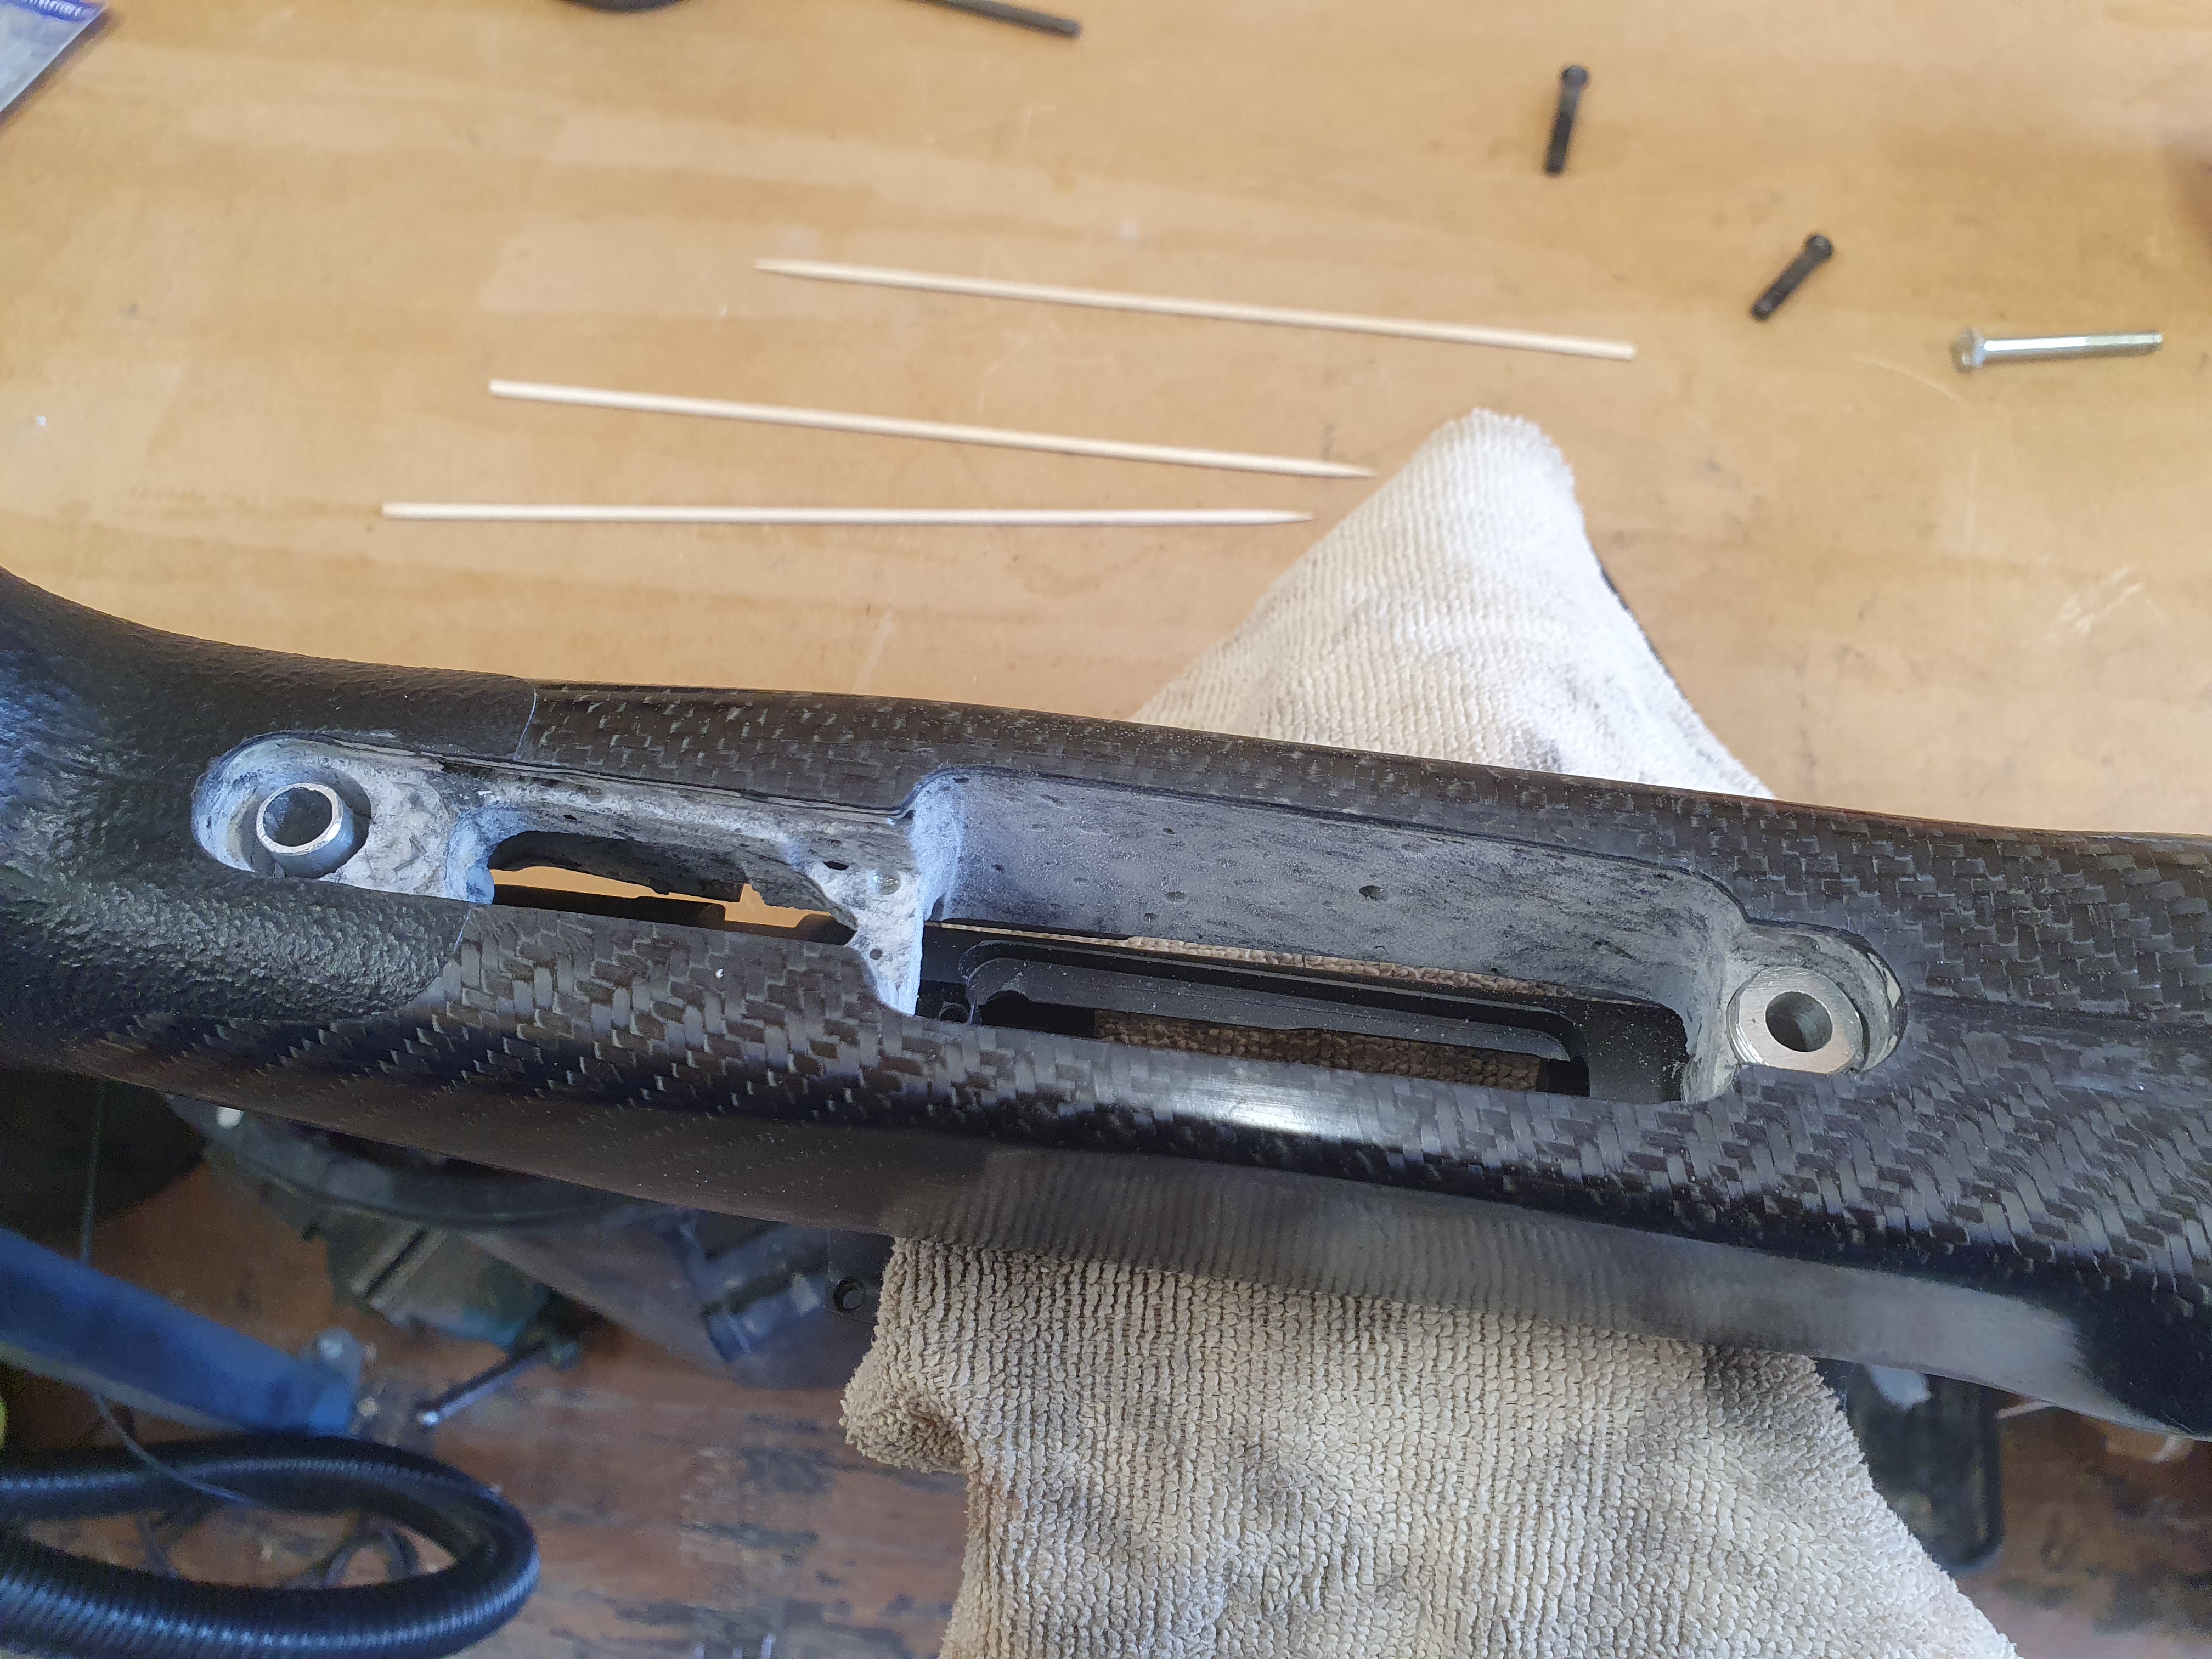
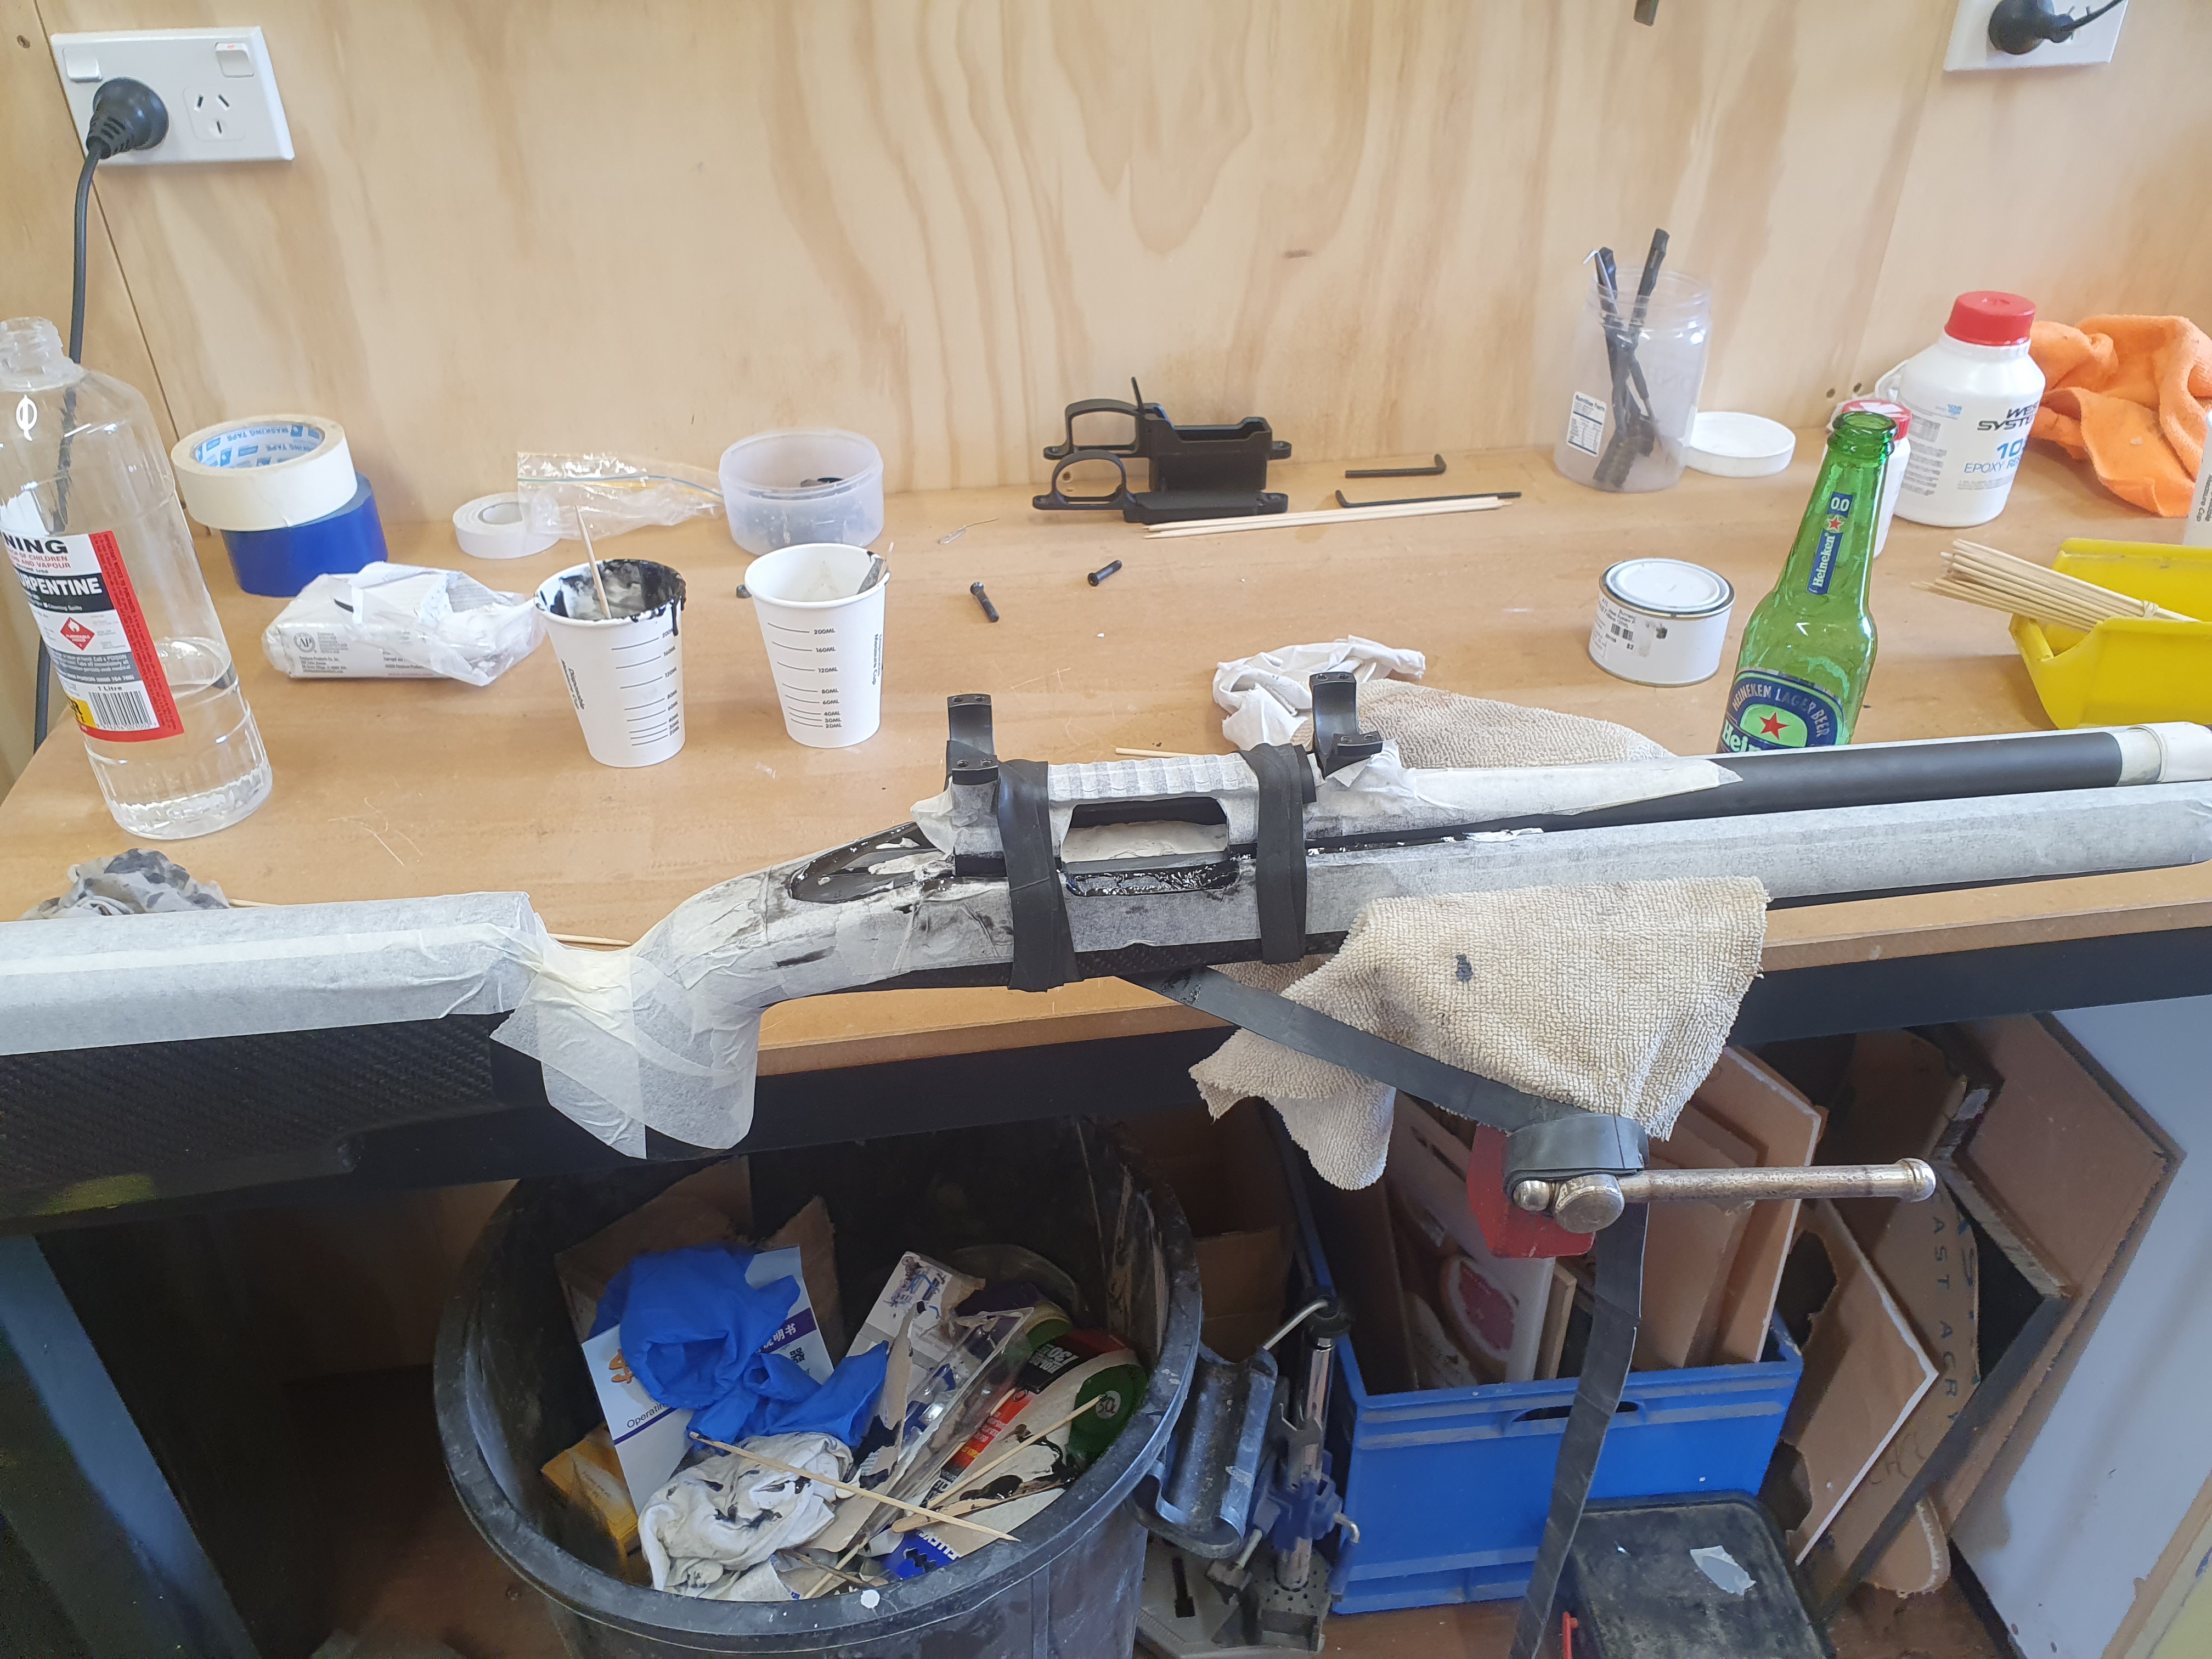
After mixing up the compound that was too runny, I split off half of it to thicken it up without risking ruining the whole lot. In hindsight I should have thickened the whole lot.
Mistake three was not putting enough compound in and setting the action in, realizing, and pulling it back out to put more in.
I also spent a lot of time just removing extra compound and cleaning it as it dried. I removed most of the masking while it was still slightly wet, figuring it would be easier, which worked not too bad.
Because the stock doesn't quite have the right slope at the rear of the action, the 'tang' area was set below the surface which made it hard to keep the epoxy from not going over the top and locking it in.
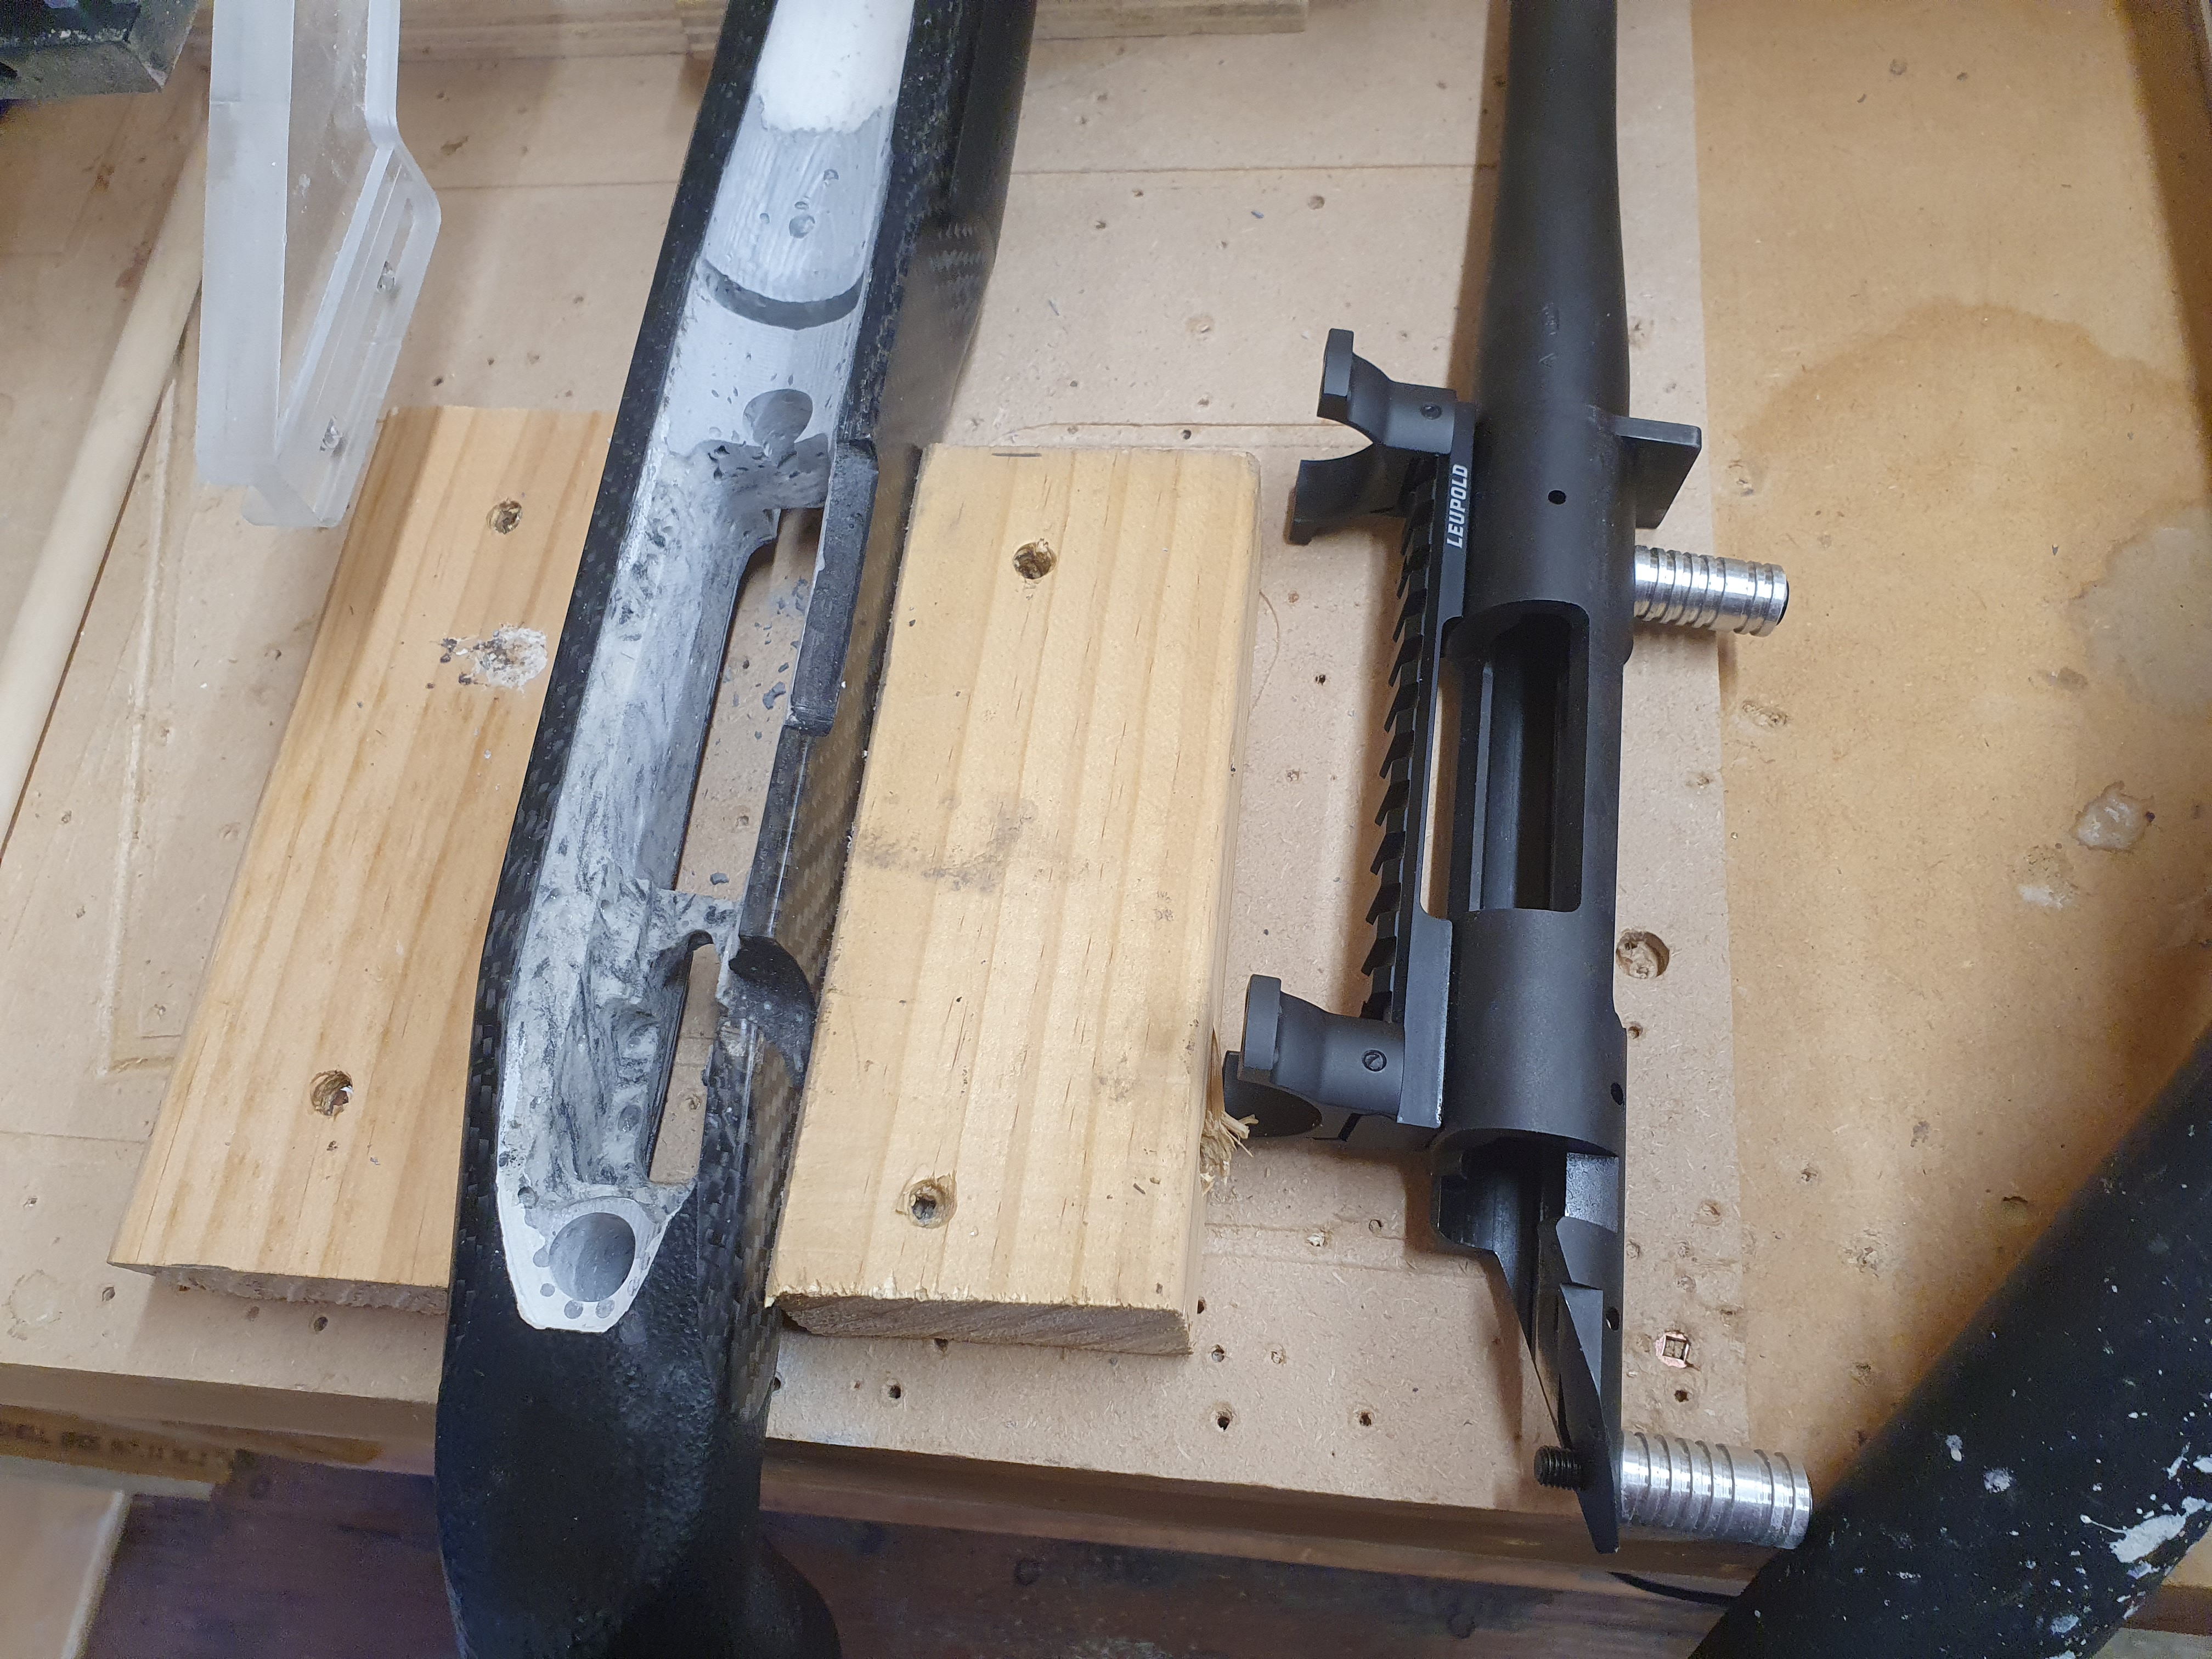
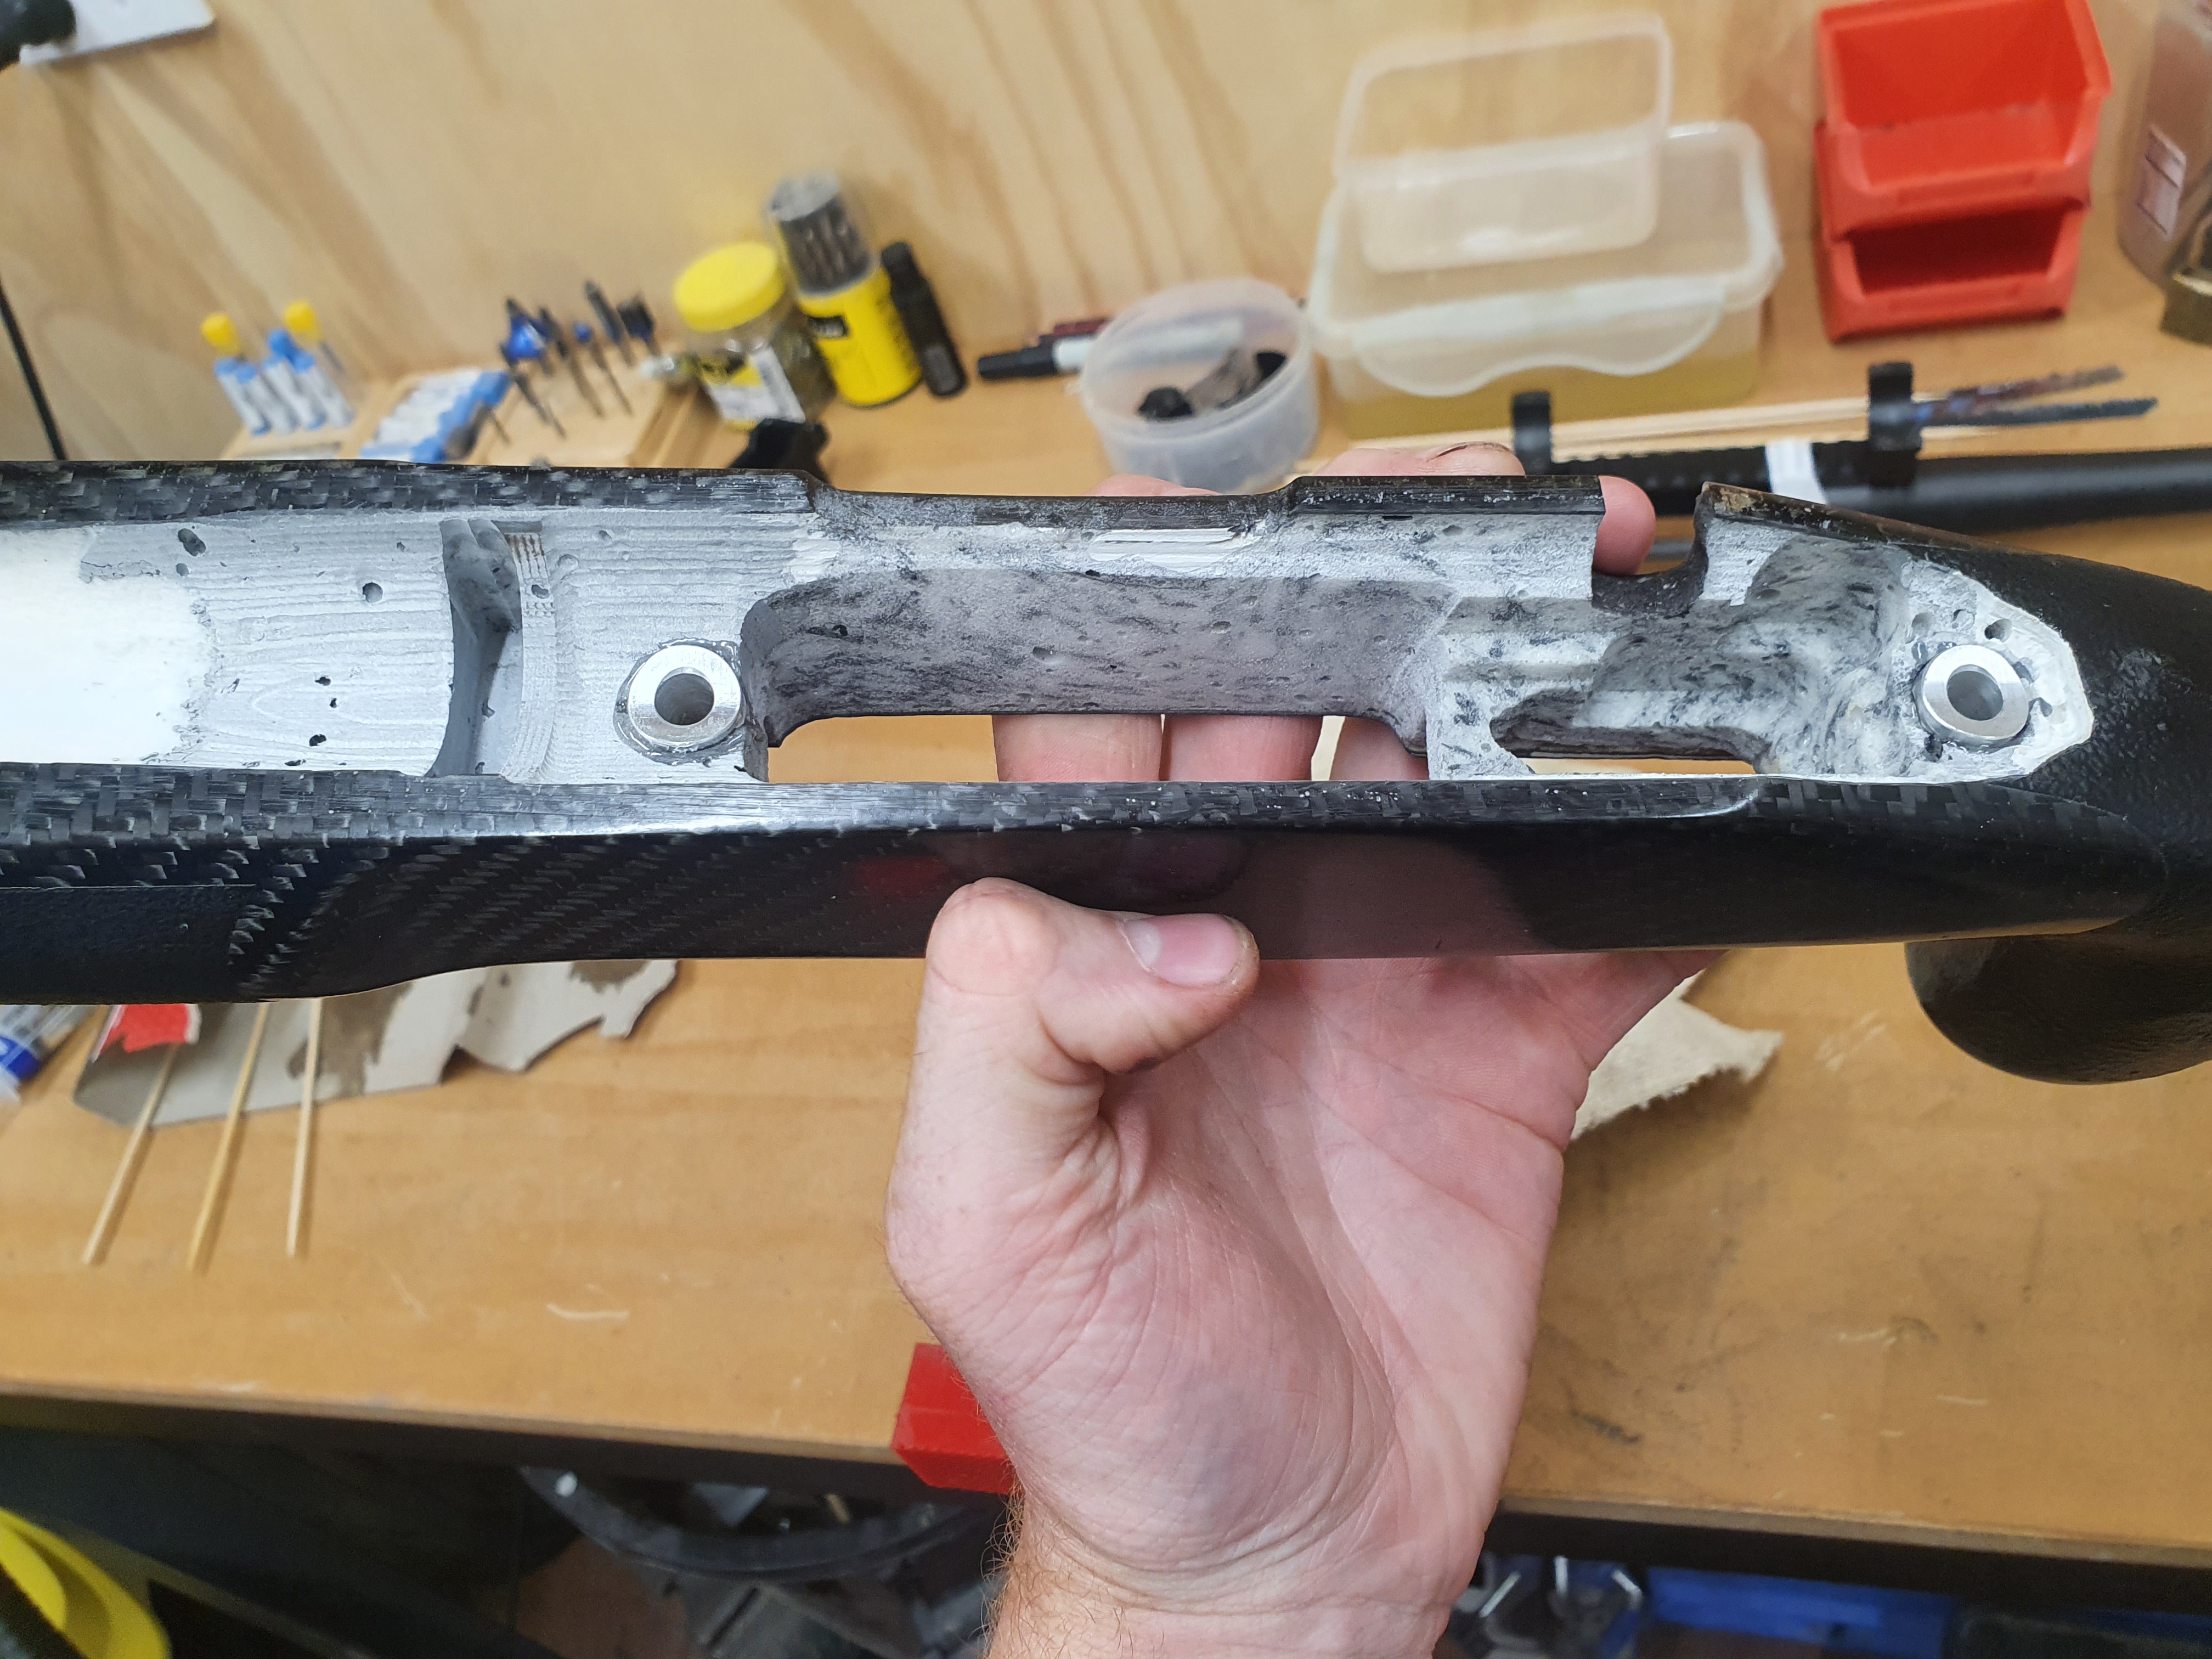
The next day, I couldn't help myself, I removed the rubber band and gently pulled up on the barrel, thinking if it was too difficult I would leave it for another day. To my surprise and relief, it popped out nicely.
Here are the results.
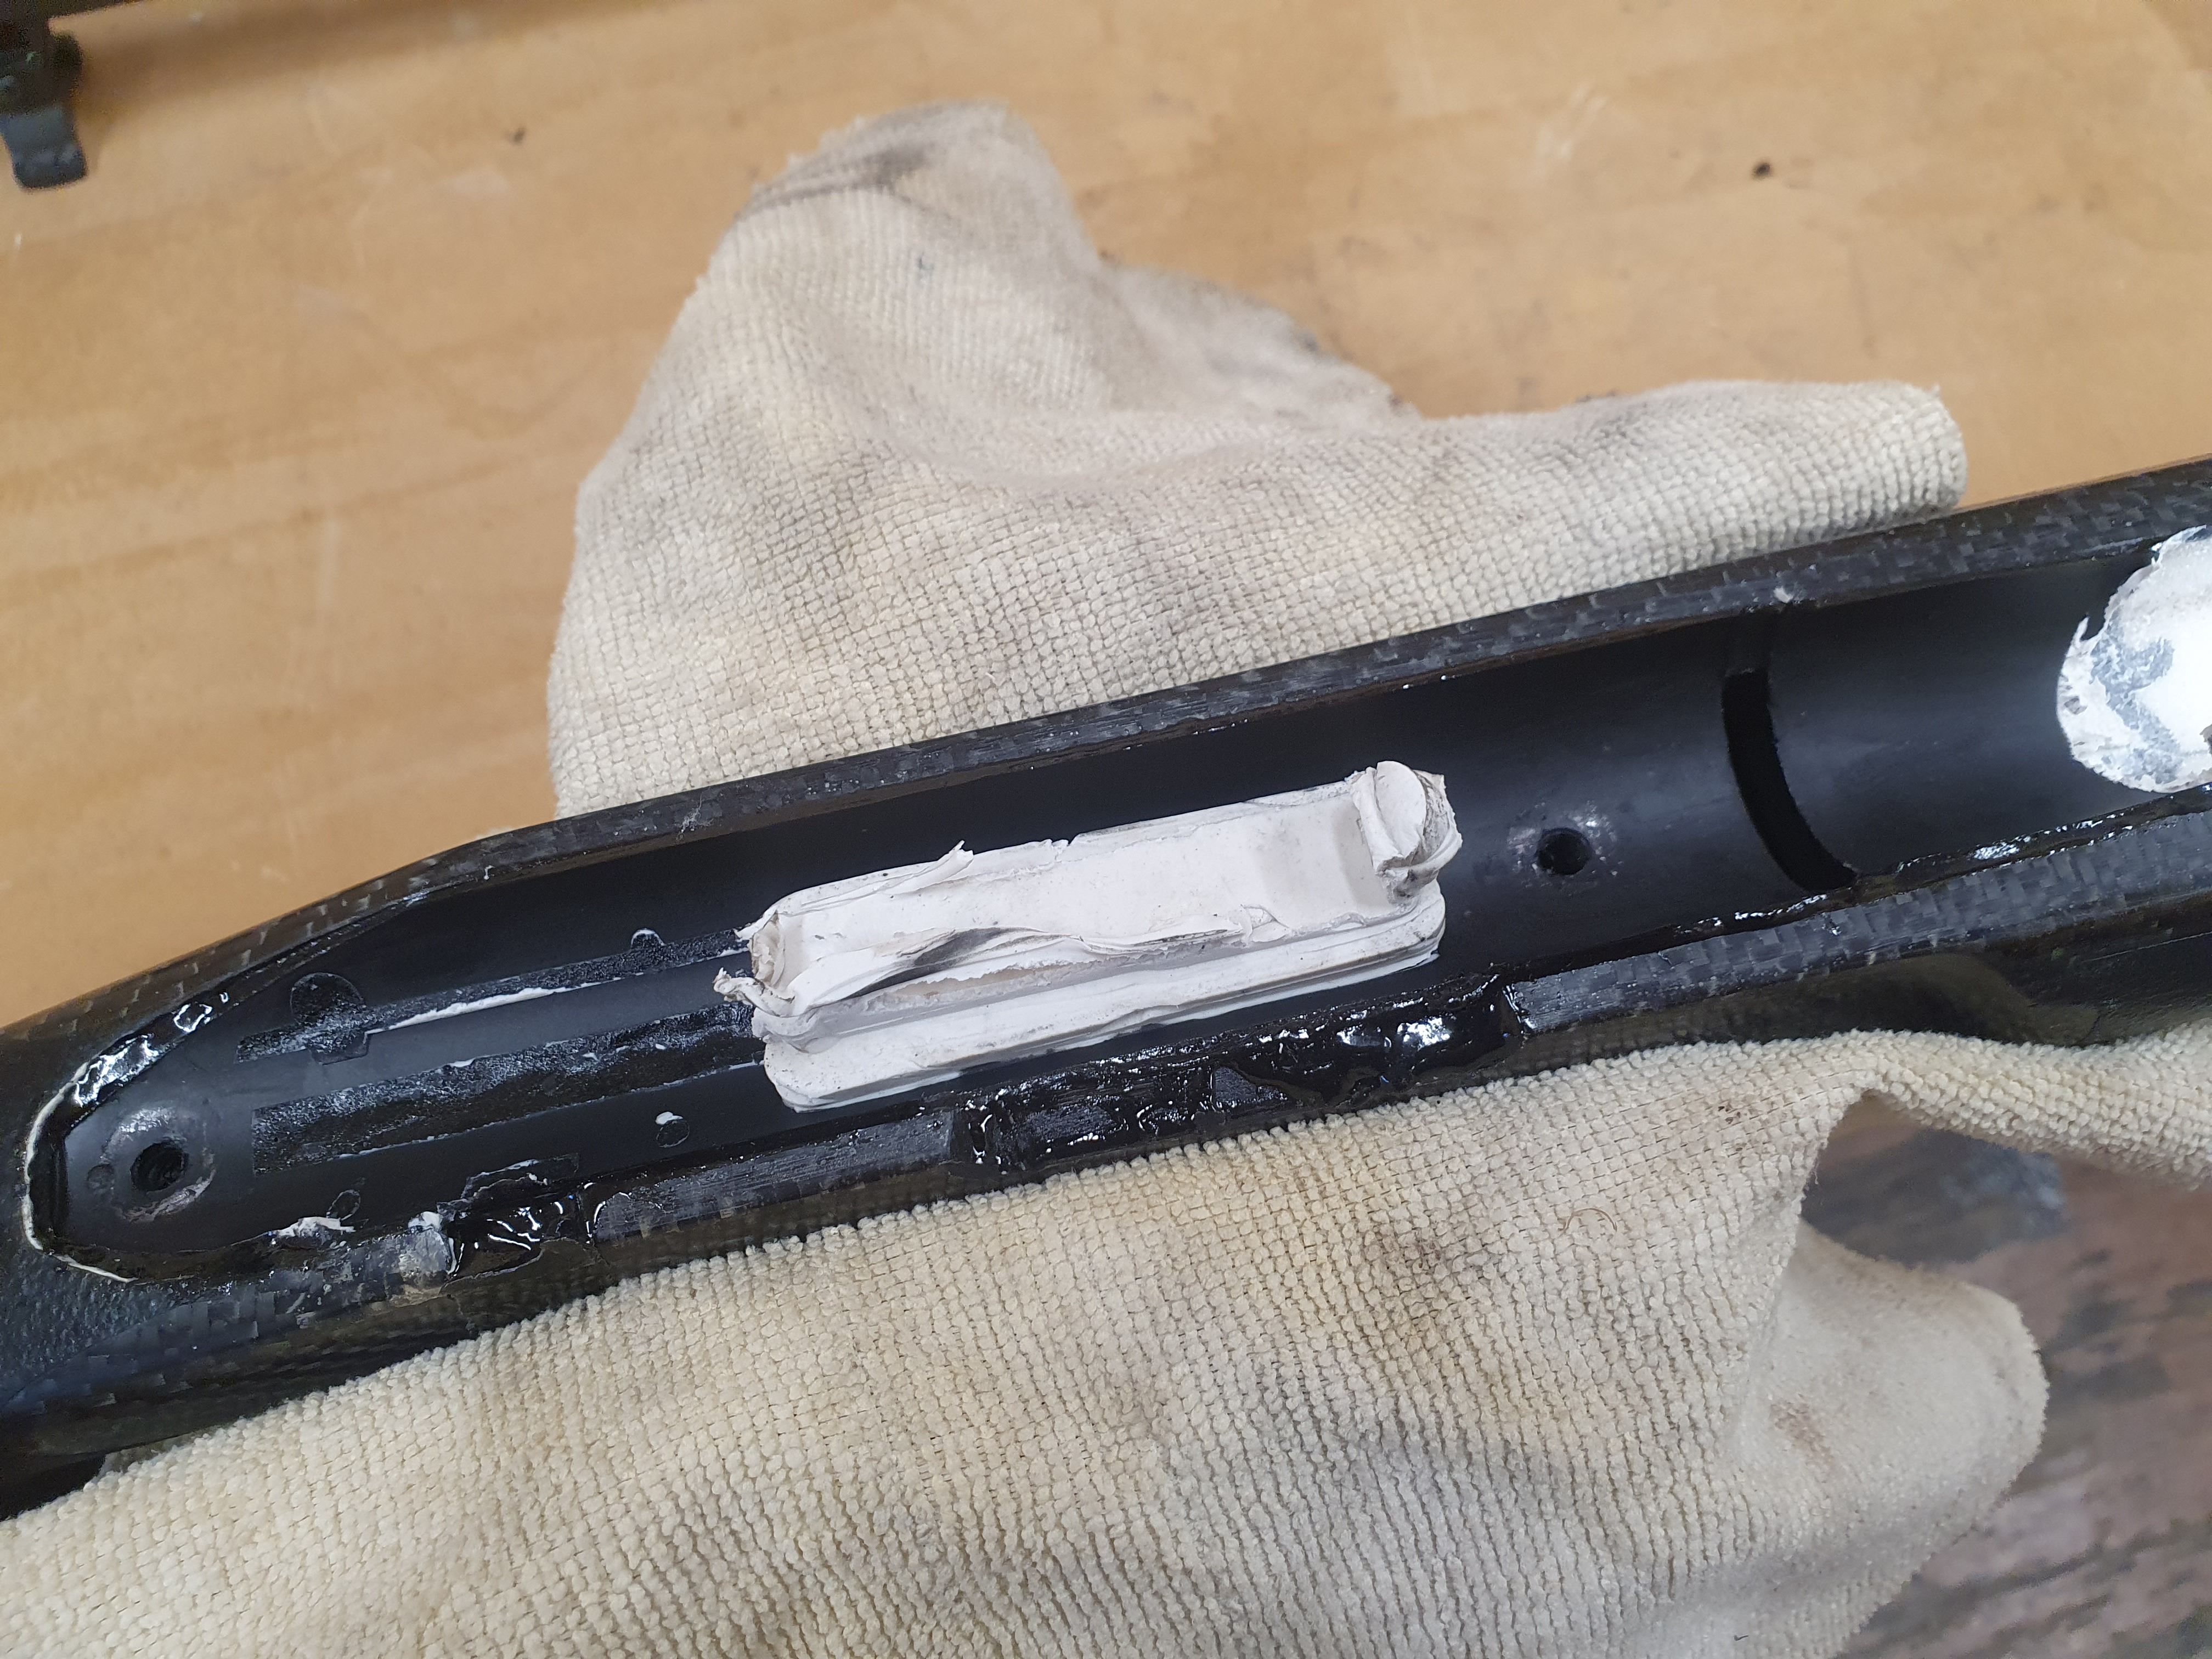
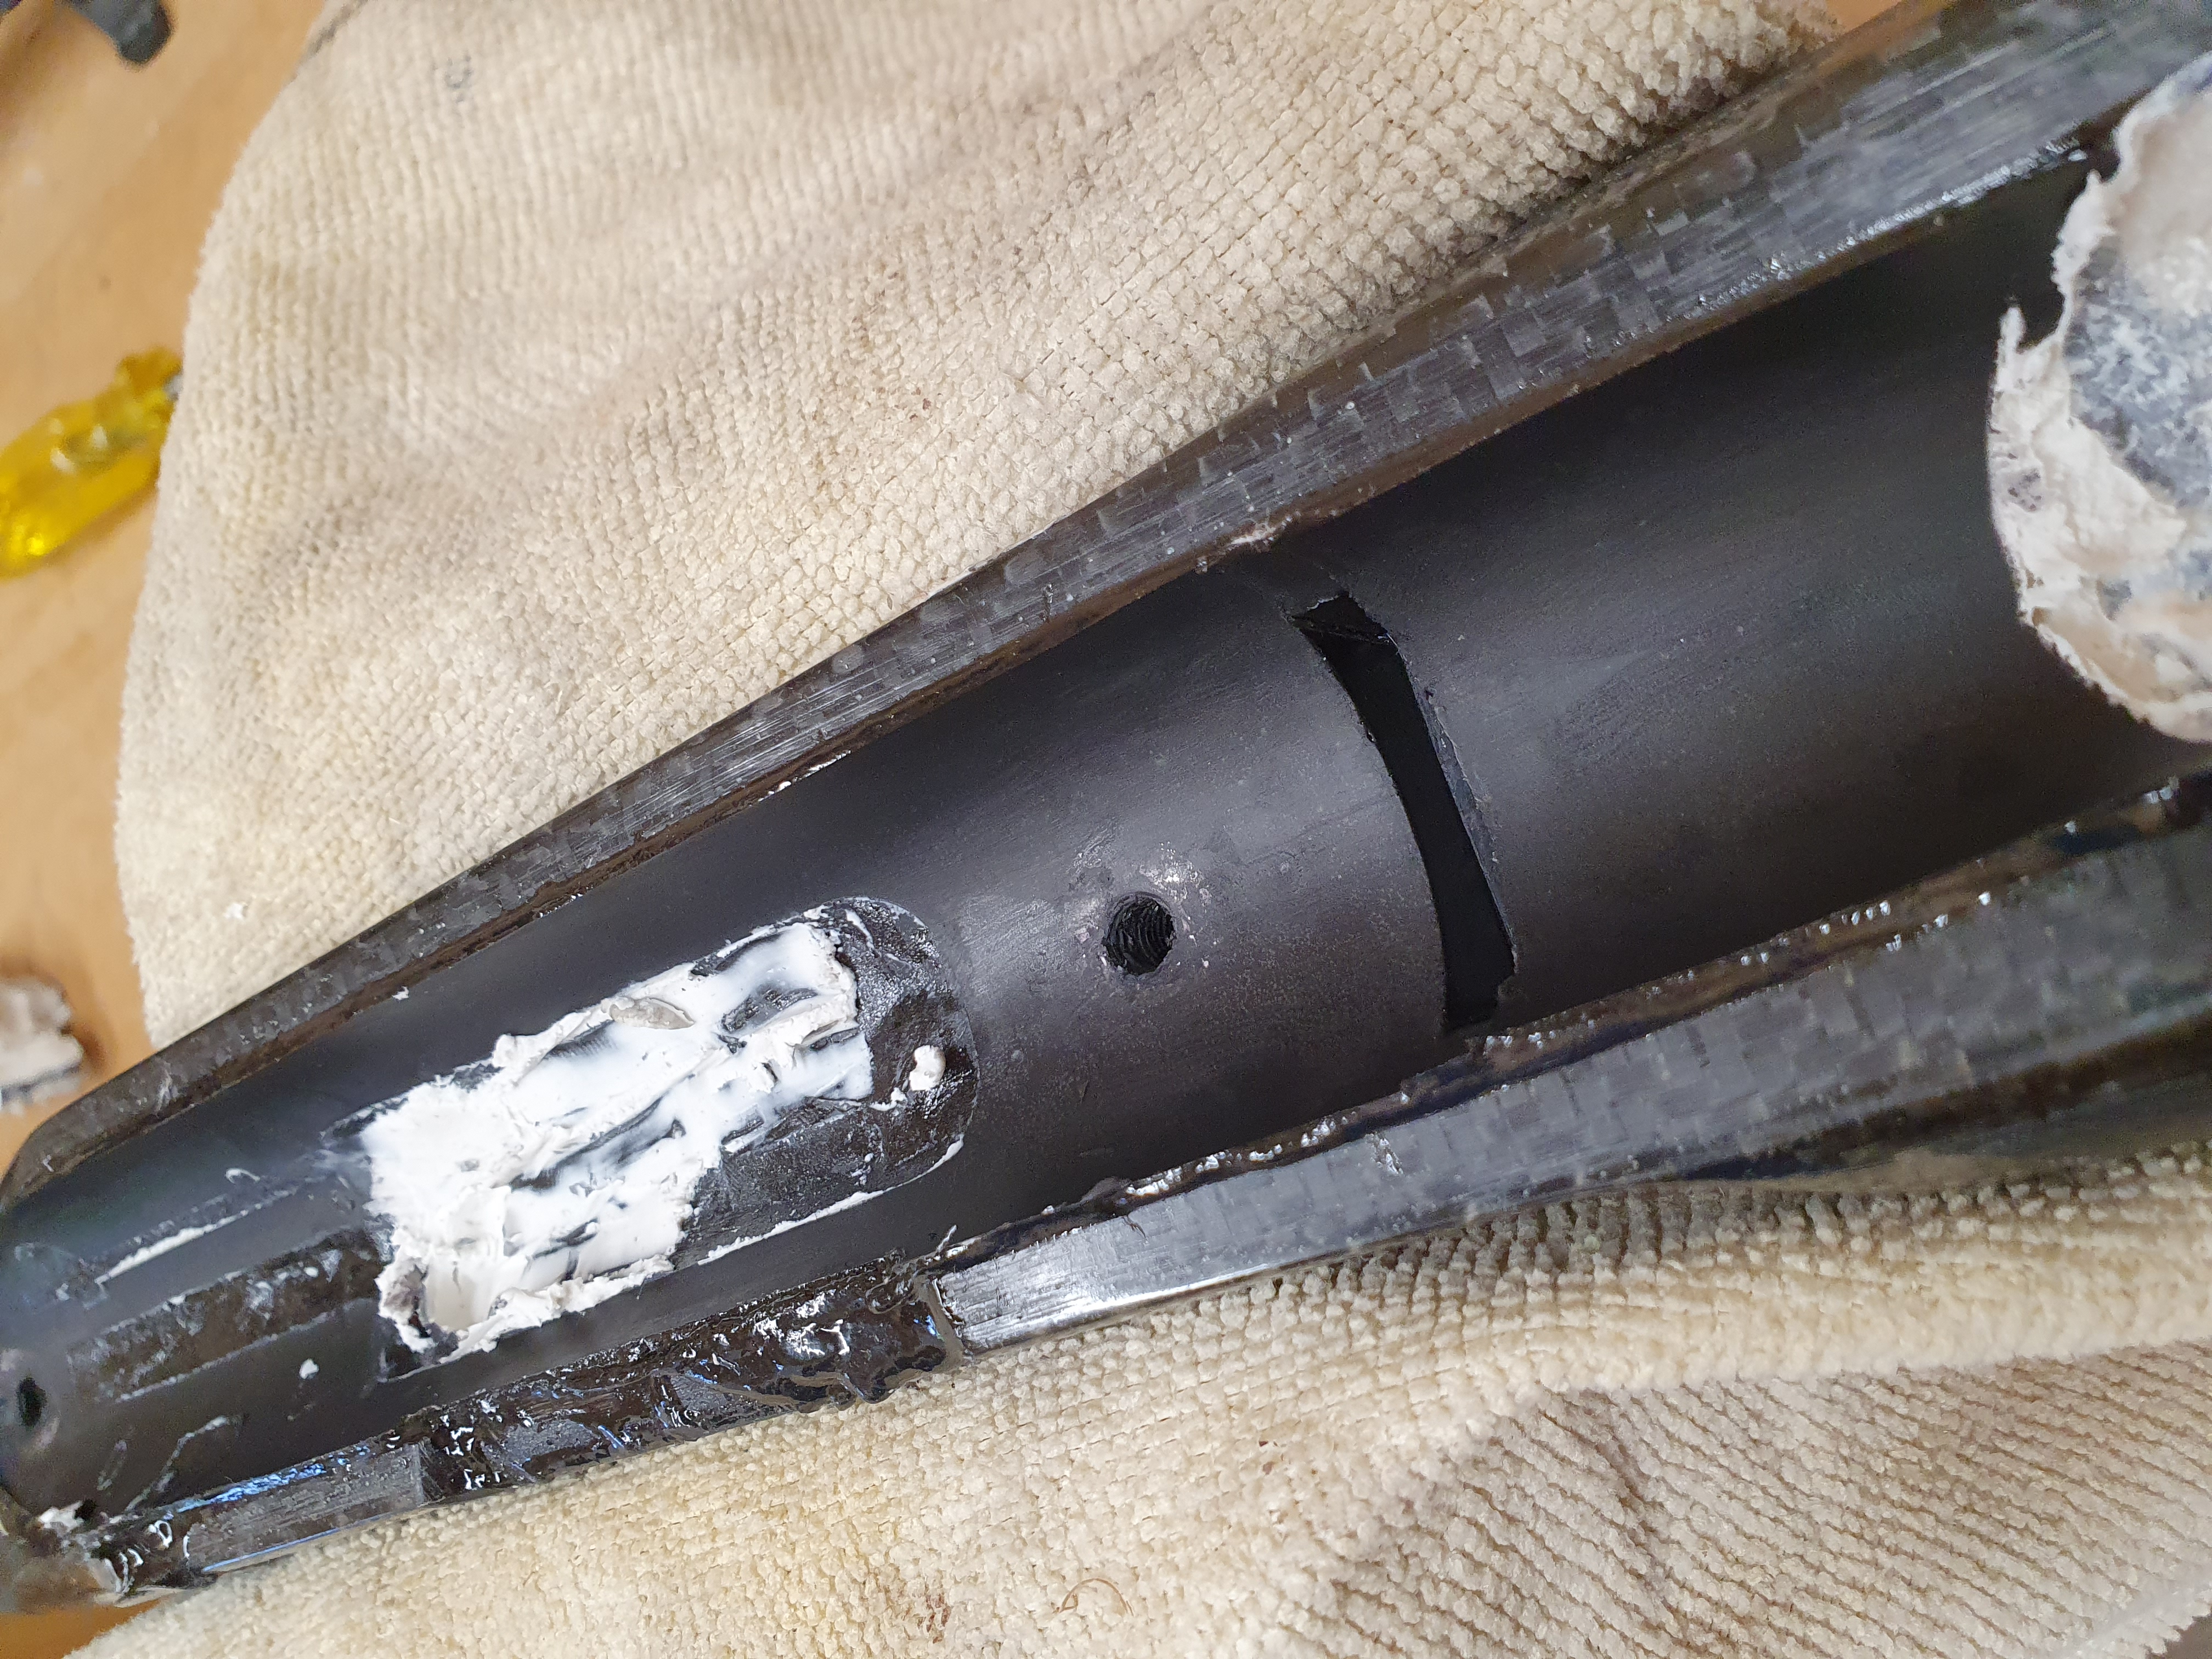
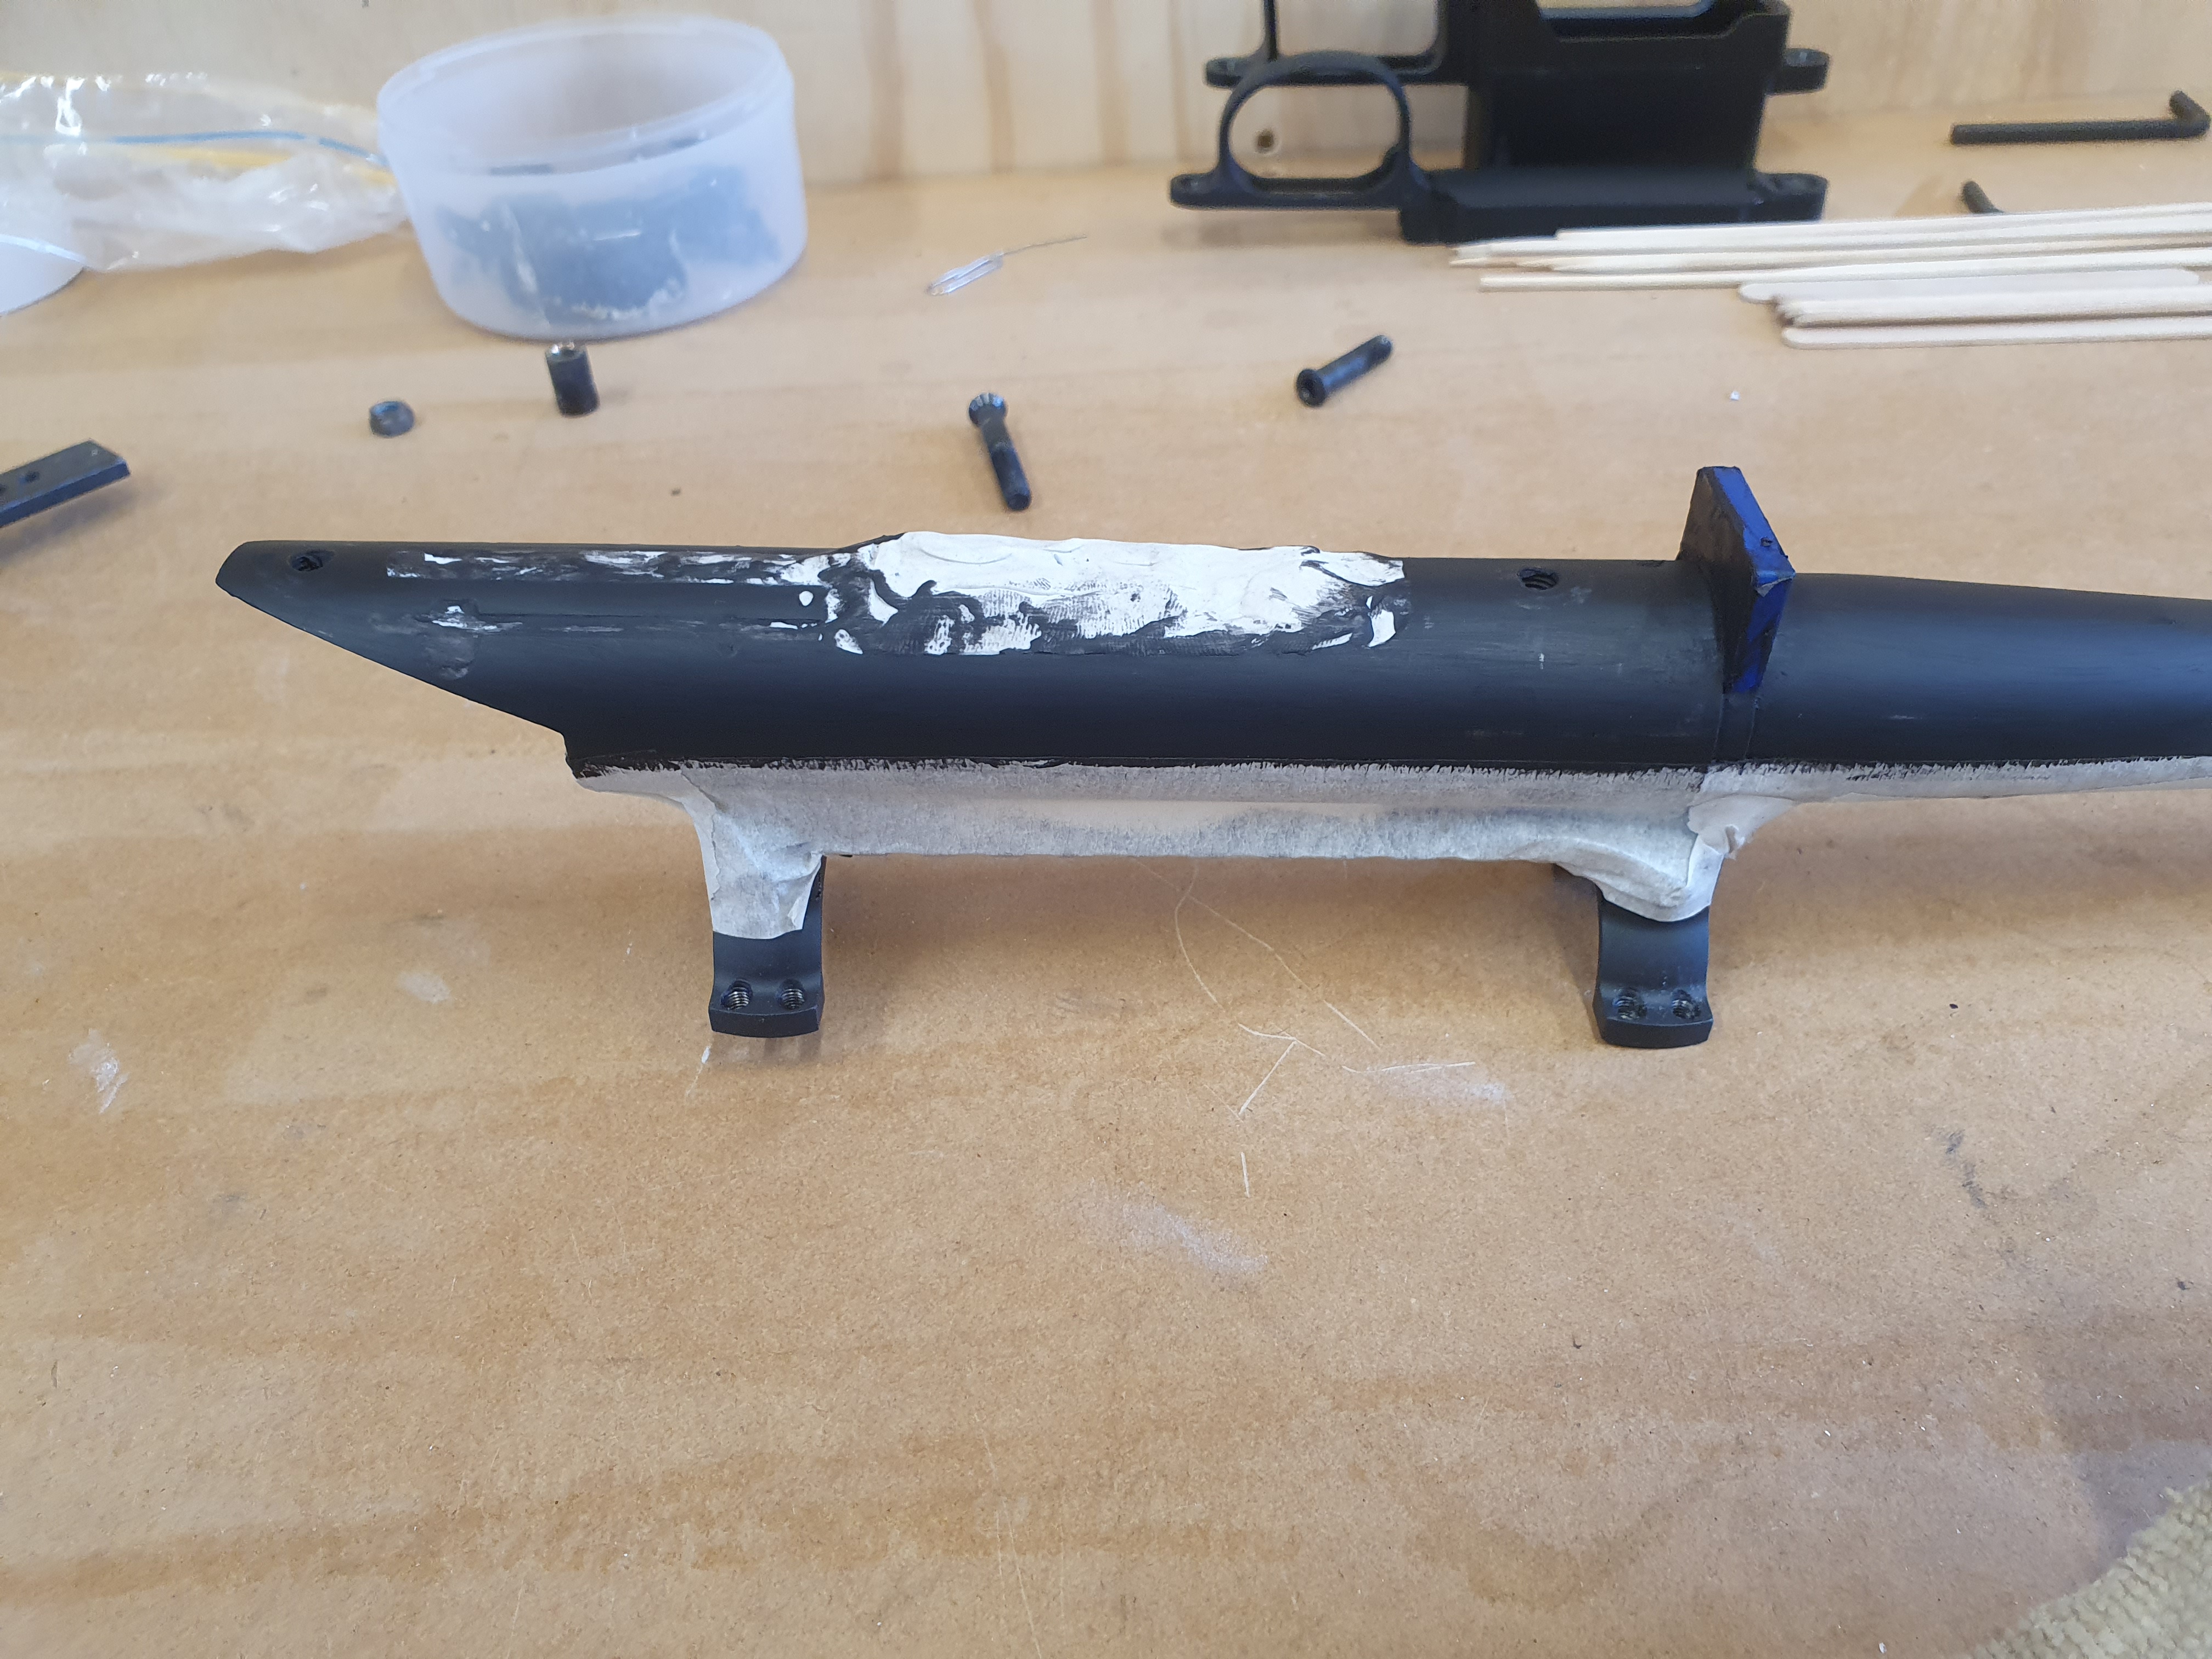
I then put the stock back in the CNC and machined out all the reliefs by jogging it around manually. only one stupid mistake doing this when I hit left instead of back.
But it came out pretty well.

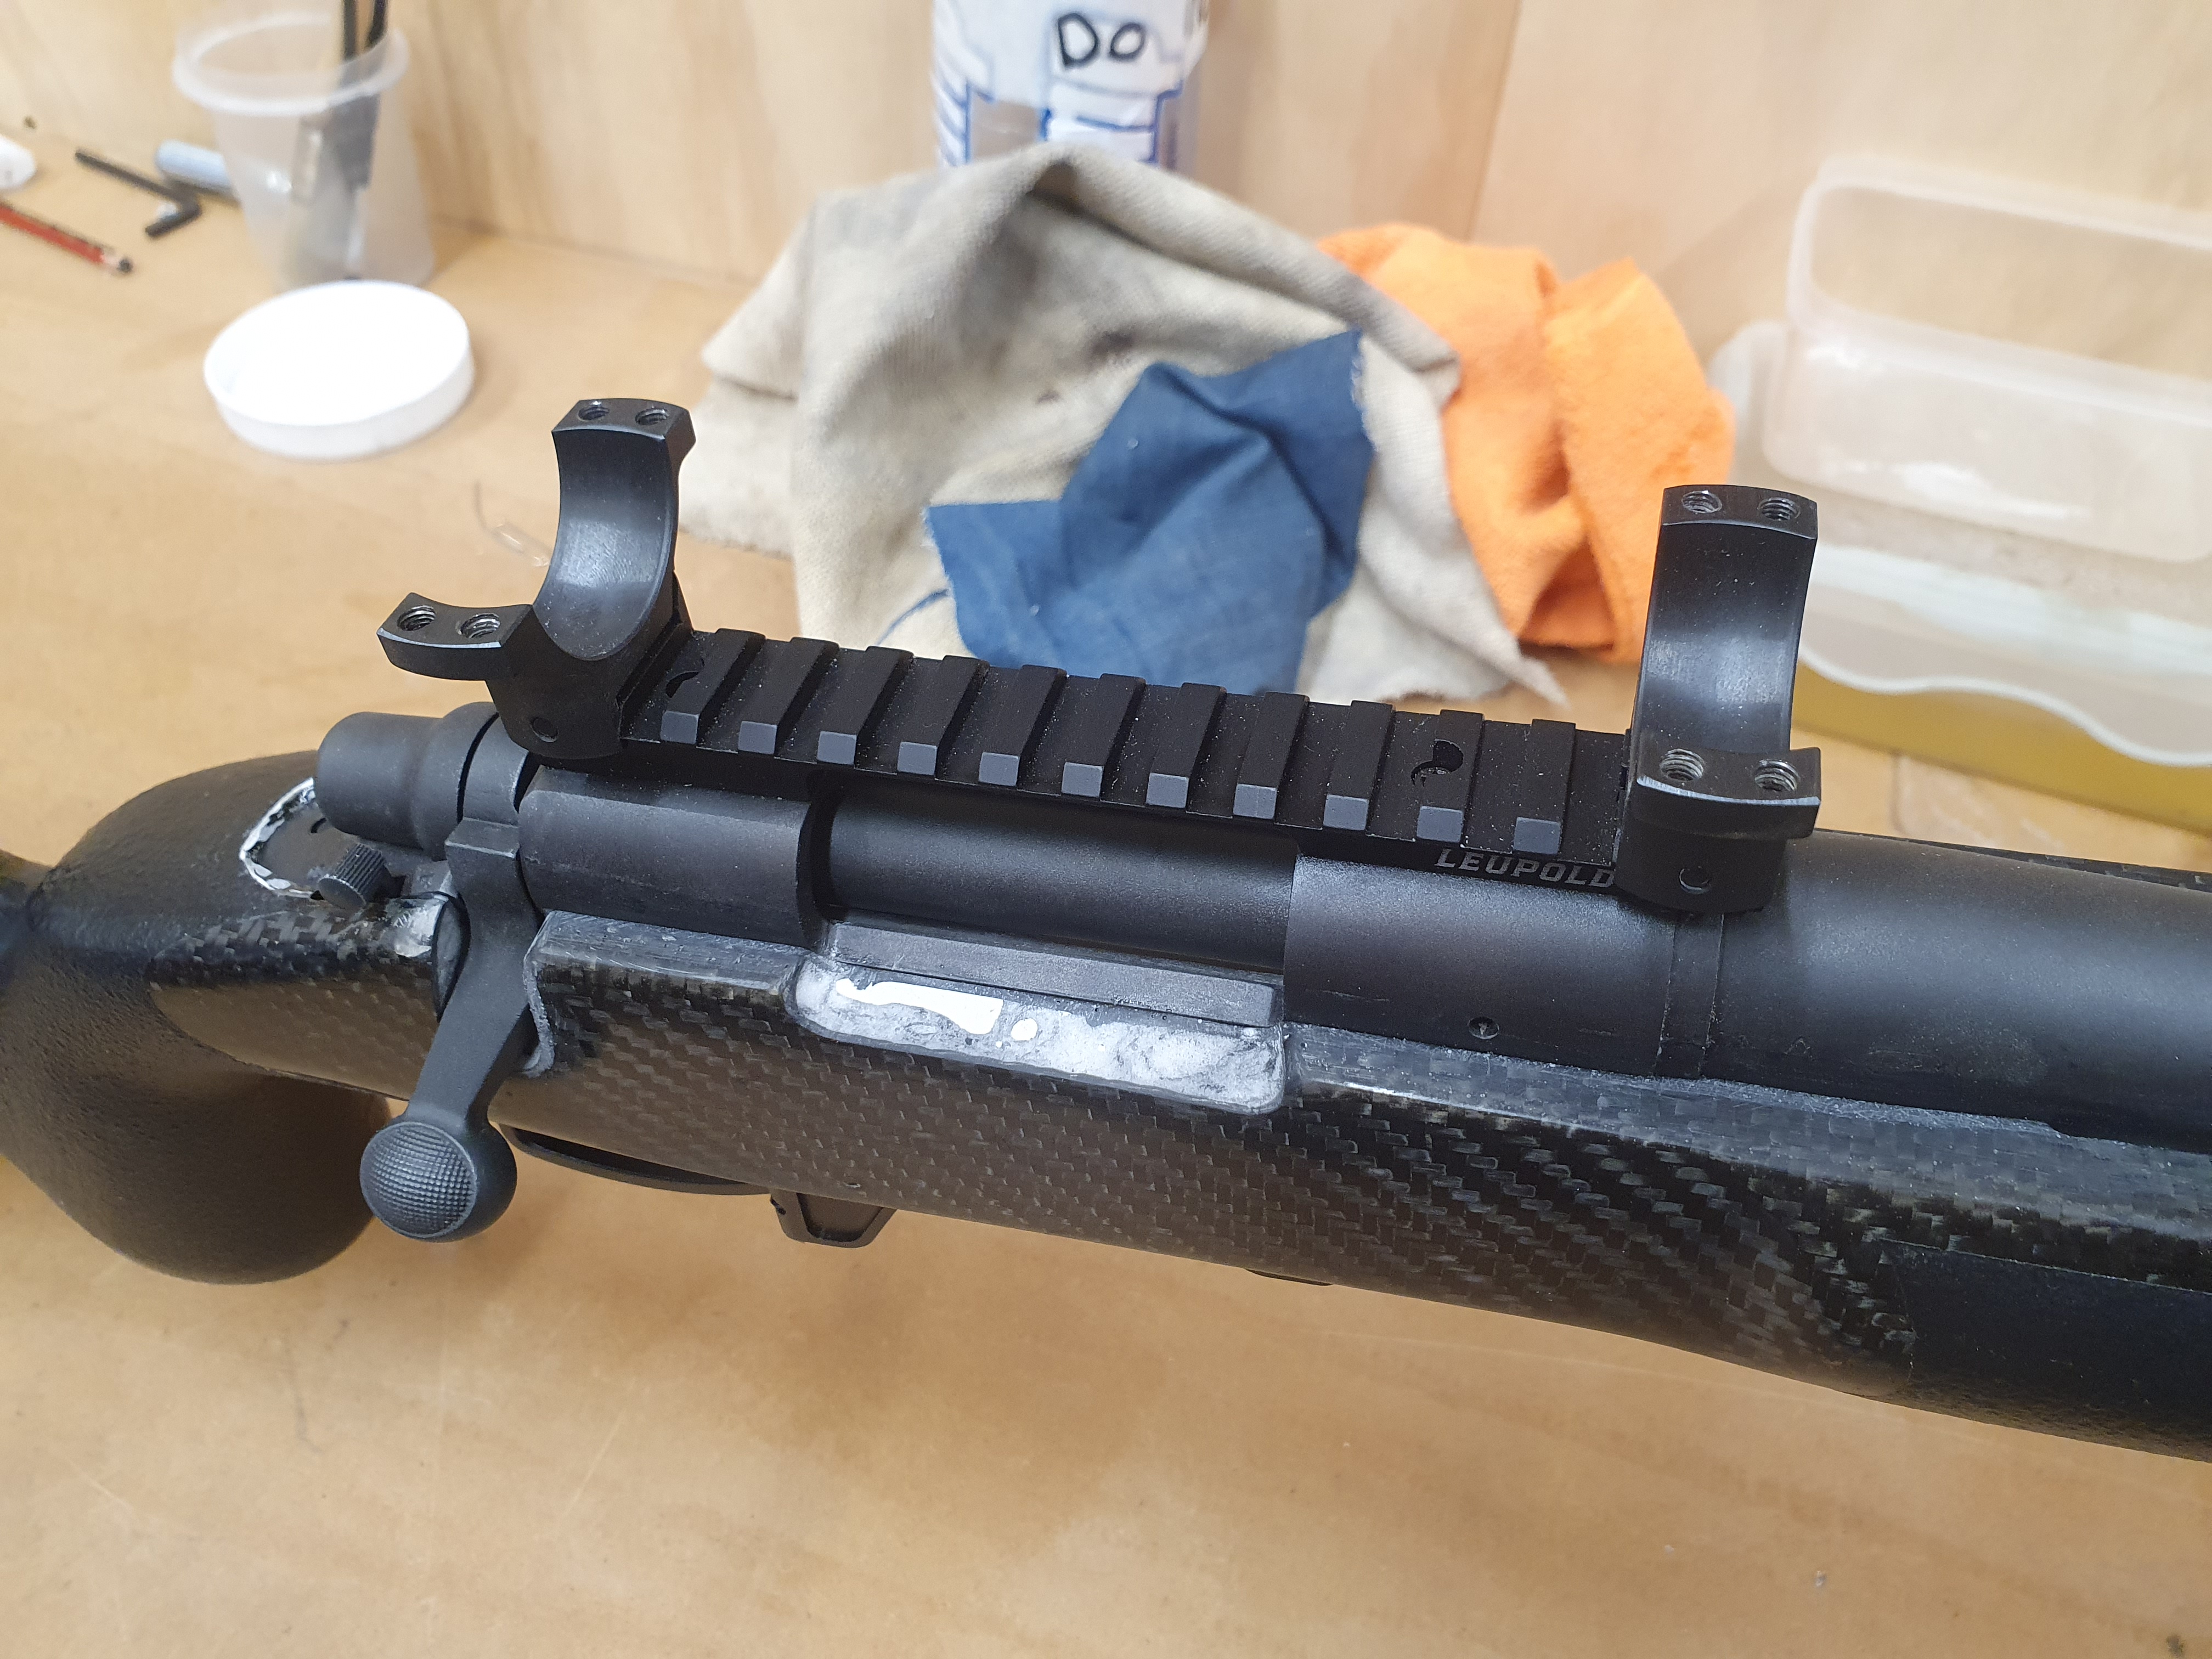
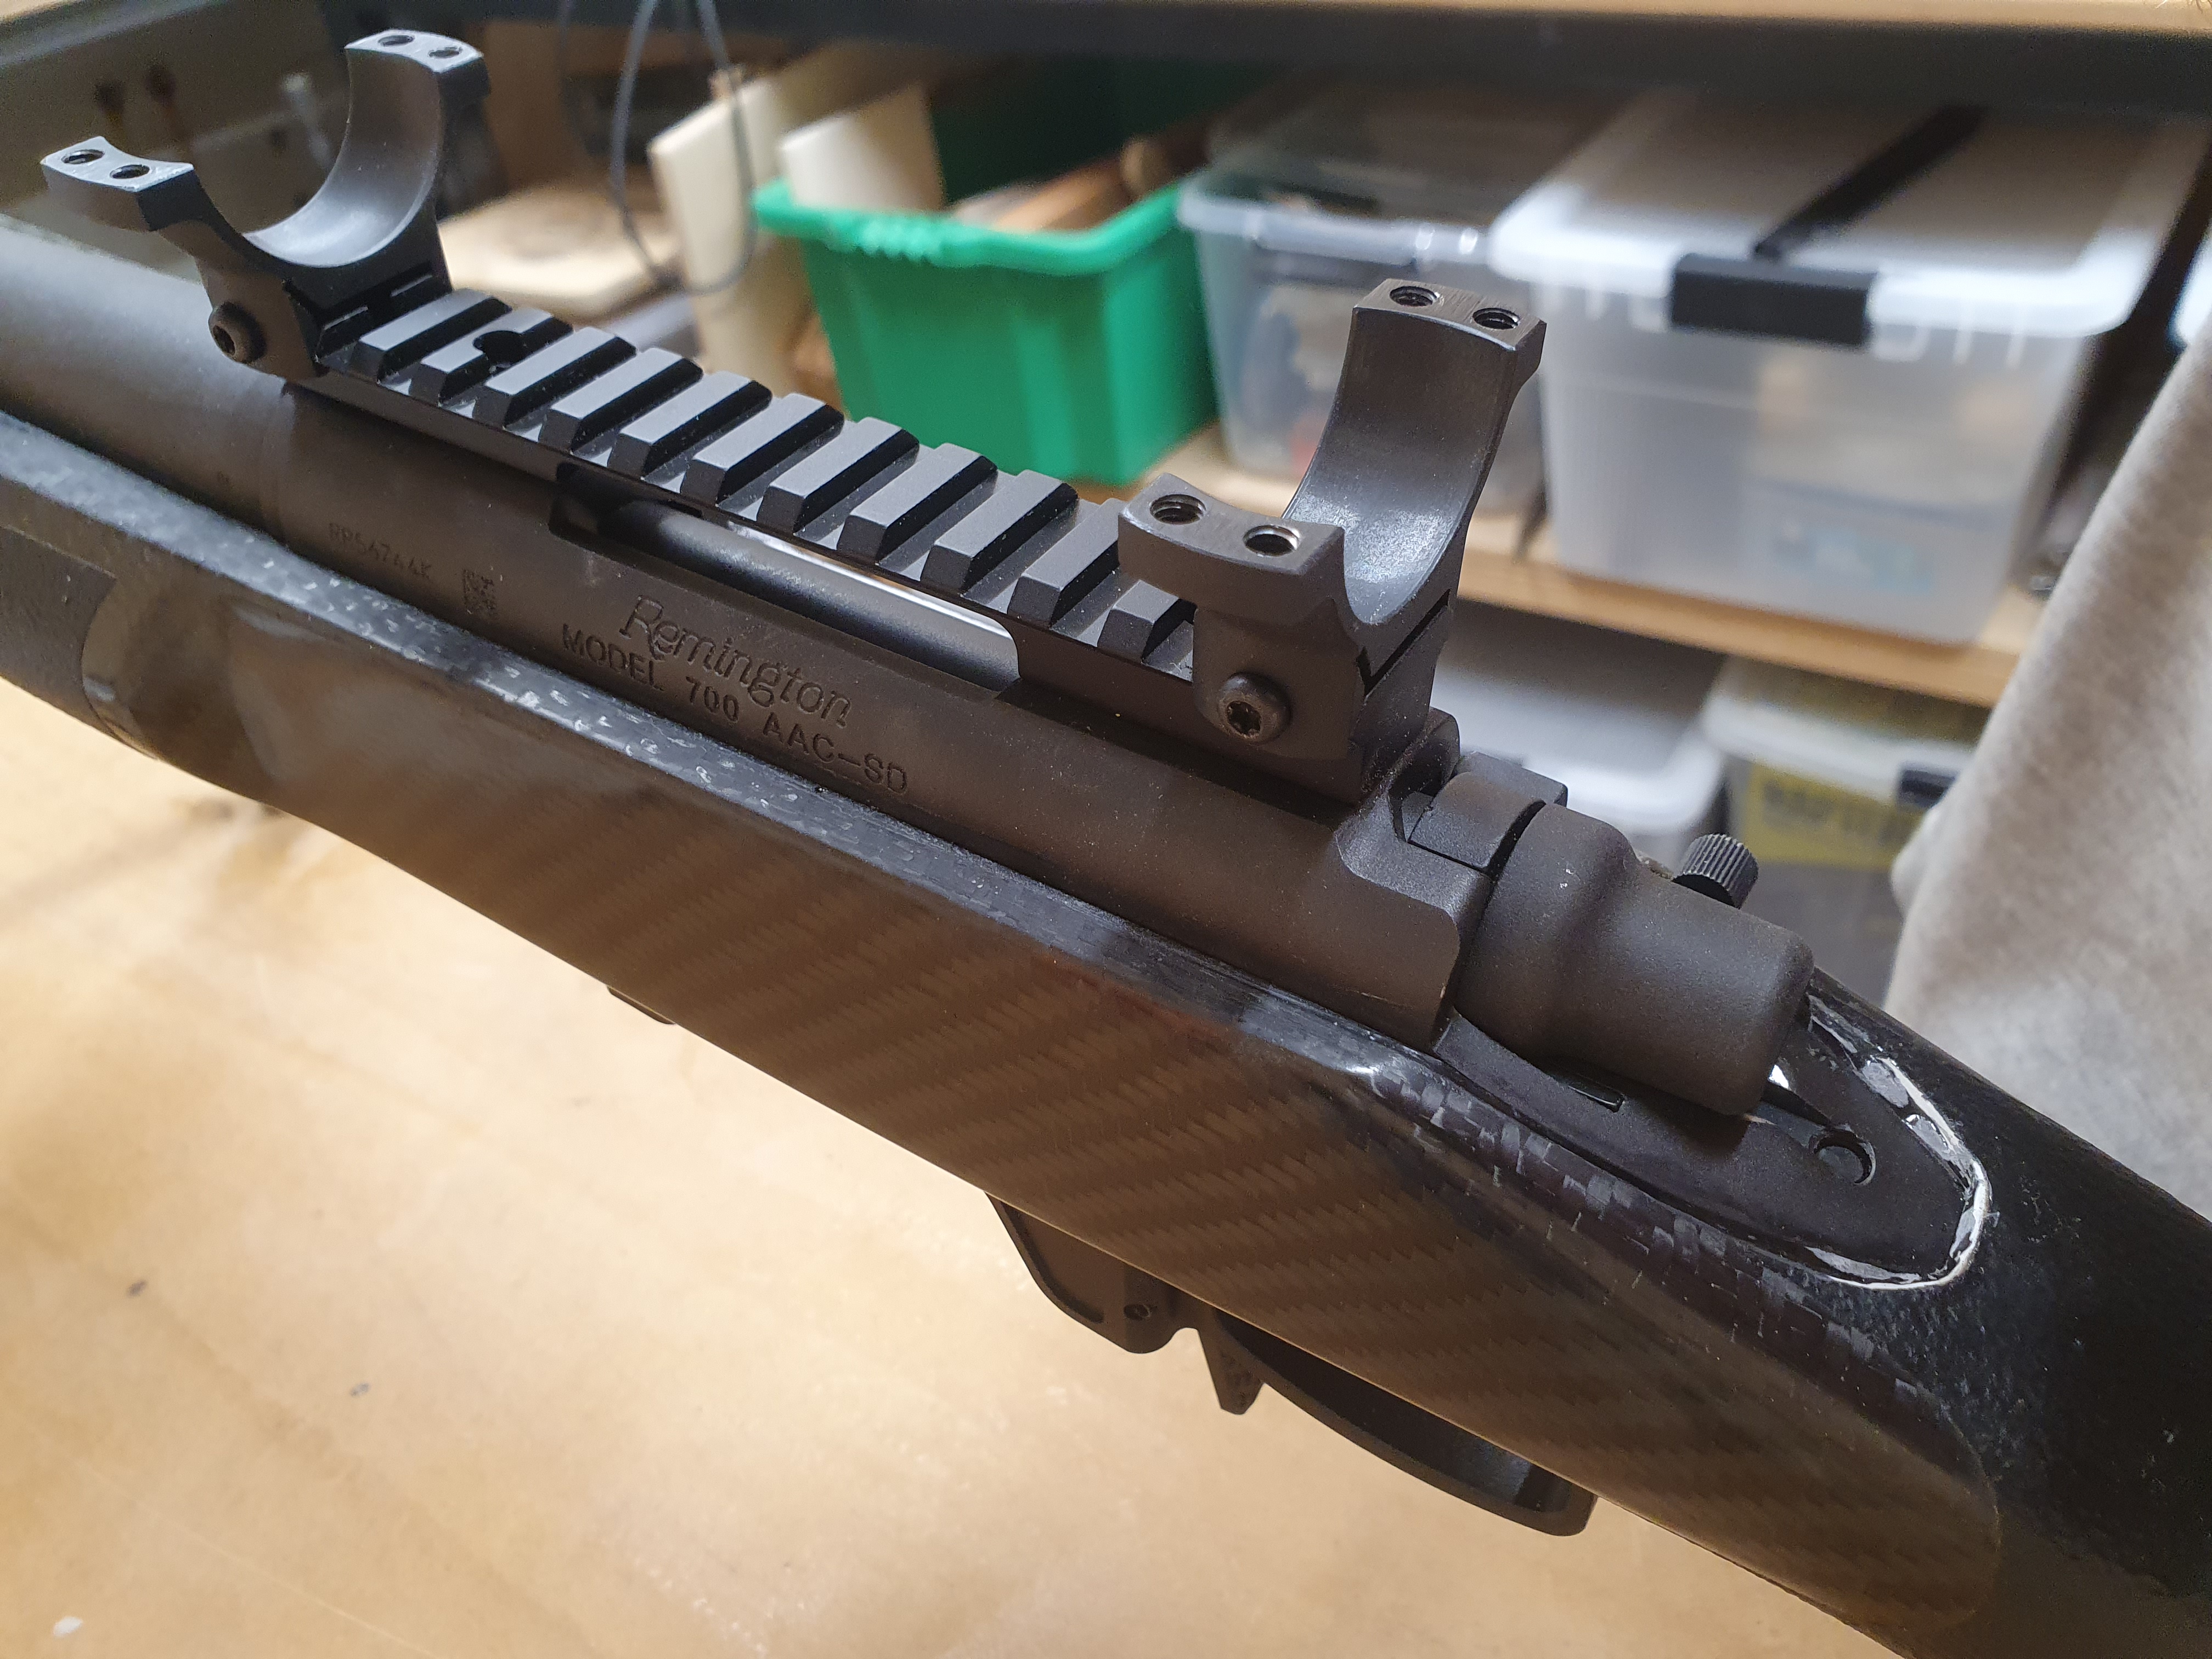
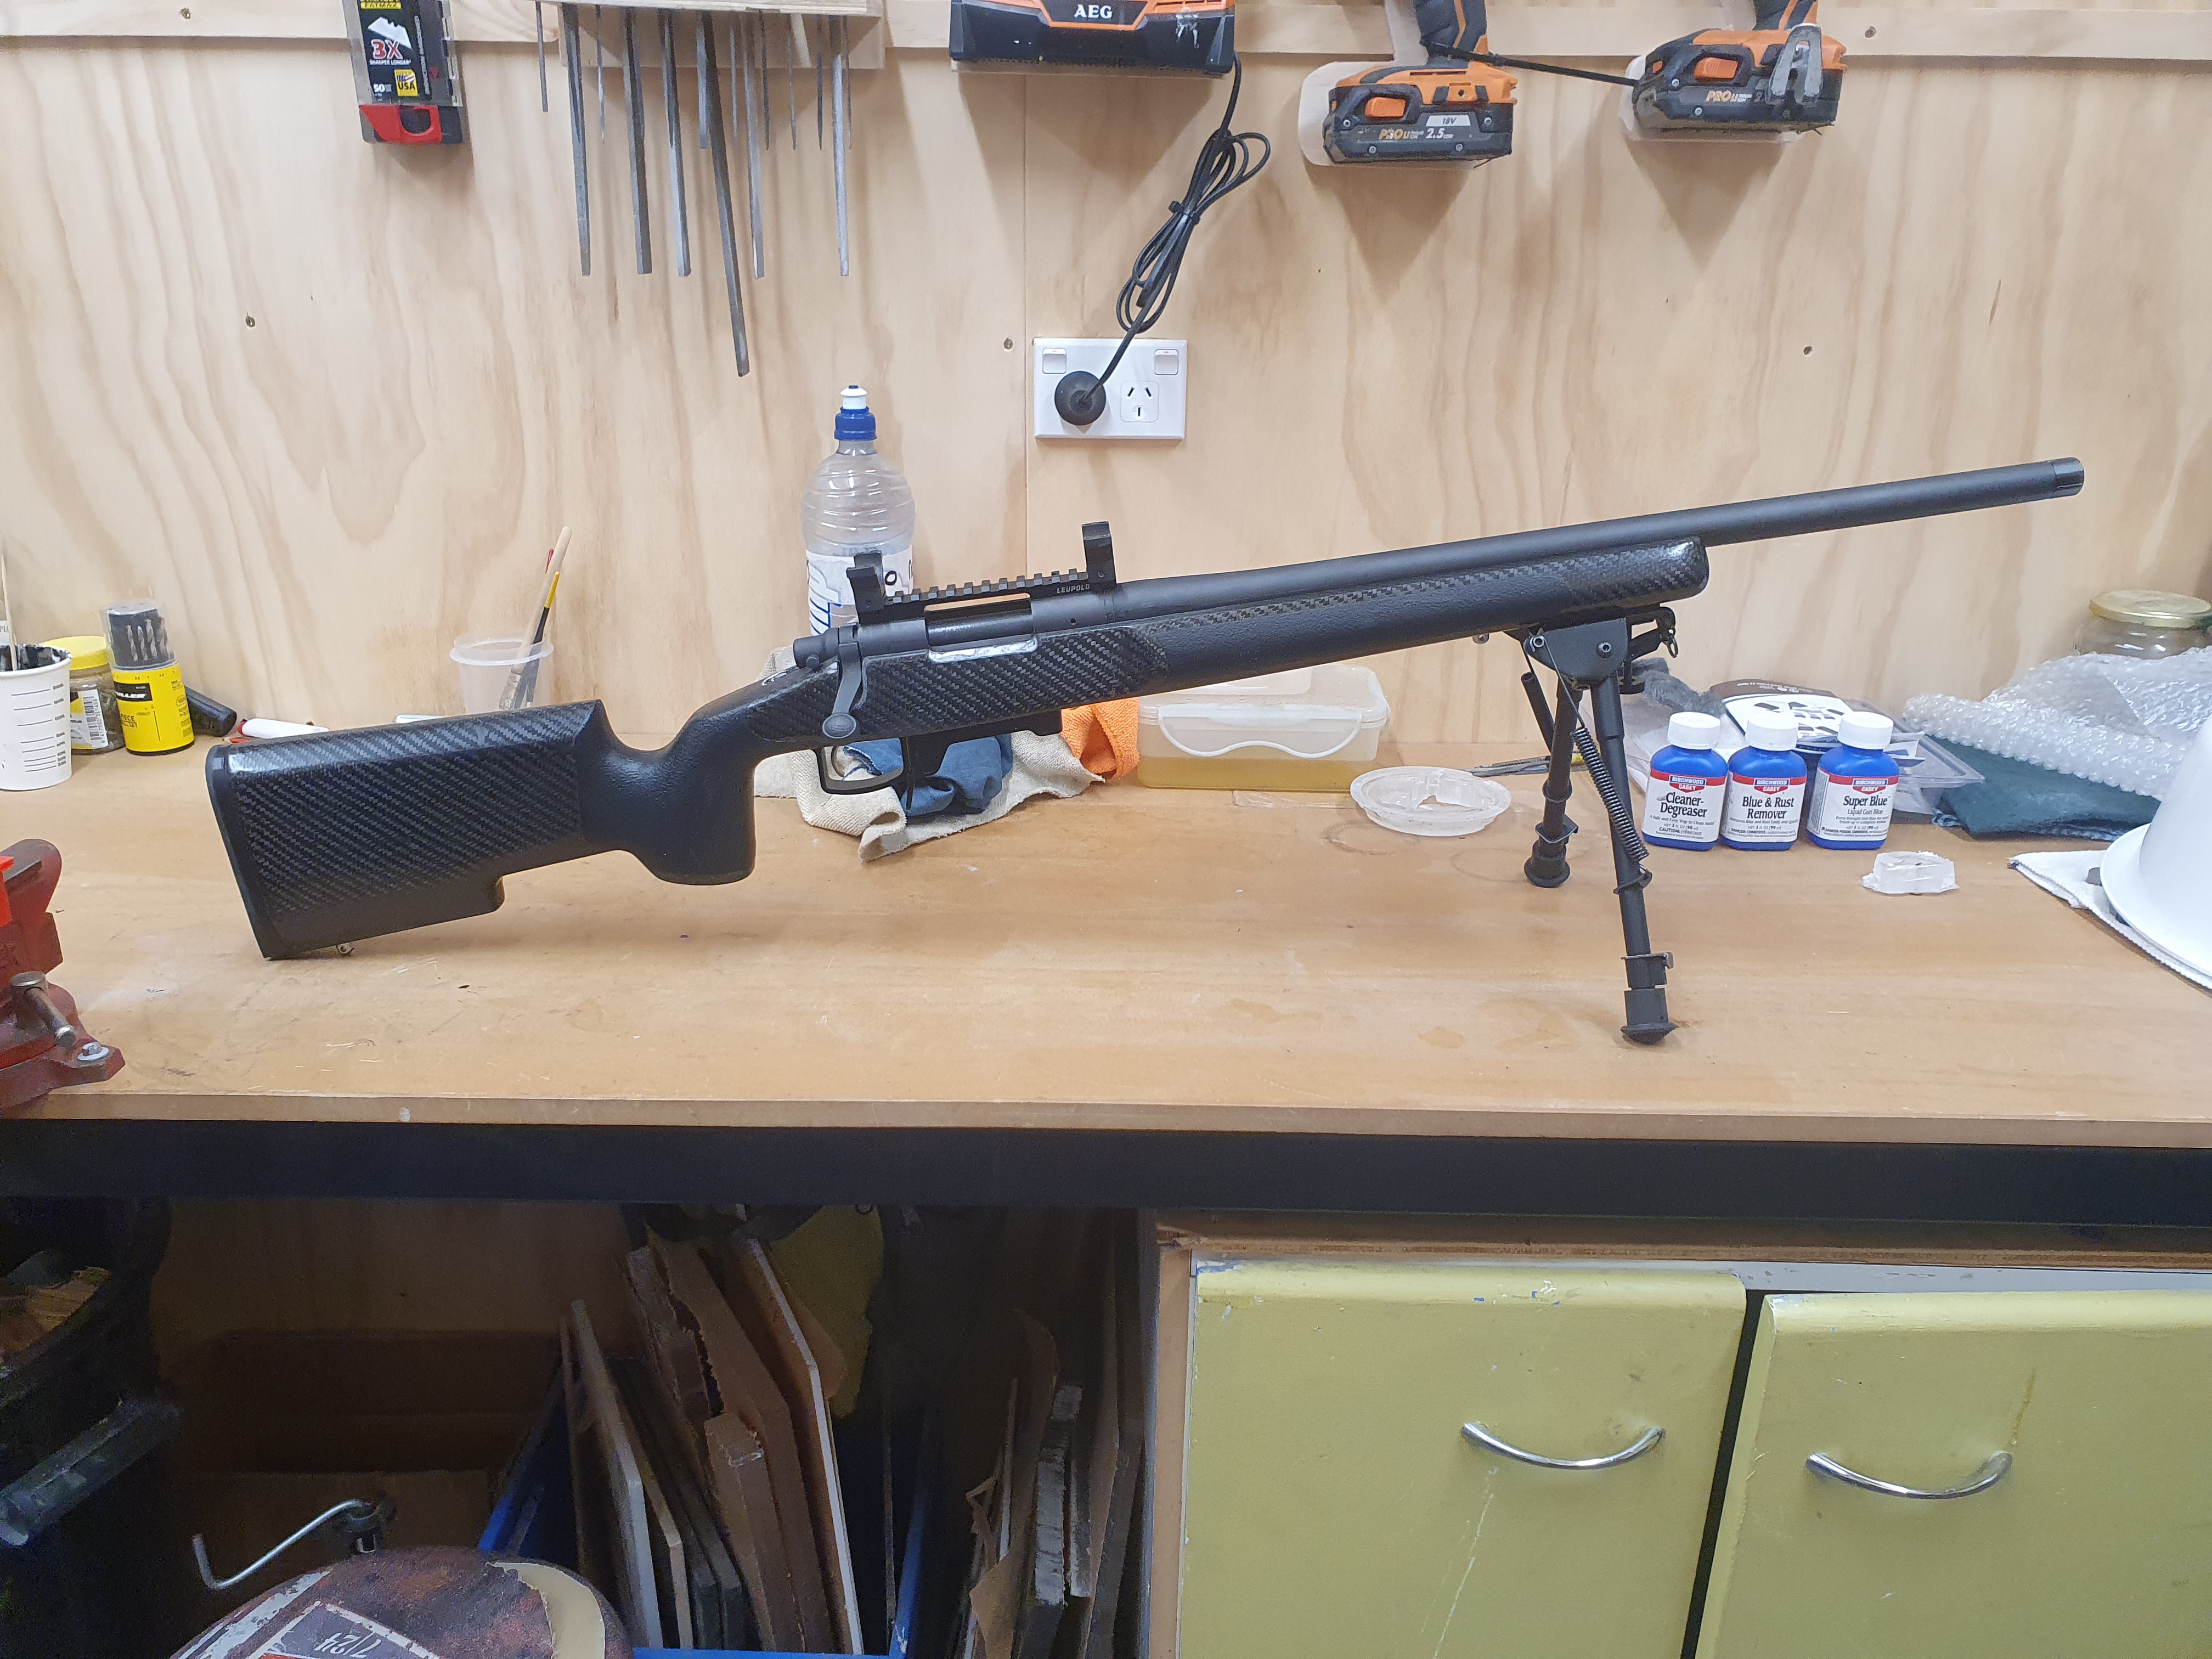
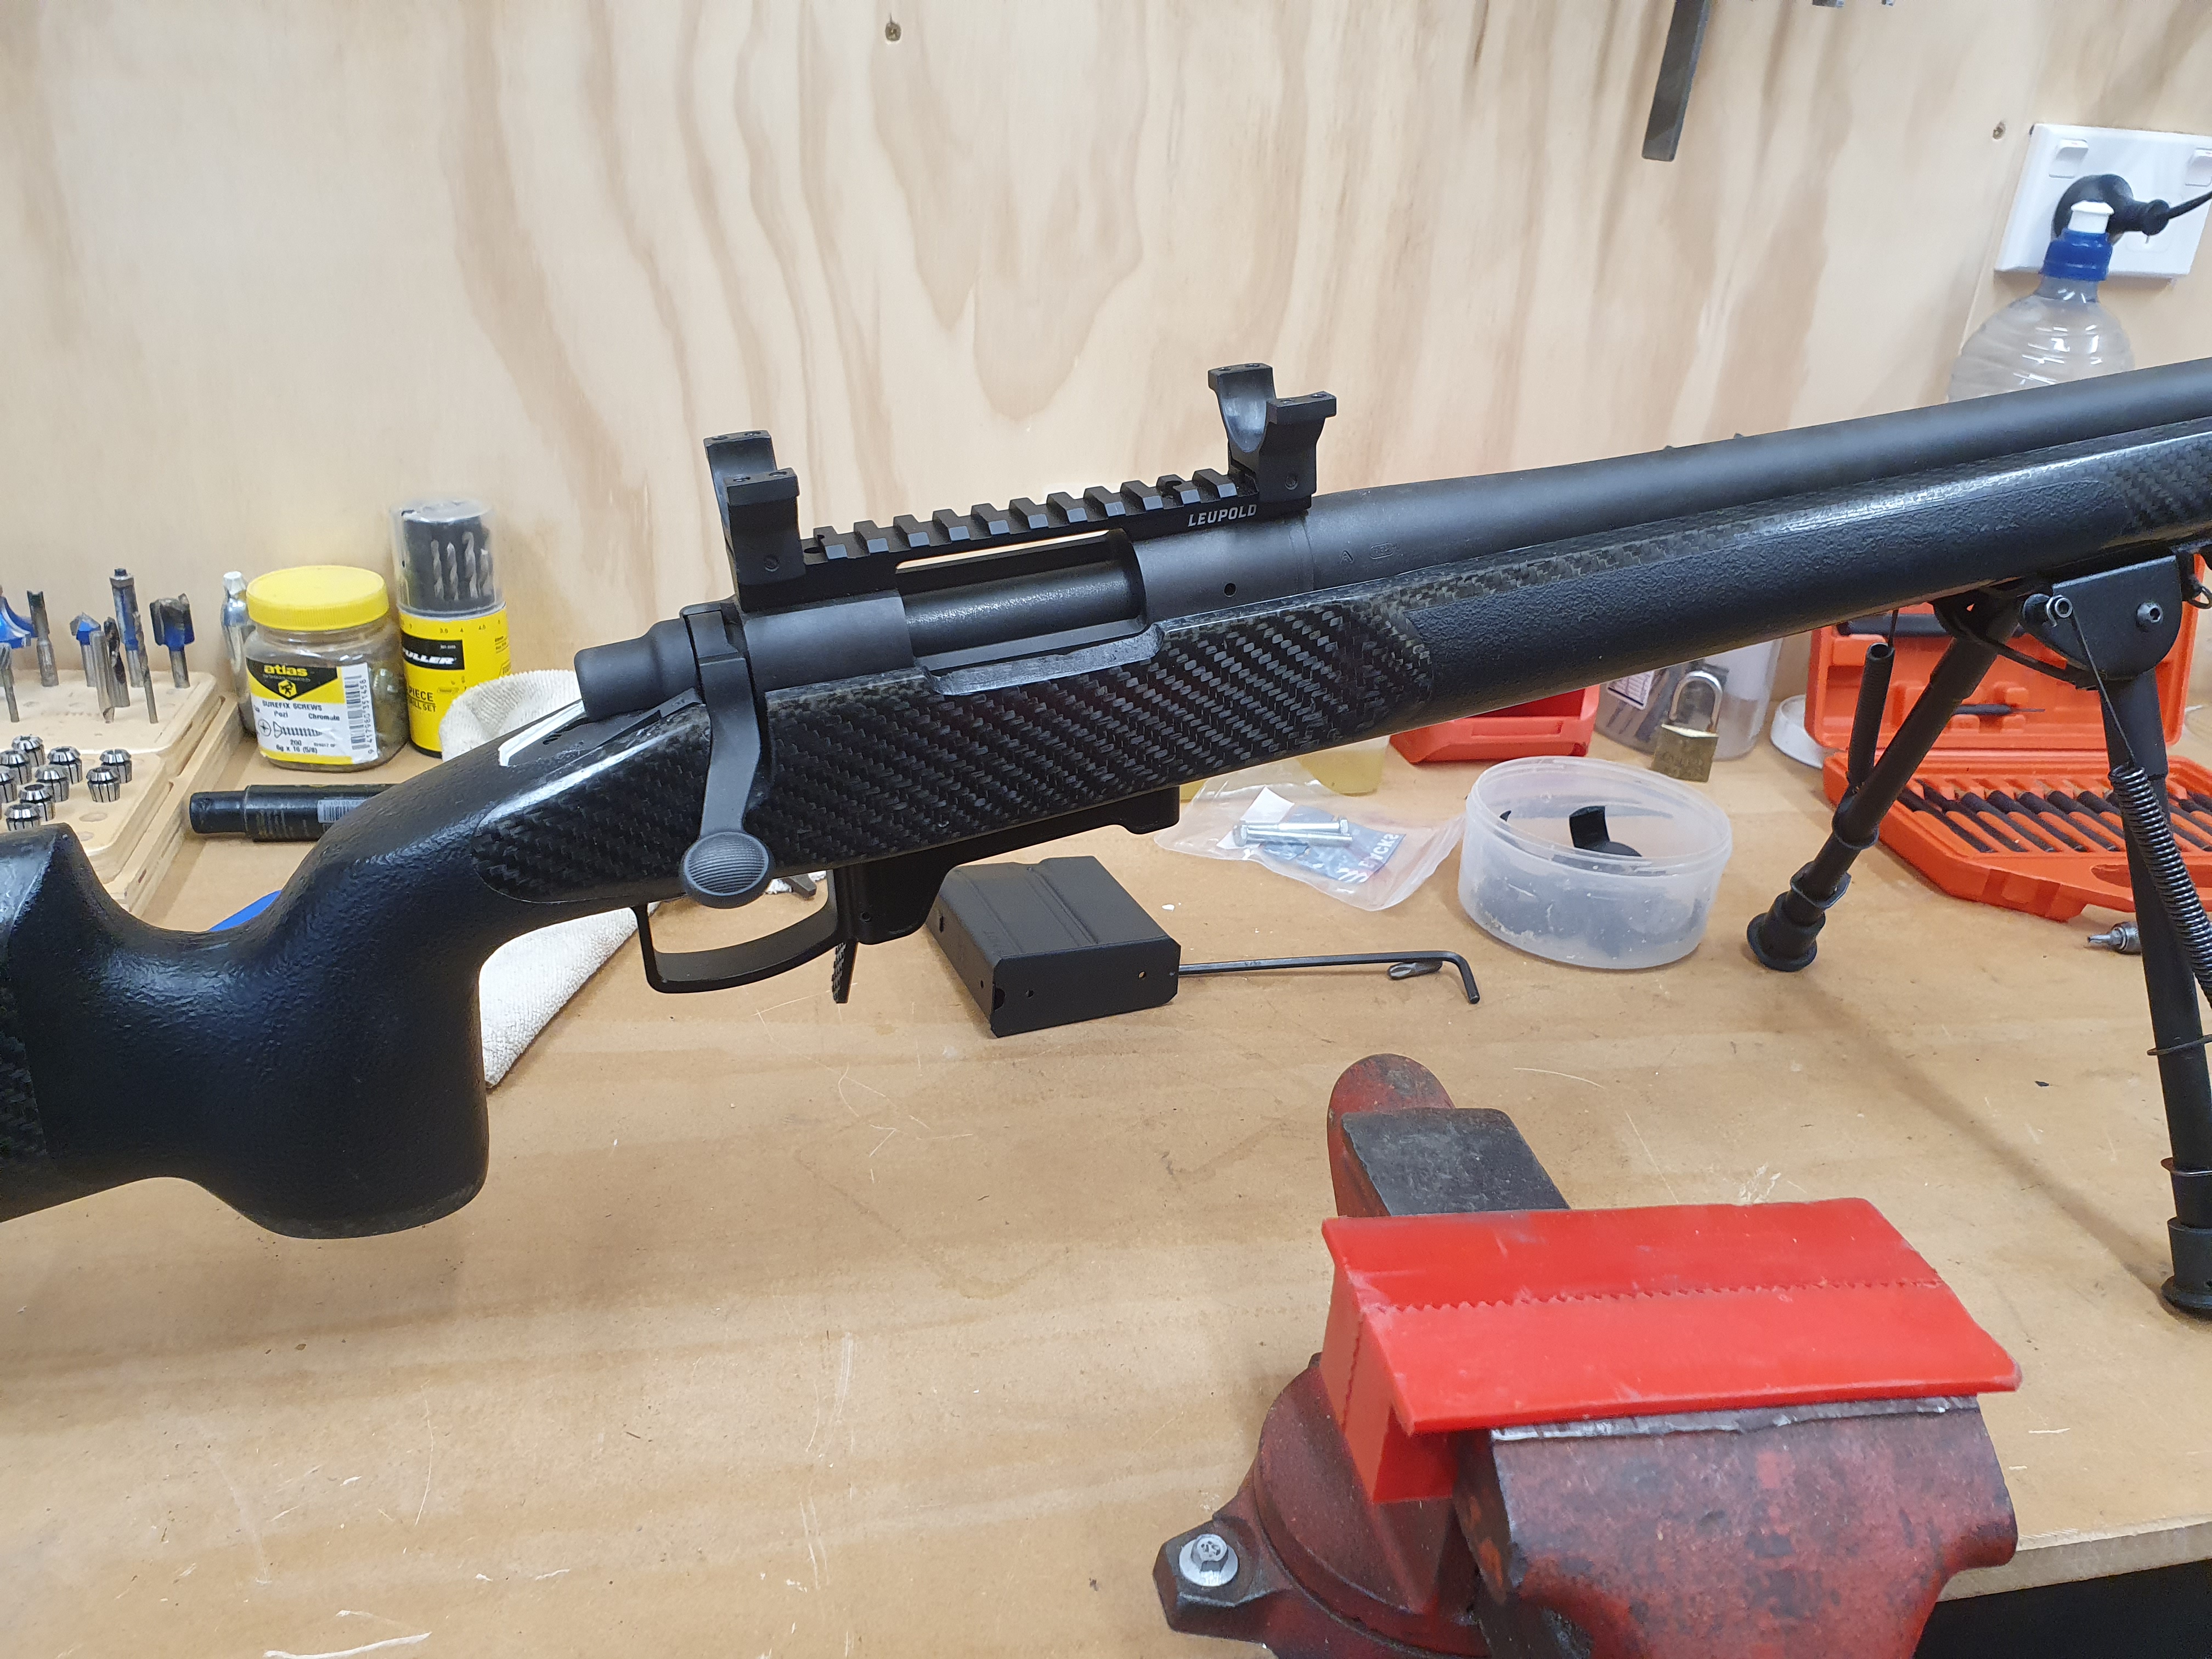
Super happy with the results. Not super happy with the fit of the bottom metal, so I may try bedding that as well.
The action did get some epoxy and marks on it, but I will be getting it cerakoted, so I'm not too concerned.
I'm also going to paint the stock, just not sure what colour/design yet, so that will cover up the transitions of epoxy to carbon.
Also looking at putting carbon in the barrel channel to stiffen it up a wee bit more.
-
30-01-2021, 11:49 AM #6Member

- Join Date
- Dec 2011
- Location
- dunedin
- Posts
- 1,313
Clever Chappy,well done looks sharp
Sent from my Nokia 7 plus using TapatalkMicky Duck likes this.
-
30-01-2021, 11:57 AM #7Member

- Join Date
- Apr 2015
- Location
- Geraldine
- Posts
- 22,596
thats a real mans shed....got some fancy tools to be sure.... how rifle groups will be ultimate test.....those pillars are HUGE....I used section of arrow shaft.
-
30-01-2021, 12:03 PM #8Member

- Join Date
- Jan 2015
- Location
- Rotorua
- Posts
- 3,787
Wow, that looks great.
-
30-01-2021, 05:05 PM #9Member

- Join Date
- Dec 2015
- Location
- Auckland
- Posts
- 483
Nice job. I have inletted and bedded a number of stocks now. I only have a manual mill, which is still better than doing it by hand, but a CNC router would be perfect for this type of work.
I would suggest keeping notes on the bedding, you can be sure that by the time you go to do it again, you have forgotten all the important lessons you learnt last time.
-
30-01-2021, 06:53 PM #10Member
- Join Date
- Jan 2019
- Location
- South Canterbury
- Posts
- 1,294
I have to agree with @Micky Duck. Nice man shed, tools and also some impressive talent there too.
canuck hunter likes this.
-
30-01-2021, 07:10 PM #11Member
- Join Date
- Jan 2021
- Location
- Methven
- Posts
- 134
Thanks guys. Learnt a lot, and still have a ways to go before the rifle is "done"
Good point Sixtyten, may be a while, though a couple others in my collection are looking a bit jealous....
-
30-01-2021, 07:45 PM #12Member
- Join Date
- Jun 2013
- Location
- Middle Earth
- Posts
- 4,055
Nice job.
Here is link to probably one of the best guy in the industry if that can help
https://www.longriflesinc.com/collec...ined-inletting


 Reply With Quote
Similar Threads
-
Carbon stock bedding
By Gusto in forum Firearms, Optics and AccessoriesReplies: 2Last Post: 21-08-2020, 12:00 PM -
Bedding flush cups into a carbon fiber stock
By dannyb in forum Projects and Home BuildsReplies: 15Last Post: 06-07-2020, 02:34 PM -
Bedding a 2 part stock Forend on a Savage 99
By ZQLewis in forum Projects and Home BuildsReplies: 0Last Post: 12-06-2018, 11:30 PM -
auckland stock bedding job
By quadhunter260 in forum Firearms, Optics and AccessoriesReplies: 8Last Post: 29-01-2018, 12:40 PM -
Winter Rifle Maintenance: stock and bedding
By Bagheera in forum Firearms, Optics and AccessoriesReplies: 2Last Post: 01-09-2016, 11:34 PM
Tags for this Thread
 Posting Permissions
- You may not post new threads
- You may not post replies
- You may not post attachments
- You may not edit your posts
Welcome to NZ Hunting and Shooting Forums! We see you're new here, or arn't logged in. Create an account, and Login for full access including our FREE BUY and SELL section Register NOW!!
All times are GMT +13. The time now is 10:49 PM.

Bookmarks