

 115Likes
 LinkBack URL
 About LinkBacks
Well whats wrong with bush sticking out, it can be cleaned up and will be stronger than original. Machine out existing hole, weld / bronze a large steel bush in place with correct sized centre and tidy up to match the flat face - as much as necessary to make the hammer functionOriginally Posted by akaroa1

Welcome guest, is this your first visit? Create Account now to join.
Welcome to the NZ Hunting and Shooting Forums.
Search Forums


User Tag List
+ Reply to Thread
Results 31 to 45 of 55
Thread: Marlin Ballard restoration
-
16-10-2022, 02:03 PM #31Banned

- Join Date
- Mar 2015
- Location
- North Canterbury
- Posts
- 5,462
-
-
16-10-2022, 02:05 PM #32Member
- Join Date
- Dec 2014
- Location
- canterbury
- Posts
- 5,452
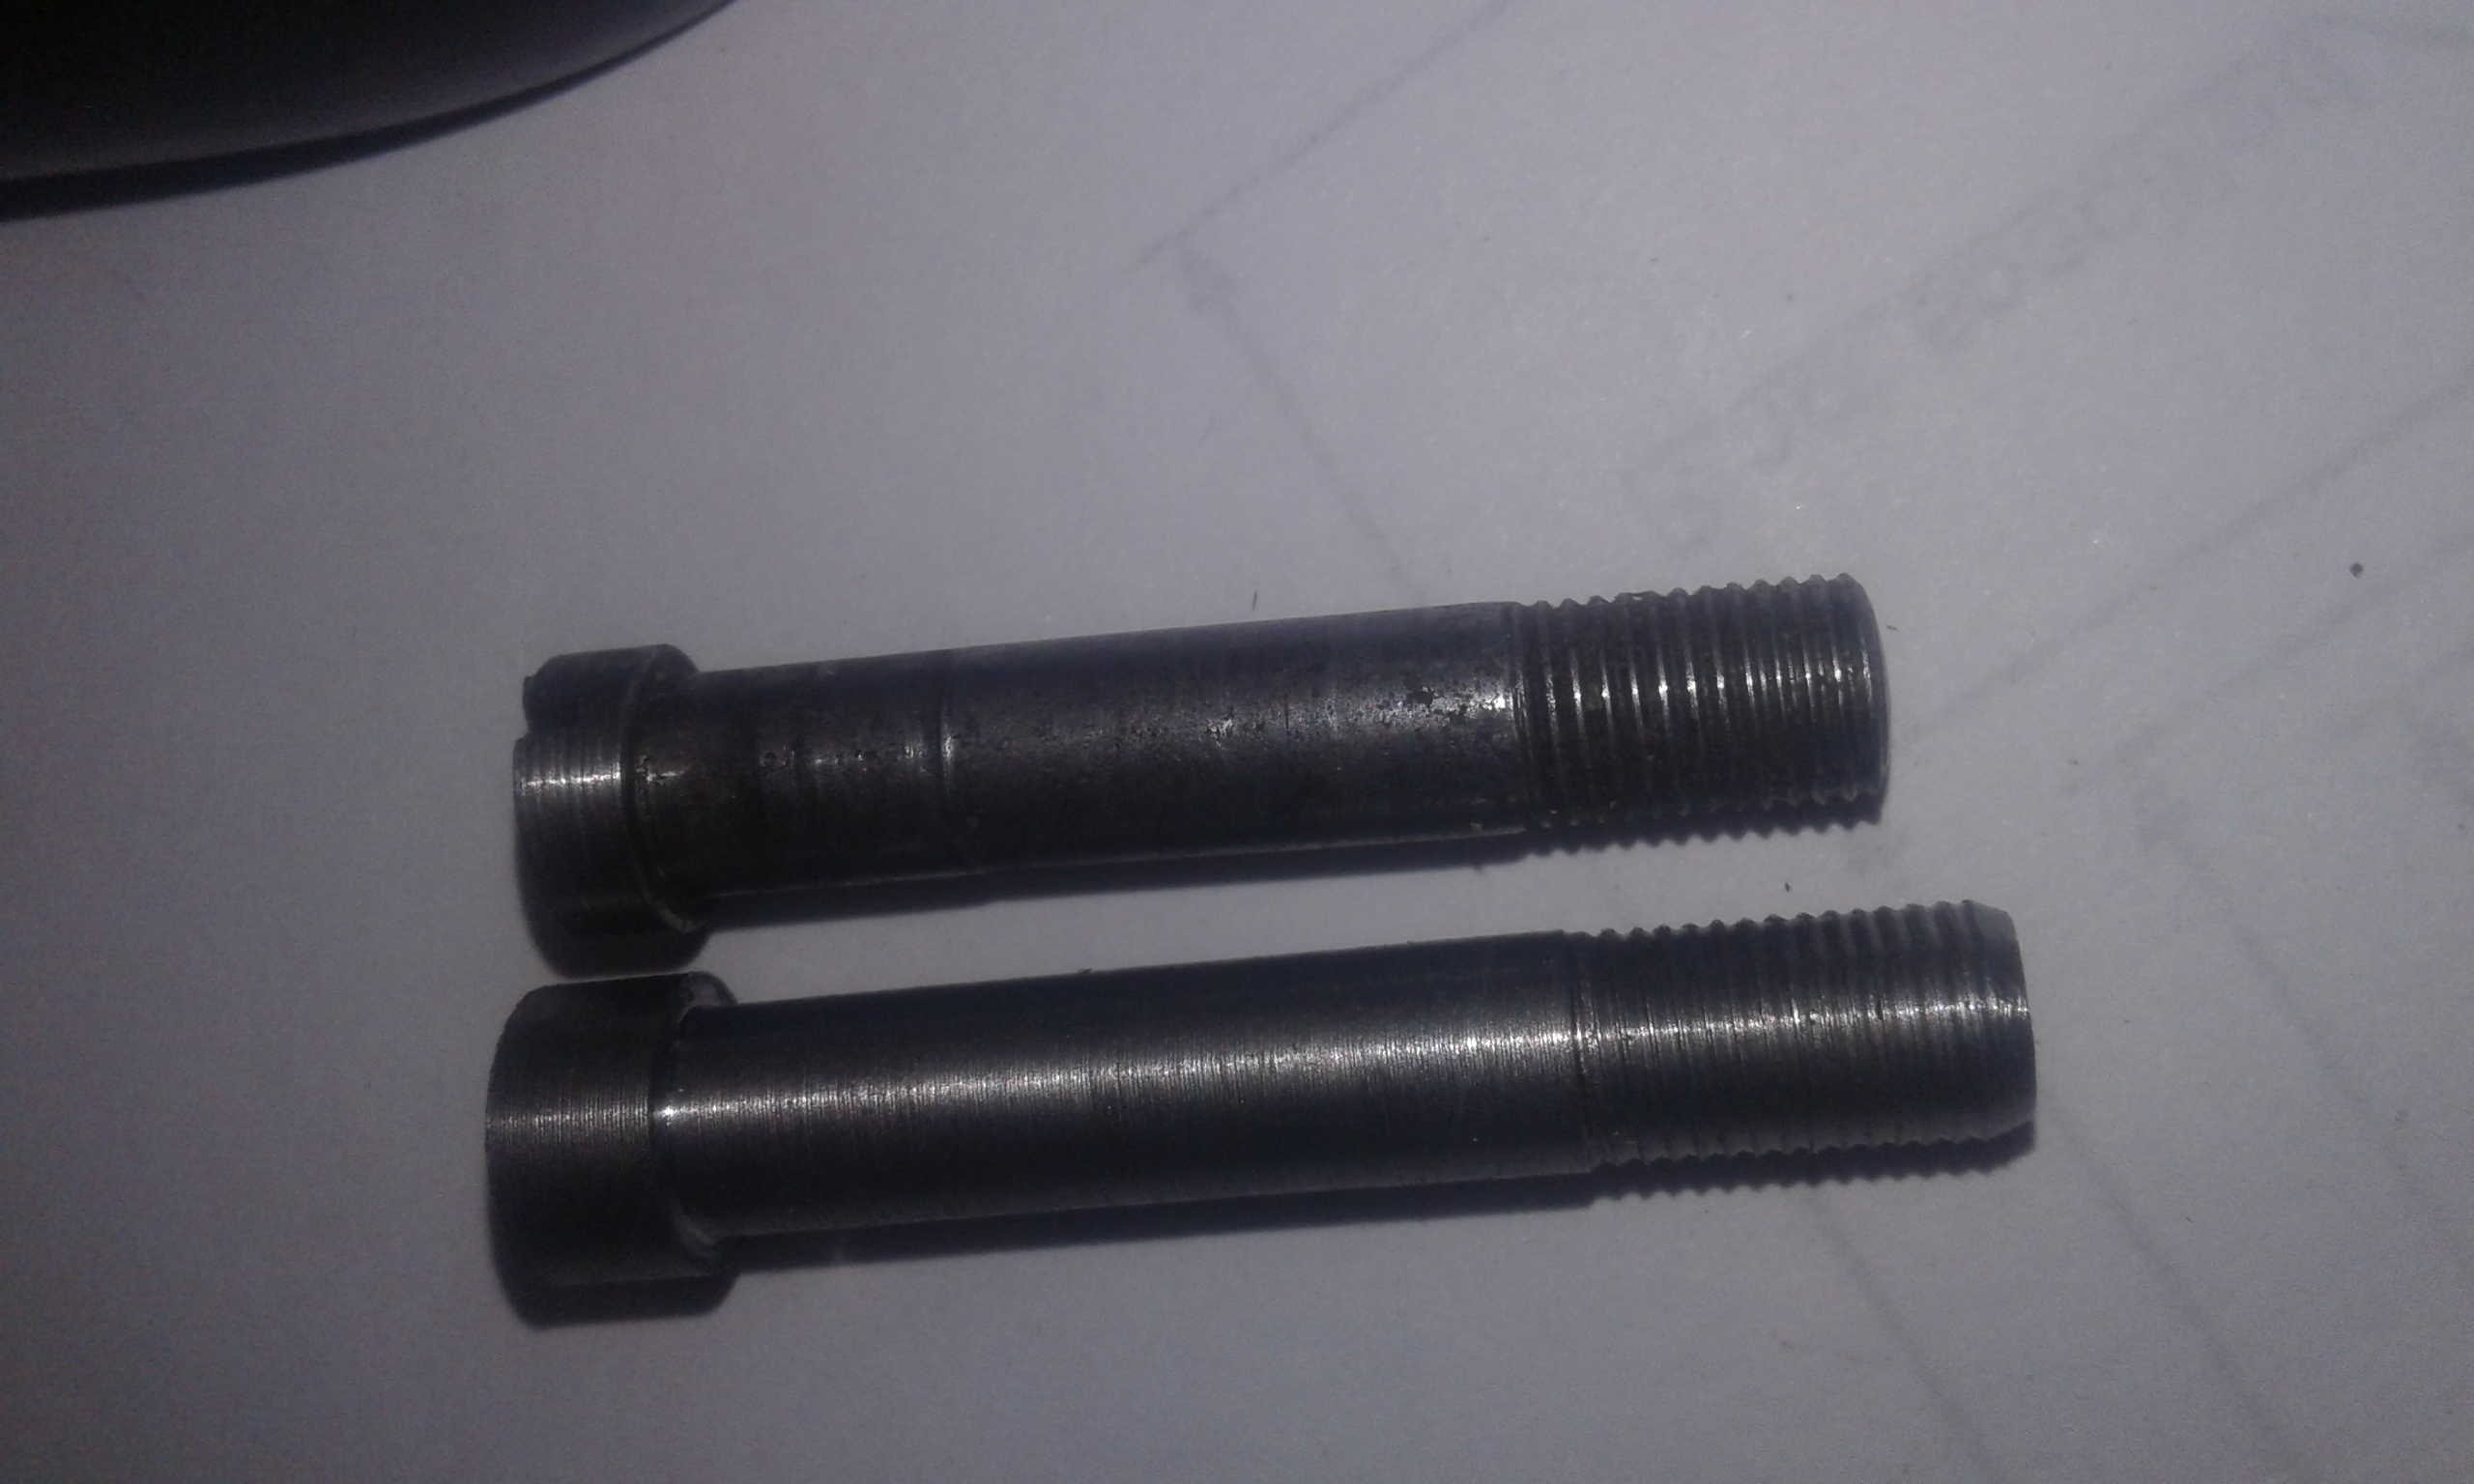
I have made one main lever screw blank from 4340 and scratch cut a 7/32-40 thread so the button die goes on straight
I will make 2 or 3 of these so I can choose the best one when they are hardened and tempered
-
16-10-2022, 04:40 PM #33Member
- Join Date
- Dec 2014
- Location
- canterbury
- Posts
- 5,452
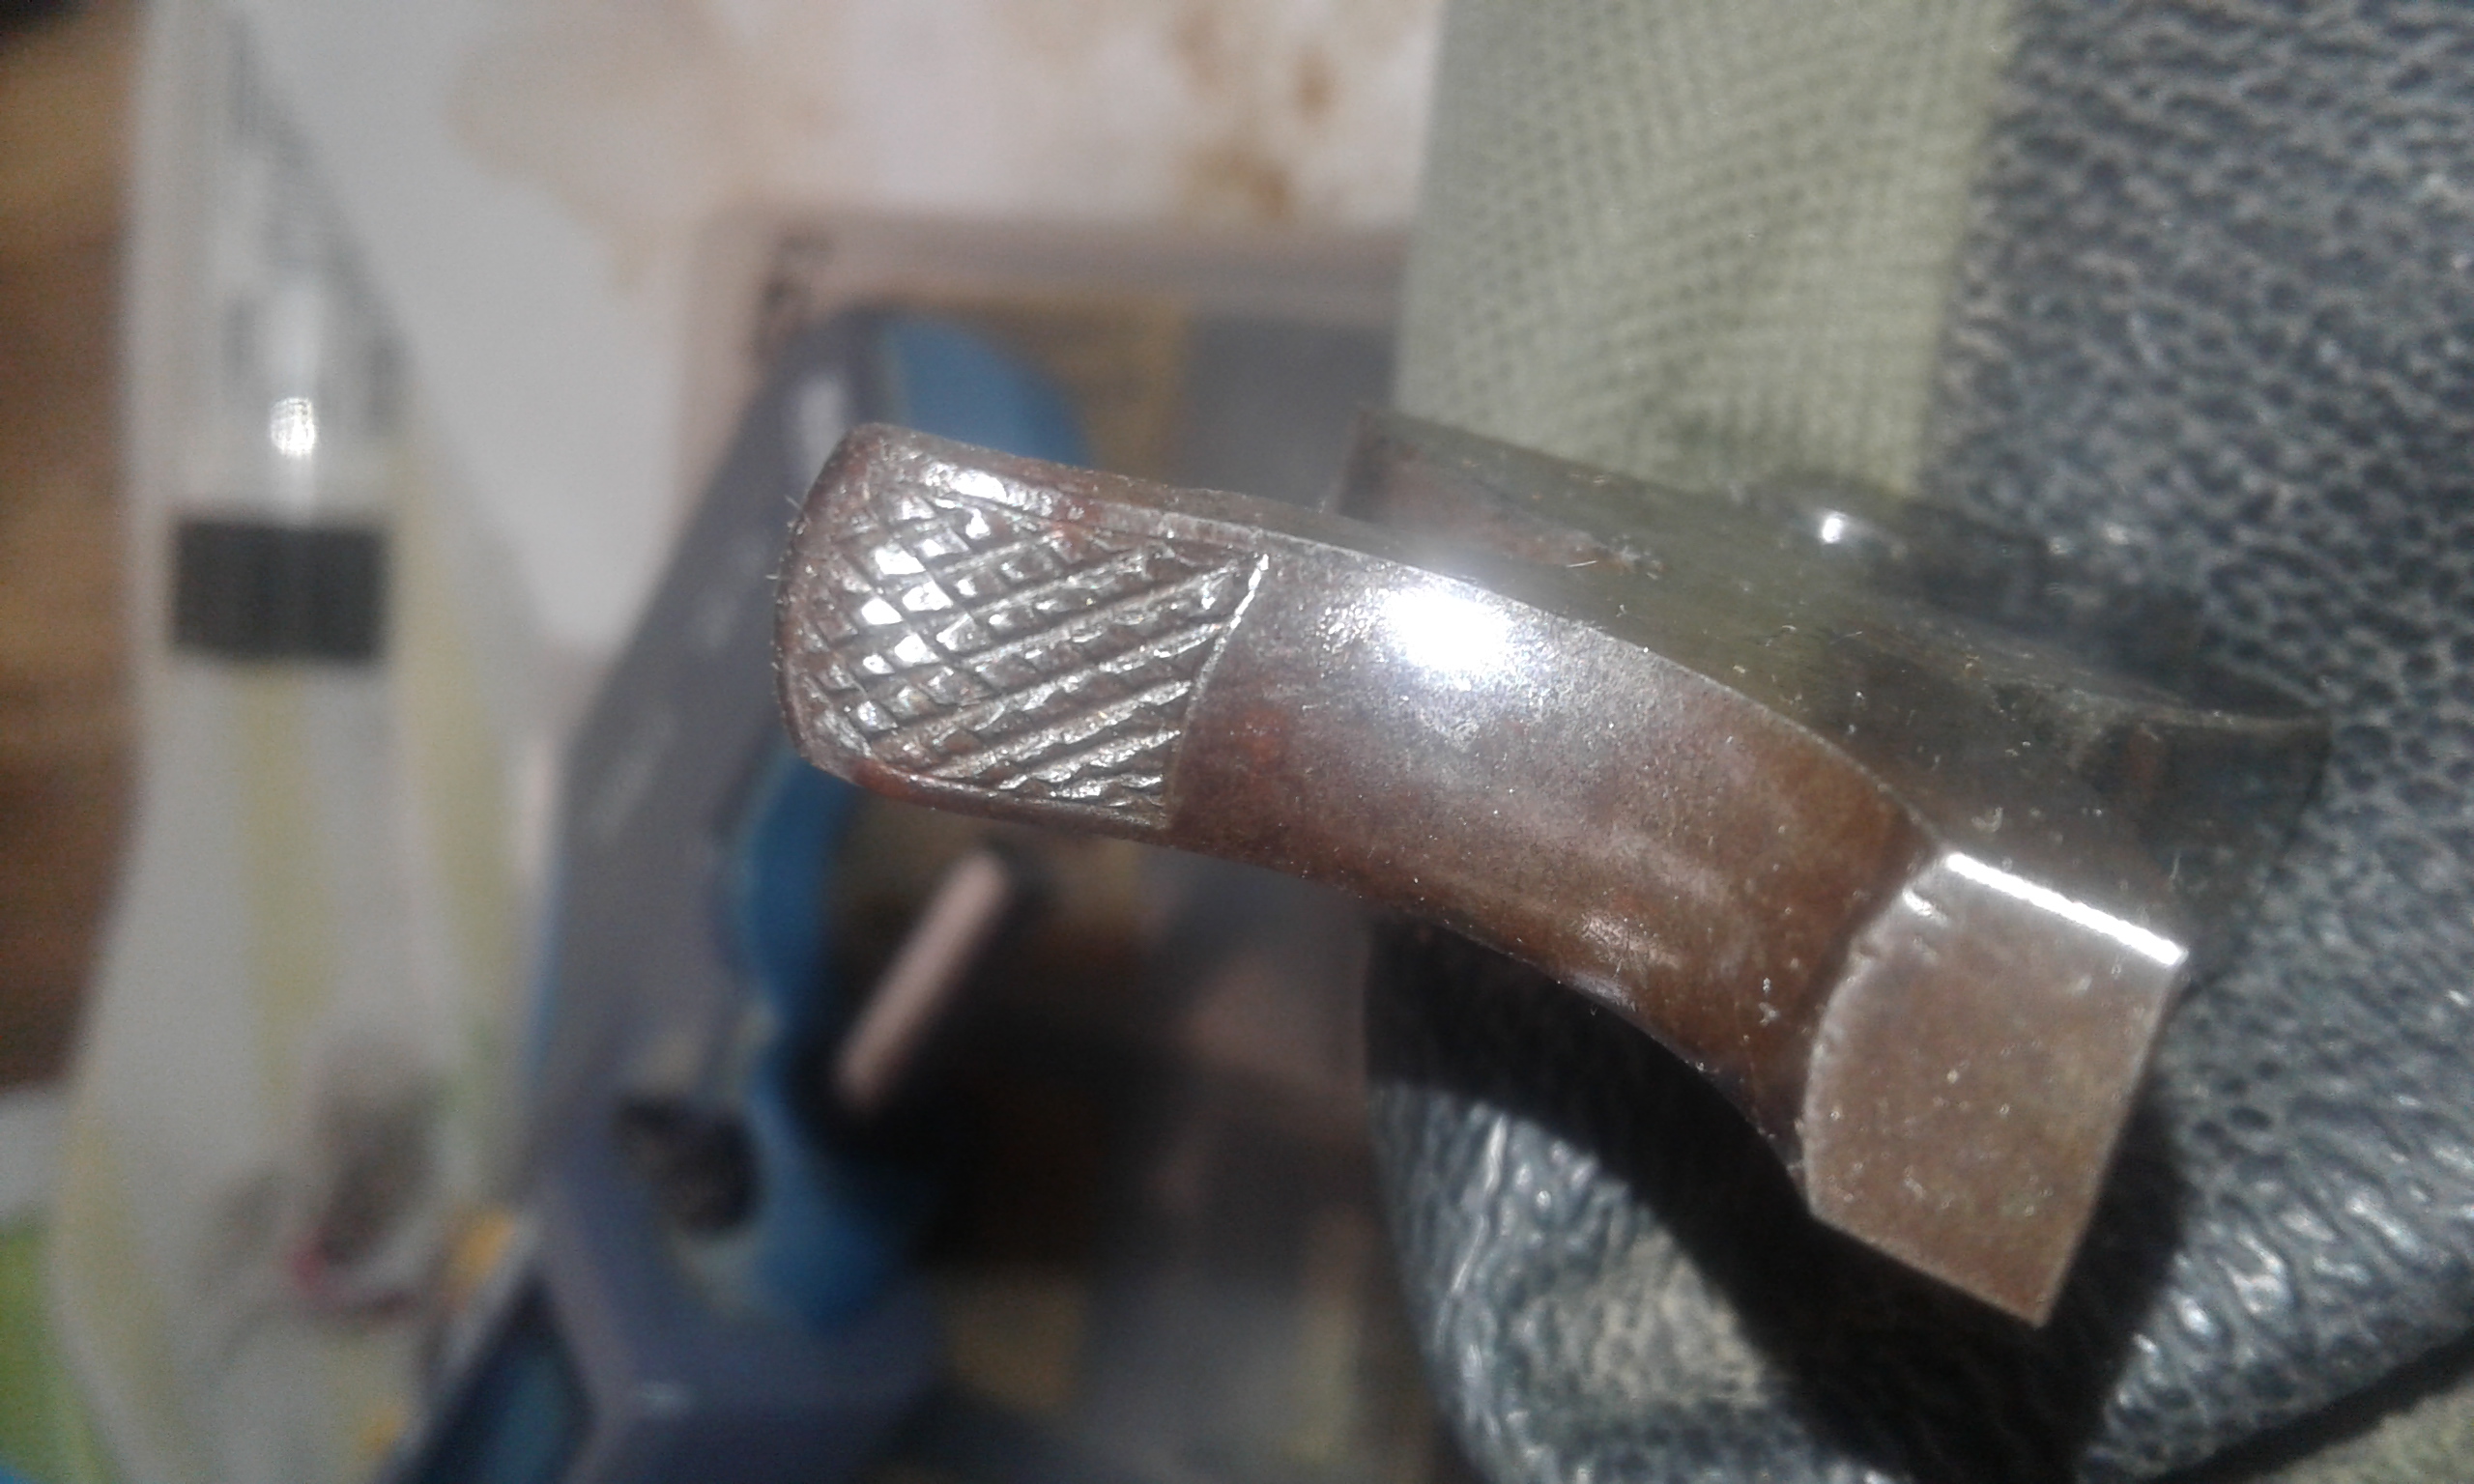
There's a small island of very nice checkering on the hammer cocking piece
It would be a crime to fit a repop without the patina and these details
So slow and steady and use as much of the original parts as possible
-
17-10-2022, 01:11 PM #34Member

- Join Date
- Jul 2021
- Location
- Whangarei
- Posts
- 402
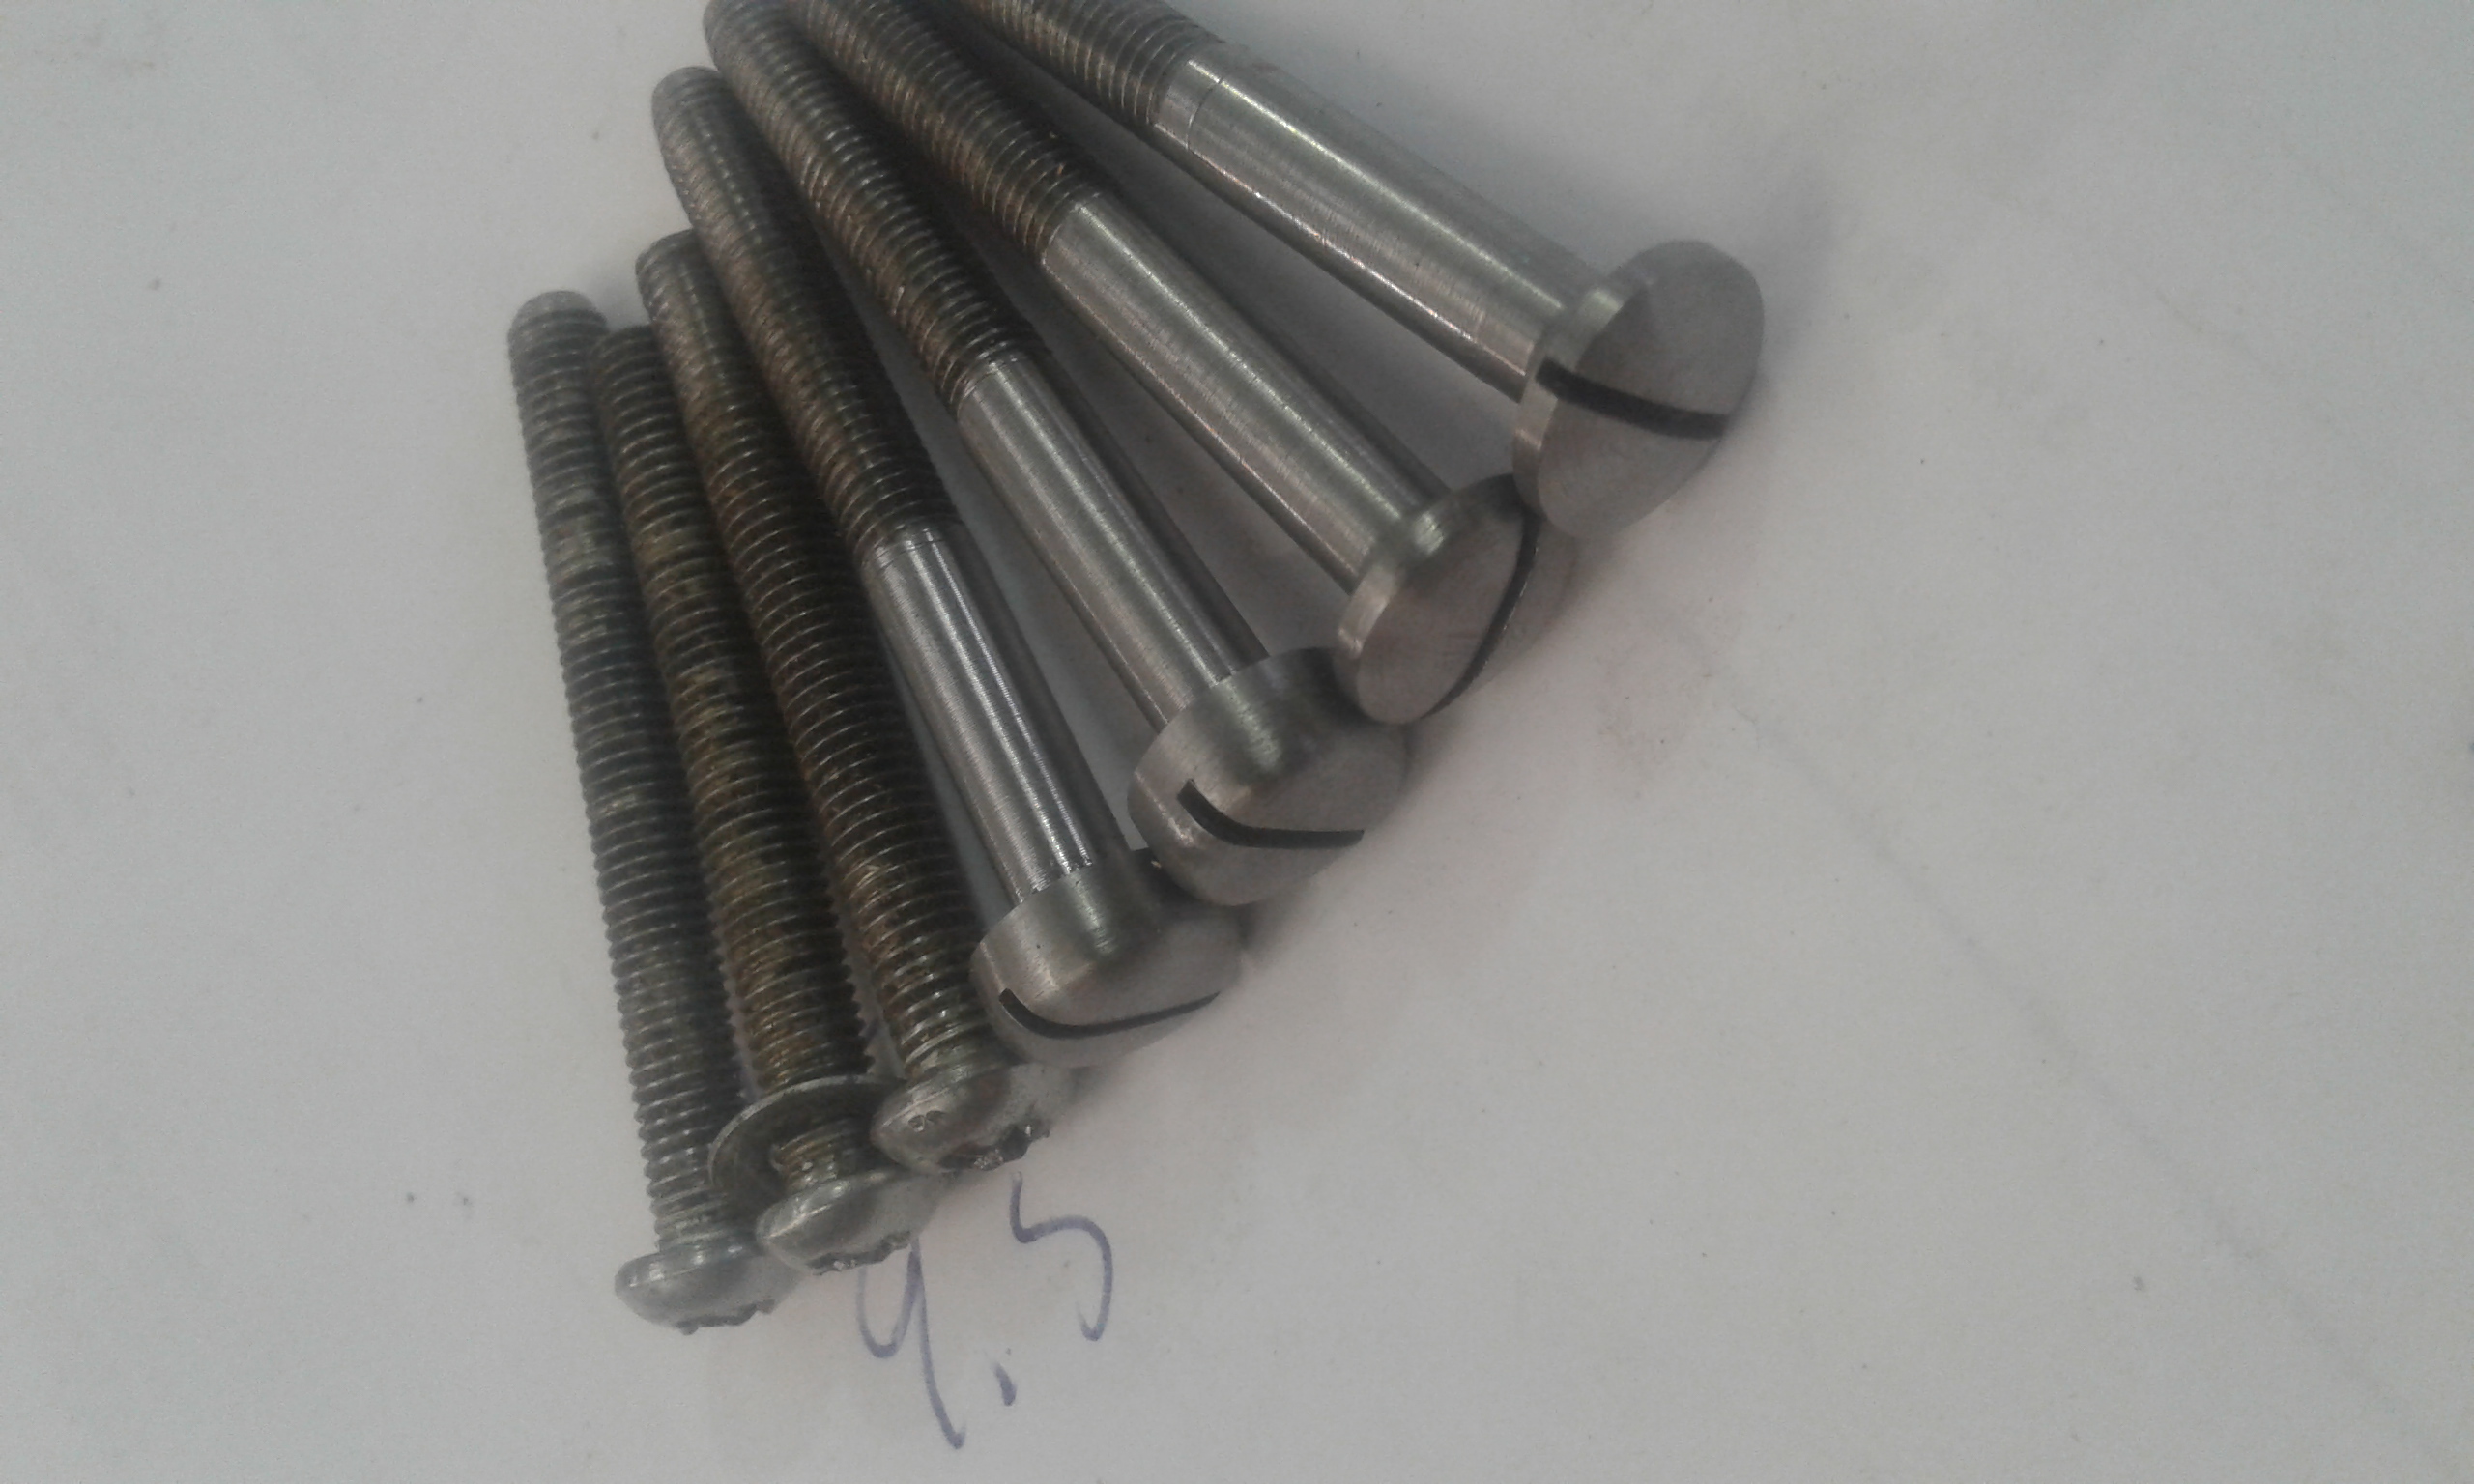
Seeing you making screws reminded me of aa set-up I made a while back to easily make perfect slots in screws. Basically, you mount a drill chuck in a tool holder and use a slitting saw in the chuck. Makes the job quick and easy, repeatable but gives a great job every time.
Don't know about you but I hate to see hand cut screws slots spoiling a good job.
Love what you are doing........ all the bestMicky Duck likes this.
-
17-10-2022, 03:56 PM #35Member
- Join Date
- Dec 2011
- Location
- Te Awamutu
- Posts
- 873
Looks like a neat system. Recently made some M4 blanking screws as I could only find hex head ones which wasn't in fitting with blanking the rear sight screw holes on a replica Sharps. Cut the slot with a thin cutting wheel on a dremel. Scrapped a few before I was happy enough. Luckily had enough M4 screws to get a few goes at it. They were only about 4mm long too. Fiddly! Originally Posted by Fssprecision
Does the slot have a radius in the bottom of it or do you have a mechanism to move the screw up and down?
-
17-10-2022, 03:57 PM #36Member
- Join Date
- Jan 2018
- Location
- kaiapoi
- Posts
- 6,793
Weld it up and retemper it. At the least make up a heat sink and have most of the hammer in that.
I'd be inclined to make some form of bush for it and weld the split when it's in there
Or put a brass rod through it and weld up to that doing little tacks
-
17-10-2022, 04:17 PM #37Member
- Join Date
- Dec 2014
- Location
- canterbury
- Posts
- 5,452
I usually cut my slots with the slitting saw in the milling machine
Same thing different machine
-
17-10-2022, 05:01 PM #38Member
- Join Date
- Jul 2021
- Location
- Whangarei
- Posts
- 402
Yes I just plunge in with the slitting saw, but given the diameter of the saw blade it is minimal. The thing with the drill chuck to hold the screws is that takes just a second to pop another screw blank into place as well.....you could actually do the same with your set up on the mill as well. Originally Posted by Makros
Tricky with the very short ones, I would be tempted to loktite them into something bigger just to give something to hold on to, then a bit of heat to remove and a clean up.
-
17-10-2022, 05:07 PM #39Member
- Join Date
- Jul 2021
- Location
- Whangarei
- Posts
- 402
Sorry not looking to hijack your thread, just sharing the knowledge.
I just remembered that I also made a radius turning jig to cut a nice smooth and consistent rad on the heads.
-
17-10-2022, 06:09 PM #40Member
- Join Date
- Dec 2014
- Location
- canterbury
- Posts
- 5,452
Hi hijacking at all
I was just fishing for reasonable repair strategies from the more technically literate forum membersFssprecision likes this.
-
17-10-2022, 06:09 PM #41Member
- Join Date
- Dec 2014
- Location
- canterbury
- Posts
- 5,452
No hijacking
Micky Duck and Fssprecision like this.
-
17-10-2022, 07:03 PM #42Member
- Join Date
- Nov 2014
- Location
- Central Otago
- Posts
- 2,239
After looking at the photo of the inside of the breechblock I can see no reason why the entire rear face that has cracked out cannot be built up with weld and remachined to increase the rear face by 1.5mm (.060"), rebore the pivot hole, anneal then re-case harden the entire hammer. If you get binding from the mainspring at full cock, then a small radius could be filed (before hardening) at the junction of the two faces to bring back that small area to the original dimension. You would need to do a sketch with accurate dimensions first so you can accurately position the new pivot hole.
Micky Duck likes this.
-
17-10-2022, 08:54 PM #43Member
- Join Date
- Dec 2014
- Location
- canterbury
- Posts
- 5,452
That's pretty well what Mr Vulcan and I came up with in the weekend Originally Posted by gundoc
Now I need to sit down with my welding guru and see how he would approach it
What's not so obvious it it's a surprisingly small hammer with a small diameter pivot screw
With a very powerful main spring that has quite a static weight
I guess that's why the Ballards were legendary target riflesMicky Duck likes this.
-
17-10-2022, 10:49 PM #44Member
- Join Date
- Nov 2014
- Location
- Central Otago
- Posts
- 2,239
Ha! Great minds etc.
 Micky Duck likes this.
-
17-10-2022, 11:35 PM #45Member
- Join Date
- Dec 2021
- Location
- Tauranga
- Posts
- 4,045
A pump repair I had to do a while back looked something like that - couple of pins cracked and flogged out which prevented the parts engaging correctly and the end result was a timing issue that locked the thing up. Different machine but similar fault be the looks of it.
The repair was to pin the part down hard, put a mill through the pin bores and sleeve the holes to the correct dimension with a polished hardened sleeve. The edges of the carrier plate were carefully welded up by a tig maestro with something tough as a filler, with heat control measures taken to not alter the hardened gear forming the center of the carrier. Then after the carrier was welded, the holes were machined out using a bloody expensive cobalt mill and the sleeves were pressed in with never move (tm) retaining poo. The sleeves were about an inch wide (bloody thing was all imperial) and once in place the sleeves were ground down to the required thickness - ground once in place made them a lot easier to hang onto and the assembly acted as the heat sink for the sleeves... Worked, and meant that the pump was out of service for a couple of days or so rather than several weeks while the 'correct' part was made wherever the thing came from.
I hate bores with thin walls on one side - it's always a place of failure and always ends up swelling out at a crack where it's thinnest which takes everything out of alignment. We can do better with design by just not removing so much meat around pins!Moa Hunter likes this.


 Reply With Quote
Similar Threads
-
Another SMLE restoration
By dogmatix in forum Projects and Home BuildsReplies: 21Last Post: 28-04-2021, 08:10 PM
Tags for this Thread
 Posting Permissions
- You may not post new threads
- You may not post replies
- You may not post attachments
- You may not edit your posts
Welcome to NZ Hunting and Shooting Forums! We see you're new here, or arn't logged in. Create an account, and Login for full access including our FREE BUY and SELL section Register NOW!!
All times are GMT +13. The time now is 04:23 PM.

Bookmarks