

 26Likes
 LinkBack URL
 About LinkBacks
With the summer season approaching I decided it was time to have a crack at building an electric Kontiki.
Most of the parts you can buy. You can make it as complicated or as simple as you like. Mine will be relatively basic. Motor at front. The line off back.
I purchased the following.
30lb thrust motor
Magnetically controlled timer from bullet fishing
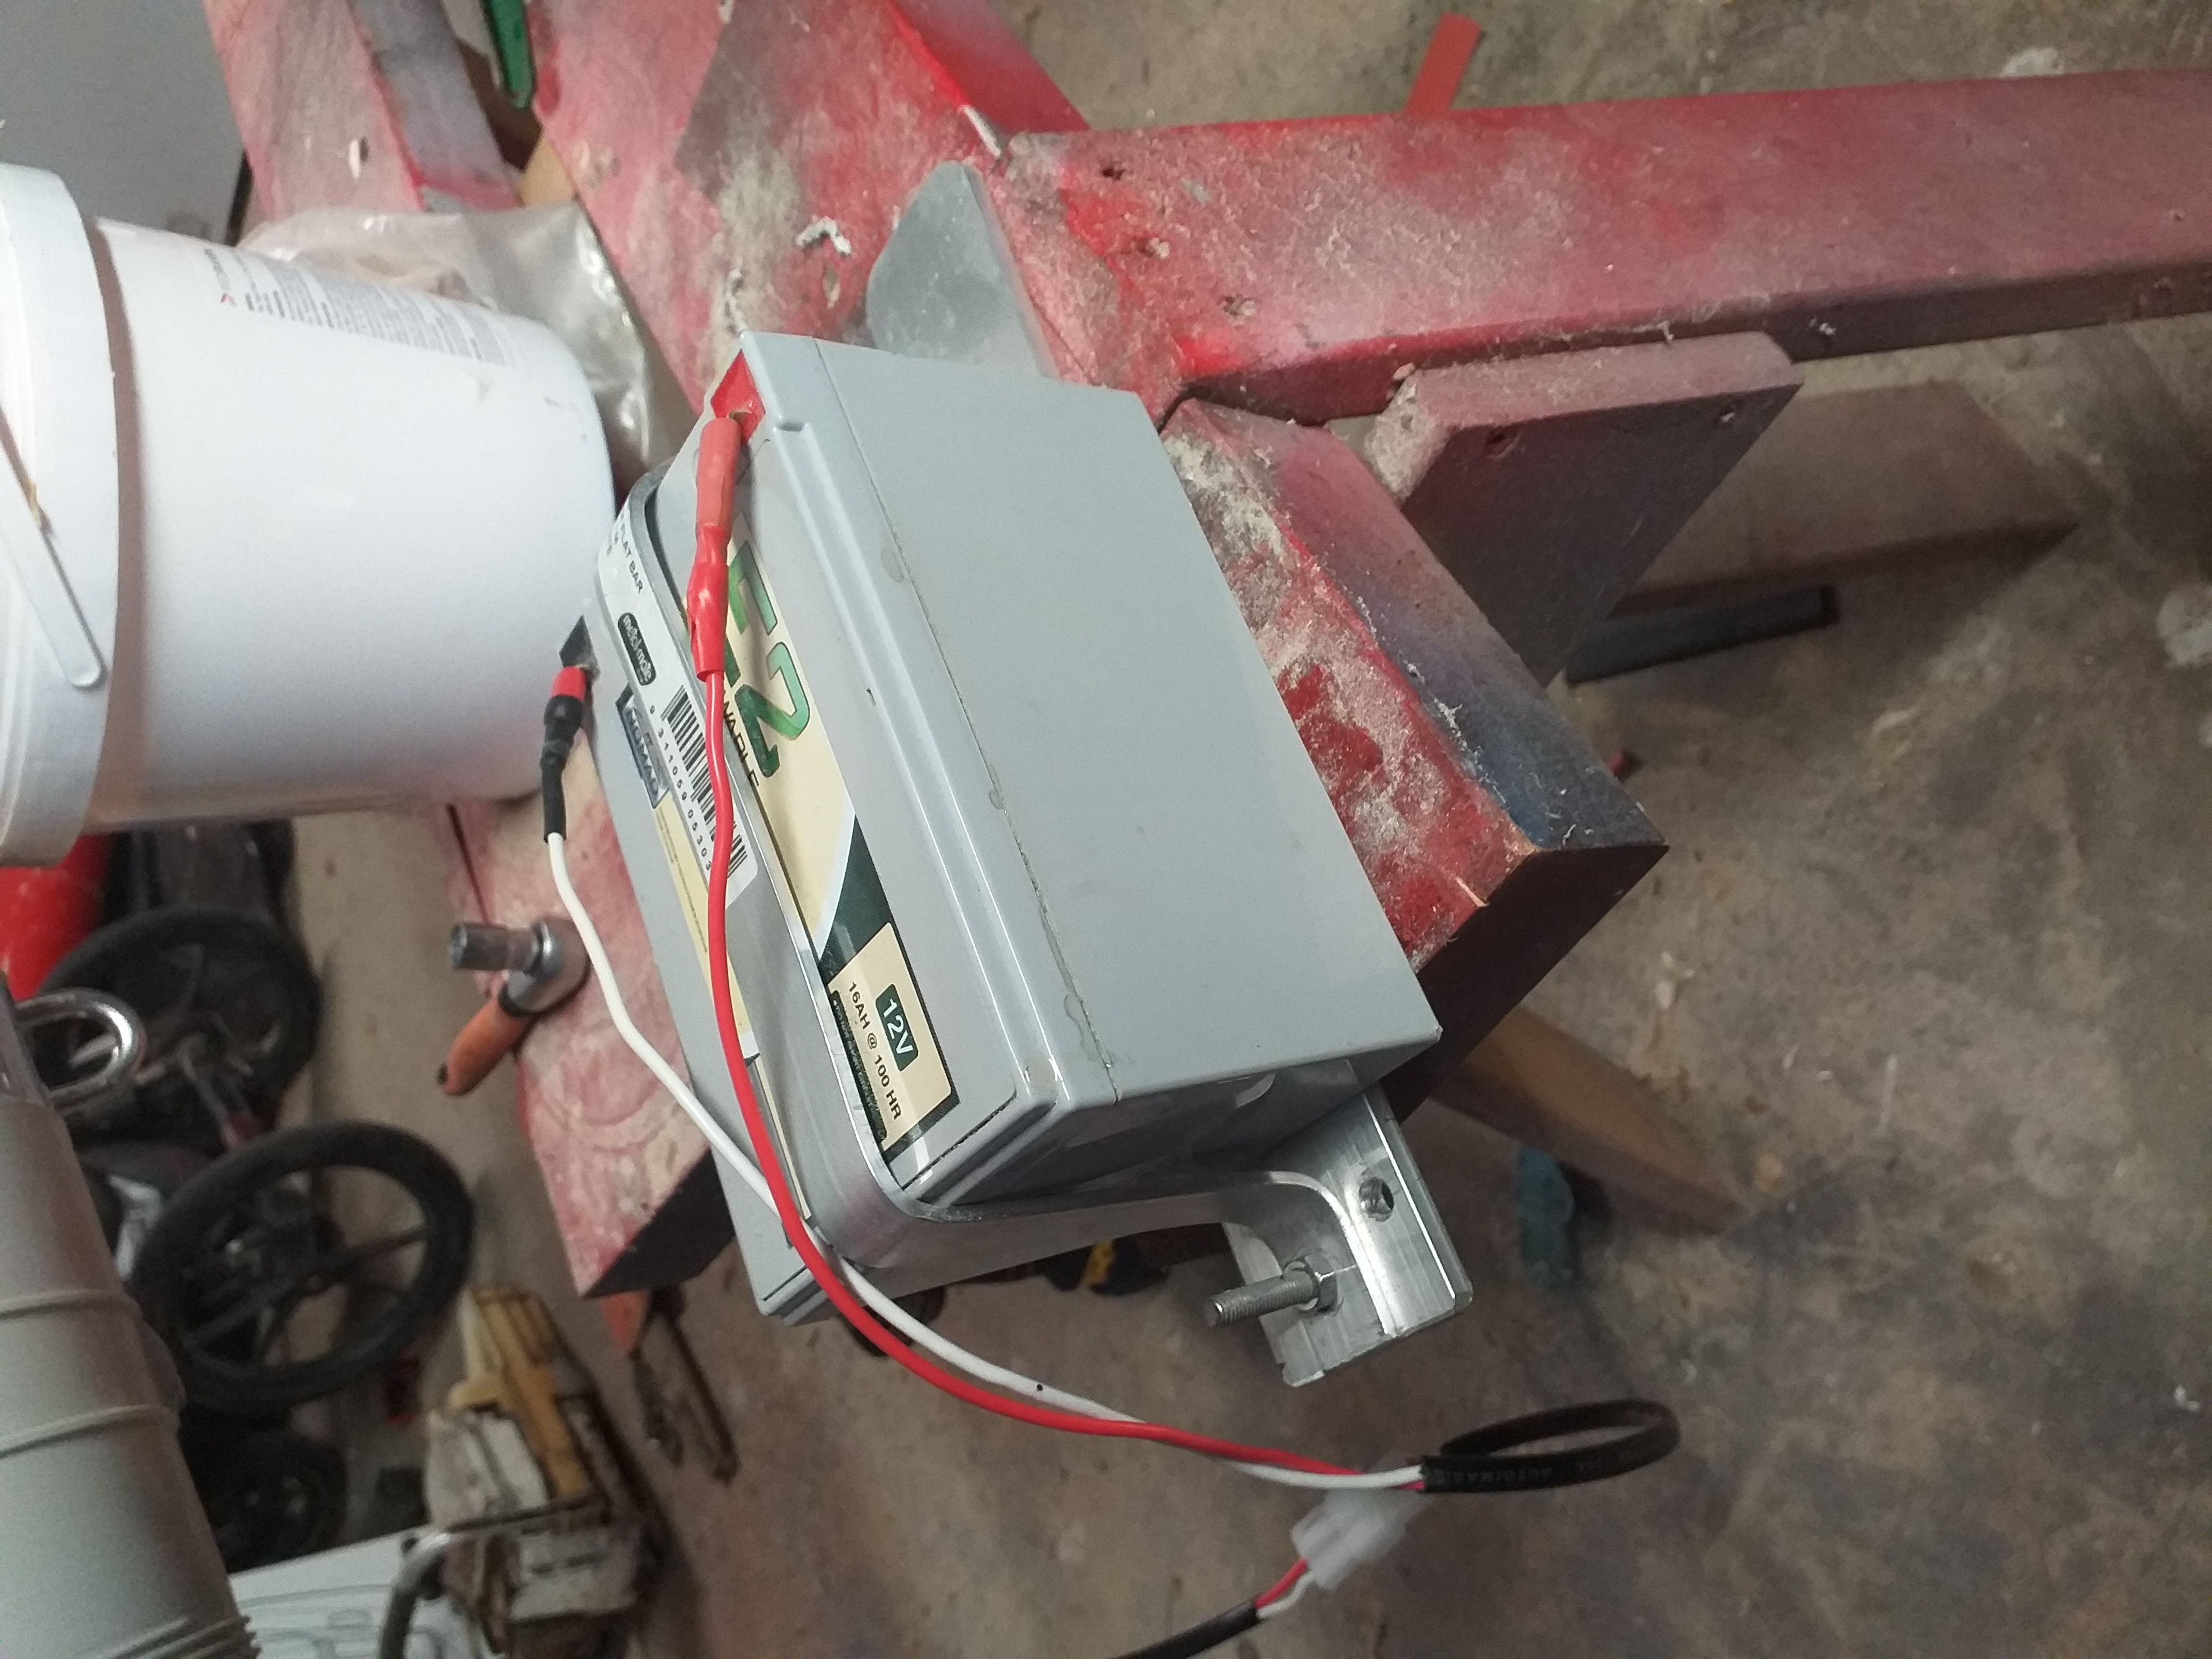
12v 16amp battery
Connectors
Dual core wire
Stainless fittings
1m 150mm pvc pipe with screw end Cap
Gorilla expanding foam
Norski fibreglass kit.
Flag
Strobe light
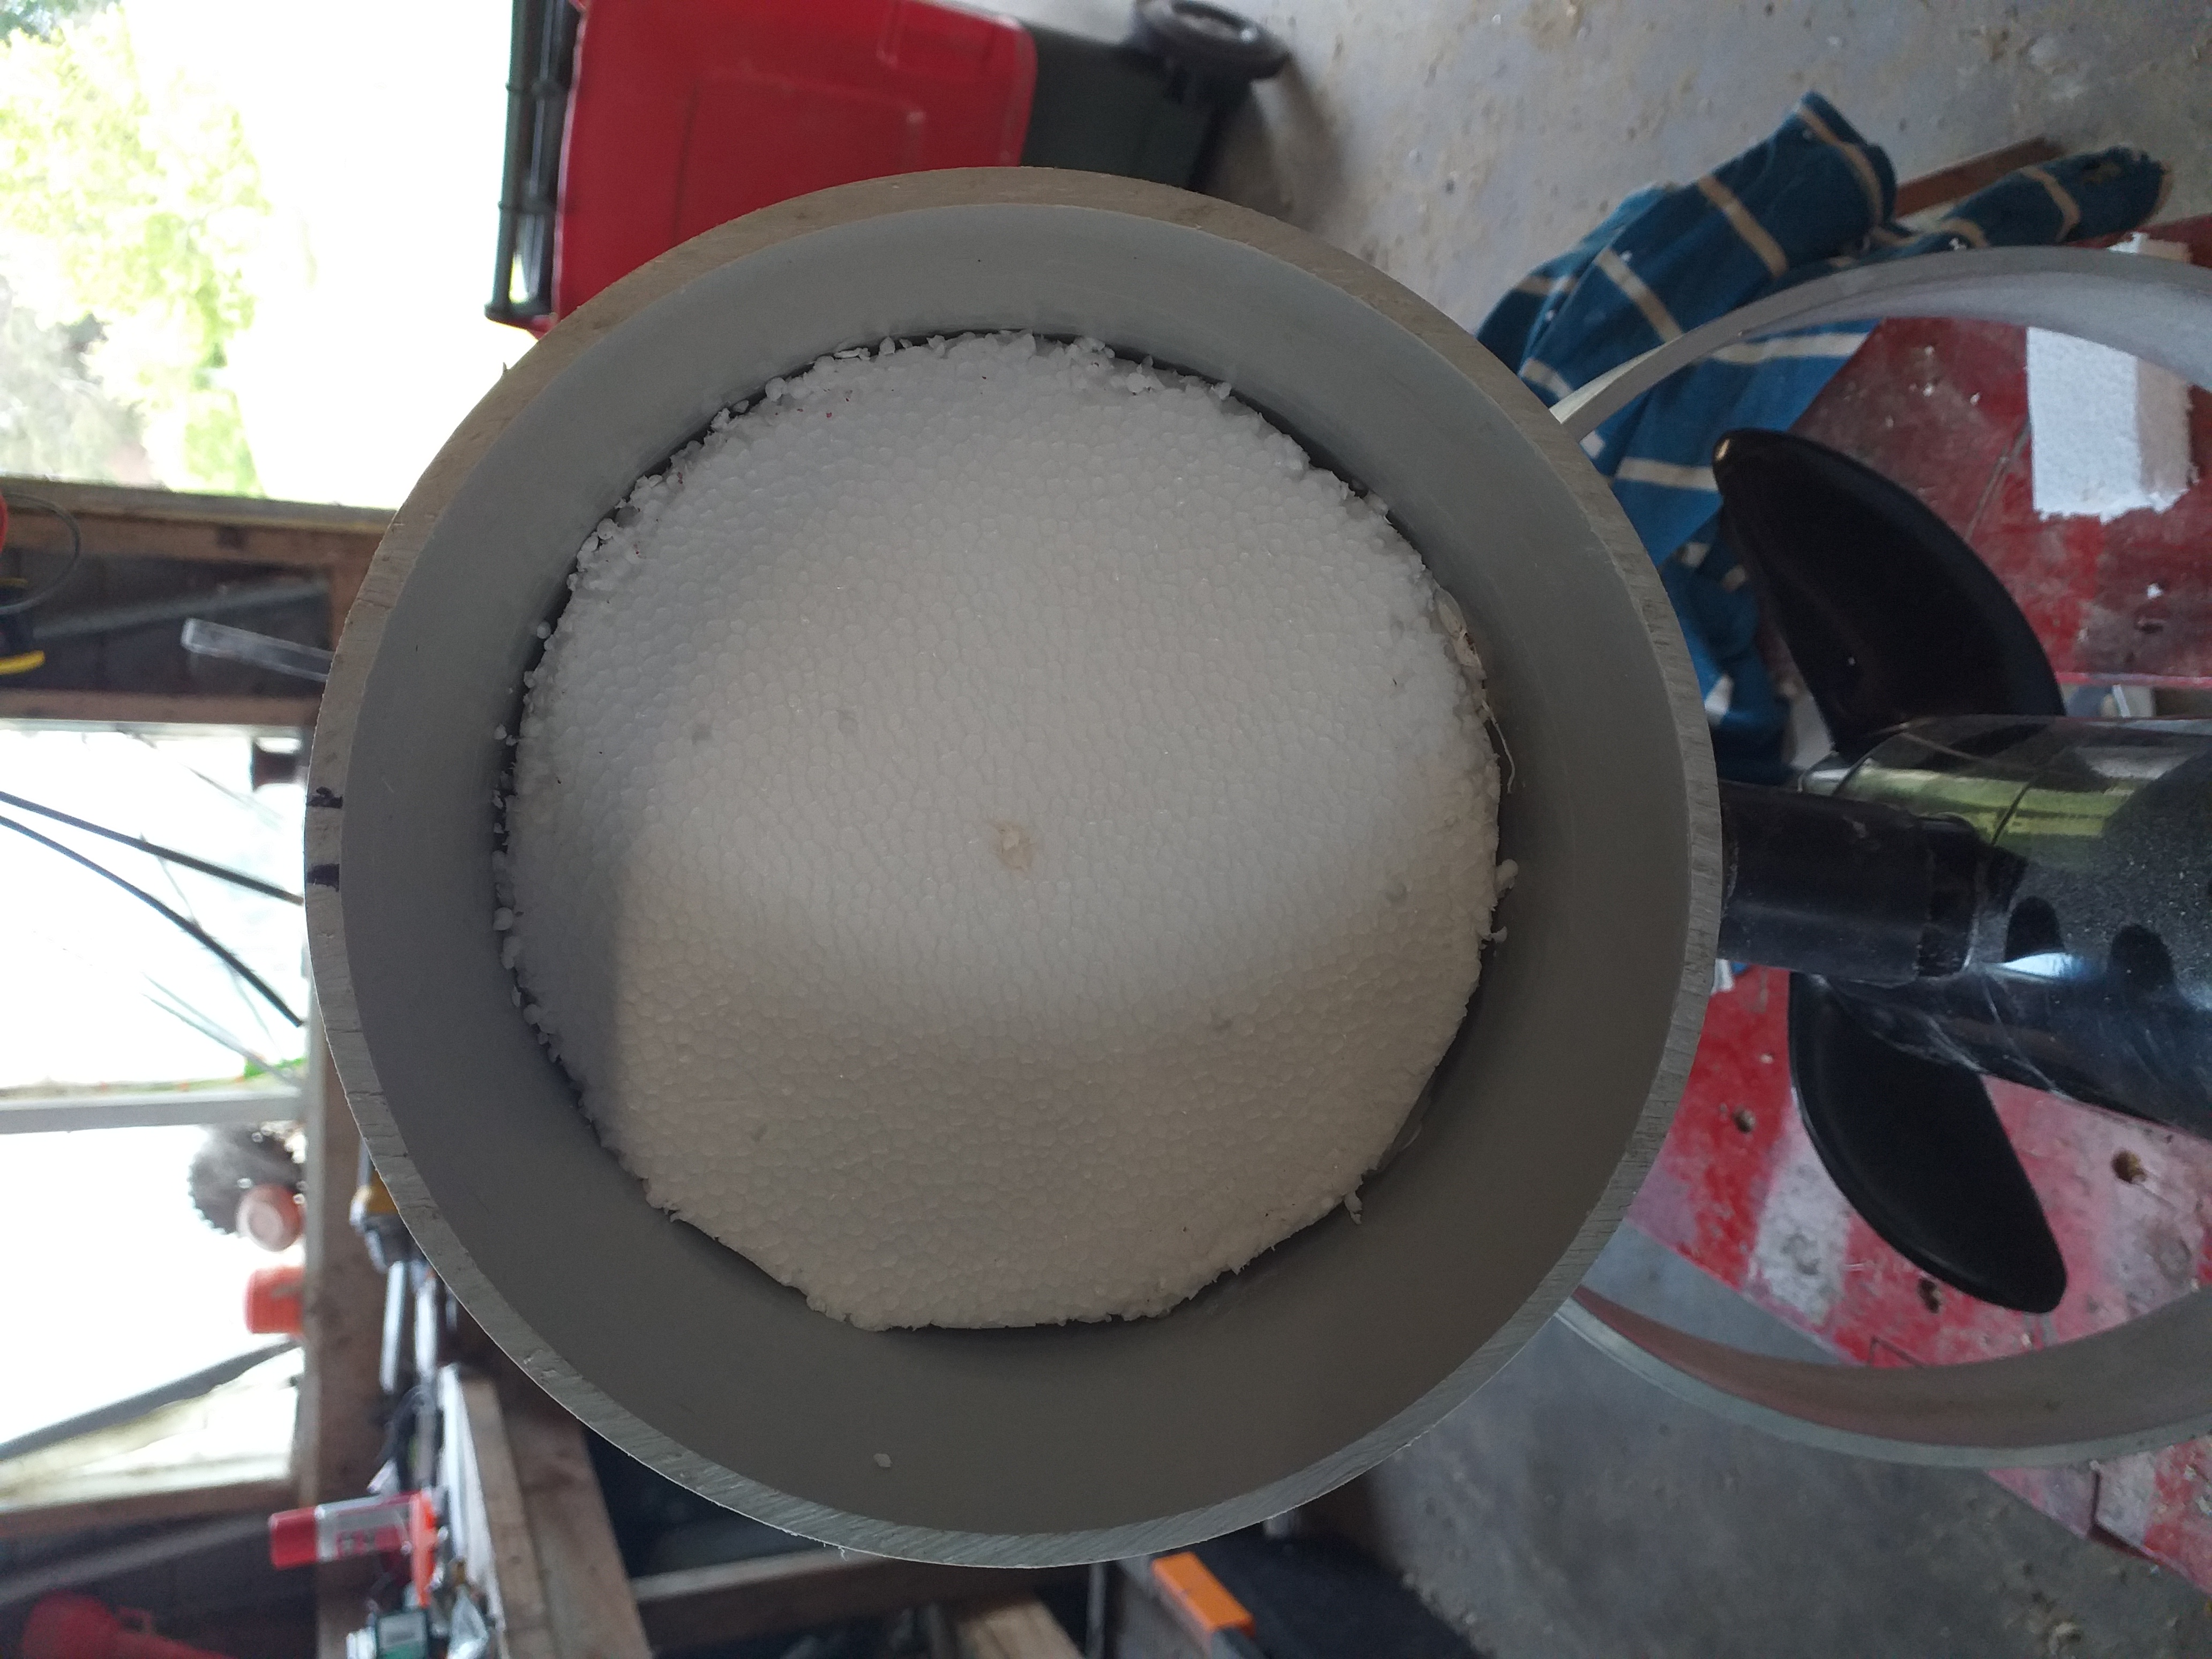
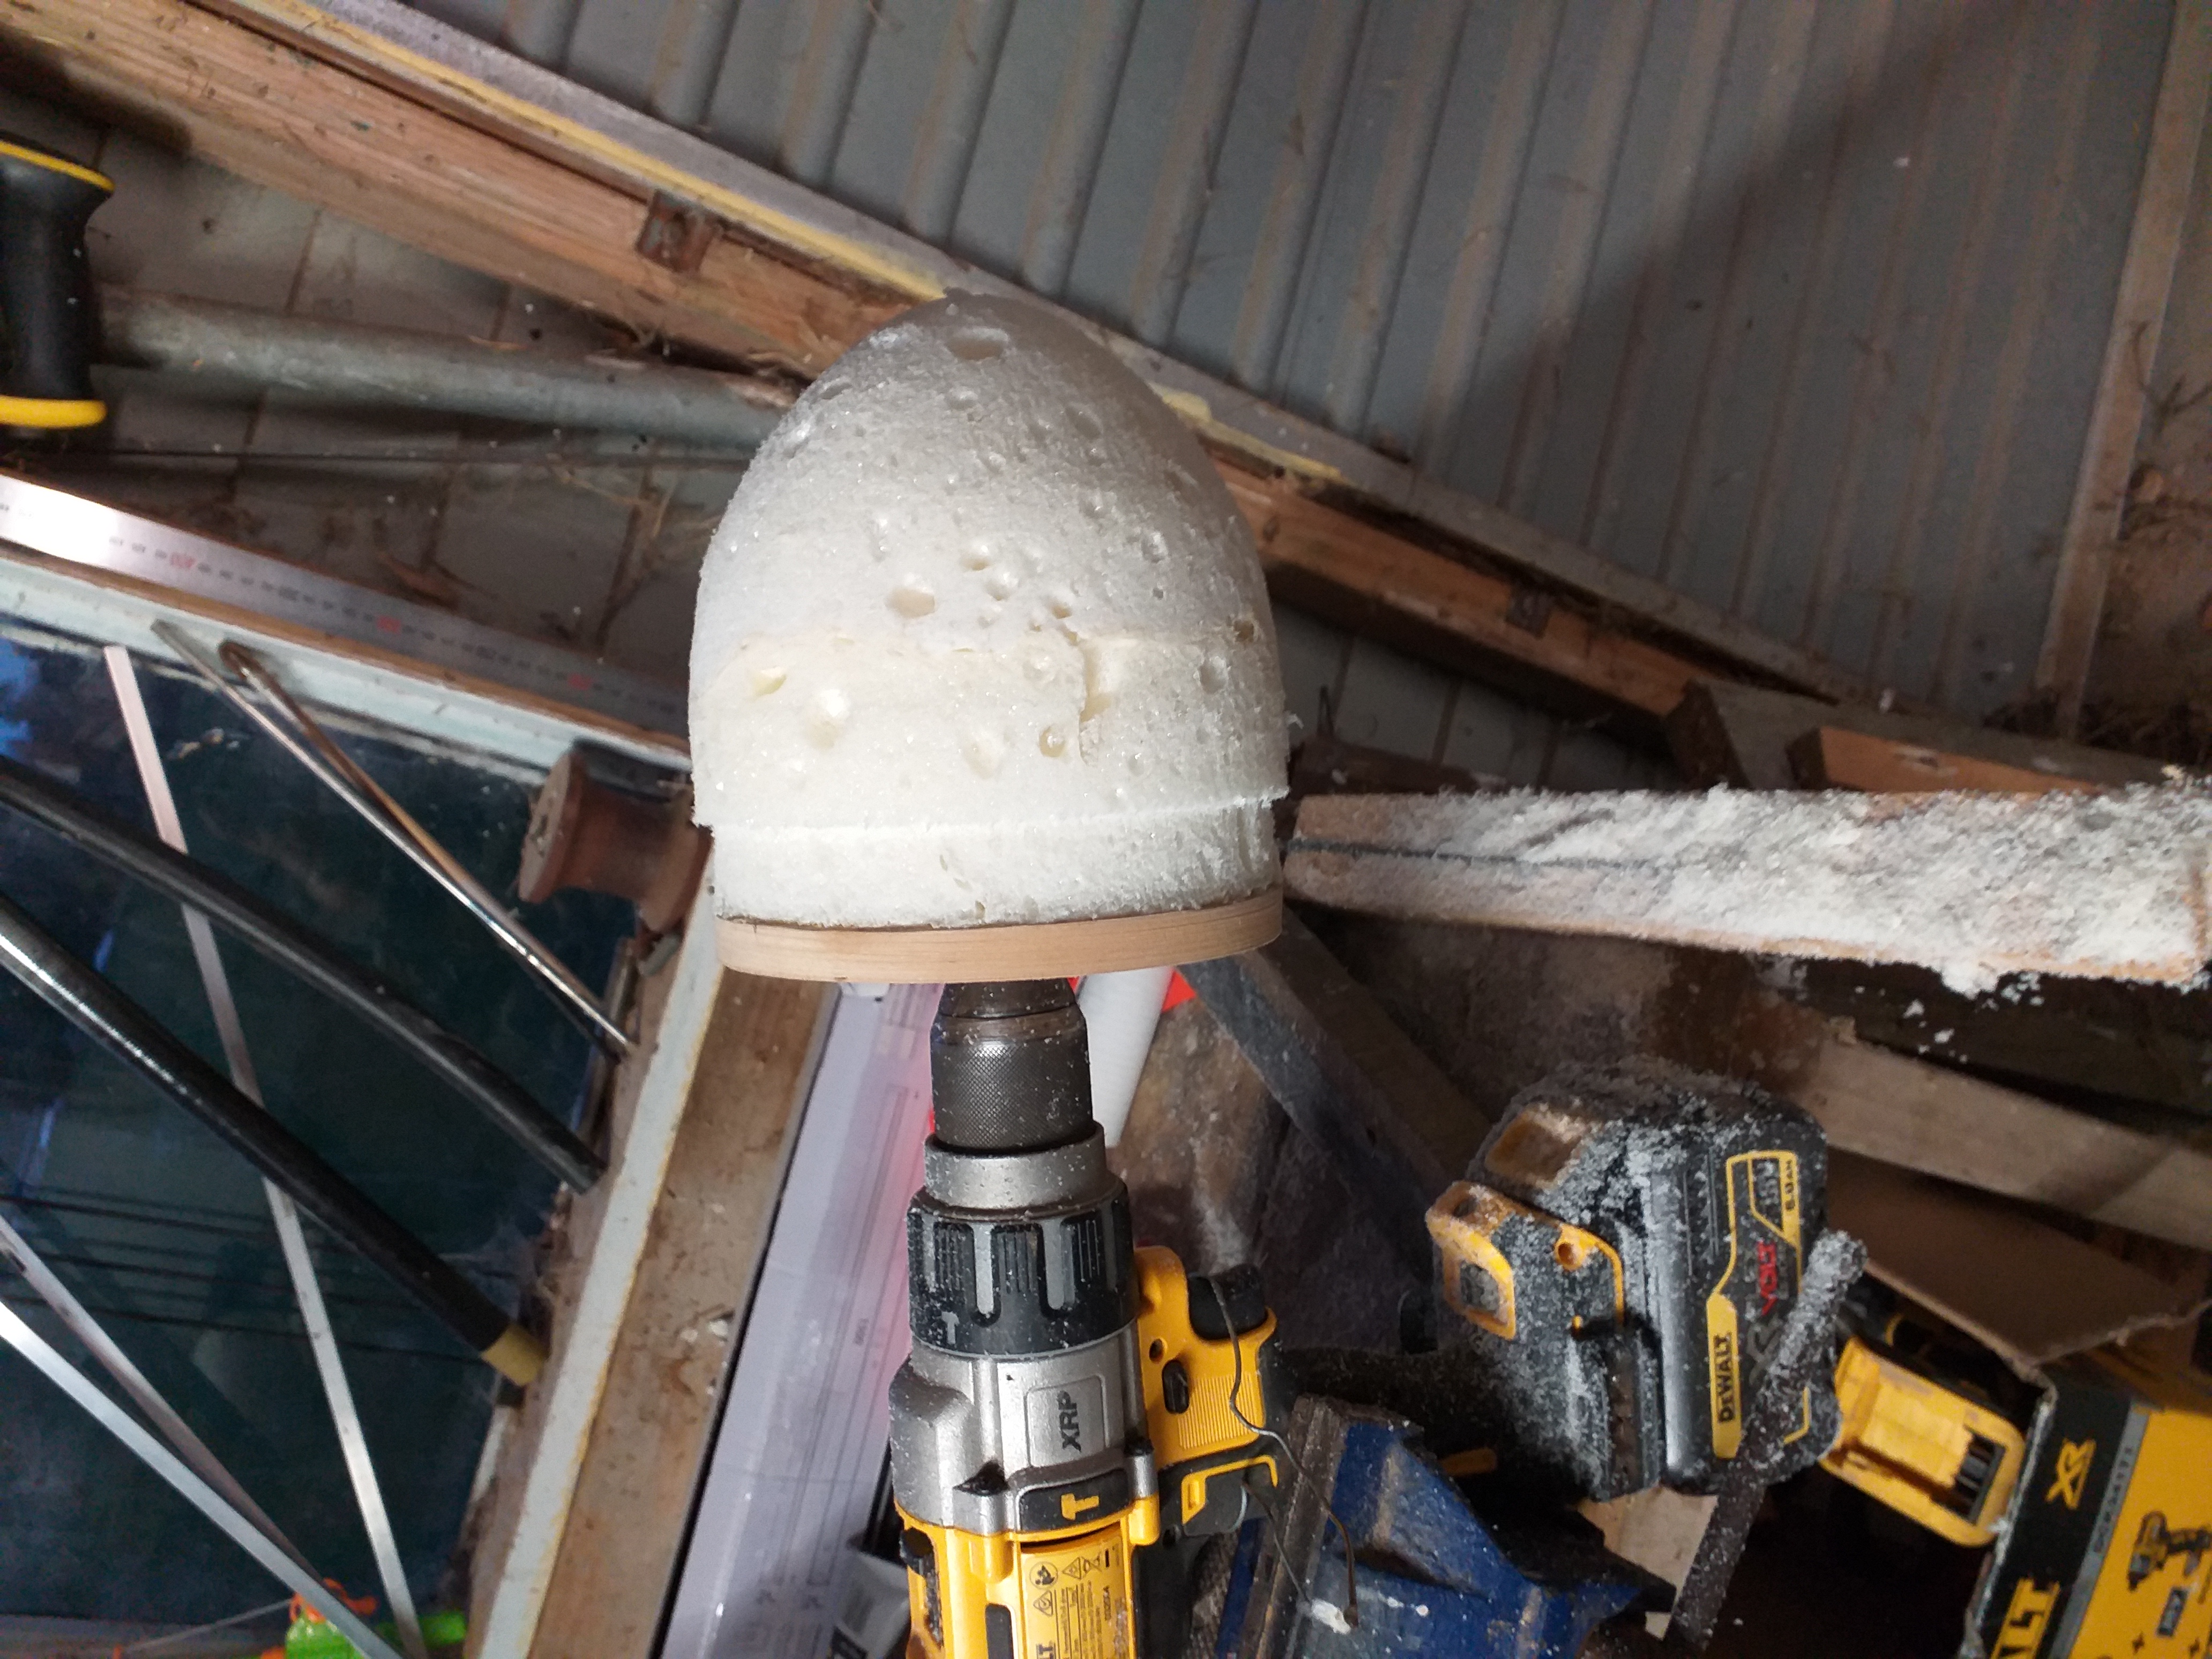
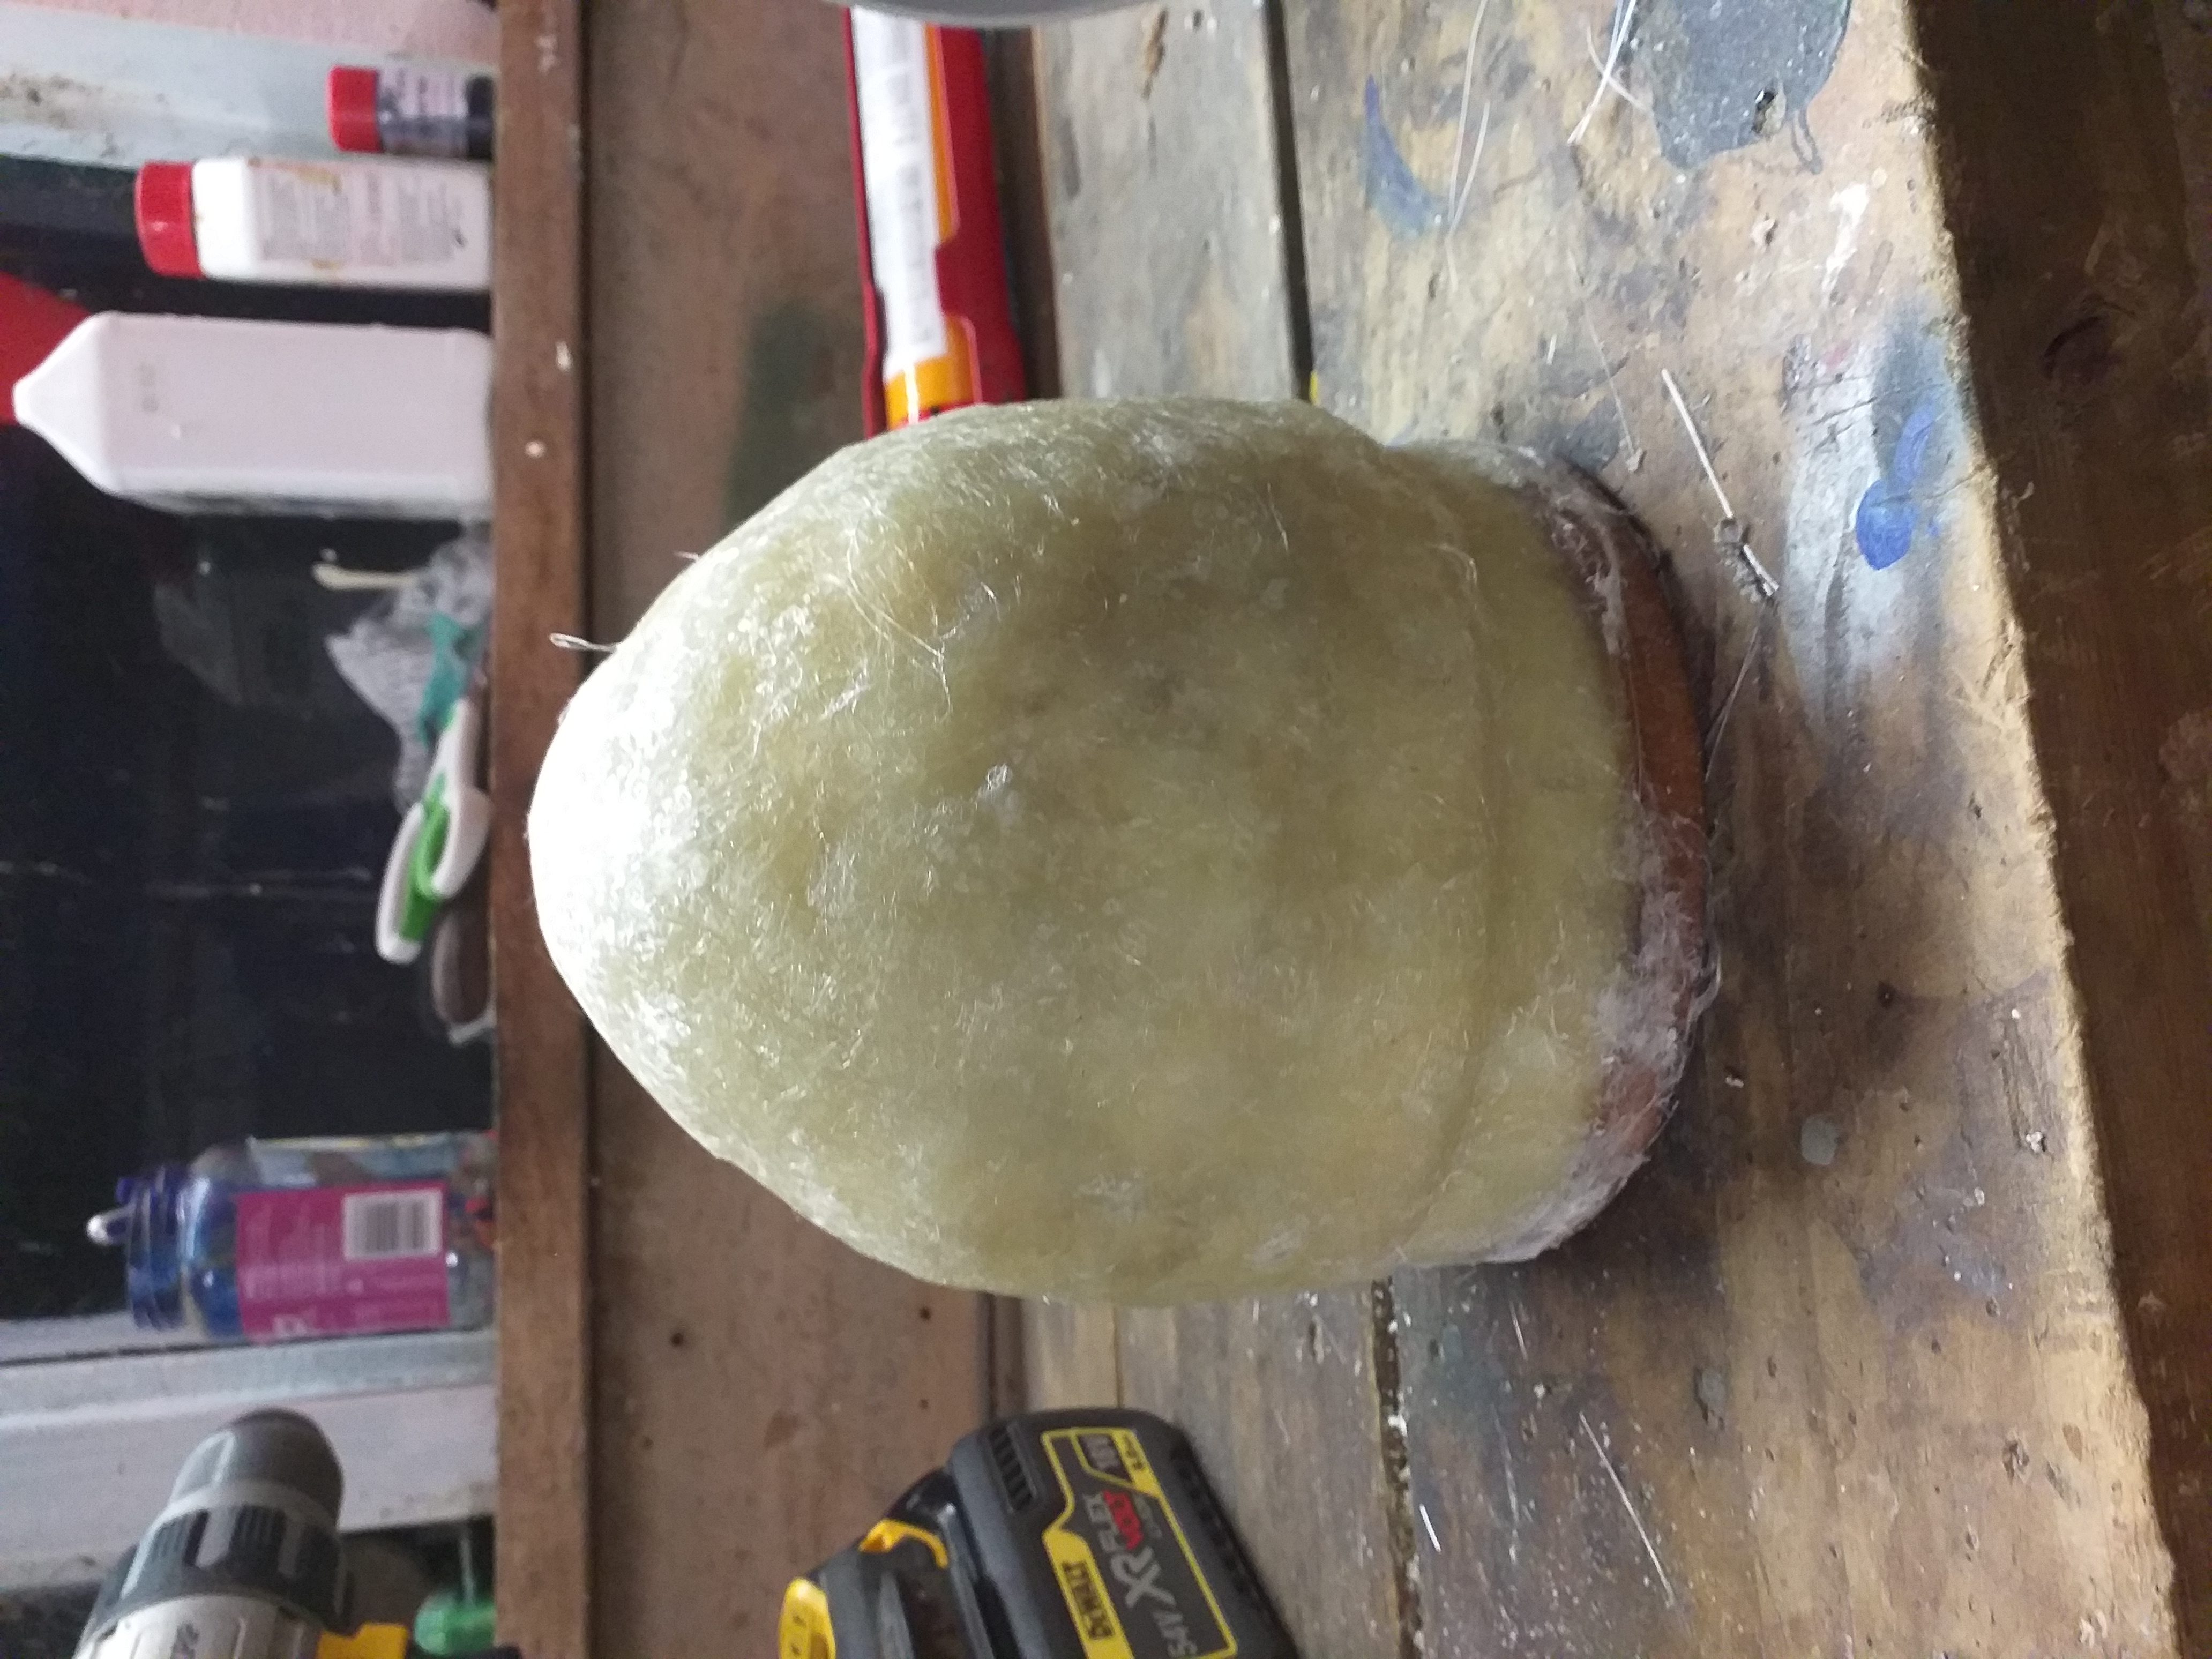
First step was to cut a disk of timber to internal diameter of the tube. Then pile on a heap of expanding foam. Once it has set carve it into a rough cone shape. I then fitted a screw to the centre and held in the drill and turned into a cone using a file and then sand paper and fibreglass over the top.
I cut a recess into the cone to allow for fibreglass to fit into the main tube rather then just buy to the front for greater strength.
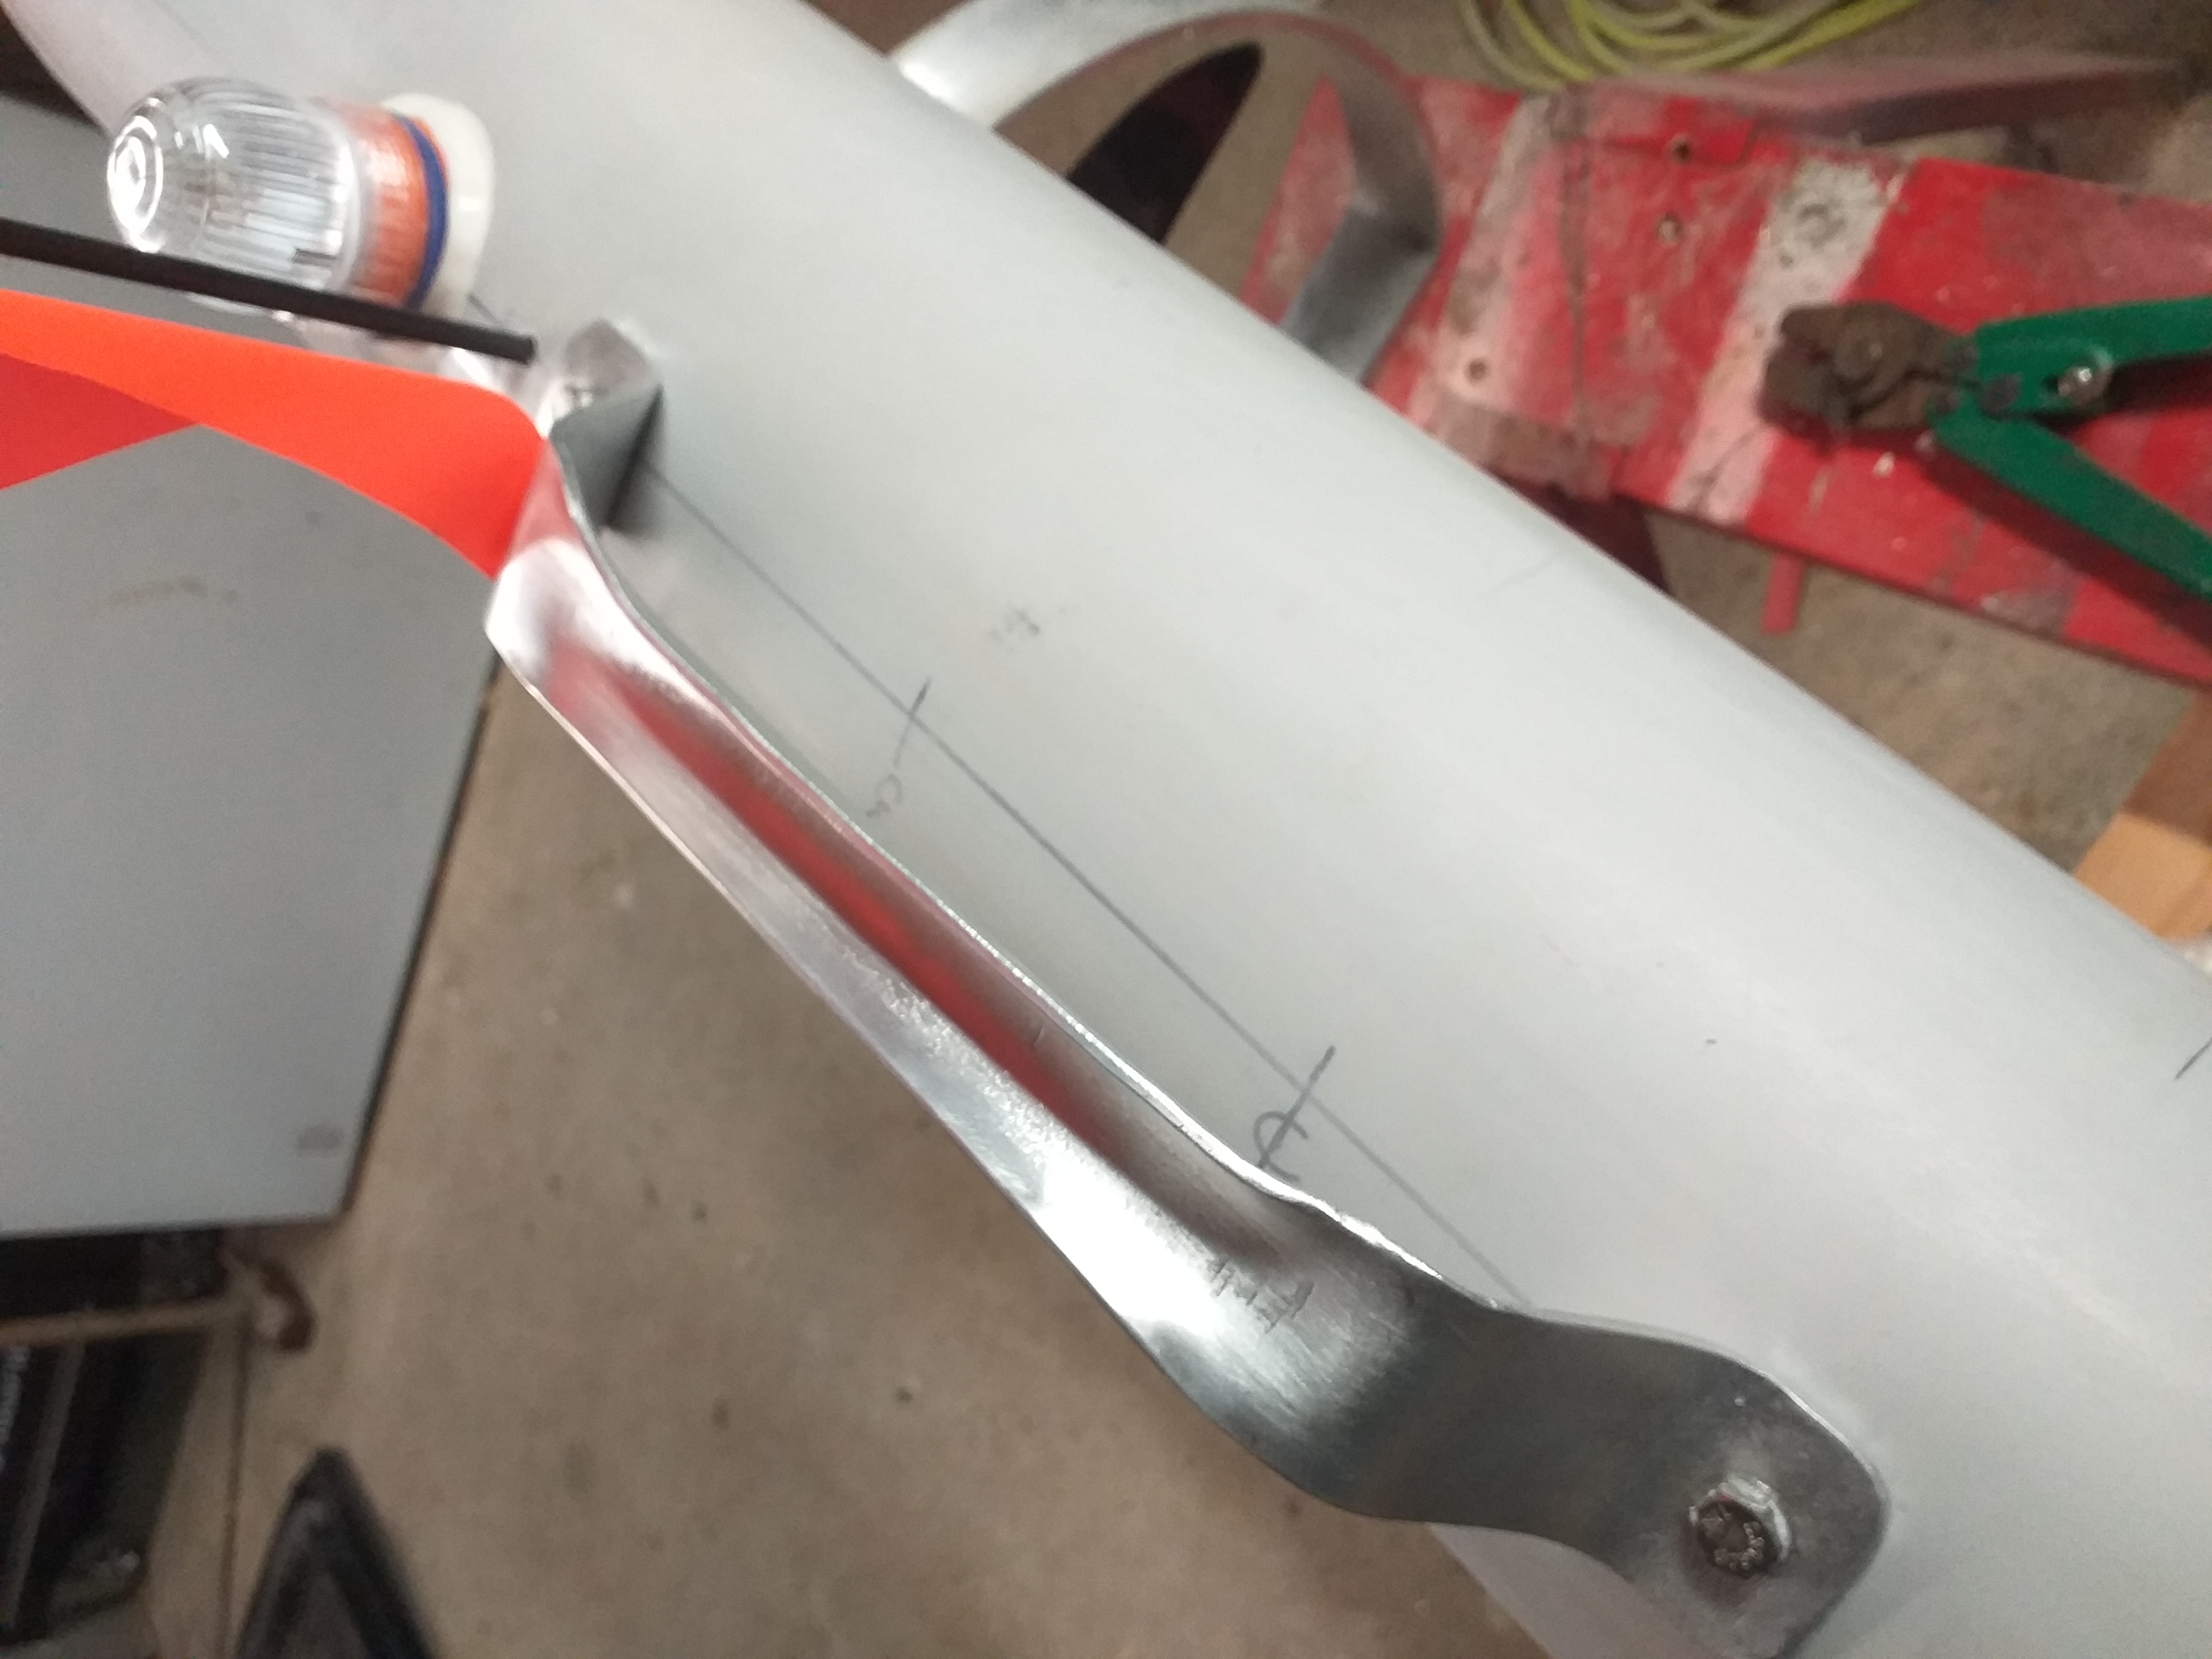
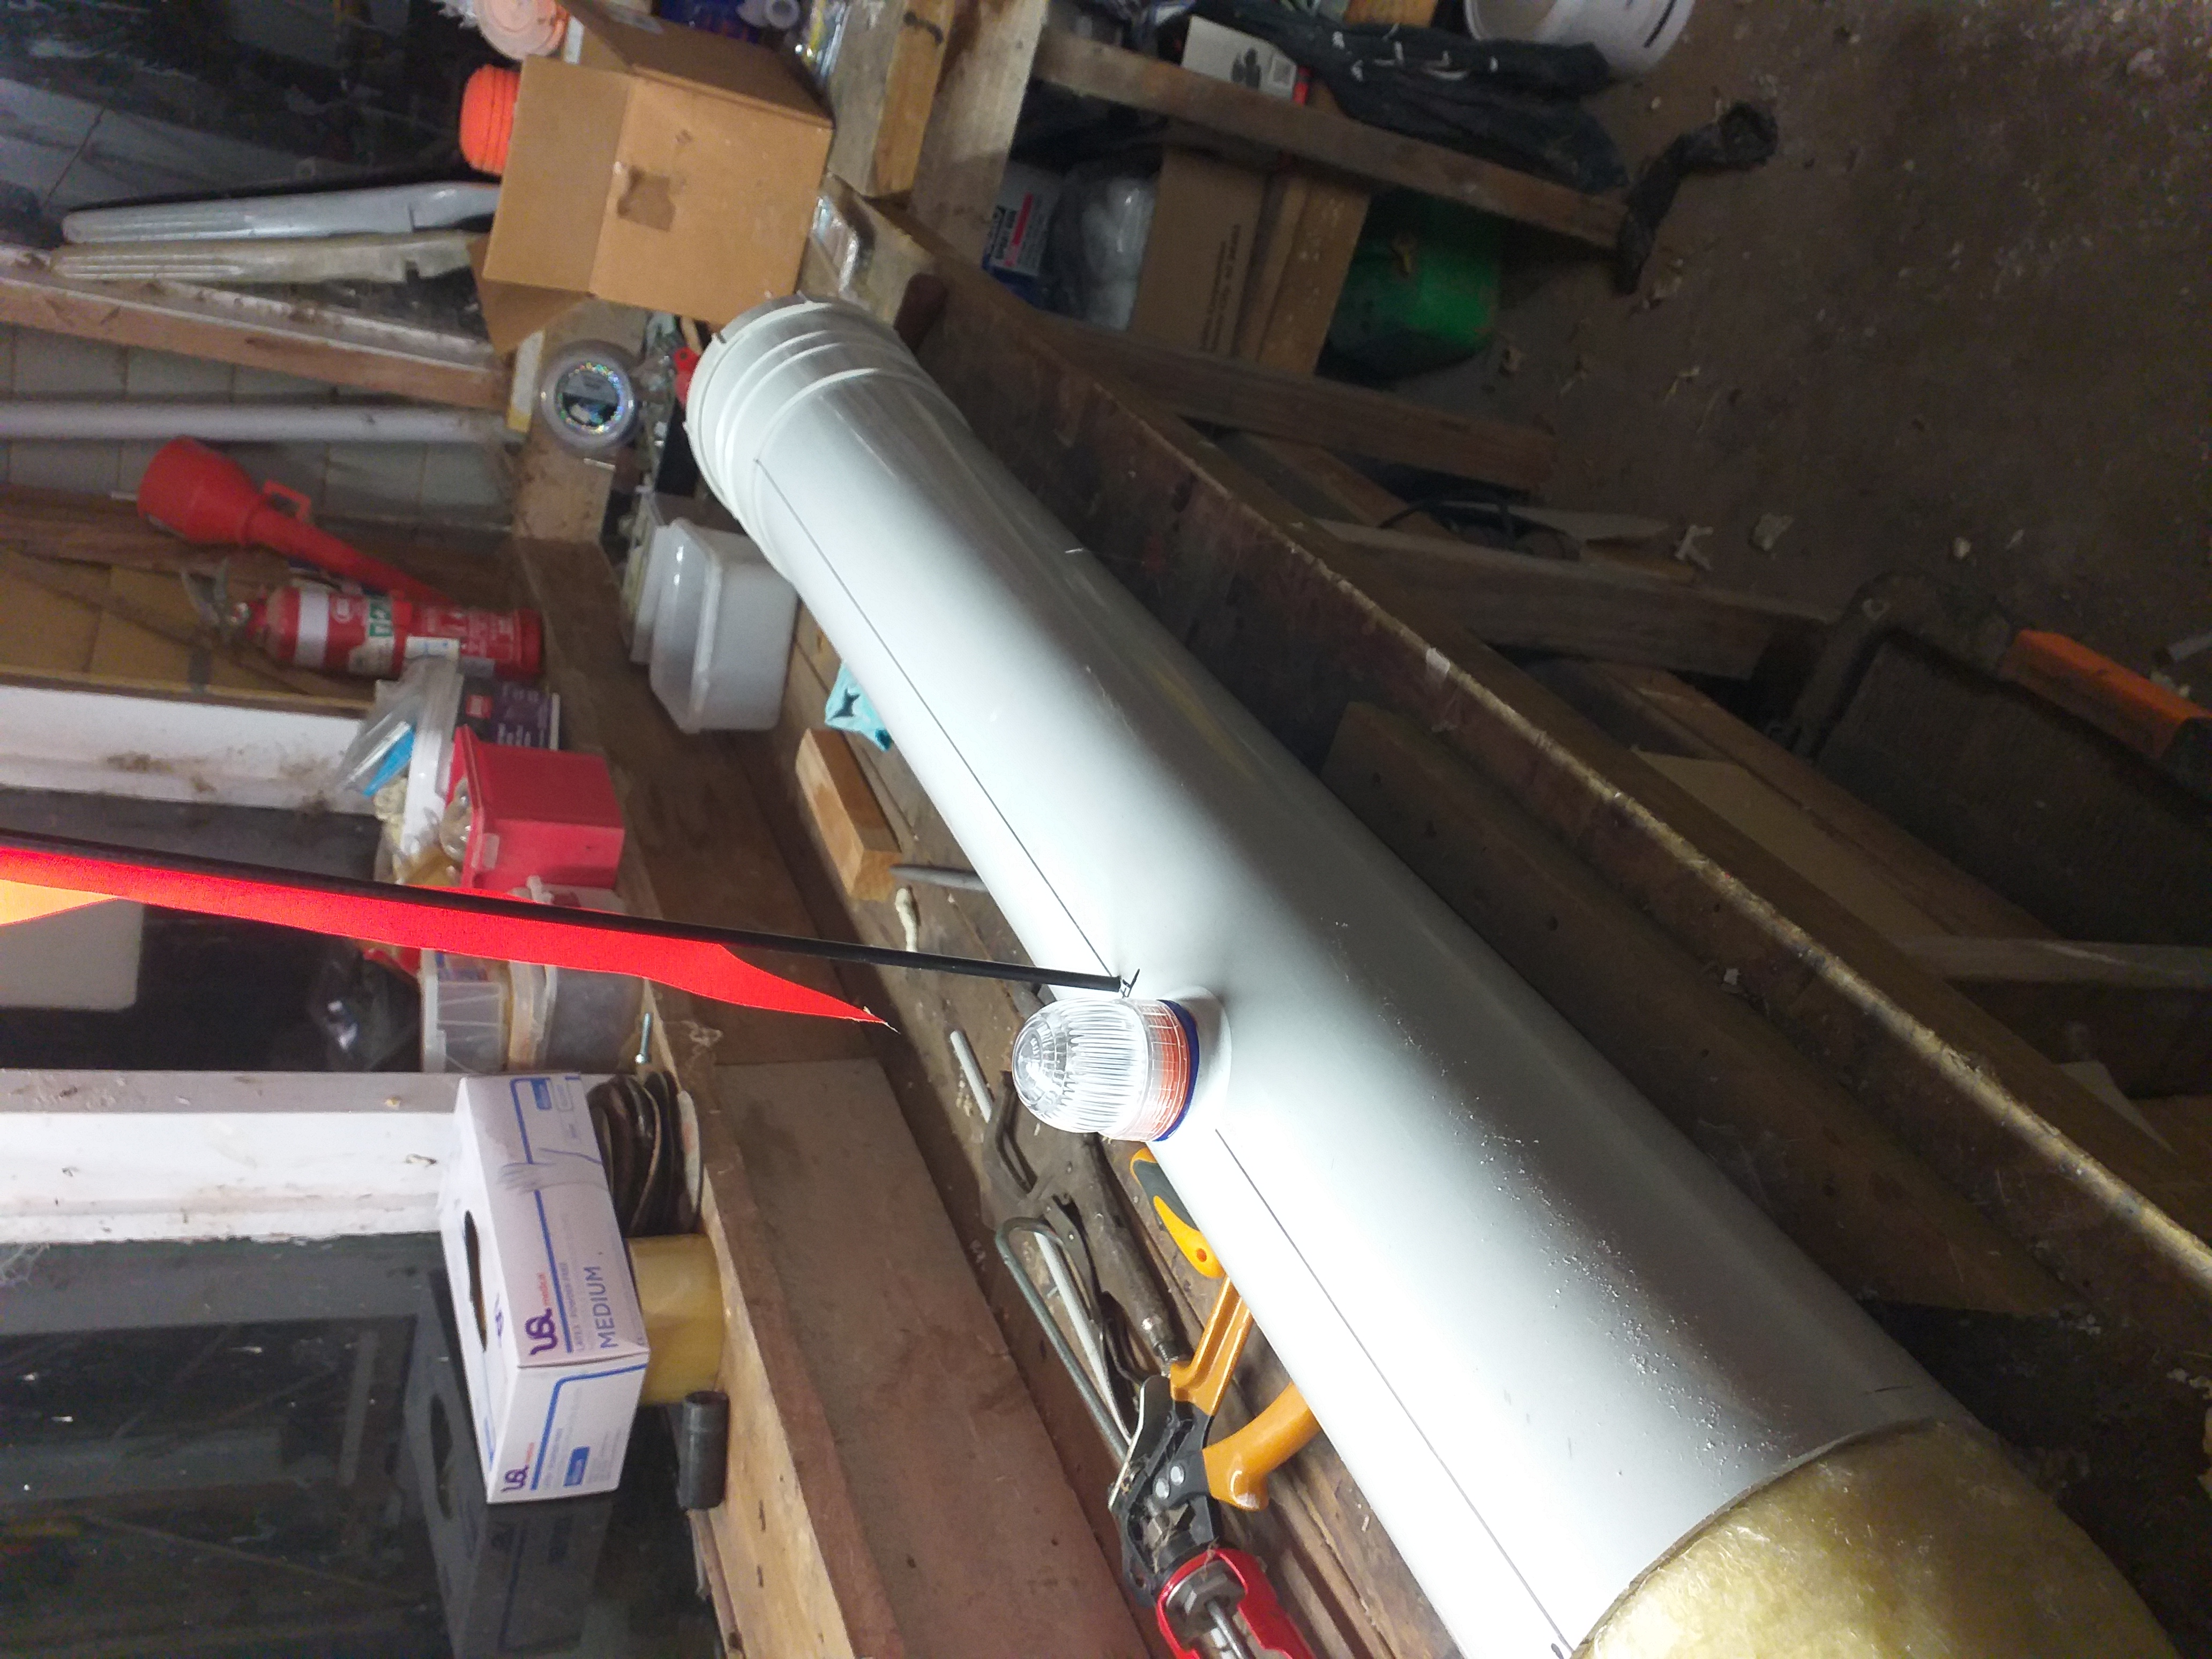
I marked a centre line down each side of the tube using a piece of angle iron.
I Glued a piece of wood to the inside of the tube. I overbroad a hole into this and filled with polyurethane glue
Once set I bored to flag pile size.
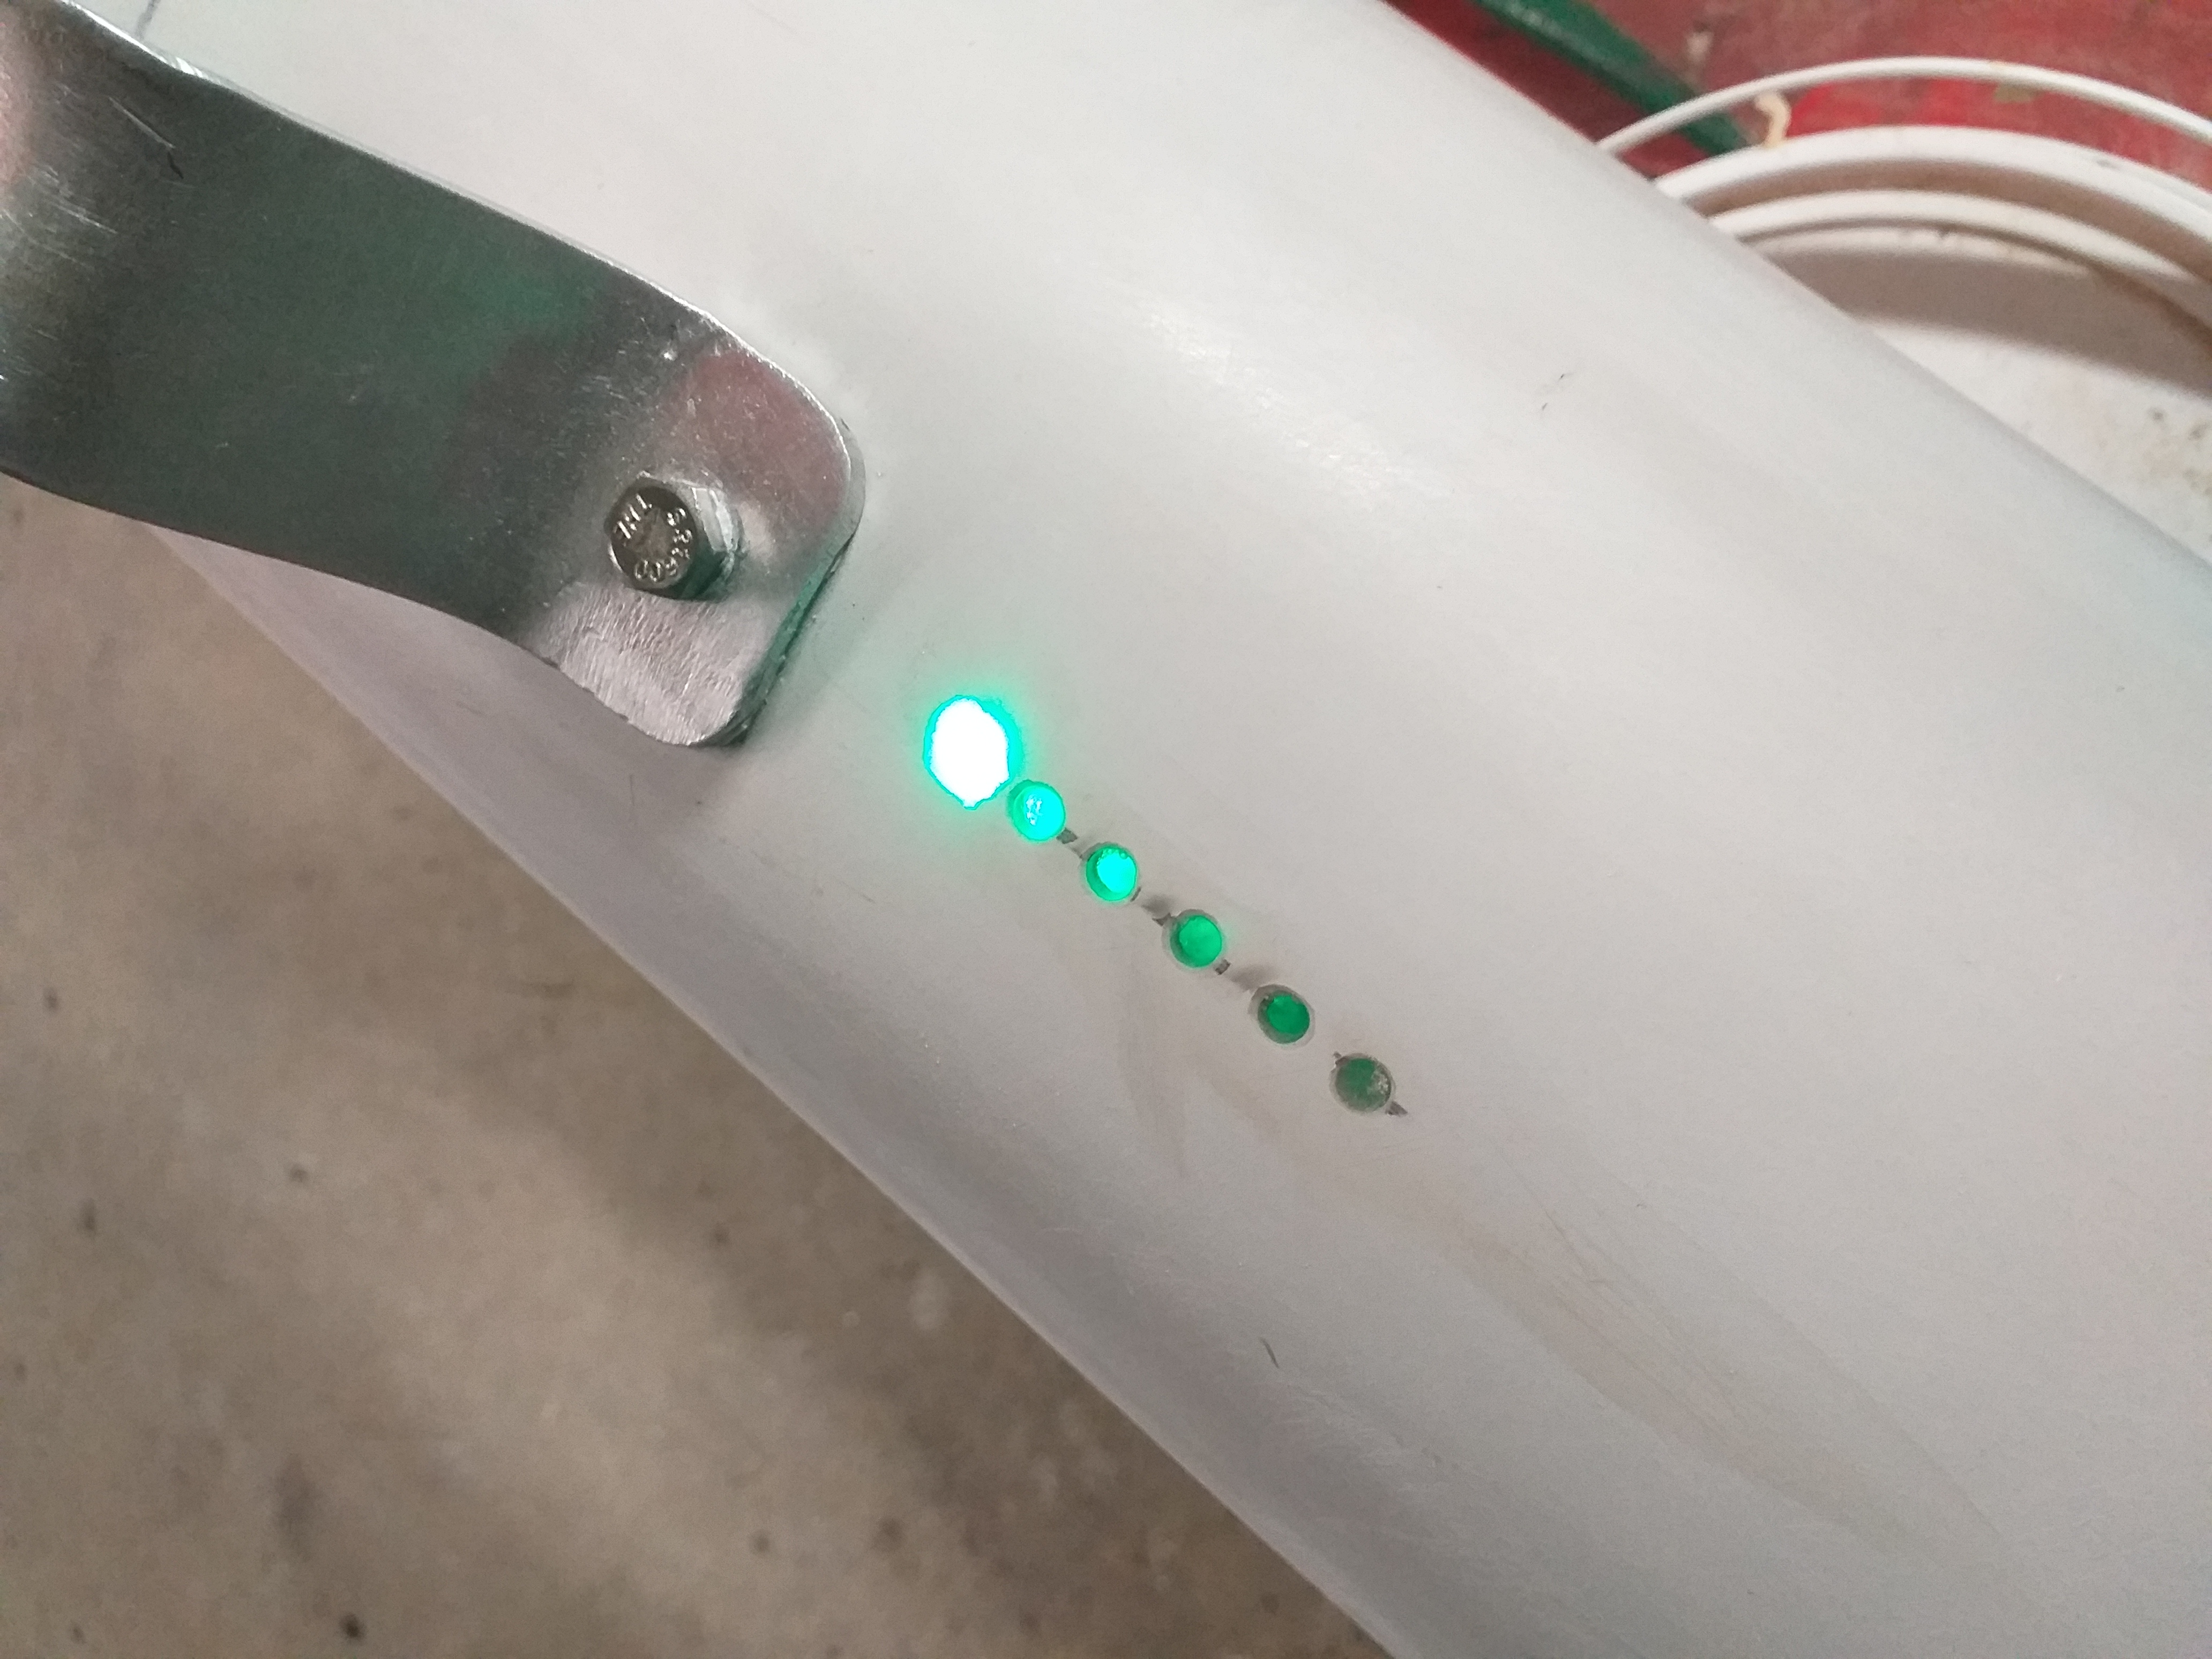
I also set in the light with polyurethane glue.
Next up will be the alloy motor mount
Welcome guest, is this your first visit? Create Account now to join.
Welcome to the NZ Hunting and Shooting Forums.
Search Forums


User Tag List
+ Reply to Thread
Results 1 to 15 of 18
Thread: Project electric kontiki
-
22-11-2020, 10:10 PM #1Member

- Join Date
- Apr 2019
- Location
- Rotorua
- Posts
- 593
Project electric kontiki
-
-
23-11-2020, 02:54 PM #2Member
- Join Date
- Jul 2012
- Location
- Napier, Hawkes Bay
- Posts
- 4,456
Cool project. im really keen to see how this progresses.
-
23-11-2020, 09:42 PM #3Member
- Join Date
- Apr 2019
- Location
- Rotorua
- Posts
- 593
Next up was the ally motor mount. I drew up a diagram to match so that I had clearance around the prop.
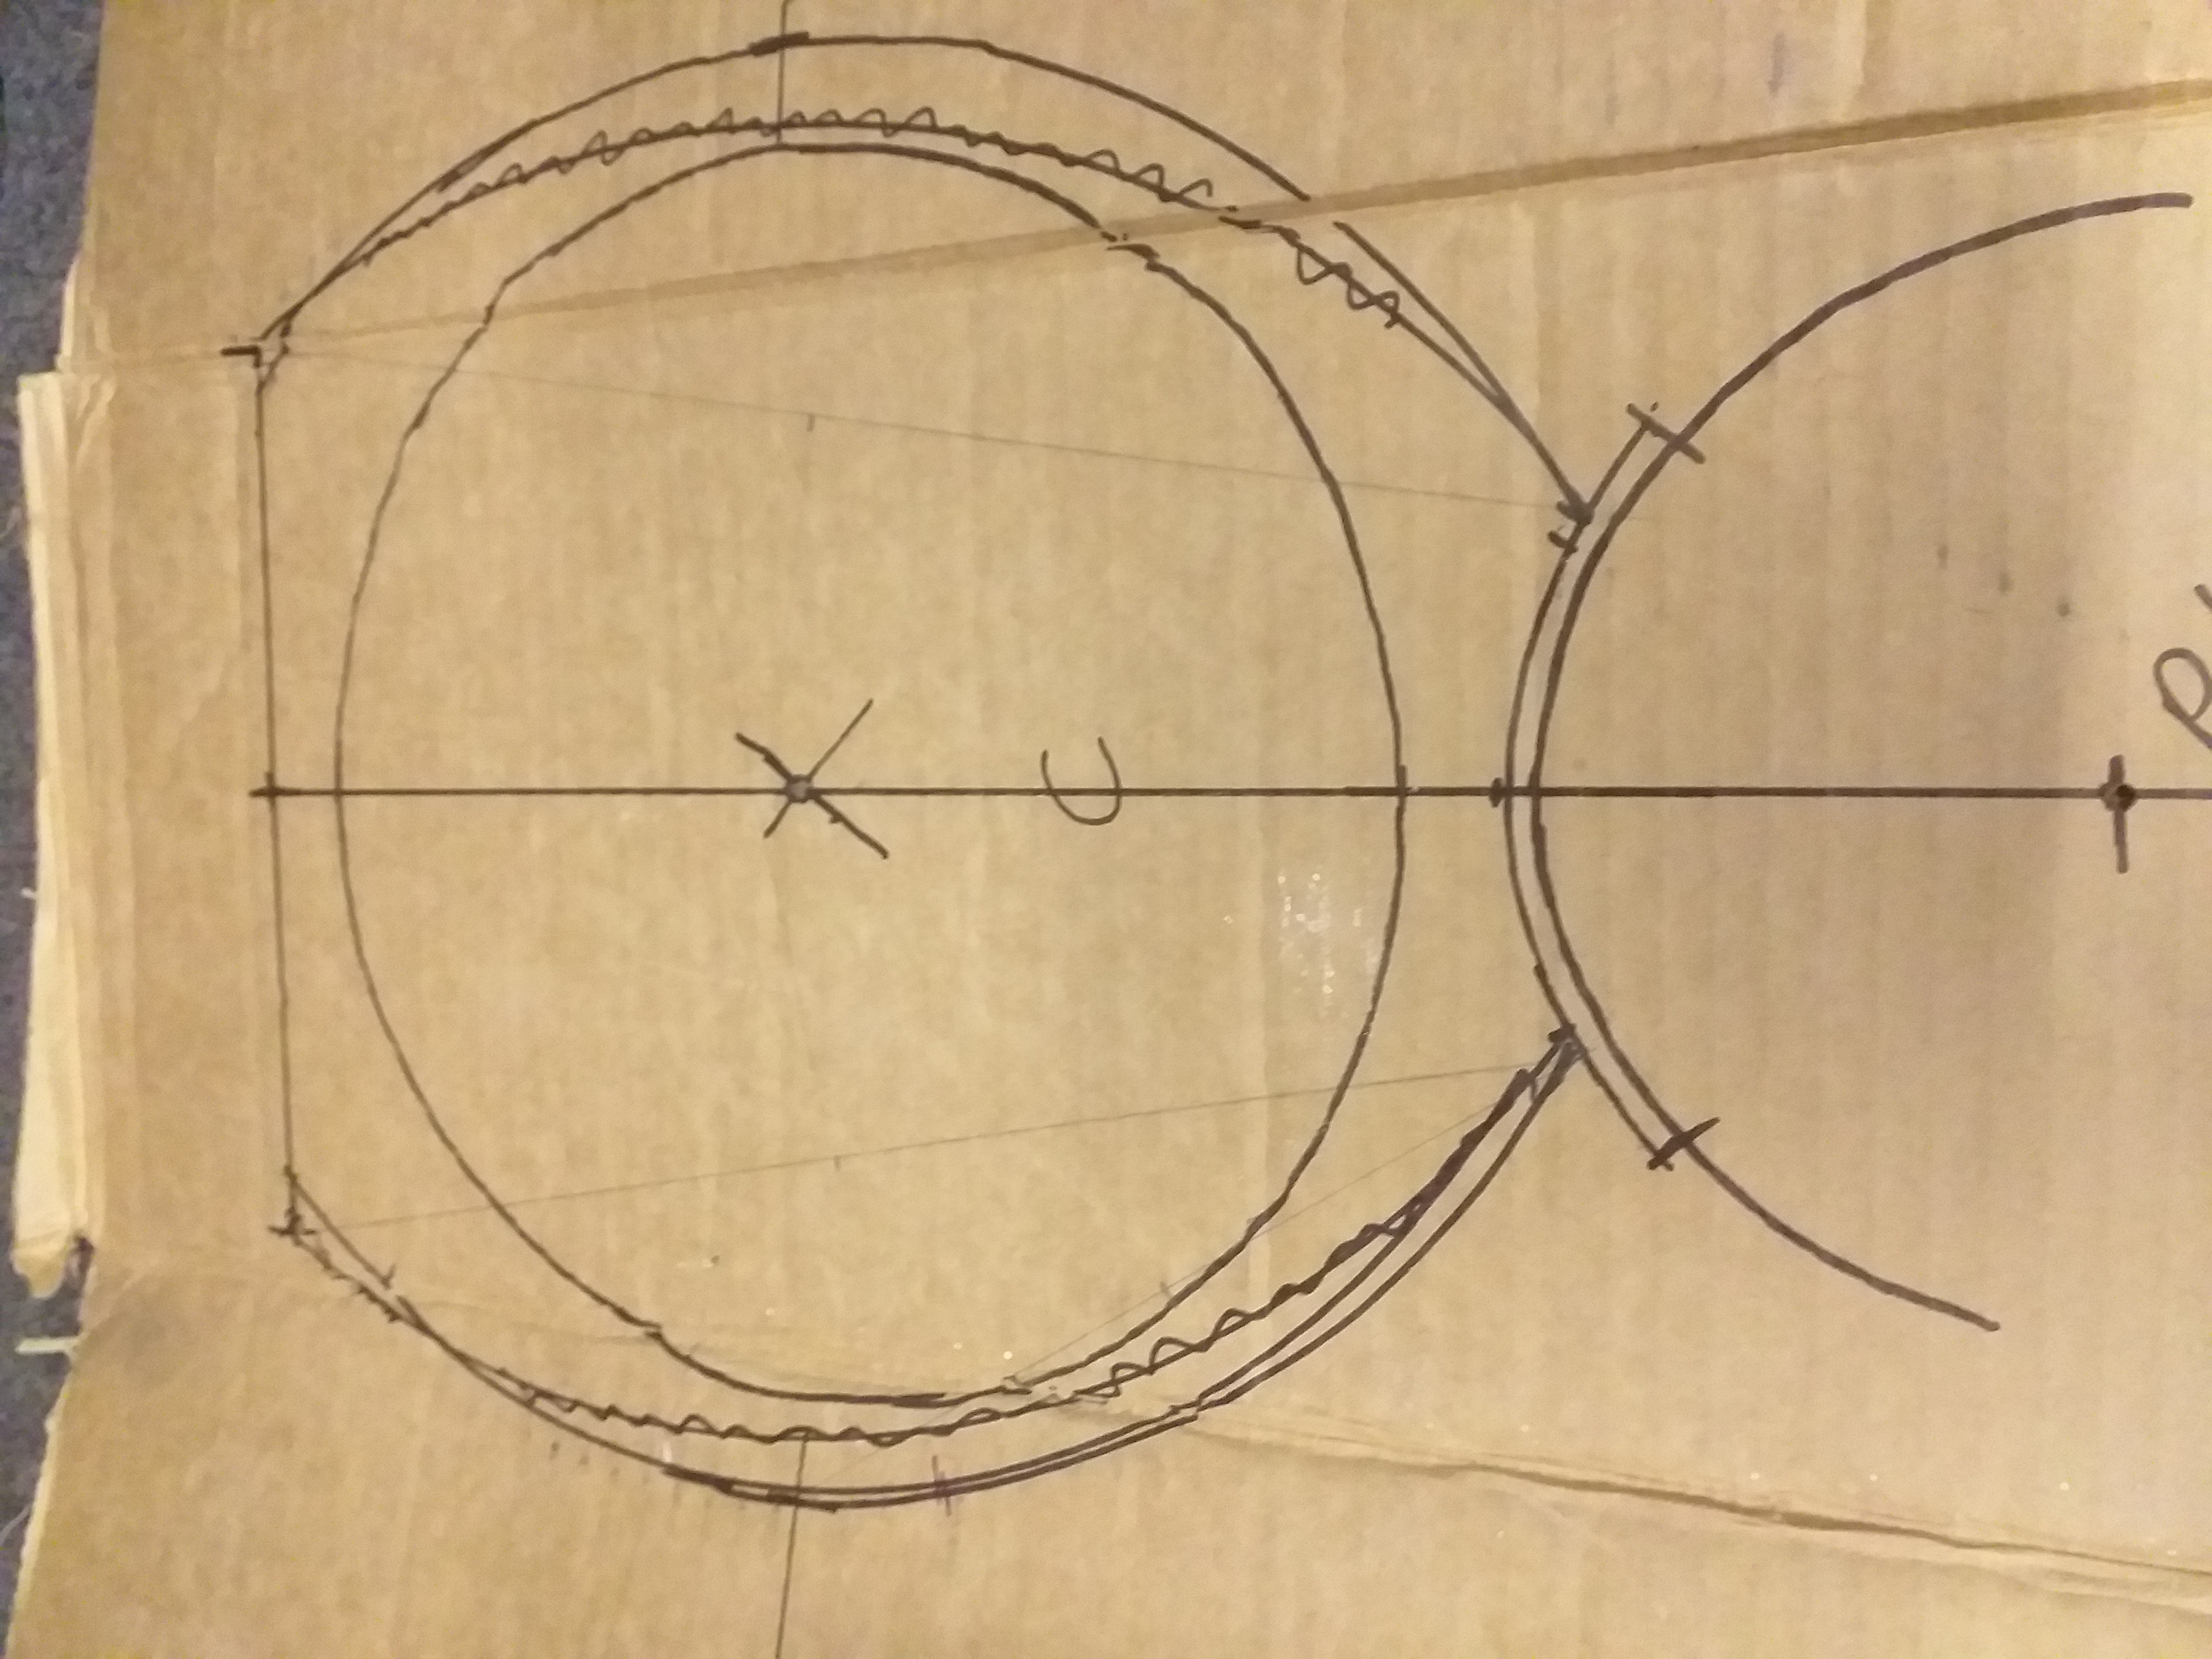
I wanted a flat spot on the bottom so I could stand the kontiki upright in the sand.
U made everything out of 6mm plate.
The motor is supplied with a threaded 1" tube so no need to make that. Luckily the father in law has a pretty set up work shop so I borrowed a few tools.
I rolled the prop guard and pressed the corners of the flat section.
Next was the mounting plate. The rollers could not handle the plate so I had to press in sections to get the radius right. I had to leave flat sections on each side of the curve as I couldn't press right to the end. These will be cut off later.
Care was then taken to get everything centred and square as I welded it up.
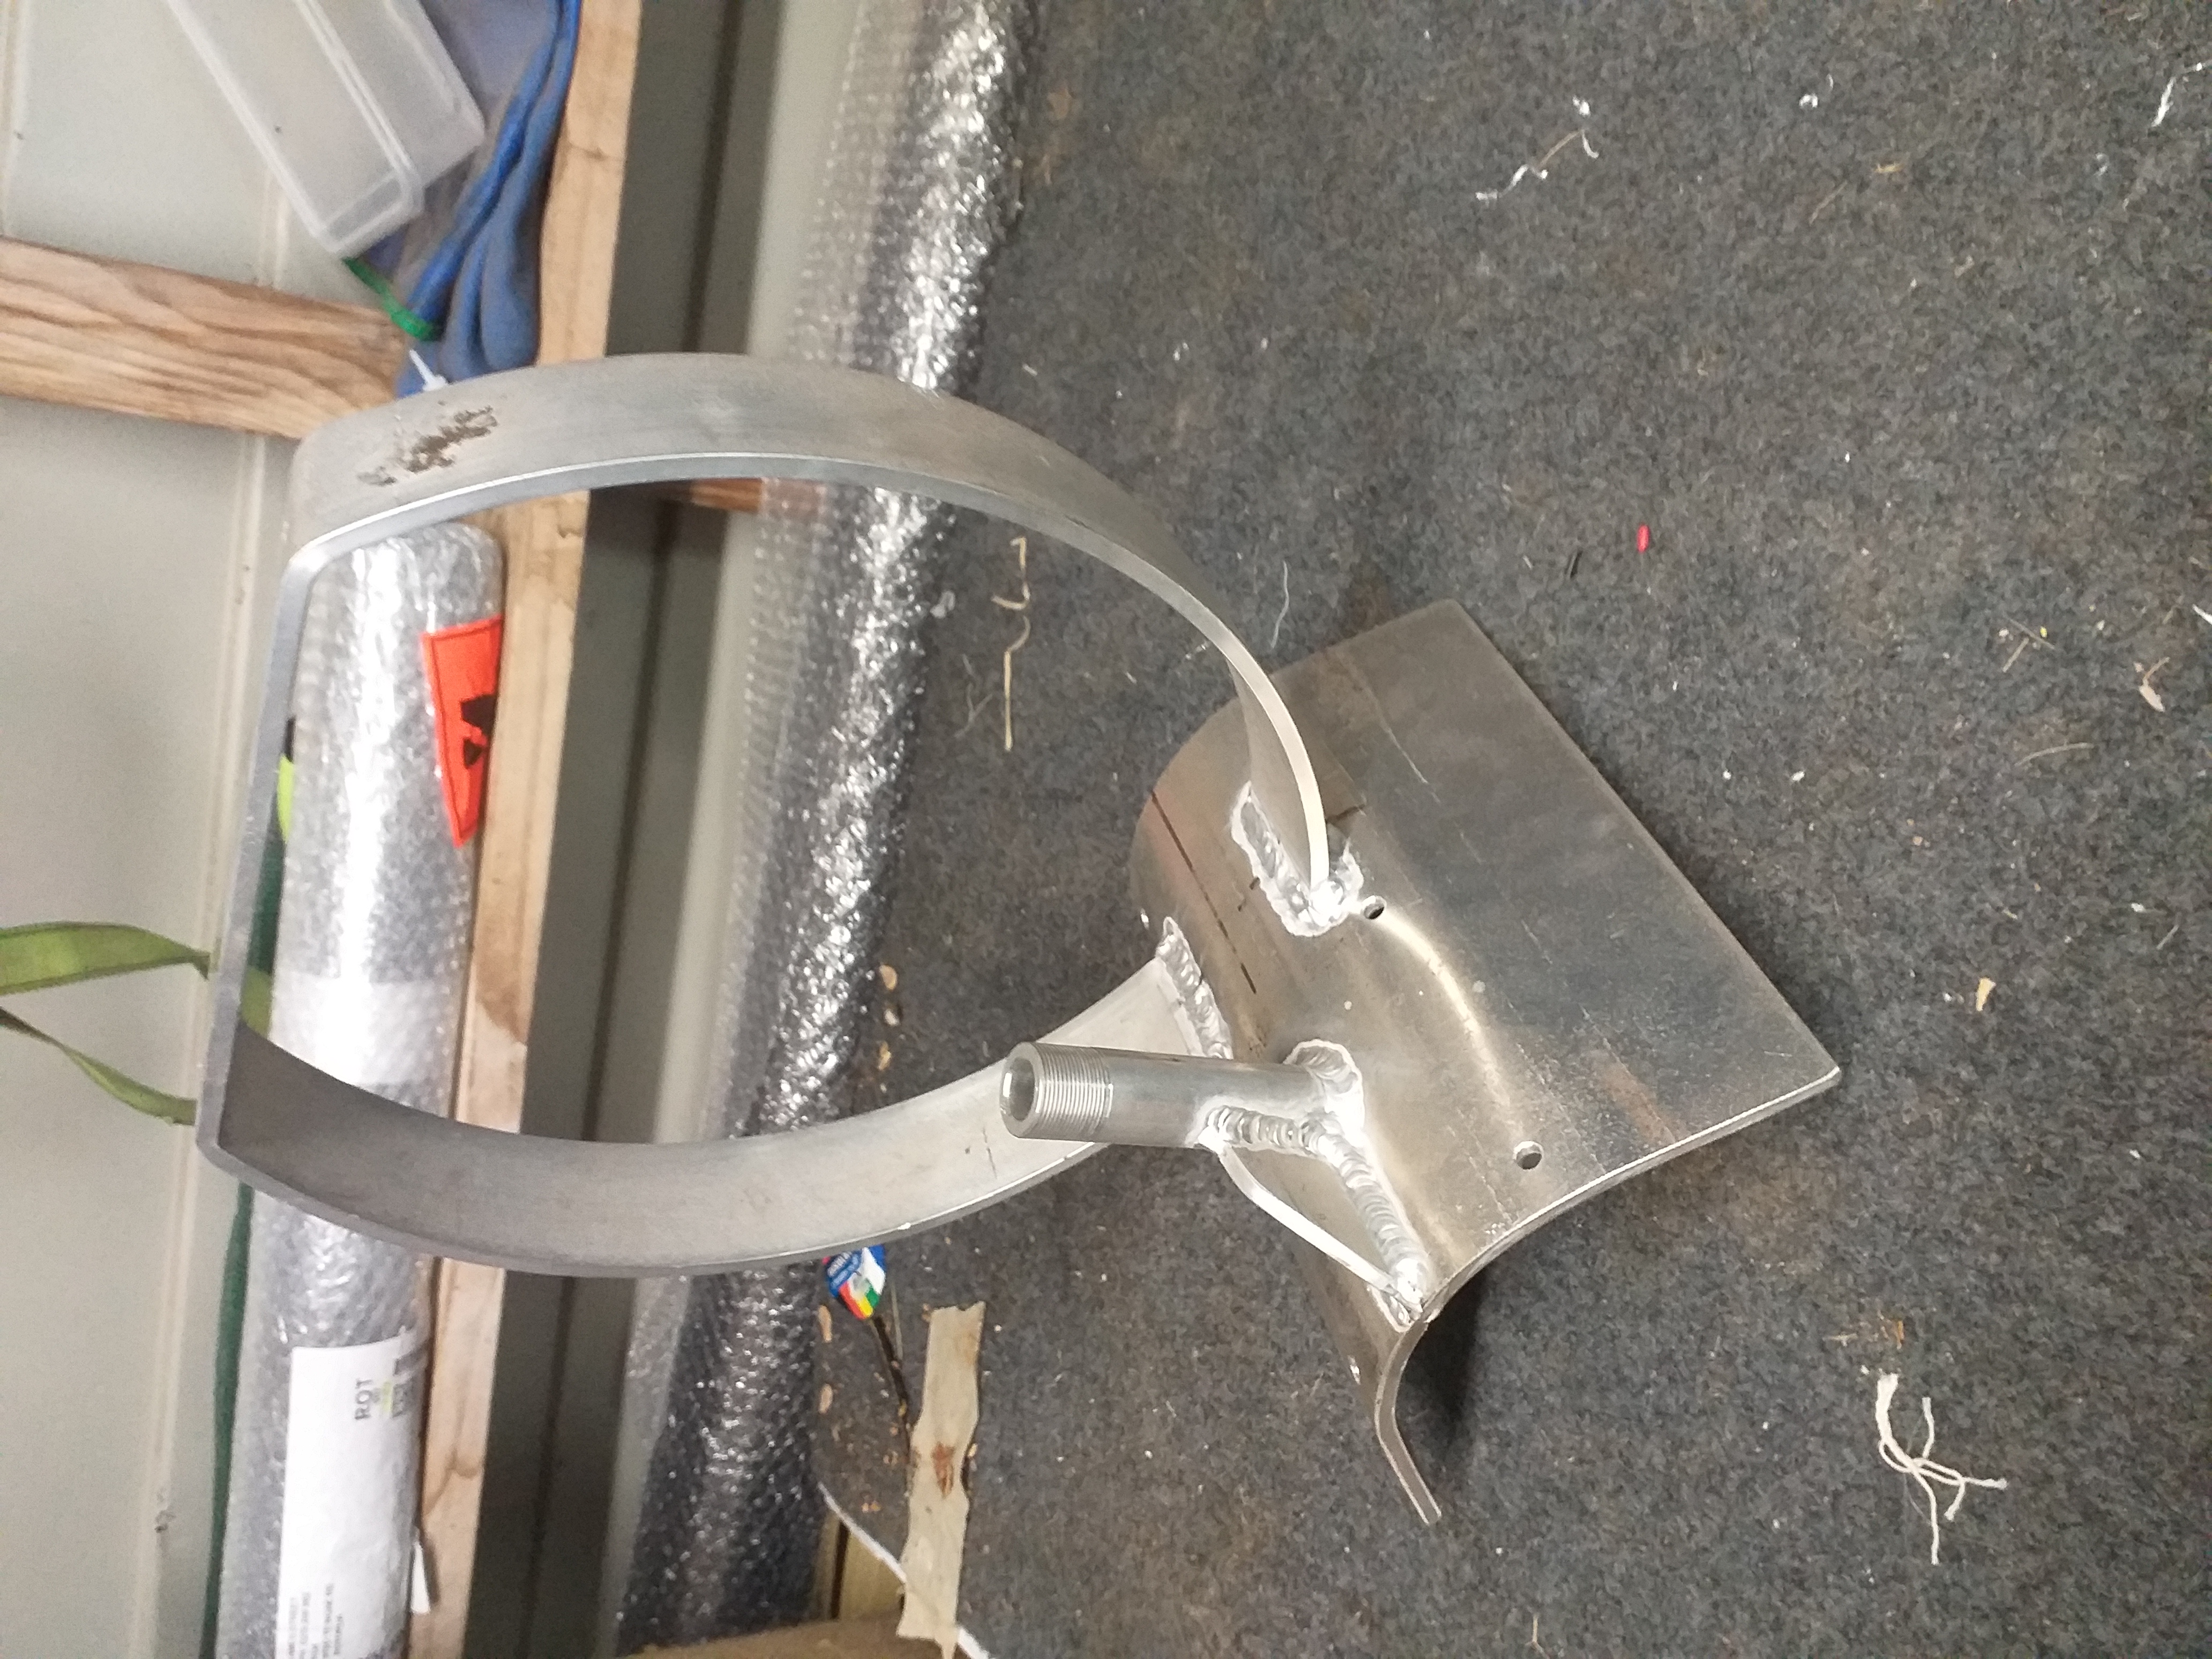
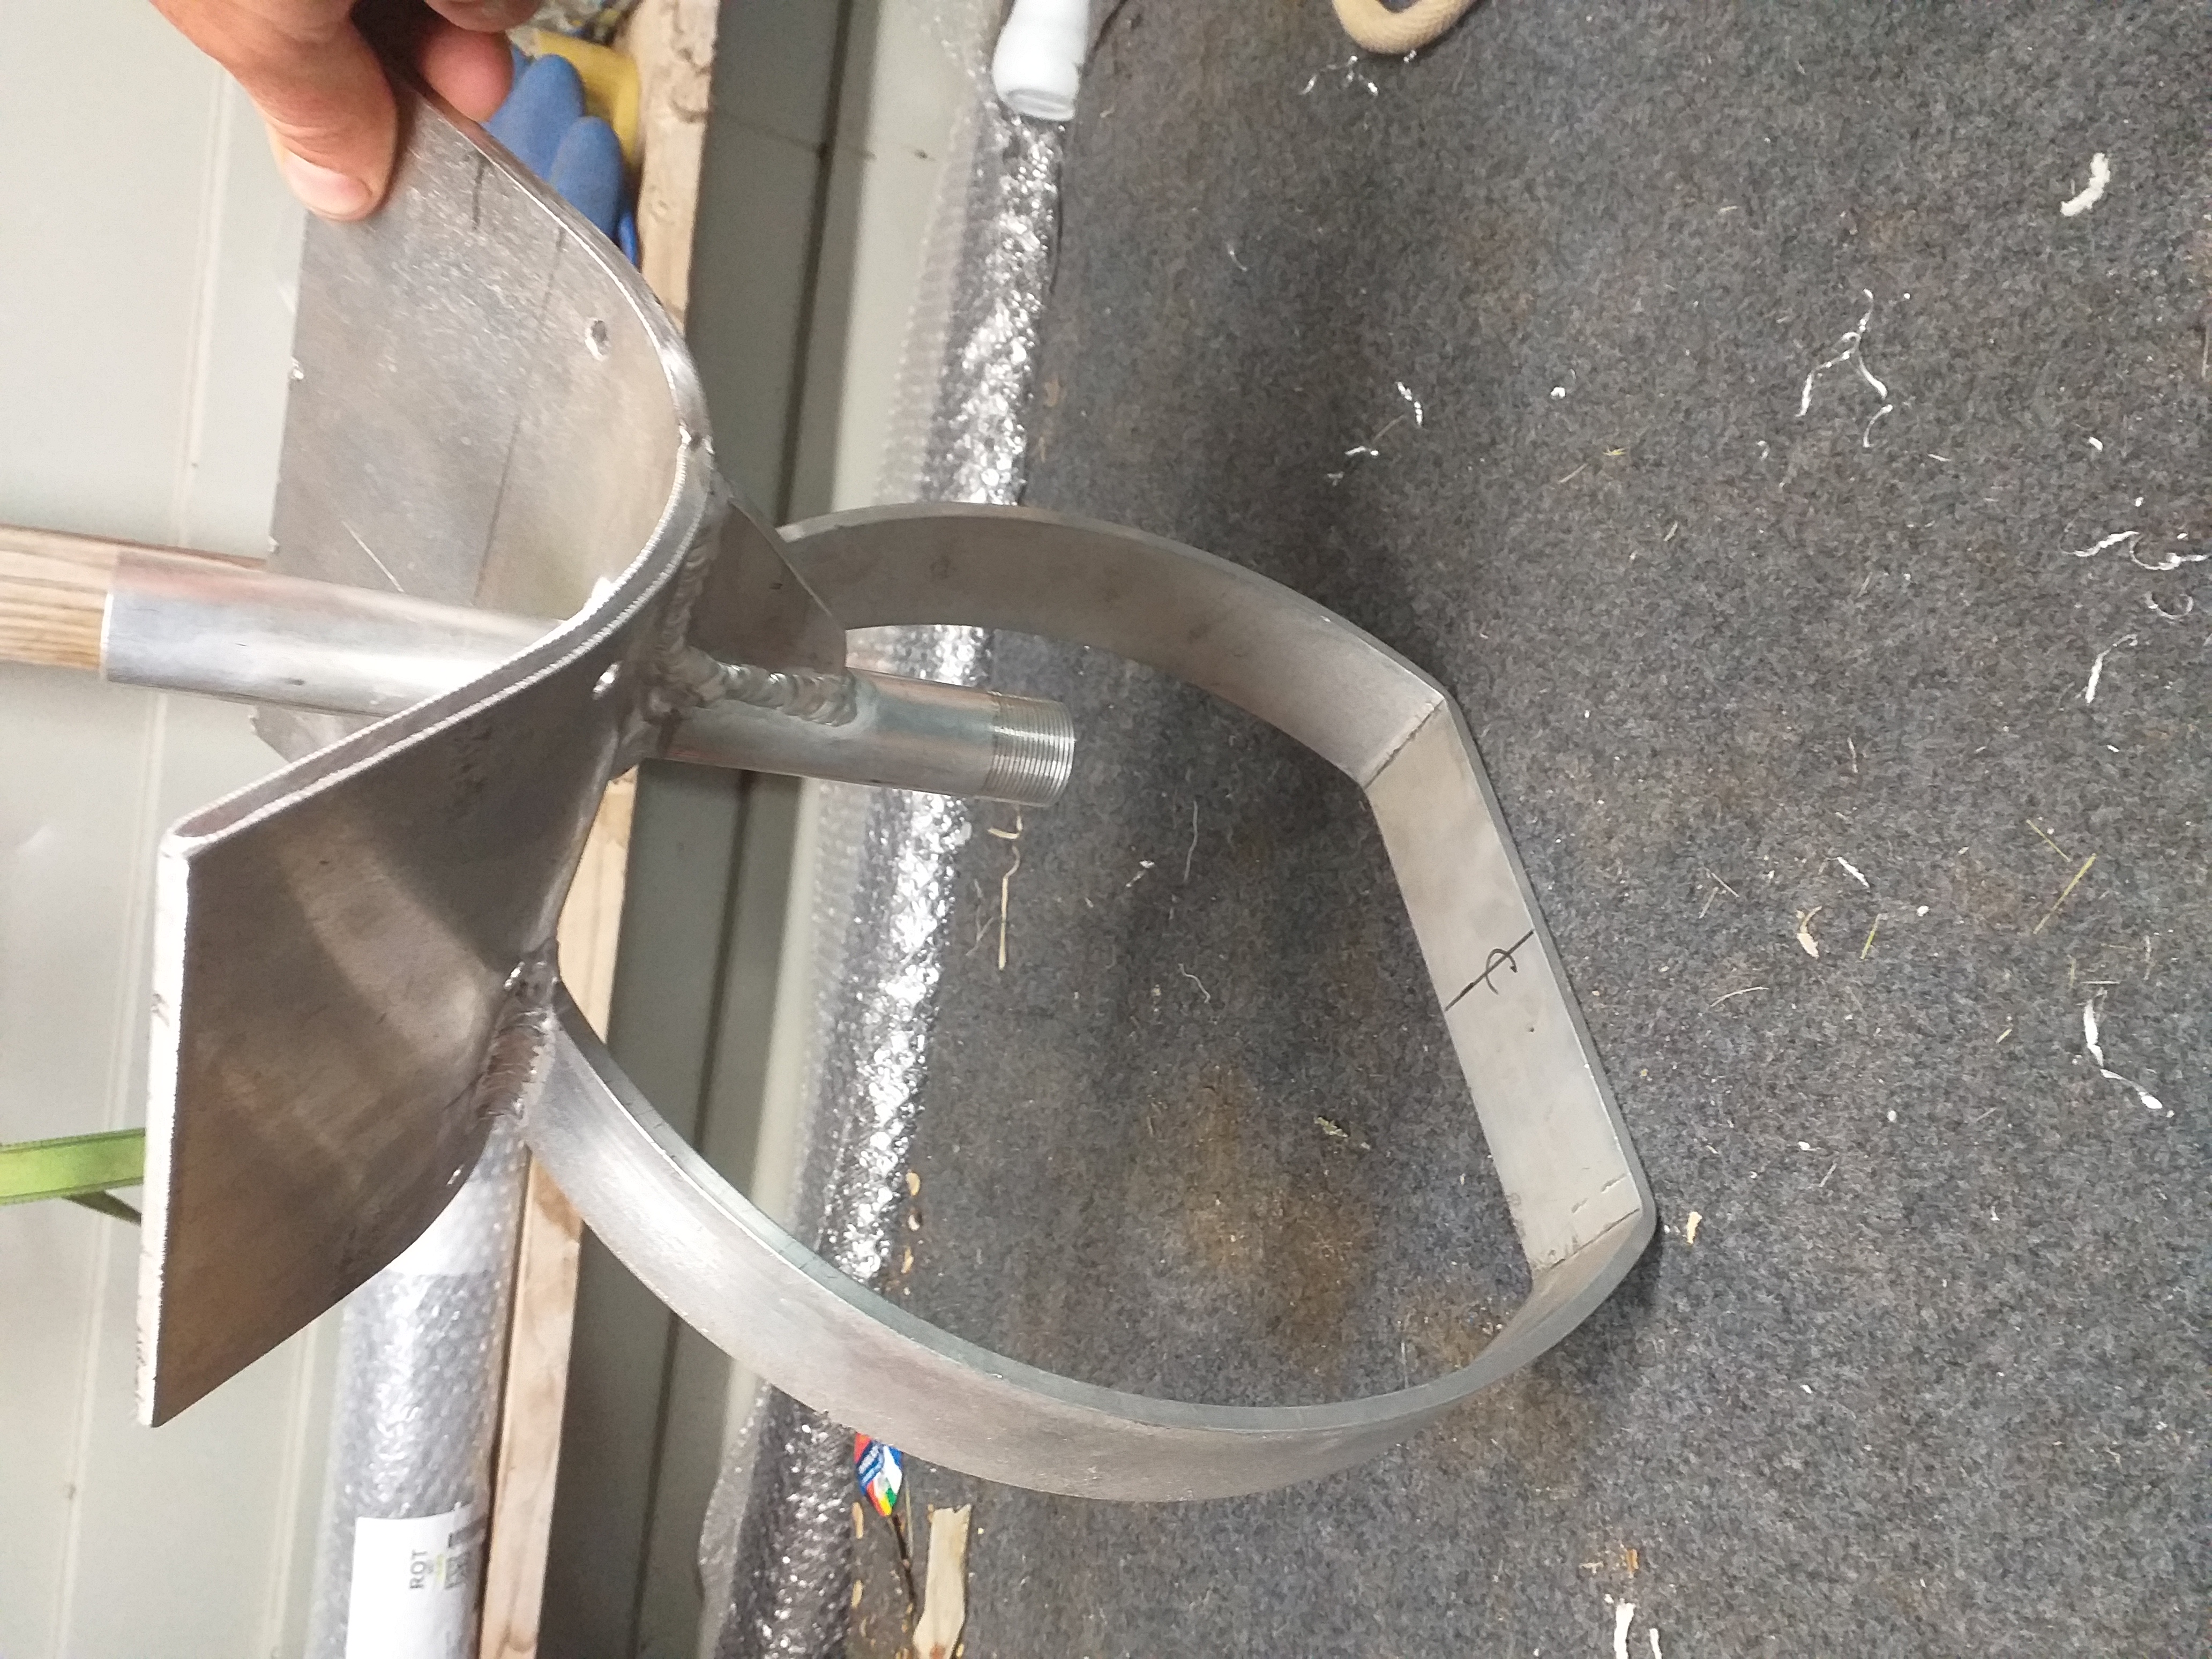
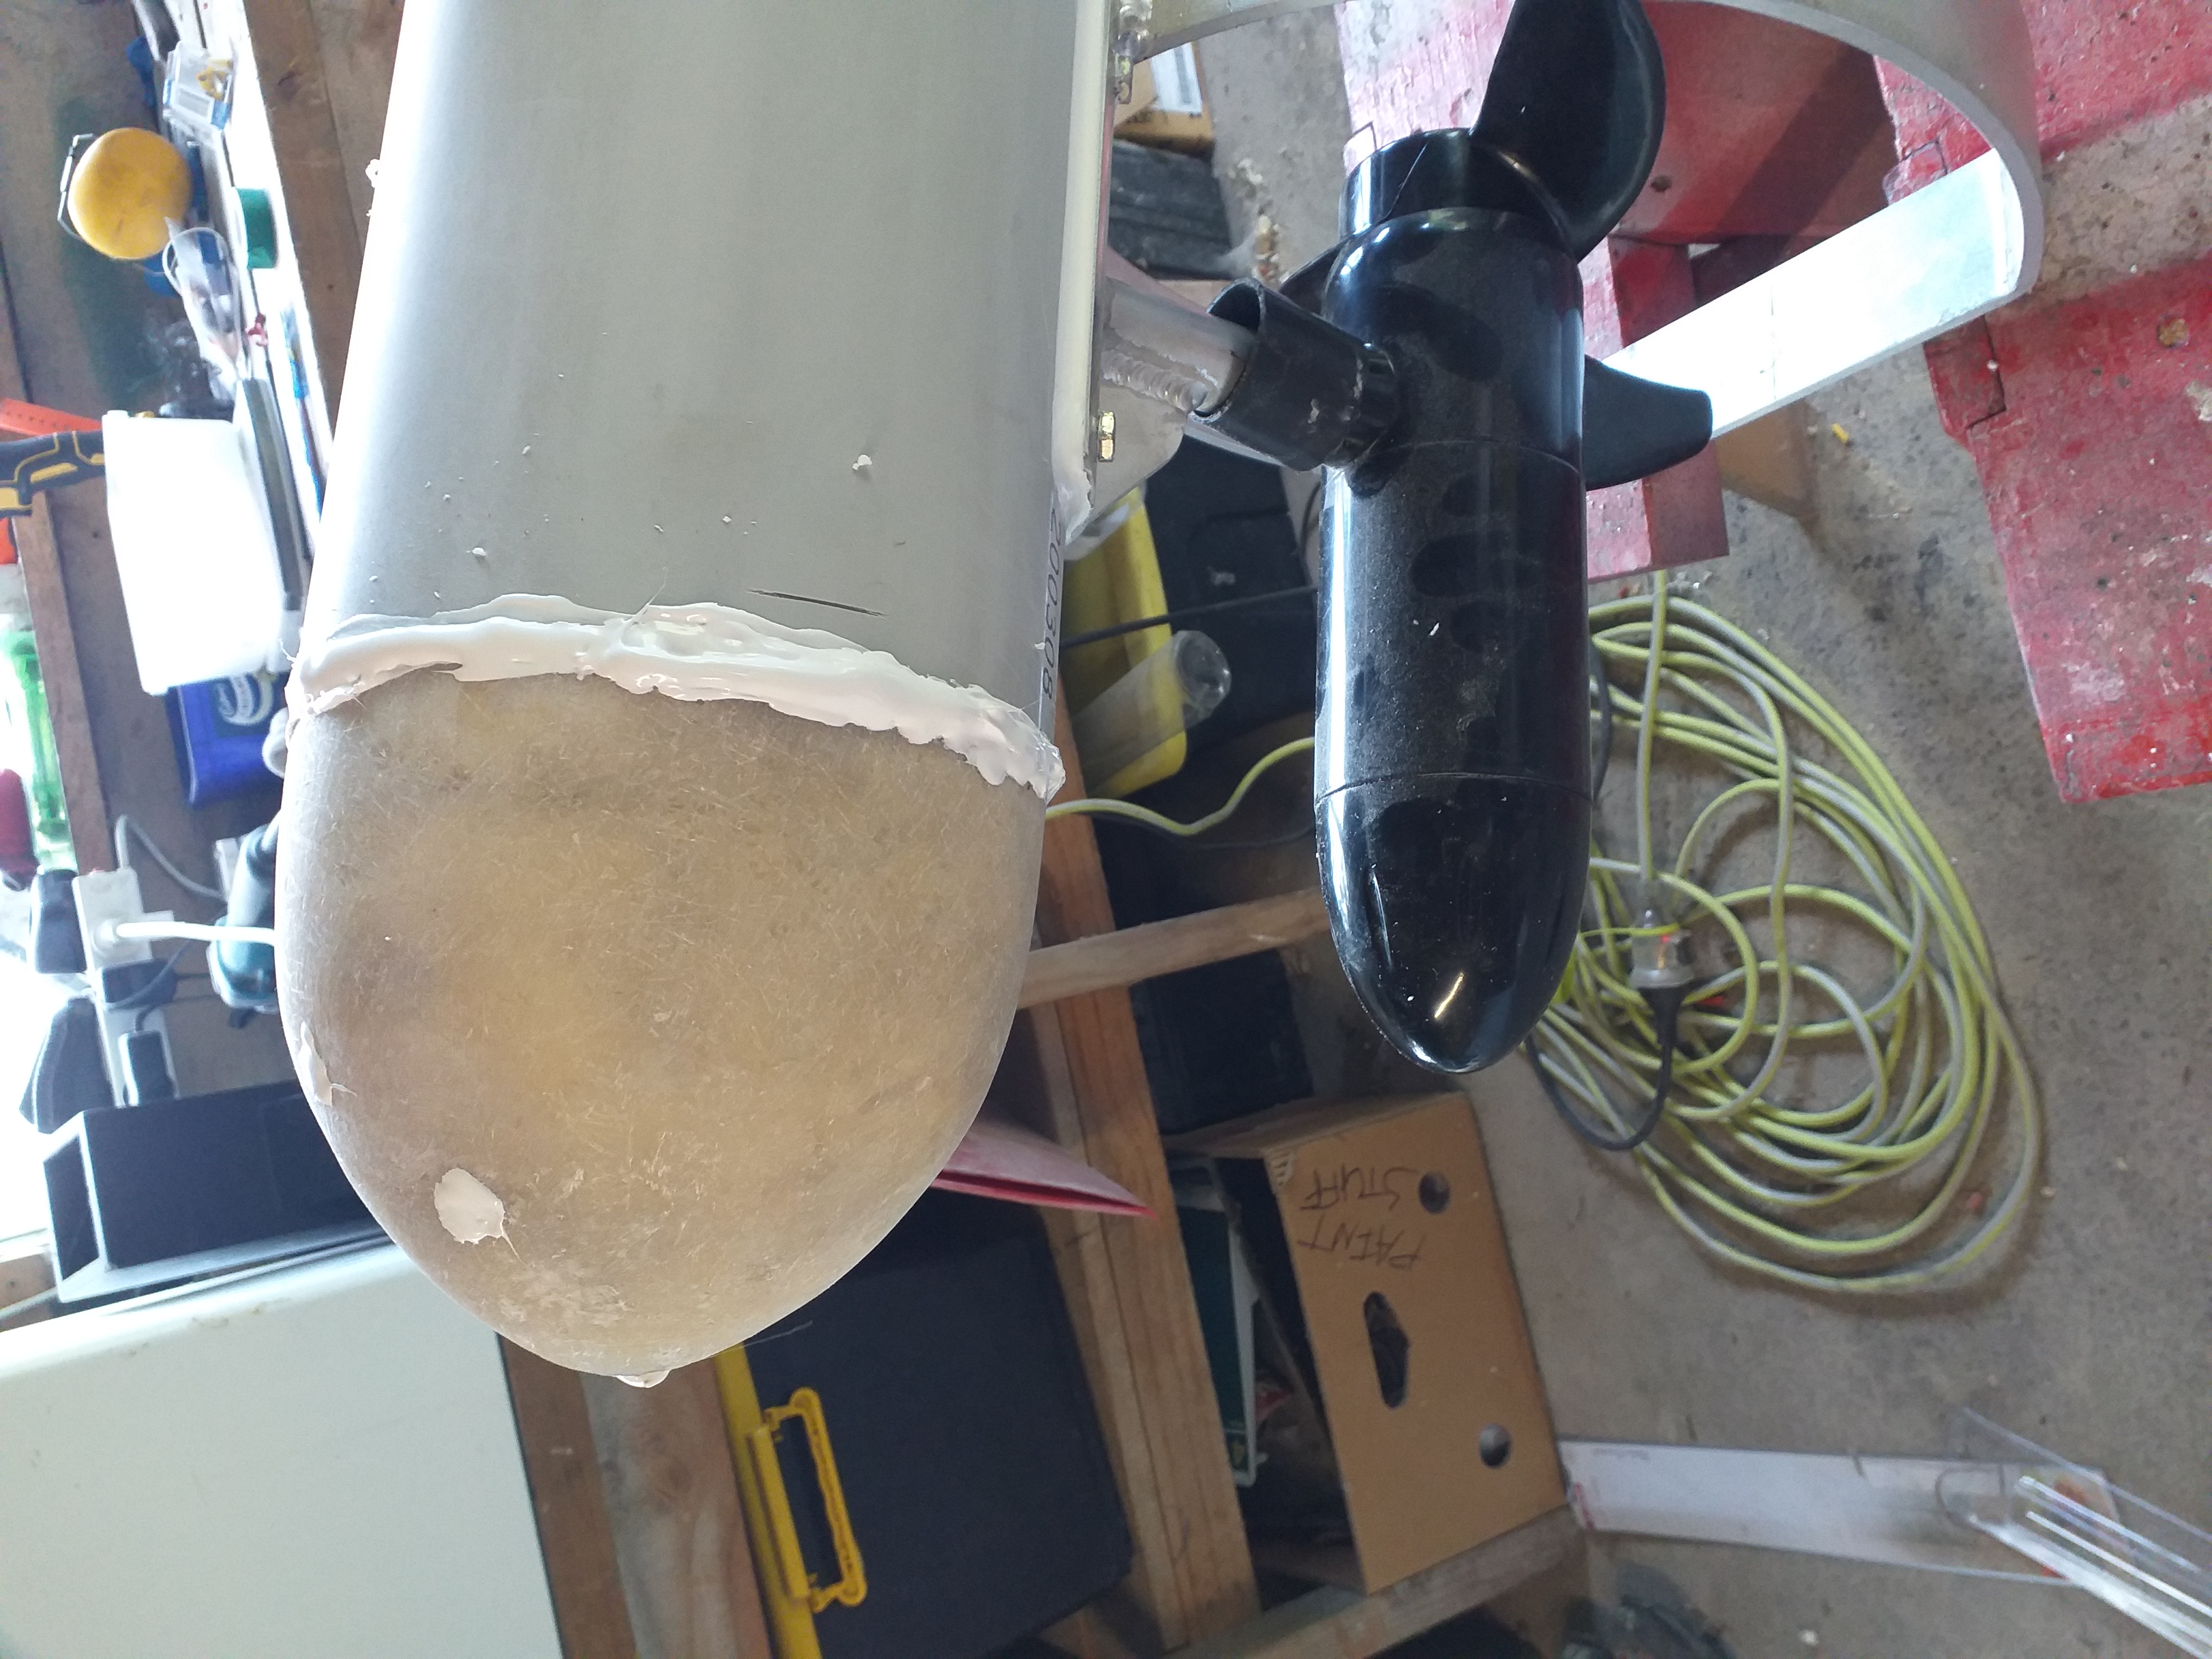
The finished project ready too be fitted
-
23-11-2020, 10:01 PM #4Member

- Join Date
- Apr 2012
- Location
- Horowhenua
- Posts
- 2,997
Nice job

Did you do any numbers on the buoyancy Vs weight of prop and battery at other end, or using an existing one as a bit of a model ? I guess you can add or remove foam etc... once everything is added on to get it sitting level in the water. I have a Seahorse but like the idea of making a little more portable one to launch a line off the rod with maybe 3 or 4 hooks instead of the full 25 mission.
-
24-11-2020, 06:22 AM #5Member
- Join Date
- Jan 2015
- Location
- Waikato
- Posts
- 2,172
Following with interest...we have come a long way from inner tube and barley sugar, an uncle tried making a mortar for taking the line out and almost hit a boat a long way from shore due to excessive black powder charge...a friend was showing his mate how carbide and water expanded a balloon to use for taking a line out with offshore wind, balloon expanded until it exploded, problem was they were in his friends menswear shop and ruined thousands of $'s of clothing...insurance paid, but not happy. My effort was using a .303 with over barrel projectile and fired by blanks..hey, this actually worked putting 2 or 3 hooks behind the breakers.
I have a mate with one of these new fangled tiki's but he also has a kayak in case it gets into trouble and he has to go get it...i would not be keen on this going into the water stuff.Moa Hunter and Micky Duck like this.
-
24-11-2020, 06:50 AM #6Member
- Join Date
- Apr 2019
- Location
- Rotorua
- Posts
- 593
@rugerman kind of copying what I have seen on line. In terms of balance I can move the battery forward or back to change balance. It kind of wants to sit slightly nose down so when it hits a wave it punches through opposed to being lifted up sand being flipped over. Adding foam inside doesn't affect buoyancy. The size of the tube sets the buoyancy. I will probably be filling with foam however in case it fills with water Originally Posted by rugerman
 rugerman likes this.
-
24-11-2020, 06:58 AM #7Banned
- Join Date
- Mar 2015
- Location
- North Canterbury
- Posts
- 5,462
I have been thinking that an old battery drill with the pistol grip cut off ( battery wires not cut ) would work for a Kontiki power plant
-
24-11-2020, 07:28 AM #8Member
- Join Date
- Apr 2019
- Location
- Rotorua
- Posts
- 593
Not a bad idea moa. The hard posts would be waterproofing the drill.
-
24-11-2020, 08:40 AM #9Member
- Join Date
- Apr 2012
- Location
- Horowhenua
- Posts
- 2,997
Yeah that should work with slightly nose down. With the line on it might hold the back down a bit more when towing out as well.
I was getting about 30mins runtime out of a combined 14Ahr and 7Ahr batteries. Of course with Lithium Ion around now that could be good for a play in the future. I normally run 2 14Ahr batteries these days but they sure add a bit of weight
-
24-11-2020, 08:45 AM #10Banned
- Join Date
- Mar 2015
- Location
- North Canterbury
- Posts
- 5,462
I thought that a front prop would be the way with the drill body inside the pipe, then it would be easy to make a sealed nose cone with the prop shaft in the chuck. Originally Posted by Remmodel7
-
25-11-2020, 08:44 PM #11Member
- Join Date
- Apr 2019
- Location
- Rotorua
- Posts
- 593
@Moa Hunter are you thinking the prop would come out the centre of the nose cone. I would worry about prop cavitation. Also not sure if the torpedo would spin opposite direction to the prop Originally Posted by Moa Hunter
-
26-11-2020, 07:56 AM #12Banned
- Join Date
- Mar 2015
- Location
- North Canterbury
- Posts
- 5,462
I have been thinking about firstly how to seal the unit and figured that a piece of 150mm pressure pipe with a screw on inspection cap with rubber gasket / seal would be the easiest way, this at the rear of the unit. I had thought of a sort of nose piece ahead of the prop, the prop then being located about 1/3 back from the front of the unit. Reason being that when I have used a Kontiki they dont pull straight. If my thinking is all wrong please tell me as water propulsion is not something I know much about. I suppose if the prop was at the rear the nose cone could be built on a screw cap and unscrewed for battery replacement. I do have some 150mm pipe fittings that have an inspection cover on the side, 90 degrees to flow. This could be used for the kontiki body so that nose and tail are fixed. What is the best layout / setup for a homemade Kontiki Originally Posted by Remmodel7
-
26-11-2020, 11:44 AM #13Member
- Join Date
- Apr 2012
- Location
- Horowhenua
- Posts
- 2,997
I would be a bit reluctant about making the unscrewy bit on the front since water might be forced around the seals as it's pushing through waves etc...on the way out. maybe a double O ring would sort it out but a bit risky ?
-
19-12-2020, 07:30 PM #14Member
- Join Date
- Apr 2019
- Location
- Rotorua
- Posts
- 593
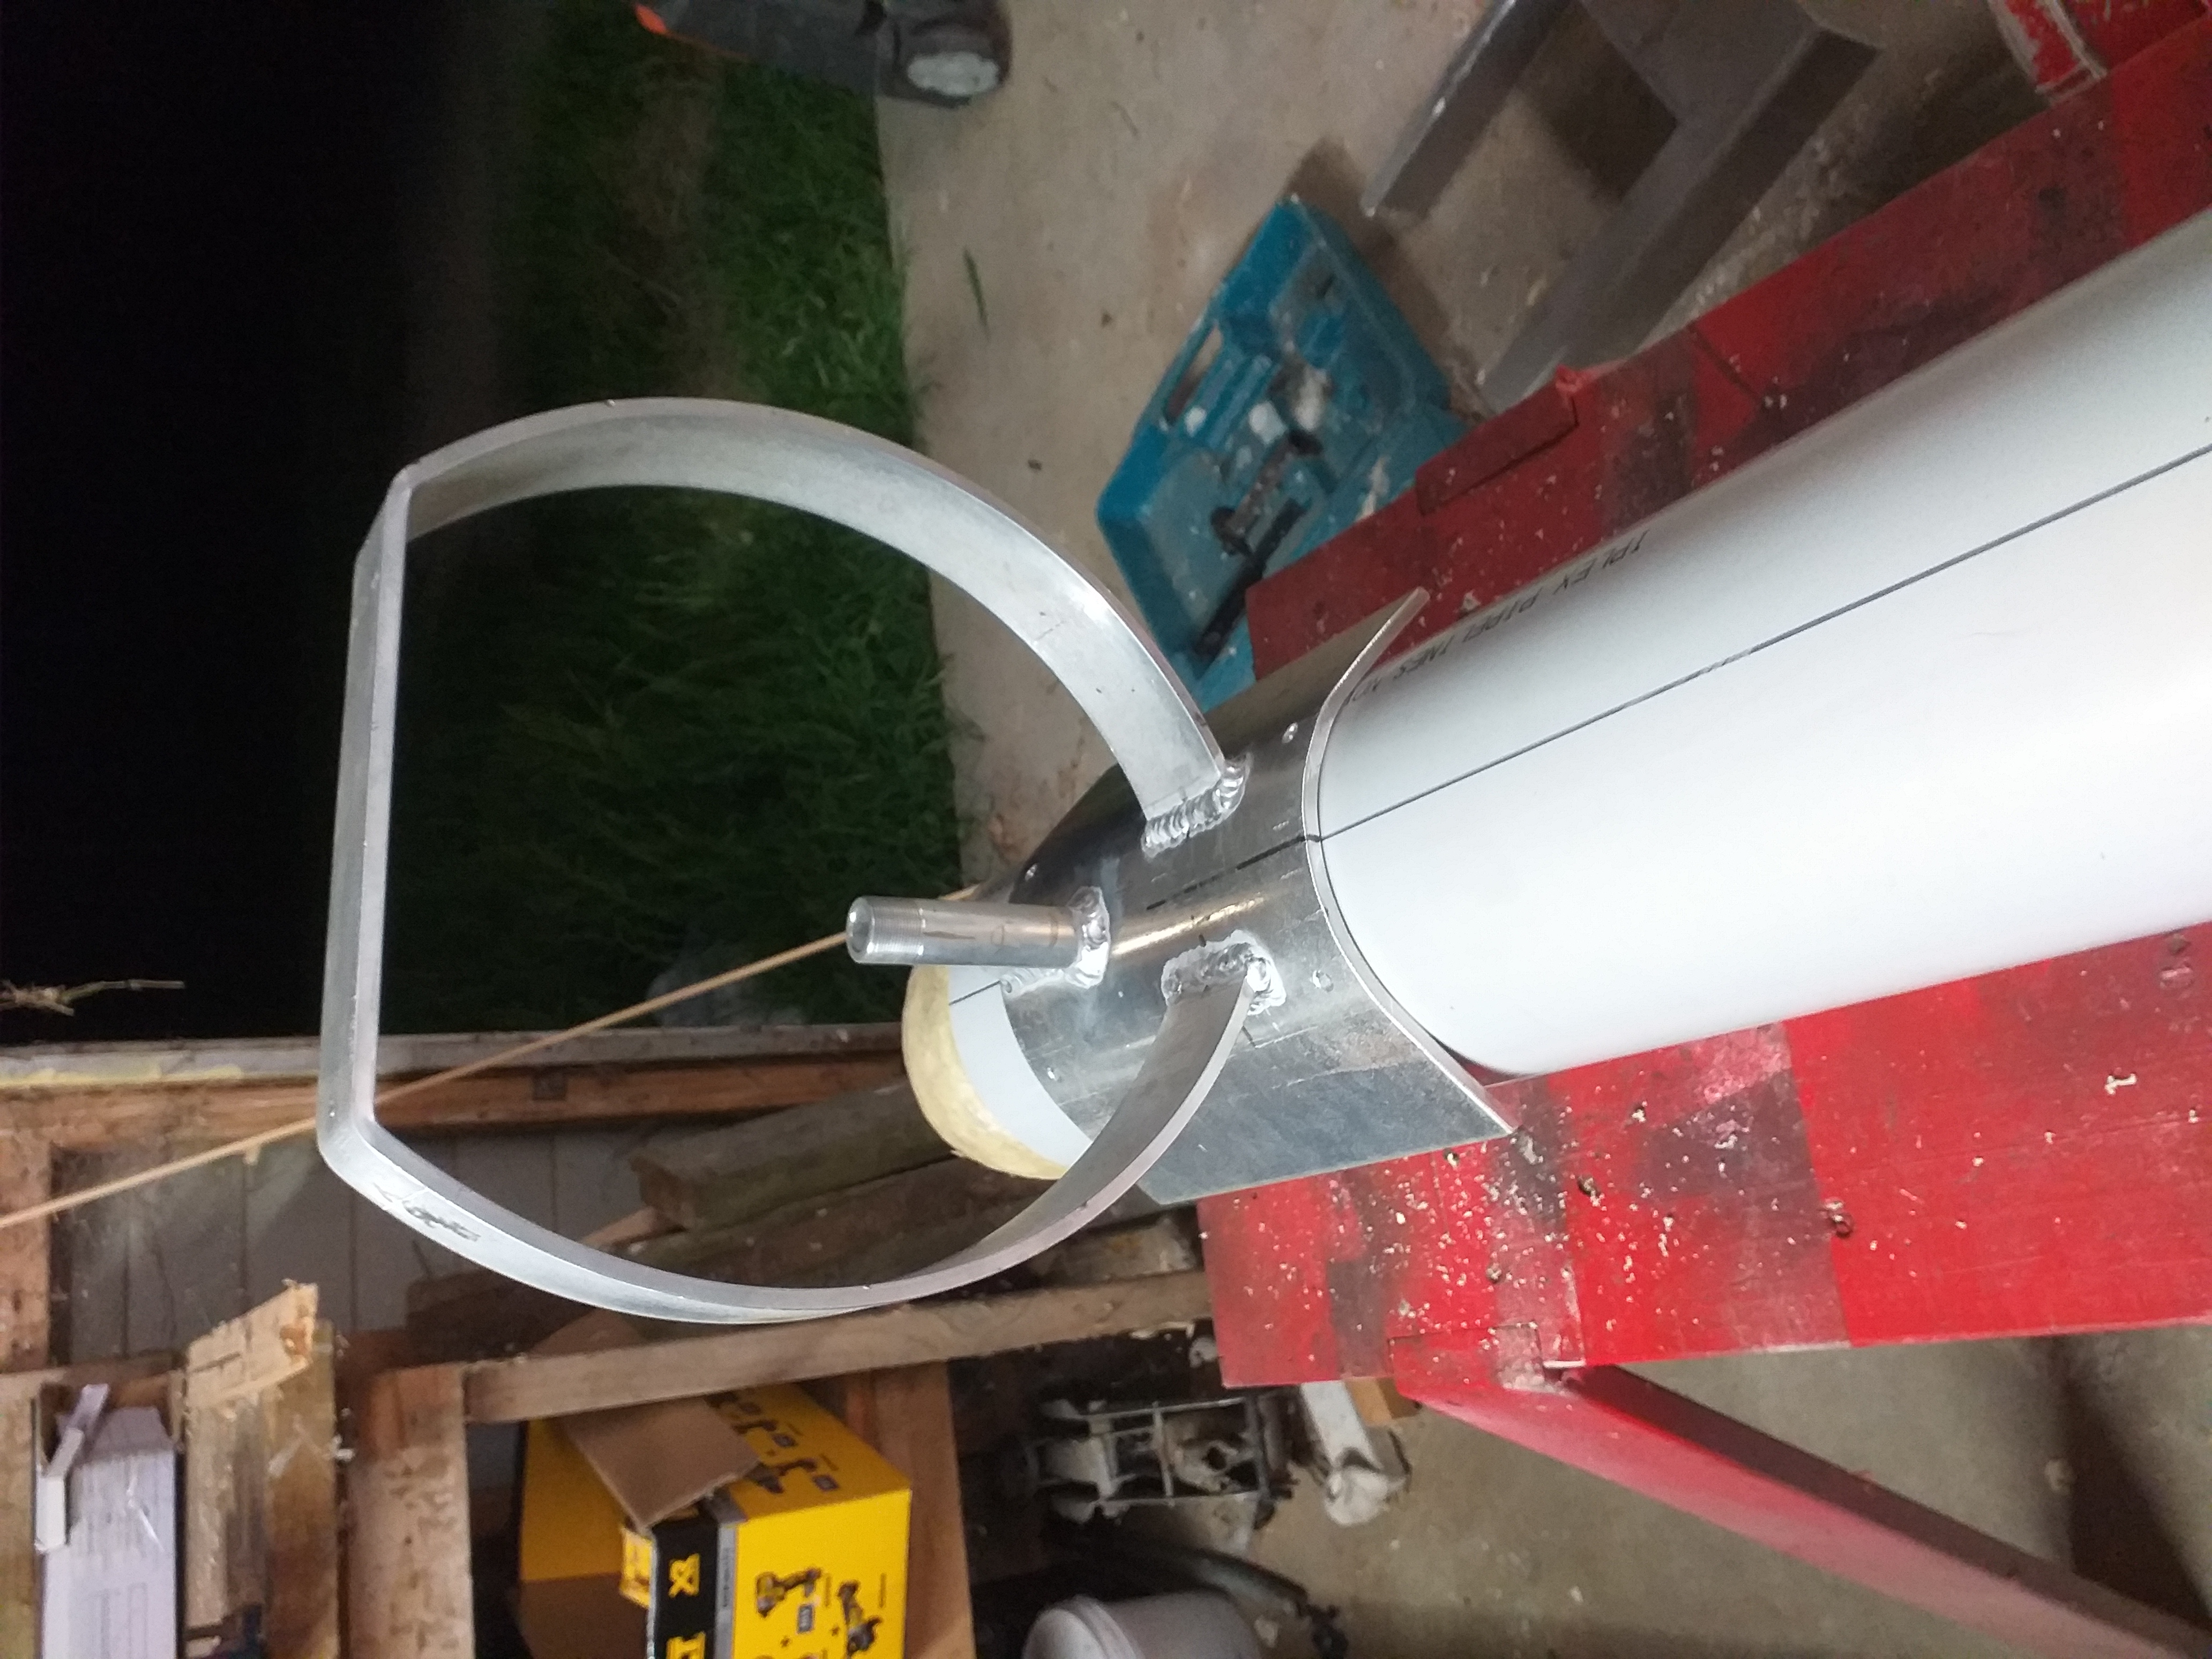
So jumped ahead a bit now as trying to get done by xmas. Decided to give as a gift to someone who has helped us out a lot with gear for our young one.
Have now fitted the motor, wired all electrics made and fitted handle, fitted nose cone, filled inside with polystyrene.
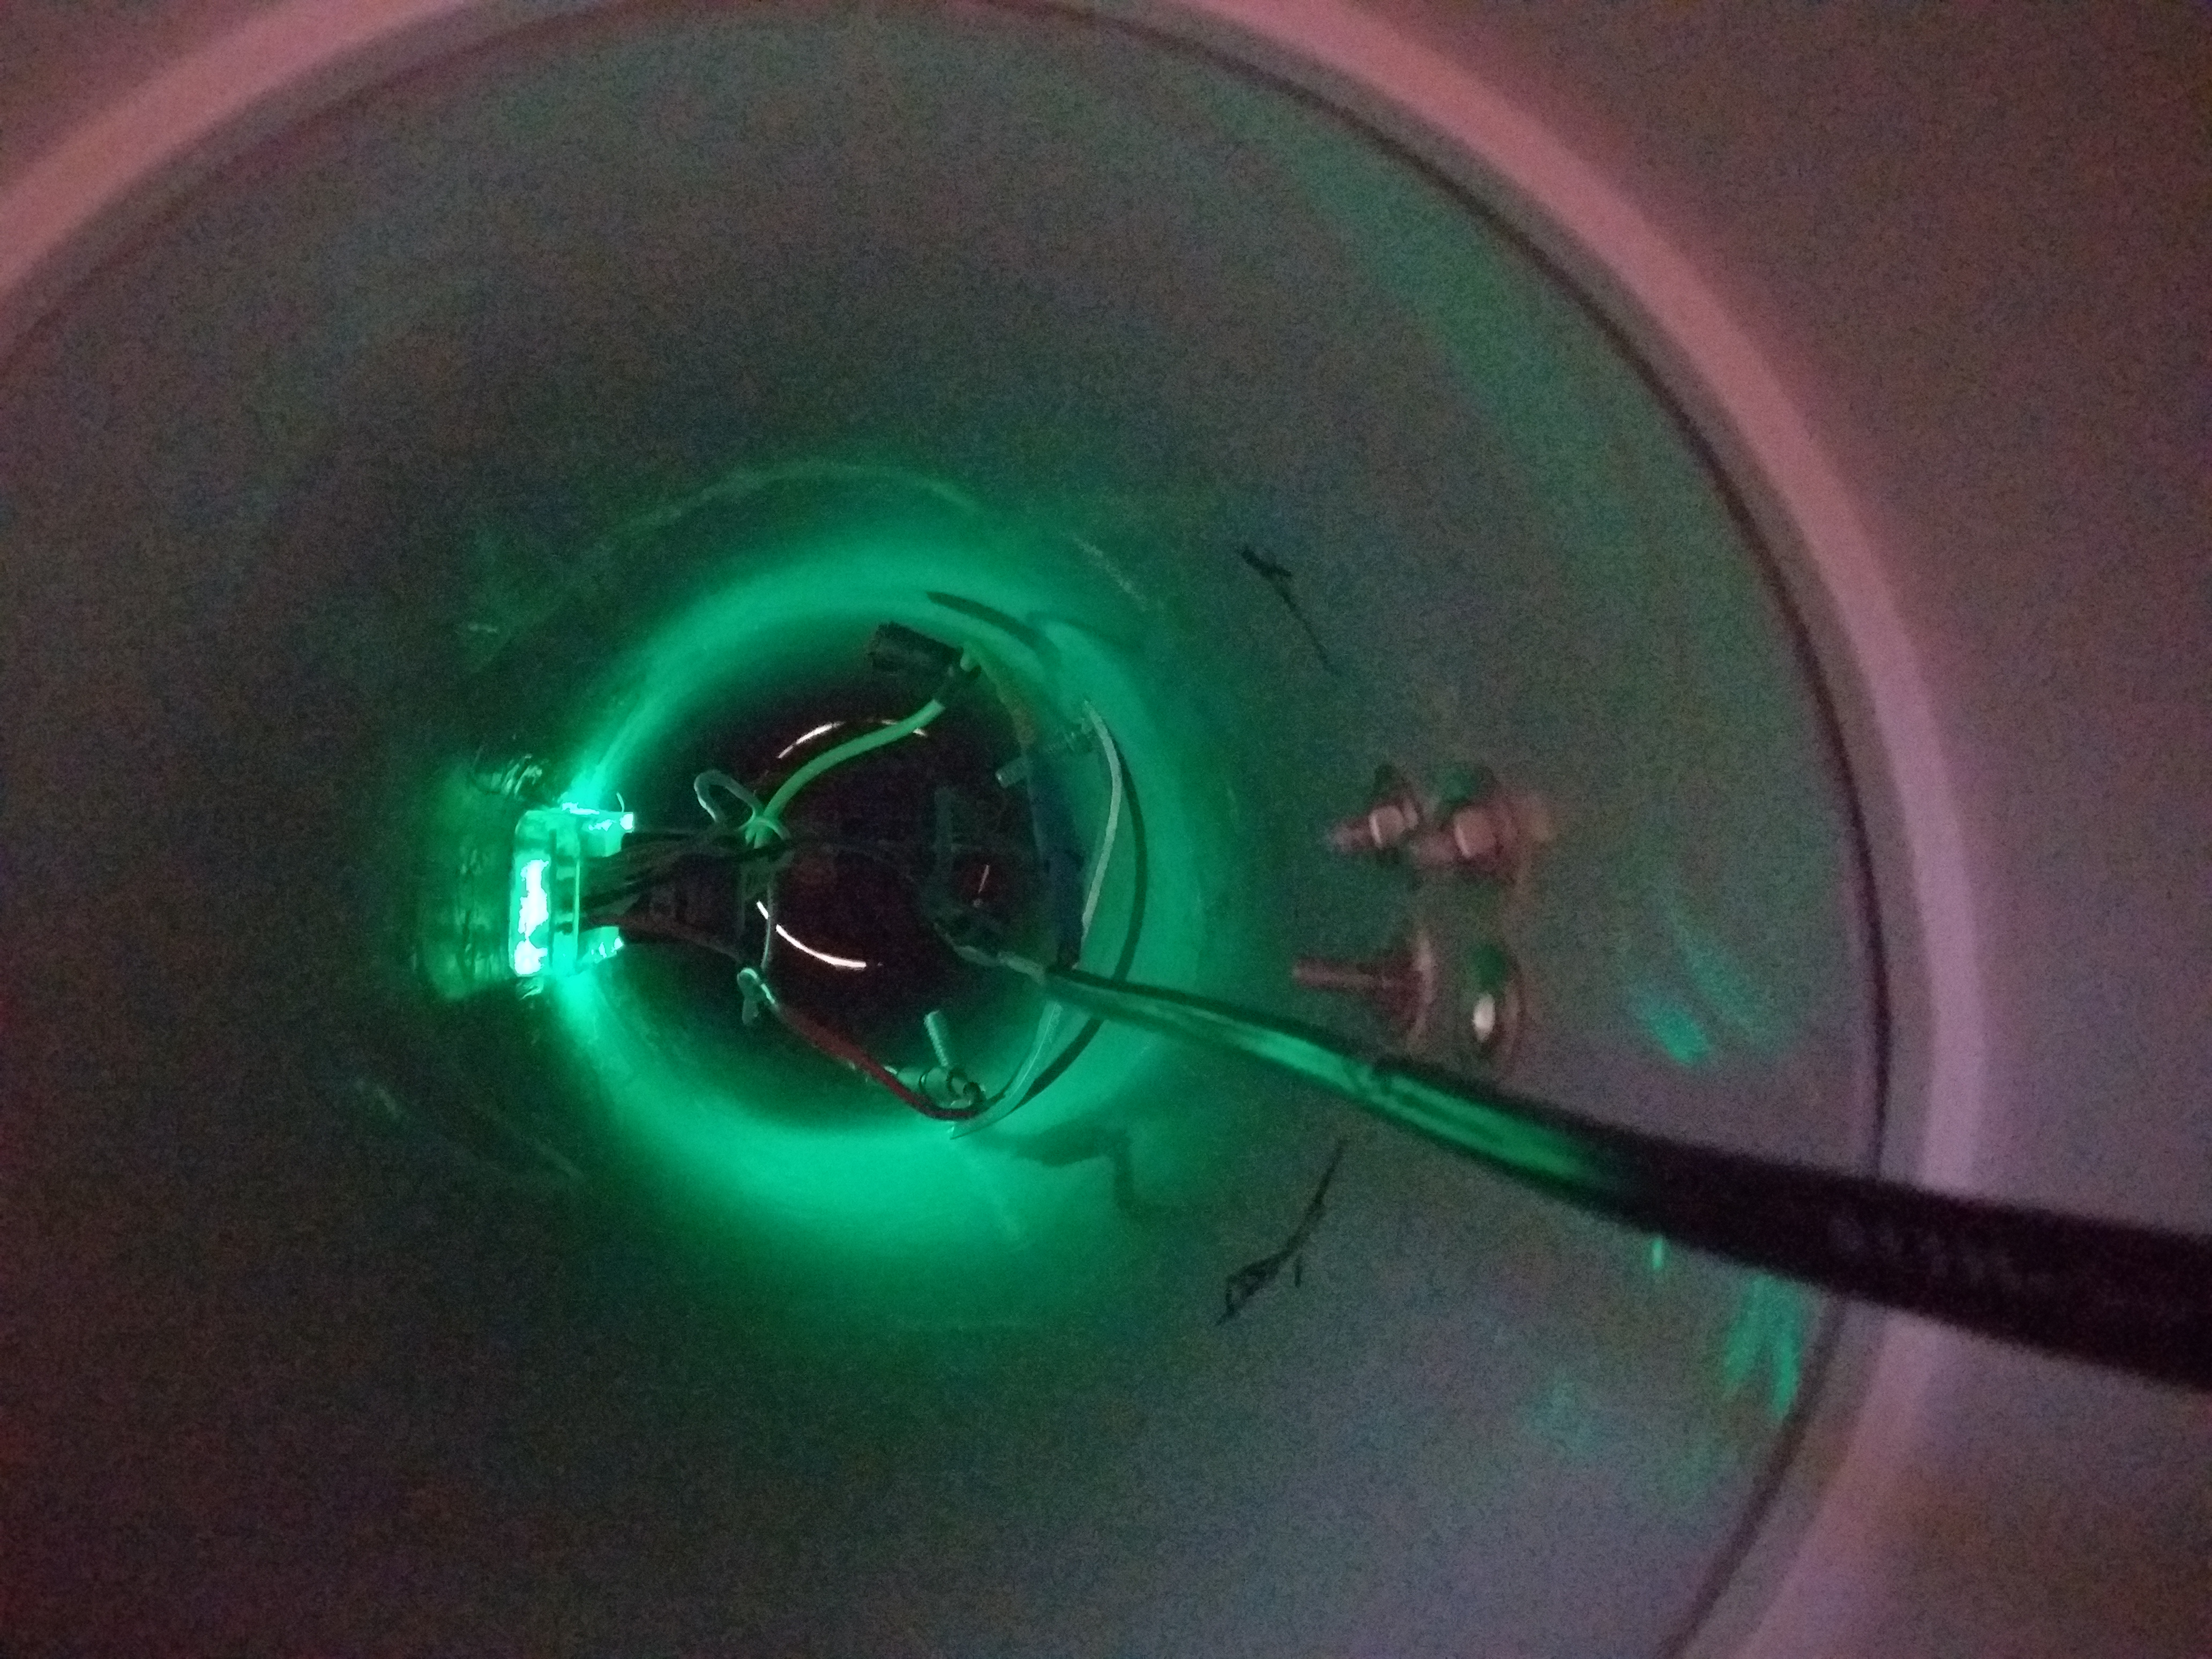 timer is a purchased unit that is magnet operated. Long bolt protruding from floor is mounting the battery backing plate to. Battery is slightly offset to counteract torque from electric motor.
-
06-02-2021, 01:55 PM #15Member
- Join Date
- Apr 2019
- Location
- Rotorua
- Posts
- 593
Forgot to put up pictures of the finished product. Got it all done for Xmas which went down really well.
Has done a couple of runs now. Does out nice and straight which is good. Stepping up the time each time it has been used to see how far is still go without running out of line.
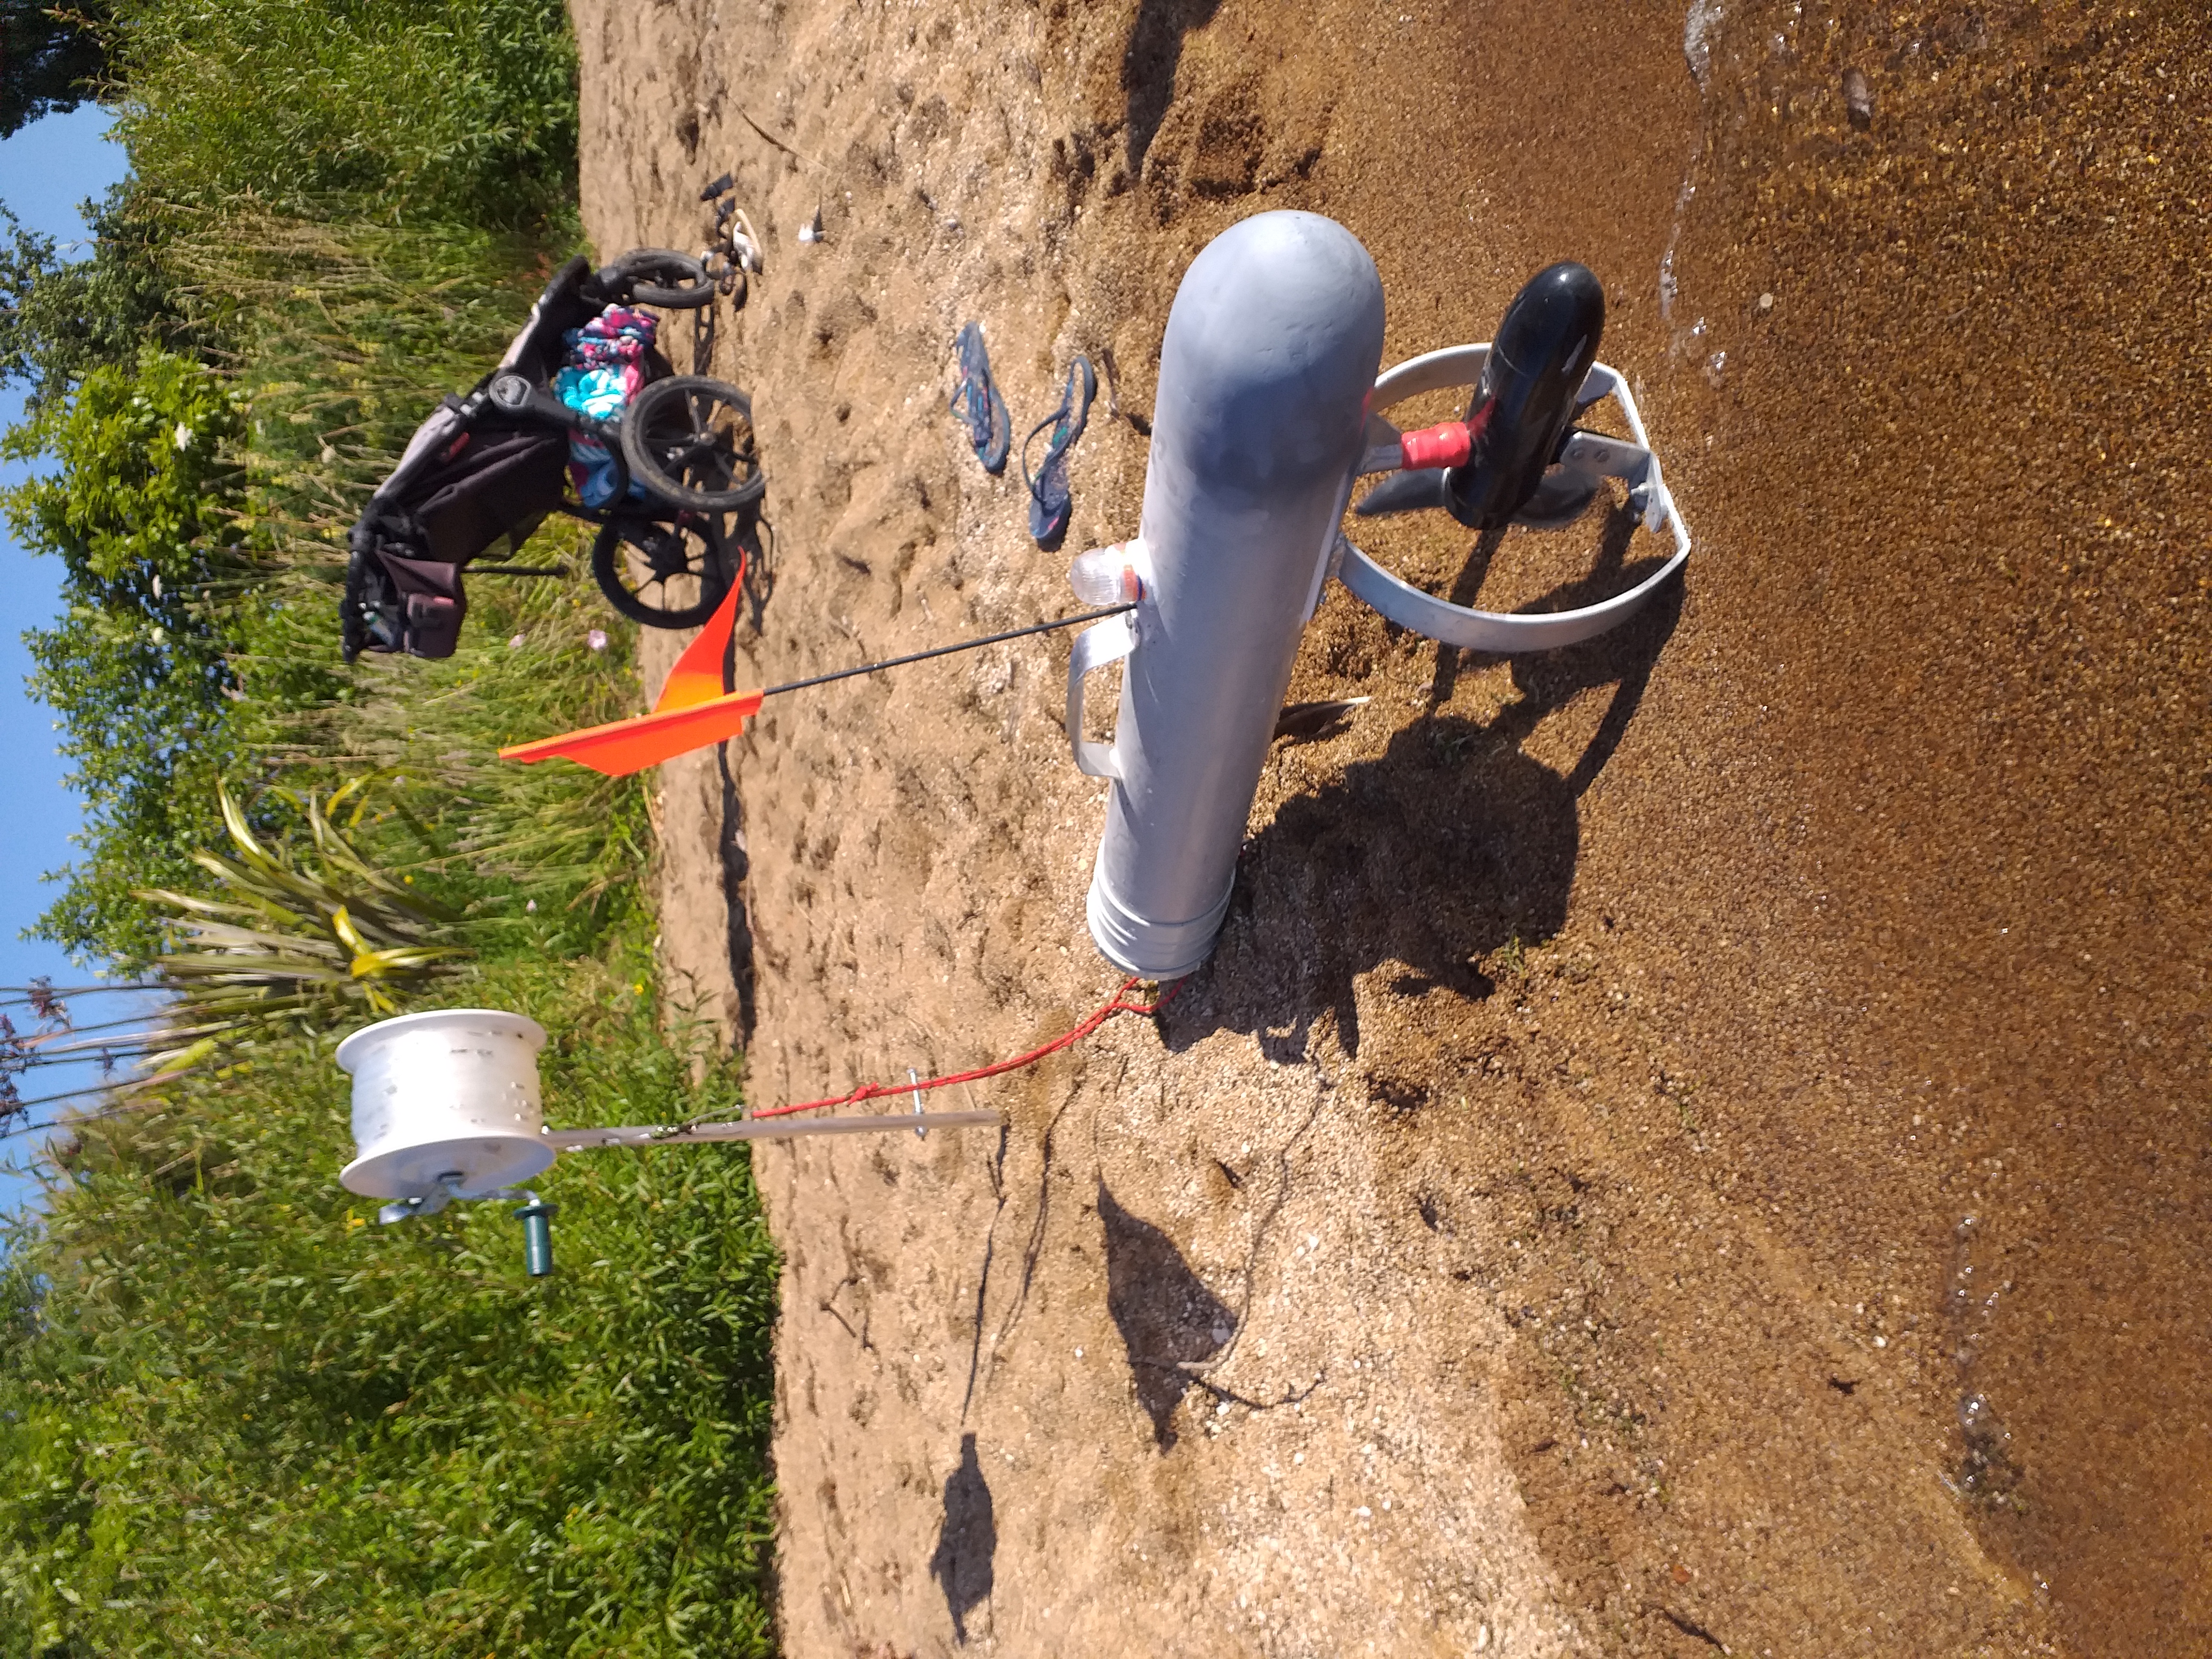
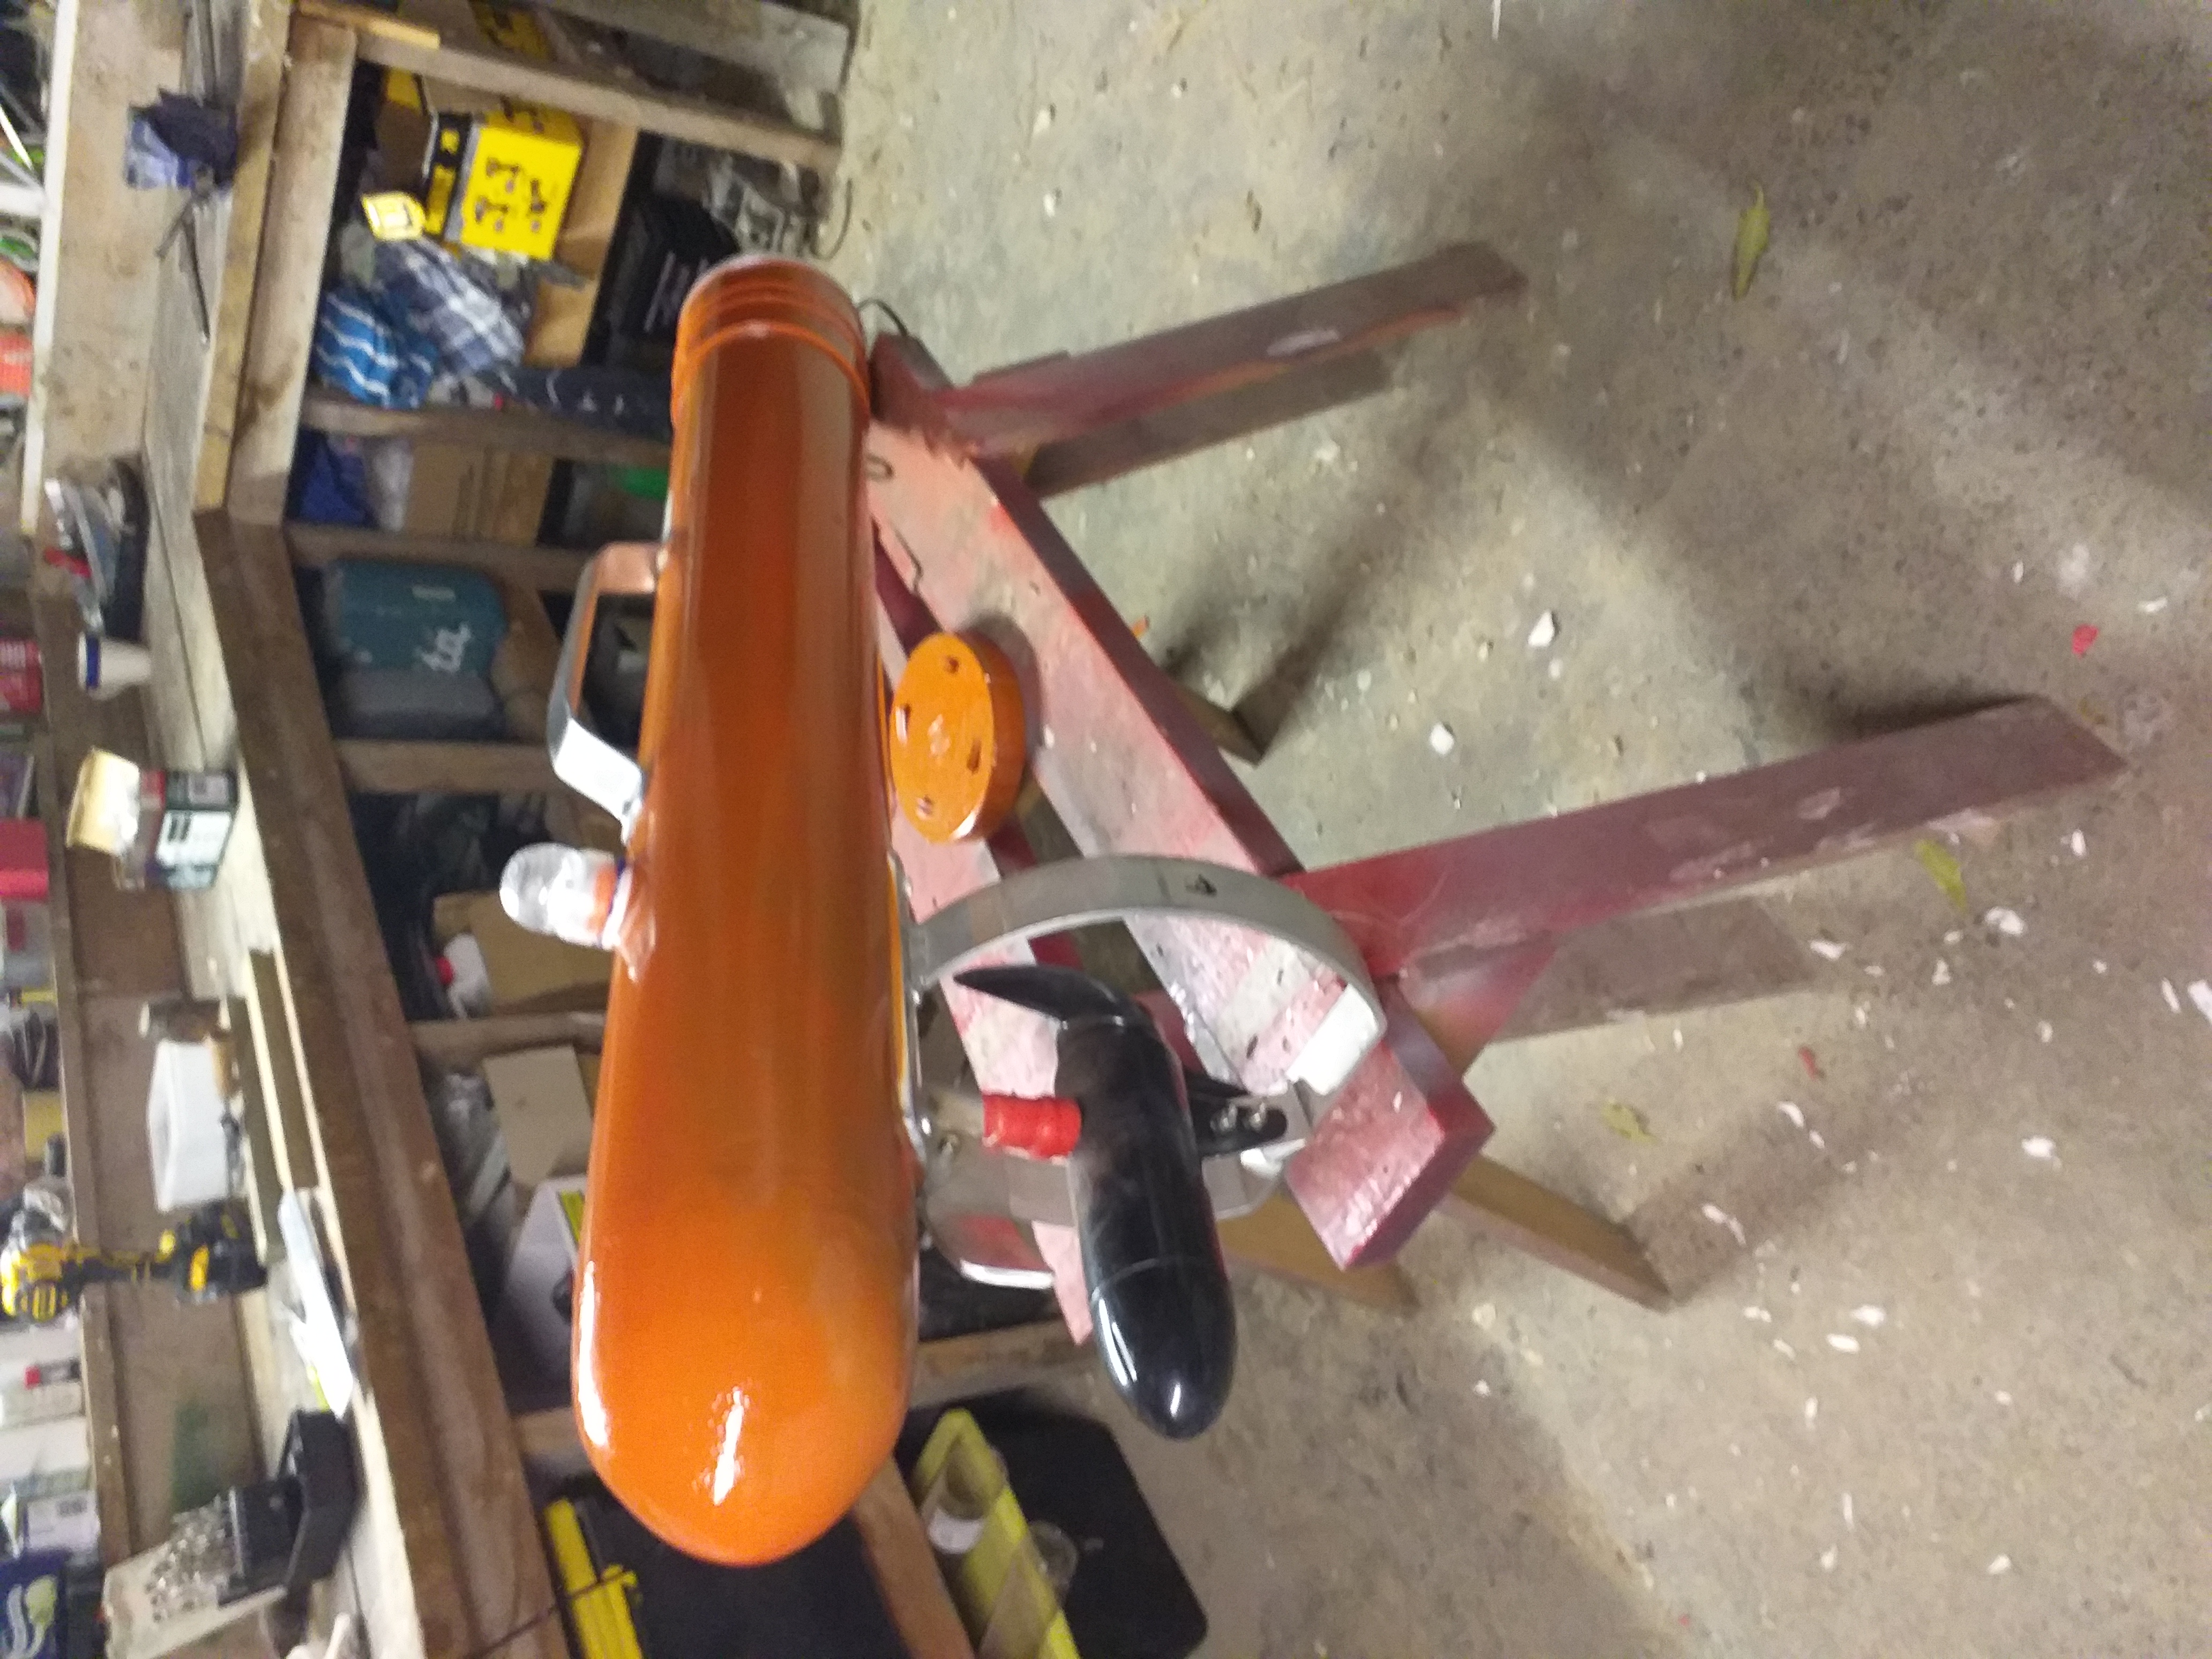
Not for next time. Use better paint. This stuff didn't cover very well. Won't matter only going to get beat off in the sun


 Reply With Quote
Similar Threads
-
Kontiki Tips Please
By Grinny in forum FishingReplies: 17Last Post: 18-12-2020, 07:58 AM -
DIY kontiki info
By gadgetman in forum FishingReplies: 70Last Post: 07-05-2020, 06:00 PM -
GT Kontiki Steering issues
By Isky27 in forum FishingReplies: 5Last Post: 27-01-2019, 10:33 PM -
GT Kontiki
By samba in forum FishingReplies: 2Last Post: 21-12-2015, 05:09 PM
Tags for this Thread
 Posting Permissions
- You may not post new threads
- You may not post replies
- You may not post attachments
- You may not edit your posts
Welcome to NZ Hunting and Shooting Forums! We see you're new here, or arn't logged in. Create an account, and Login for full access including our FREE BUY and SELL section Register NOW!!
All times are GMT +13. The time now is 01:07 PM.

Bookmarks