

 74Likes
 LinkBack URL
 About LinkBacks
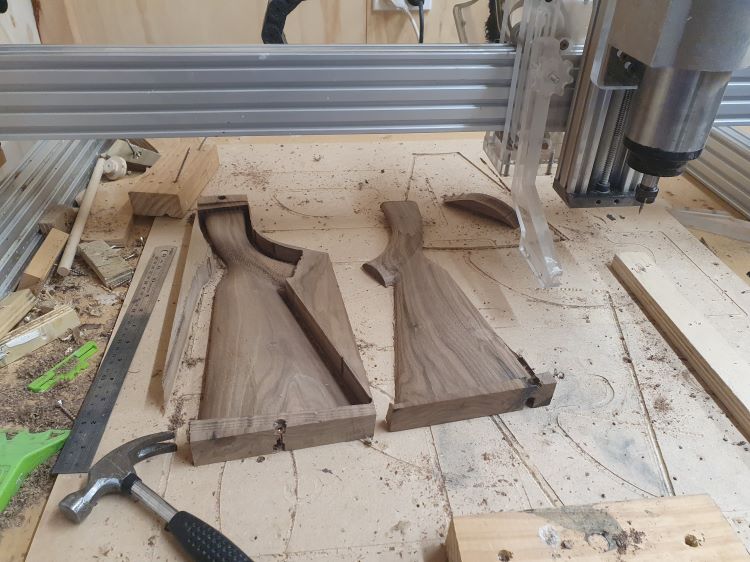
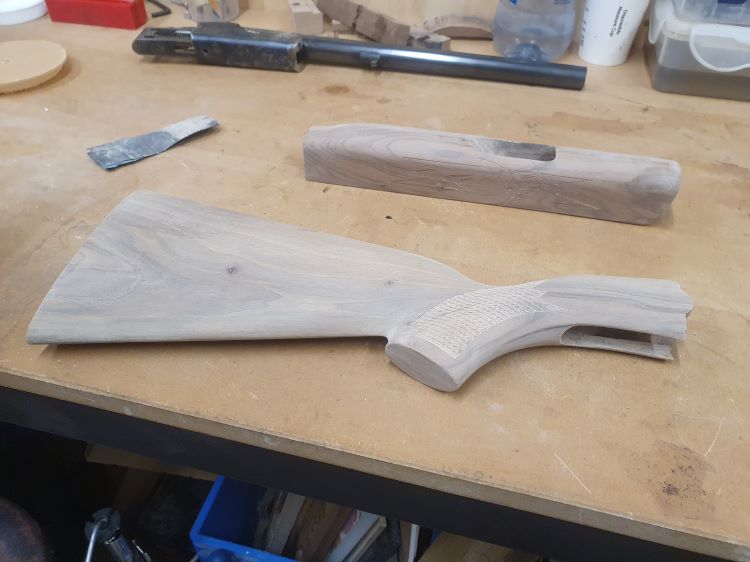
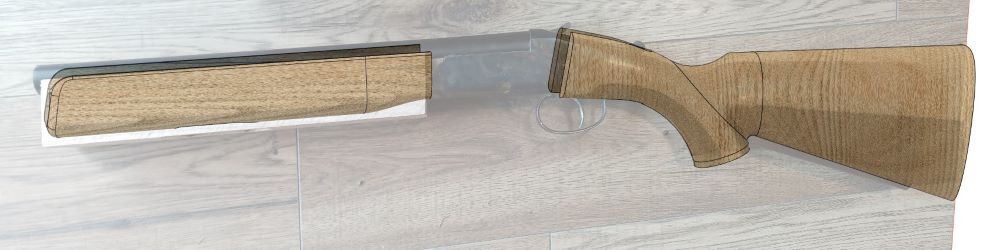
Thought I'd throw up some photos of a buttstock and fore-end I've been making out of some nice chocolatey (is that a word?) walnut I was given.
I'd previously done a trial set out of some macrocarpa, just as a test to make sure the shape and fit were correct.
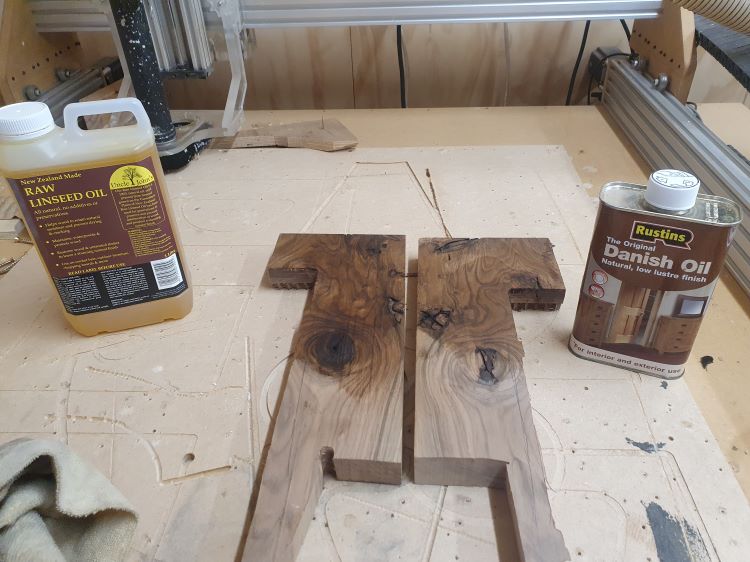
The test set was also made from one thick slab, but with this set, I had two small pieces that were bookmatched, but would have to be made in two halves.
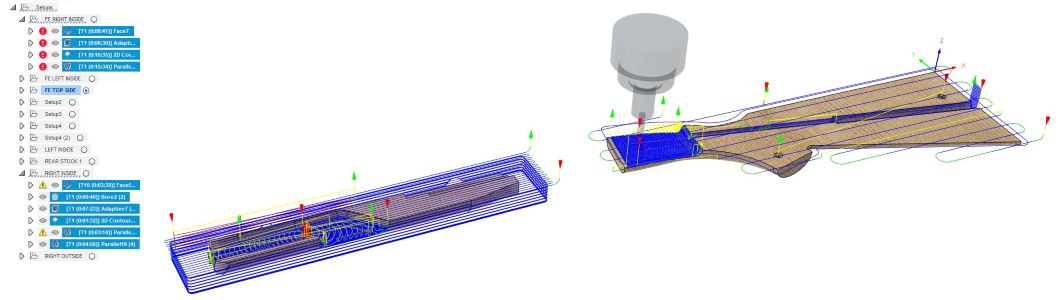
Here's what the models look like, with some reference images and a lot of rough measuring to make sure I was in the ballpark. Also for those interested, the CNC toolpaths on the models.
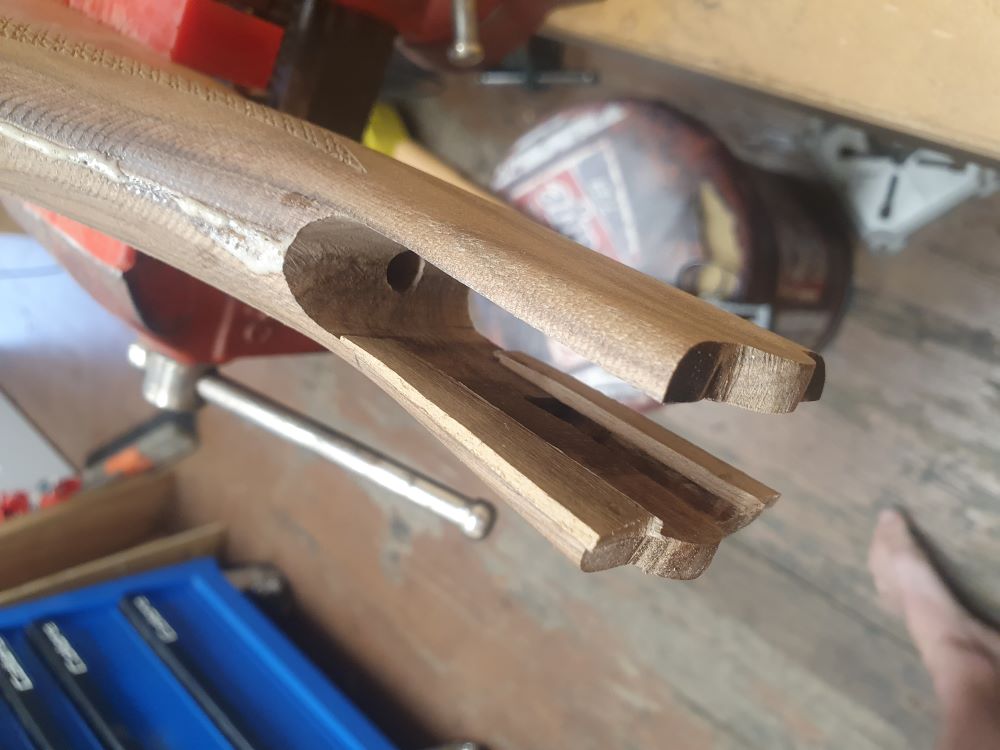
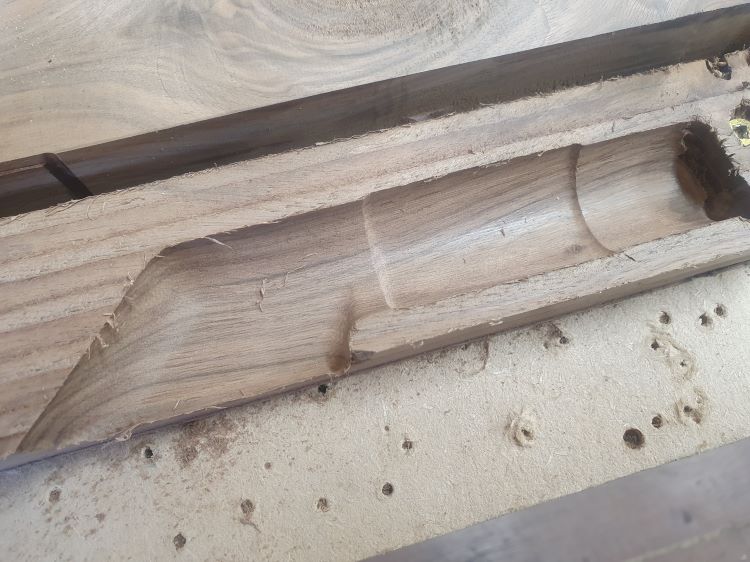
First I cut the inside of the butt section, machining the groove for the bolt and the gap for the action to fit into.
I cut the bolt hole length too short, kind of on purpose, thinking I could just drill more out once it was together, but in hindsight I should have just trusted my measurements.
I also machined locating holes that I could use to flip and locate the part on the machine, but also to glue the two halves together.
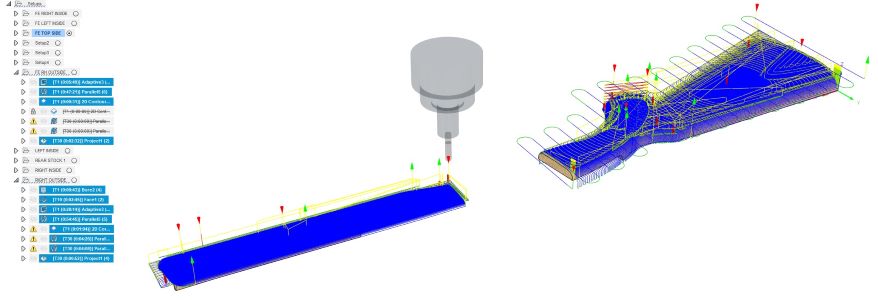
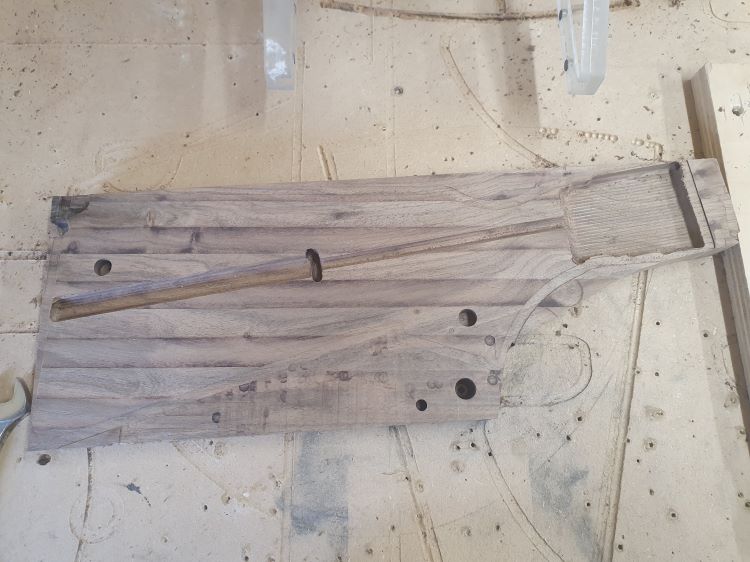
Everything was cut slightly oversize so it could be fit to the action by hand. A few small issues but overall, not too bad.
Then machining the other side.
.
Then copy and paste a mirrored part.
Welcome guest, is this your first visit? Create Account now to join.
Welcome to the NZ Hunting and Shooting Forums.
Search Forums


User Tag List
+ Reply to Thread
Results 1 to 15 of 24
Thread: Shotgun Stock CNC Build
-
01-03-2021, 05:11 PM #1Member

- Join Date
- Jan 2021
- Location
- Methven
- Posts
- 134
Shotgun Stock CNC Build
-
-
01-03-2021, 05:27 PM #2Member
- Join Date
- Jan 2021
- Location
- Methven
- Posts
- 134
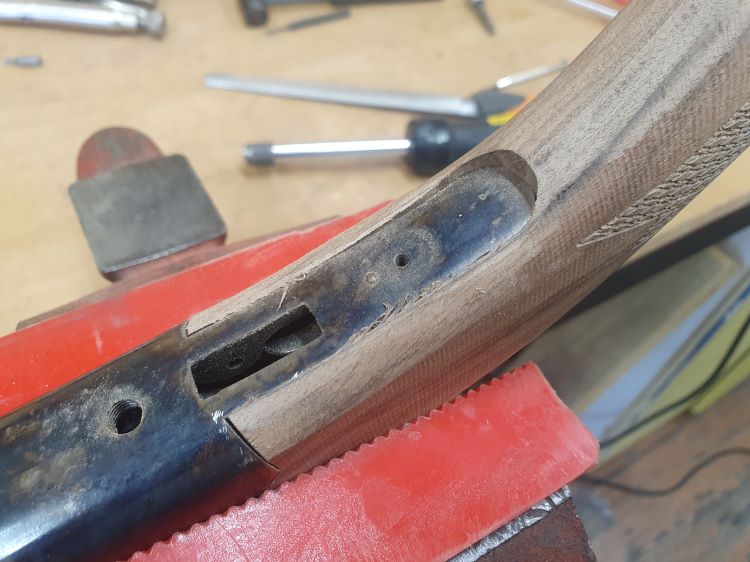
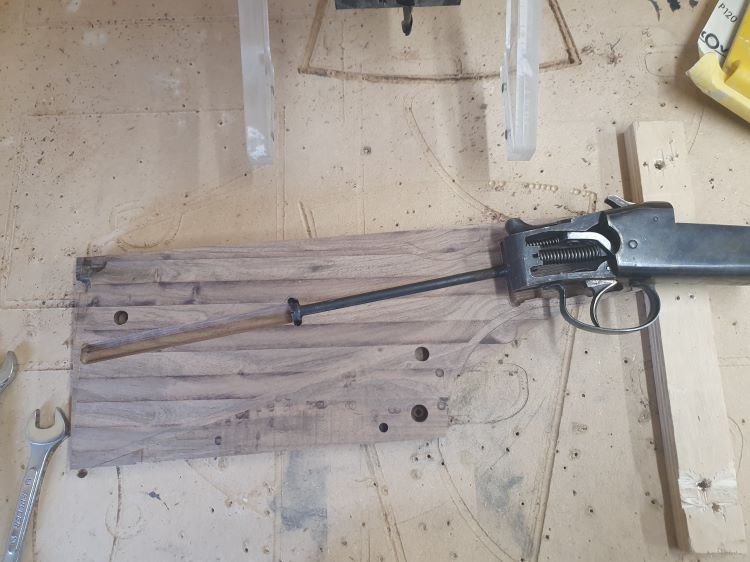
Next thing I did was to clamp the two halves together and start fitting them to the action. Its a tricky bugger, tapering in and having a semi-circle part in the center.
I just wanted to see how everything was fitting before I glued the two halves together.
I mostly used files, but I've also got a vertical belt sander that is nice to remove material quickly and leave things flat.
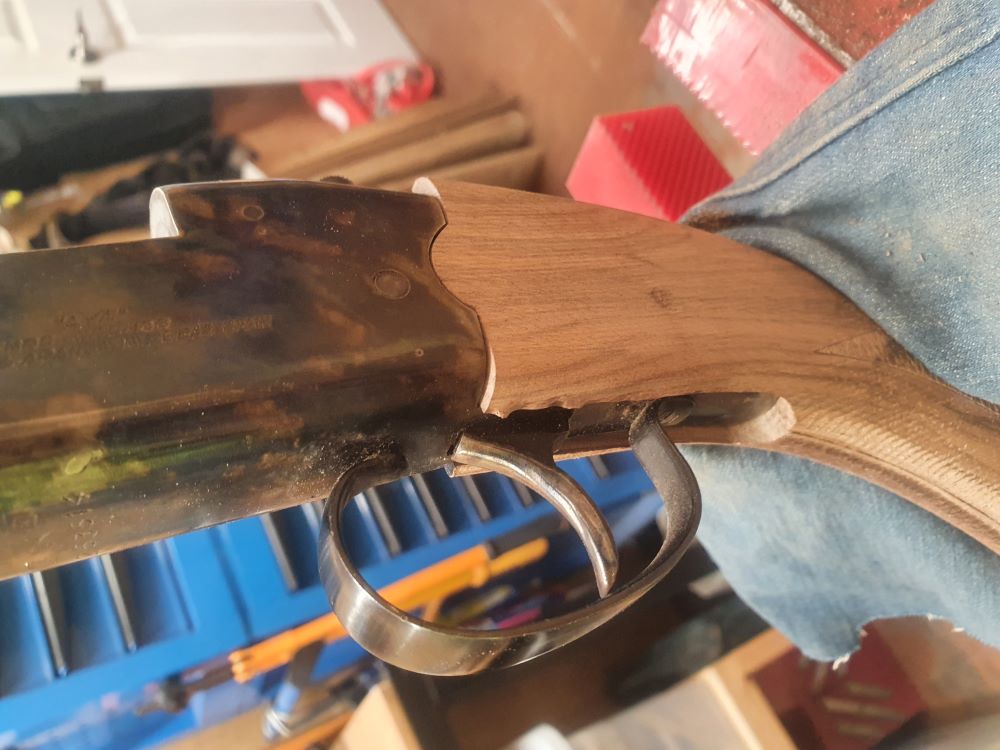
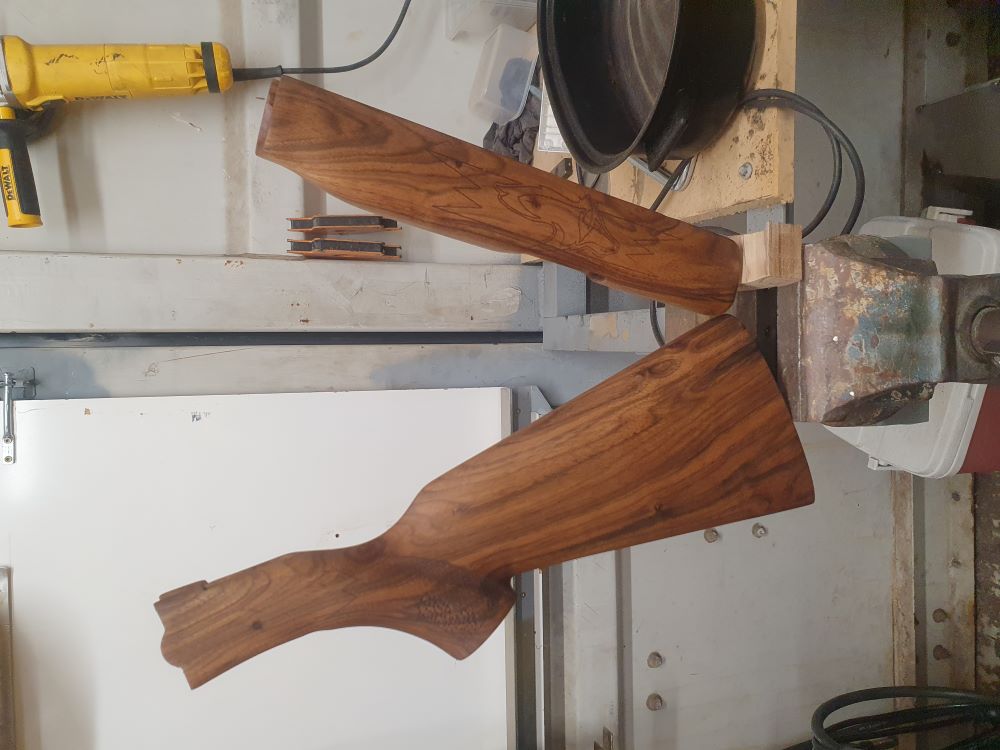
Once I was happy enough, I glued the two halves with lots of glue.
Then I continued fitting it to the action, unfortunately I cocked up, I couldn't get the action to slide in nicely, and in a rush I took too much material off one side and created a taper.
To fix it, I made two small wedges and glued one at the top and one at the bottom.
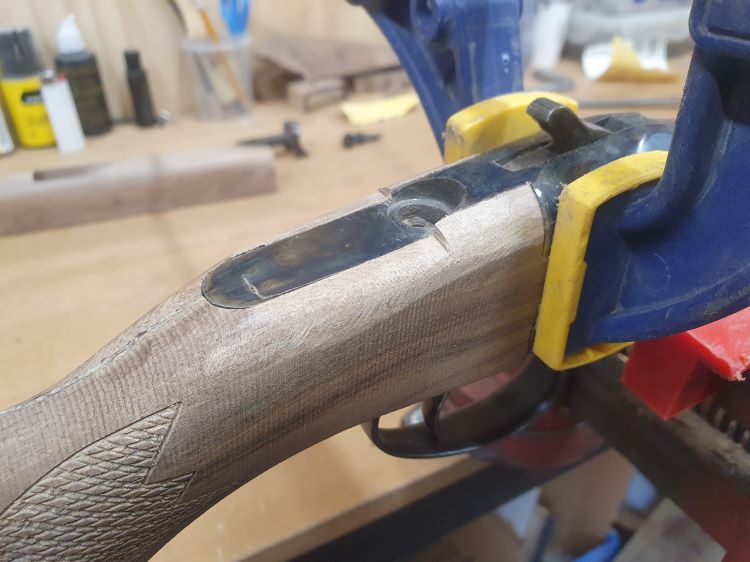
That worked very well. Next I had to make a slight angle adjustment to the bolt hole as it was slightly too high, maybe 2mm. Then I removed the lever, trigger and trigger guard to start matching the action.
-
01-03-2021, 05:37 PM #3Member
- Join Date
- Jan 2021
- Location
- Methven
- Posts
- 134
While fitting the stock, I was going back and forth, machining the fore-end.
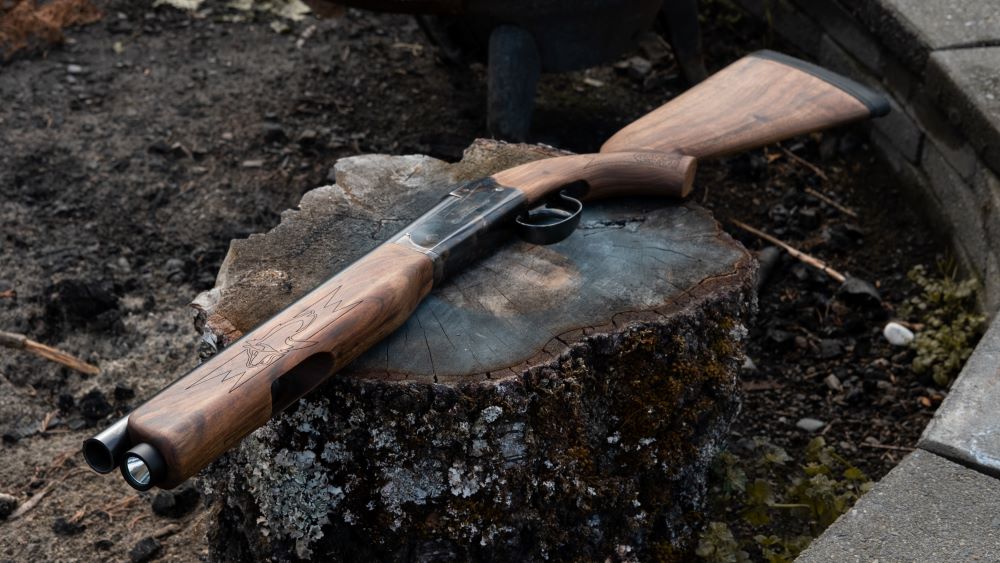
Its got a wee surprise that I haven't seen done before but I thought would be cool.

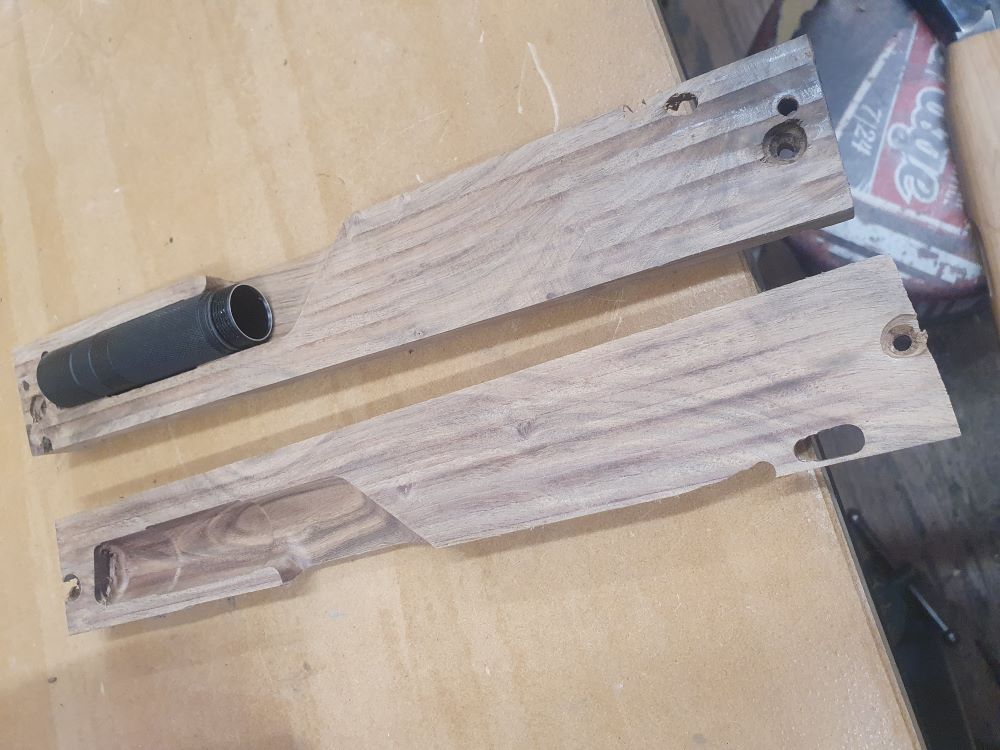
I should have done it on the machine, but I drilled locating holes to strengthen and locate the two halves with dowels.
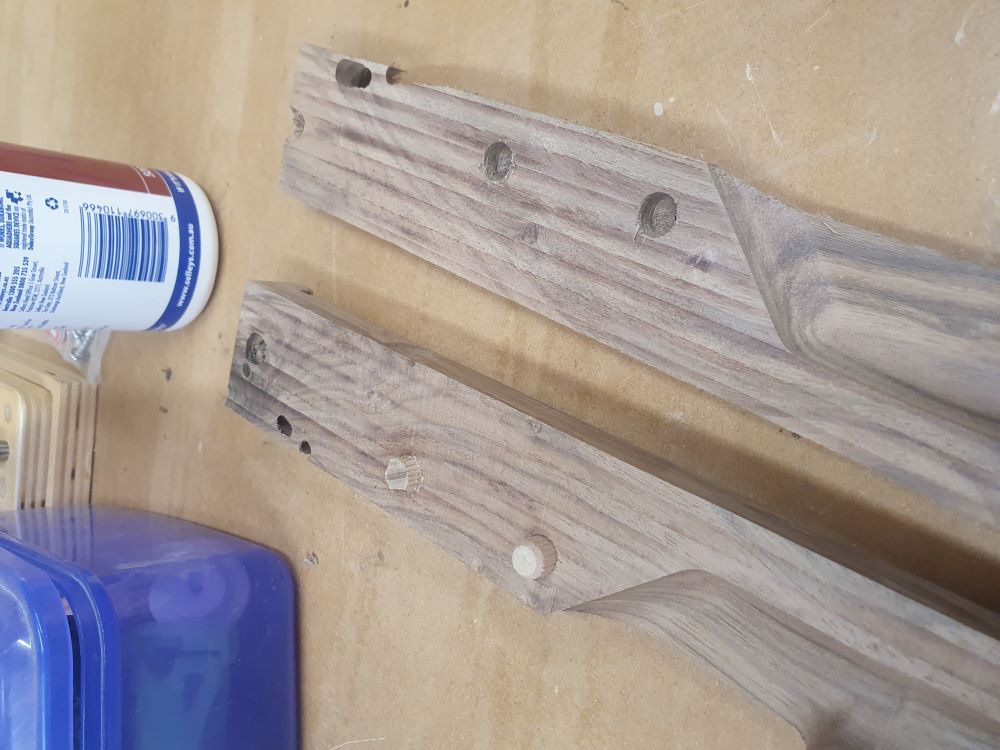
Clamped and glued.
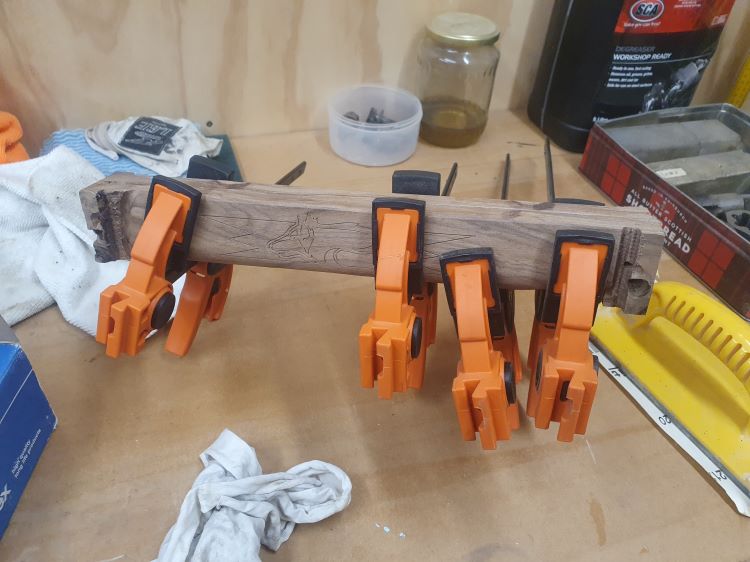
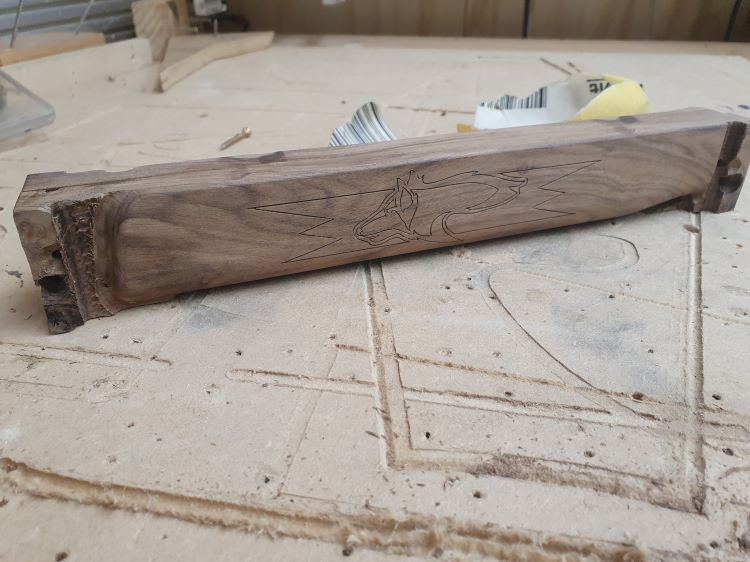
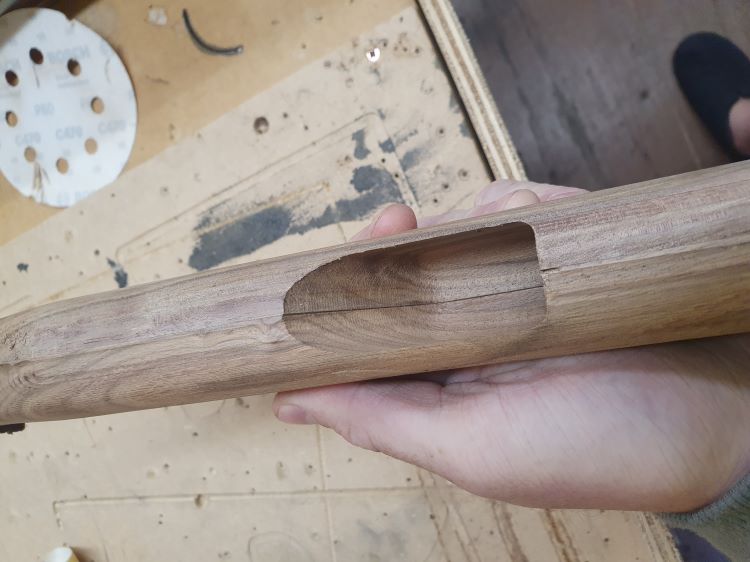
So next I trimmed it and machined out the barrel channel and mounting, but I may have forgotten photos.
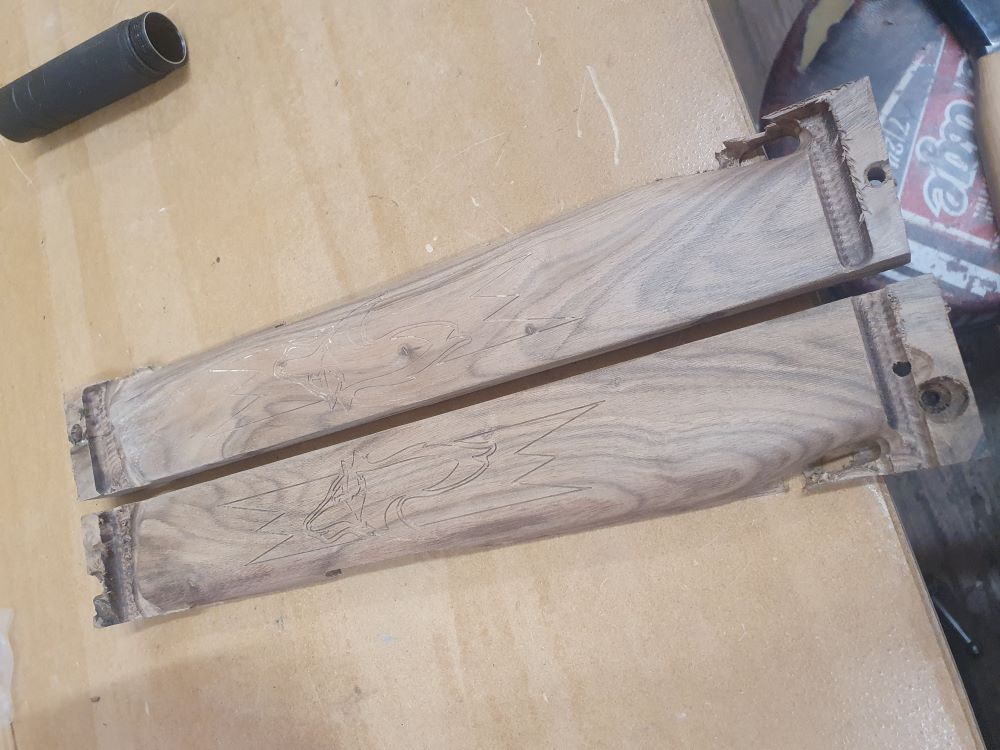
The major thing I stuffed up on the whole set was the checkering, last time it went perfect, but this time the machine was a bit sloppy and didn't do nice even lines. So on the fore end I just engraved the outline. I may just finish it all and then decide on how to do the checkering or stippling or whatever.
-
02-03-2021, 09:15 PM #4Member

- Join Date
- Sep 2016
- Location
- Waikato
- Posts
- 417
Very impressive, please keep the updates coming. Did you model that from scratch or 3d scan an existing stock? I'm impressed you were able to go to final production after only a single trial set!
Is it a straight stock or have you worked in some cast?
-
02-03-2021, 09:39 PM #5Member
- Join Date
- Nov 2012
- Location
- AKL
- Posts
- 396
awesome job, man! awesome! loving it!
Skirch likes this.
-
02-03-2021, 09:57 PM #6Member
- Join Date
- Nov 2014
- Location
- Central Otago
- Posts
- 2,221
I am impressed with your skills in getting the machine to do all that! Being closely associated with dinosaurs, I have always whittled stocks from solid, 90% inletting on the milling machine and hand fitting. Horses for courses I suppose, but impressive work nonetheless! Keep it up.
Micky Duck likes this.
-
03-03-2021, 10:06 AM #7Member
- Join Date
- Jan 2021
- Location
- Methven
- Posts
- 134
Cheers! Yeah modeled it from scratch. My normal shotgun is a remington 1187, so I took lots of measurements and modelled it to match that, slightly increasing the palmswell. Originally Posted by PaulNZ

-
03-03-2021, 10:08 AM #8Member
- Join Date
- Jan 2021
- Location
- Methven
- Posts
- 134
Cheers Doc! I'm a mechanical thinker rather than creative, so getting the machine to do what I want is easier for me. Originally Posted by gundoc
-
03-03-2021, 10:25 AM #9Member
- Join Date
- Jan 2021
- Location
- Methven
- Posts
- 134
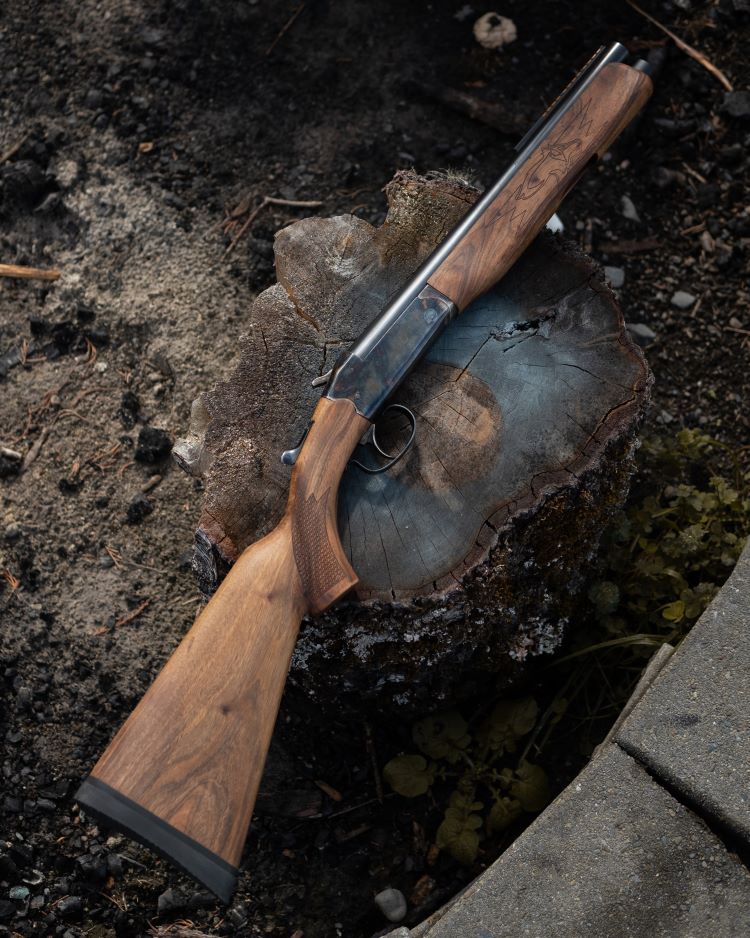
Kinda got caught up in the moment with it and forgot a bunch of photos. But I spent some time sanding it down to 320 and decided on which oil to use. I know boiled linseed would have been better, but Raw was what I had, and made it a nice dark colour which I was after.
The biggest cock up of the whole thing is the checkering. In hindsight I would just do the outline on the machine and checker it by hand. Im a bit gutted about it, but decided I'll just finish it all and then decide what to do.
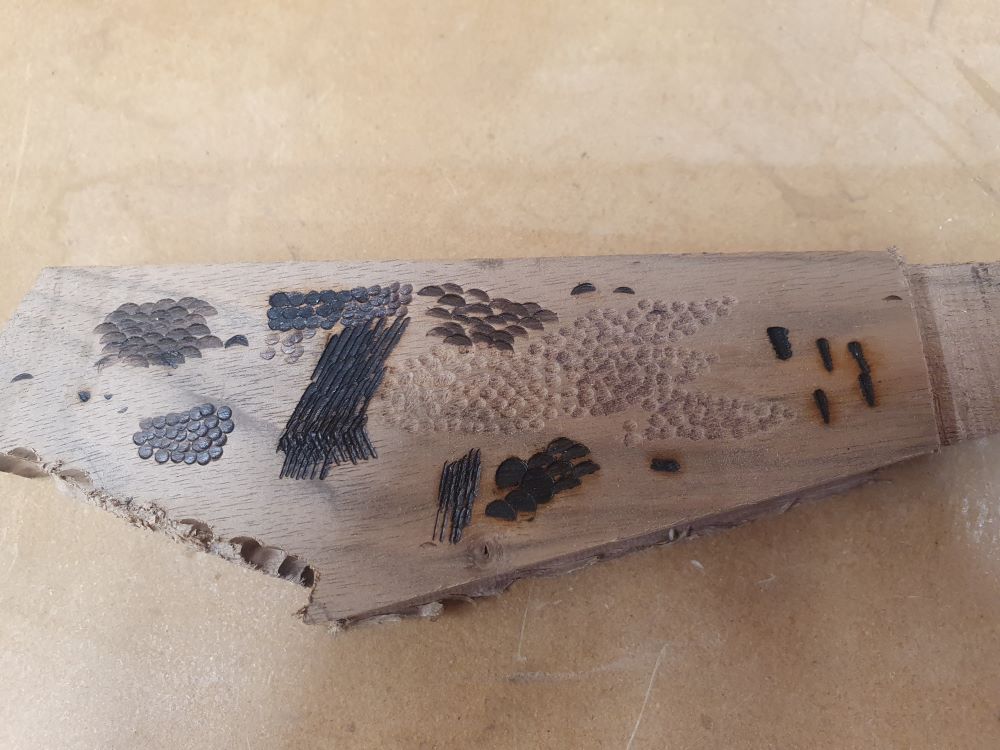
Played around with some stippling with the Dremel and the wood burning kit, and will try again on some oiled pieces to see what might work. Any ideas are welcome!
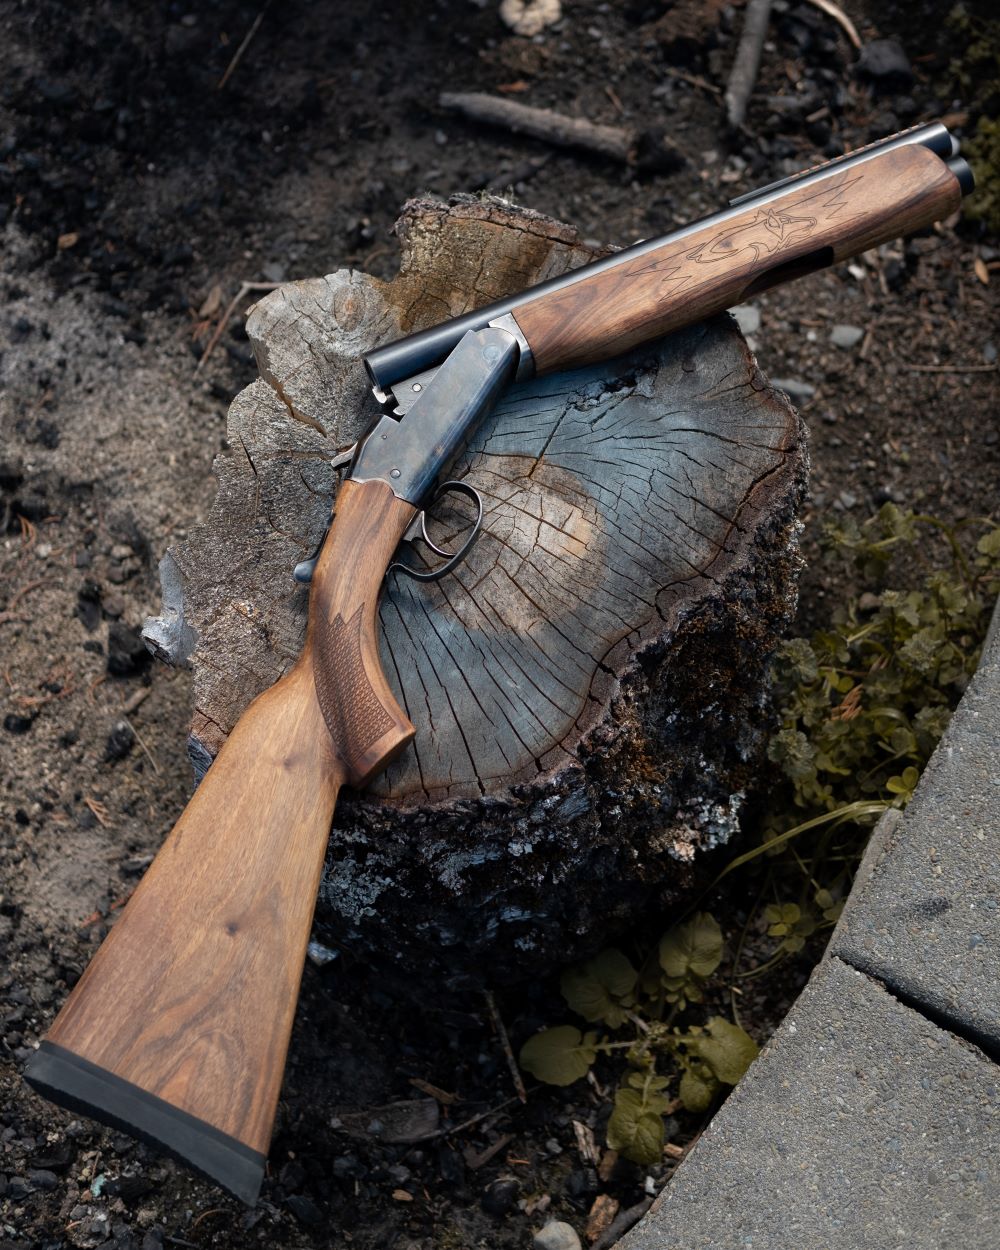
This gun definitely wont be everyone's taste. It was just an old russian single shot that I'd originally planned to convert to a suppressed 44 mag. Then after feeling grumpy about the abuse gun owners get, I decided to cut it to minimum legal length in my own wee protest. It'll just be a loud fun gun, that might get to shoot the odd pig round the farm.
-
03-03-2021, 02:40 PM #10Member
- Join Date
- Dec 2019
- Location
- Auckland
- Posts
- 108
@Skirch well done! What software did you use for 3d modeling and CNC machining?
-
04-03-2021, 07:04 AM #11Member
- Join Date
- Jan 2021
- Location
- Methven
- Posts
- 134
Cheers! Using fusion 360. I'm a mechanical consultant and usually use Inventor, but fusion for all my cnc stuff. Originally Posted by LookingForMauser
-
04-03-2021, 08:22 AM #12Member

- Join Date
- Dec 2011
- Location
- Northern Gaul (Pukekohe)
- Posts
- 5,780
Want a job machining some replacement Lee Enfield stocks?

Quite a demand for them now.Welcome to Sako club.
-
05-03-2021, 10:33 AM #13Member
- Join Date
- Jan 2021
- Location
- Methven
- Posts
- 134
Not sure I want a job doing anything! Id have to do a run of them to make it worth my time unfortunately, too many projects on the list! Originally Posted by dogmatix
-
06-03-2021, 04:36 PM #14Member
- Join Date
- Mar 2014
- Location
- Waikato
- Posts
- 435
Very clever, Sir.
-
08-03-2021, 11:11 AM #15Member
- Join Date
- Jan 2021
- Location
- Methven
- Posts
- 134
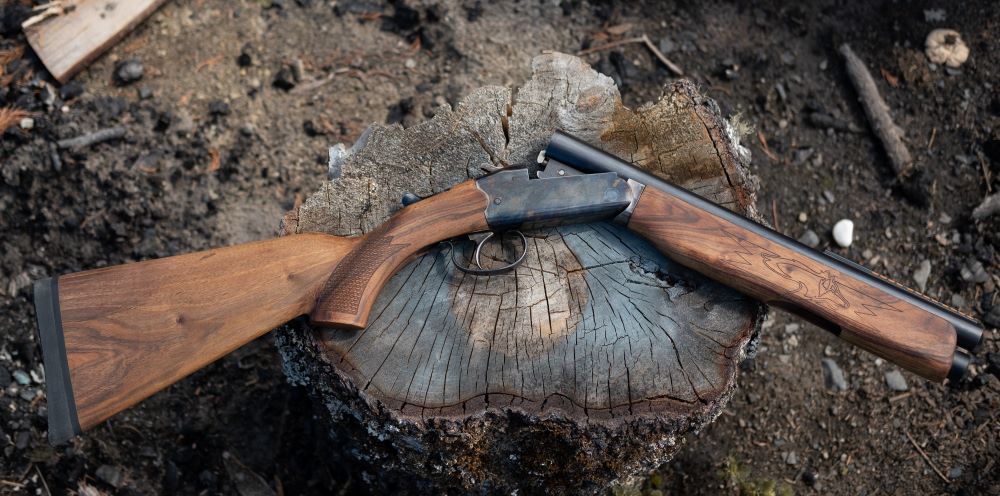
Its done! For now.... still doesn't have the stippling or checkering tidied up, but I'll just leave it for now and make a decision on how to finish that one day.
My brother was out for the weekend and used his photography skills on it for me.
I was having a quick add up in my head about how much I have into this project.
Shotgun - $150 (from GunDoc about 10 years ago)
Buttpad - $70
Front sight - $30
Torch - $30
Tooling, oil and spilt bottle of bluing solution - $50
Wood was all free.
Total of $330, not bad for a shotgun that might fire ten shots a year.
Anyway, here's some pretty pictures.


 Reply With Quote
Similar Threads
-
Walnut Stock Build
By PaulNZ in forum Projects and Home BuildsReplies: 80Last Post: 19-01-2023, 08:31 AM -
Wooden stock build
By Remmodel7 in forum Projects and Home BuildsReplies: 3Last Post: 03-03-2020, 09:57 PM -
284 build. Carbon stock question. Slippery when wet?
By 284 Gypsy in forum Projects and Home BuildsReplies: 11Last Post: 08-06-2019, 11:17 AM -
suggestions on material to build up rifle stock grip
By ebf in forum Projects and Home BuildsReplies: 8Last Post: 15-10-2016, 10:39 PM -
Stock pad for a shotgun
By Dino in forum Firearms, Optics and AccessoriesReplies: 6Last Post: 13-03-2014, 11:57 AM
Tags for this Thread
 Posting Permissions
- You may not post new threads
- You may not post replies
- You may not post attachments
- You may not edit your posts
Welcome to NZ Hunting and Shooting Forums! We see you're new here, or arn't logged in. Create an account, and Login for full access including our FREE BUY and SELL section Register NOW!!
All times are GMT +13. The time now is 01:41 PM.

Bookmarks