

 3Likes
 LinkBack URL
 About LinkBacks
Wow Greg ... those look awesome.
Not sure i can post a picture once i have a finished product, with your pictures in the thread - mine will look rubbish hahaha.
I do have some pictures I was trying to load up thismorning but my work computer has admin issues so ill do it tonight when I get home. Overall the condition of the rifle (and in particular the stock) is not that bad.
Welcome guest, is this your first visit? Create Account now to join.
Welcome to the NZ Hunting and Shooting Forums.
Search Forums


User Tag List
+ Reply to Thread
Results 16 to 30 of 60
Thread: Norinco .22 resoration
-
12-09-2012, 11:39 AM #16Member


- Join Date
- Aug 2012
- Location
- Wellington
- Posts
- 138
-
-
12-09-2012, 08:30 PM #17Member
- Join Date
- Feb 2012
- Location
- in the middle of the bottom of the south
- Posts
- 427
i didnt want to show you up, rather to inspire you, i am often inspired when i do up an old firearm as they can turn out realy nice.
that first one started out as a hand in, when the prevous owner decided he didnt want to spend the money to get it going again, it looked like this.
it was going to the cops to get cut up when i decided i would give it a go.
it cost me nothing, but i have ended up spending a couple hundred on it in parts and bits. but the end result is very satisfying.
greg
-
12-09-2012, 09:28 PM #18Member
- Join Date
- Aug 2012
- Location
- Wellington
- Posts
- 138
Trying to get some pics up but aparently the files are too large ...
Nah Greg that is very inspiring... Ill share the pics through the process .....
The paint stripper is doing its job as we speak ..
-
12-09-2012, 09:54 PM #19Member
- Join Date
- Aug 2012
- Location
- Wellington
- Posts
- 138


hope this works .. took forever
-
12-09-2012, 10:08 PM #20Member
- Join Date
- Feb 2012
- Location
- in the middle of the bottom of the south
- Posts
- 427
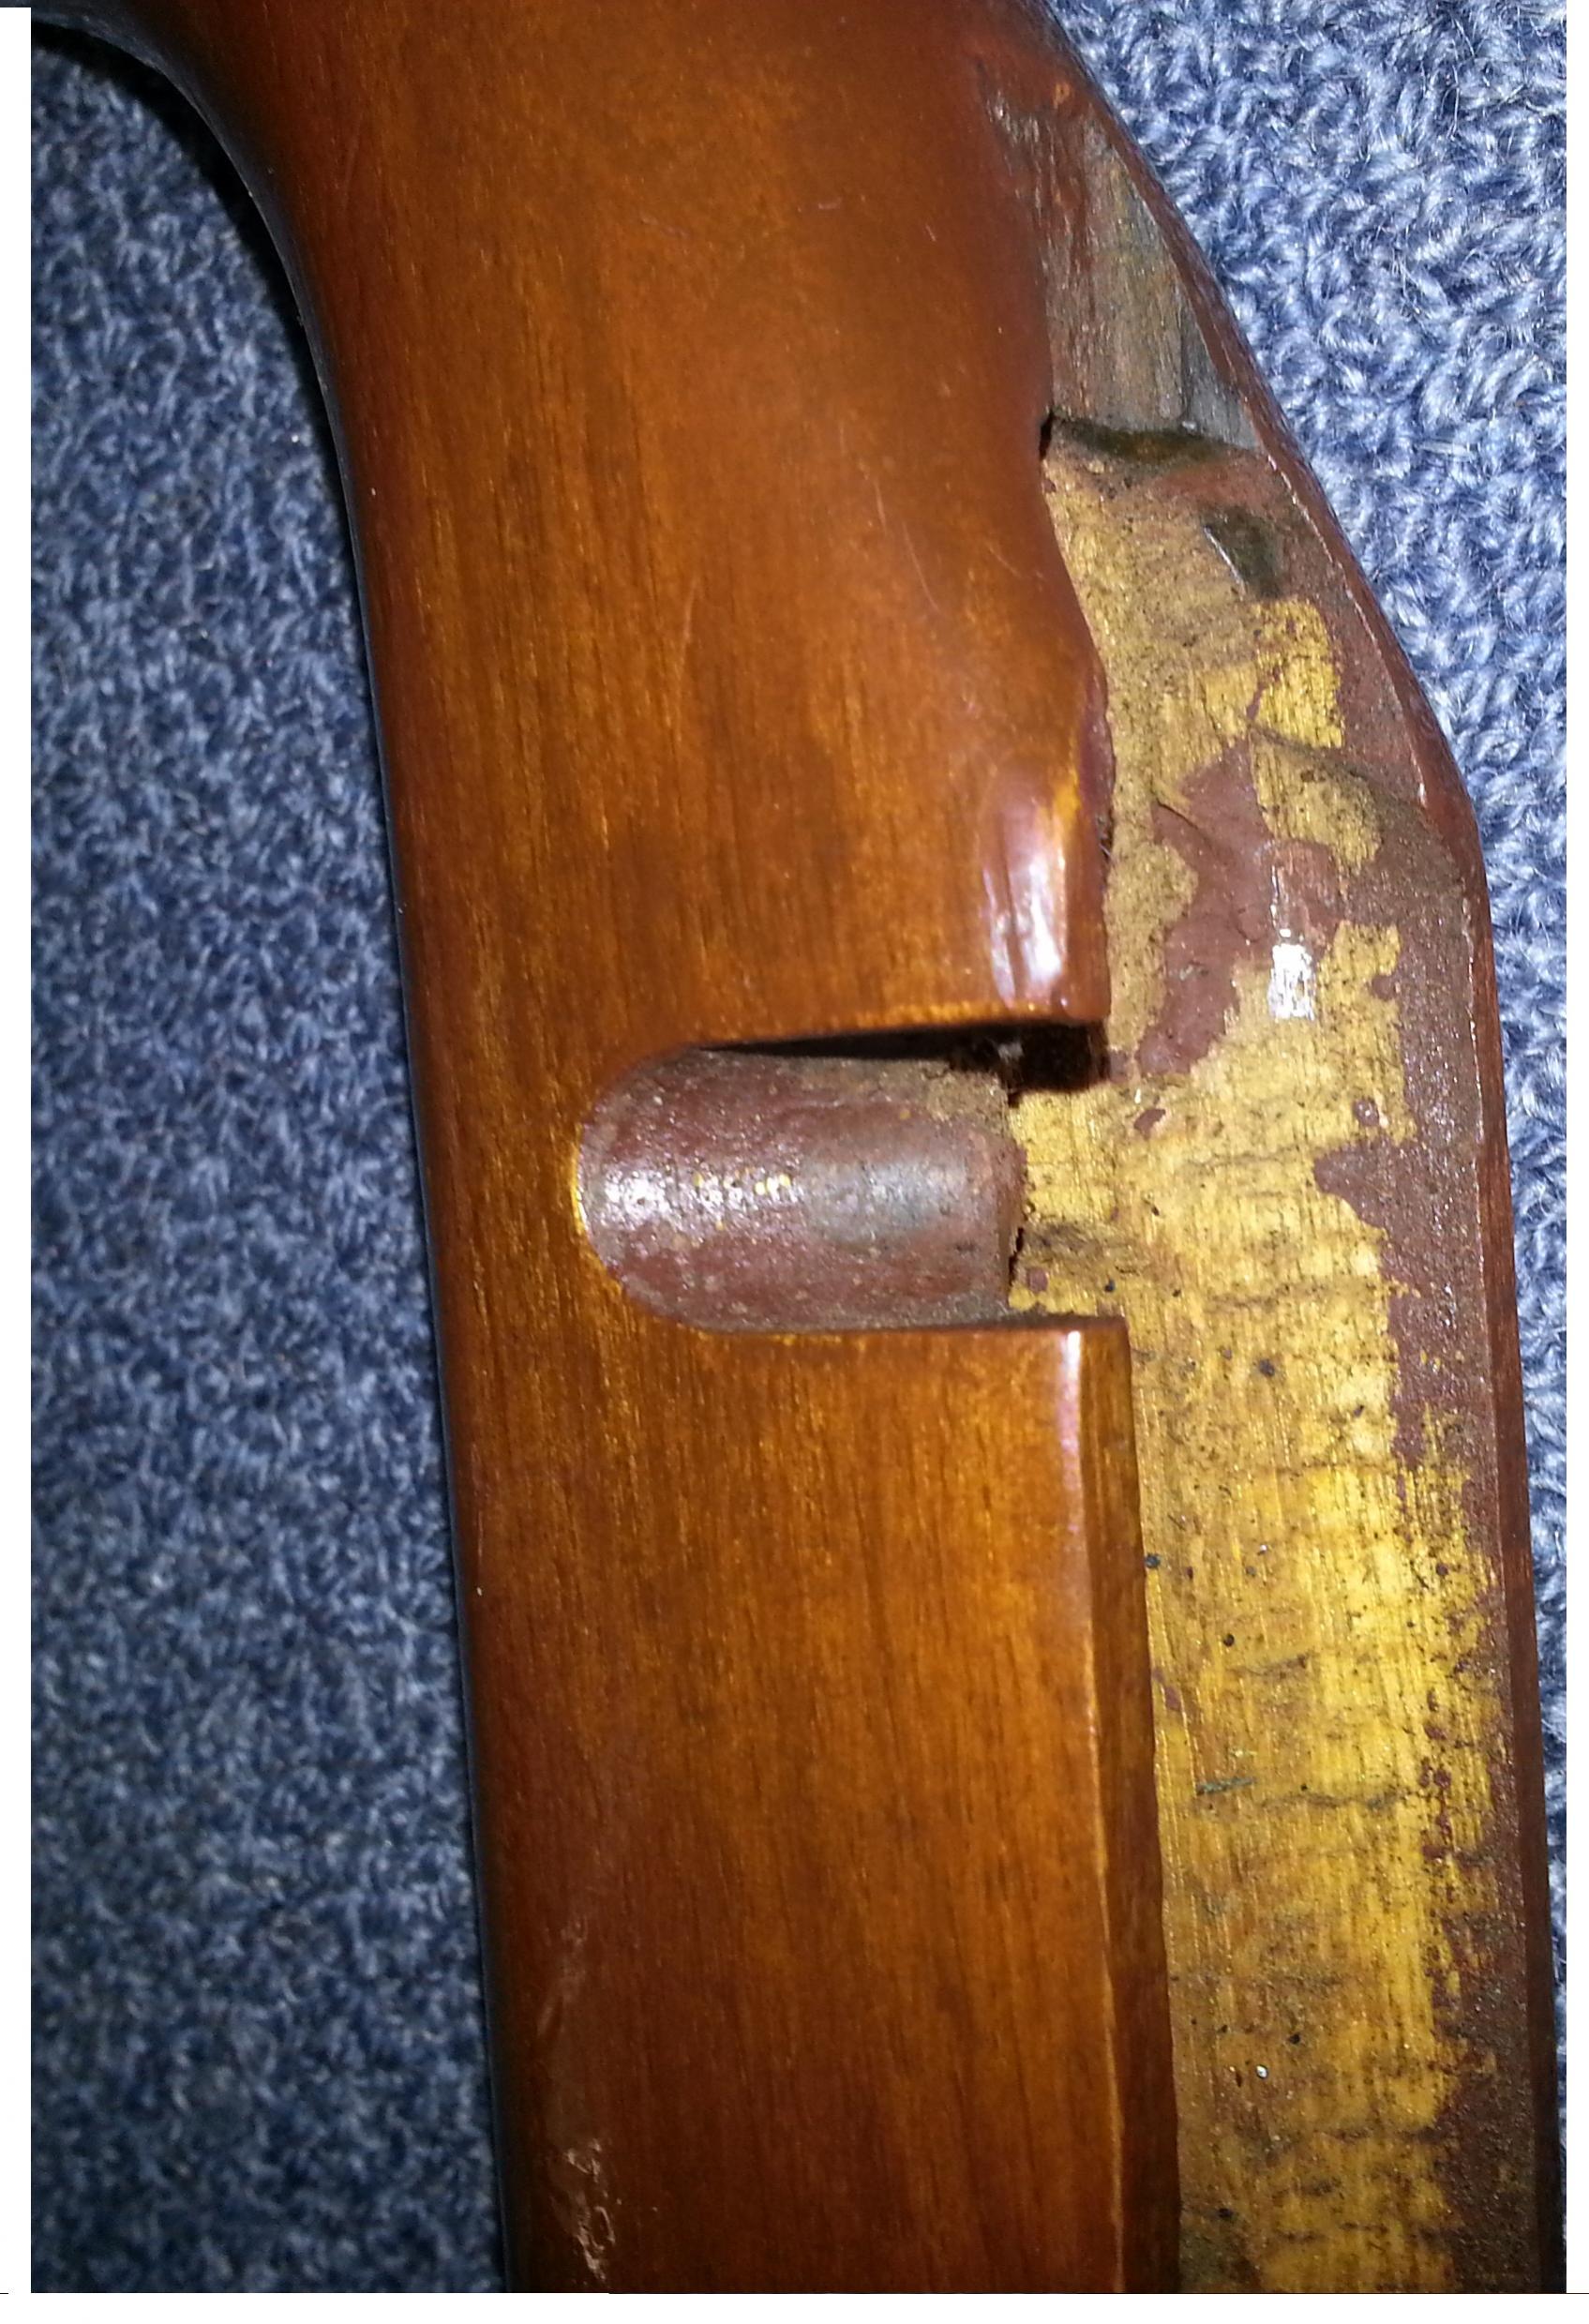
oh gee, i did say you can polish a turd but err.....................
what is that black thing on the front of the stock? better check if it is plastic, as the stripper will react to it.
the blobs of purple crap in the action are cheap stain, it mite be an idea to try to clean the stock up and get it consistant colour so you can stain it to a even colour.
greg
-
12-09-2012, 10:14 PM #21Member
- Join Date
- Aug 2012
- Location
- Wellington
- Posts
- 138
Yep that black bit was plastic of some description, that is gone, 80% of it is now stripped with paint stripper and the varnish is pretty much gone. Originally Posted by greghud

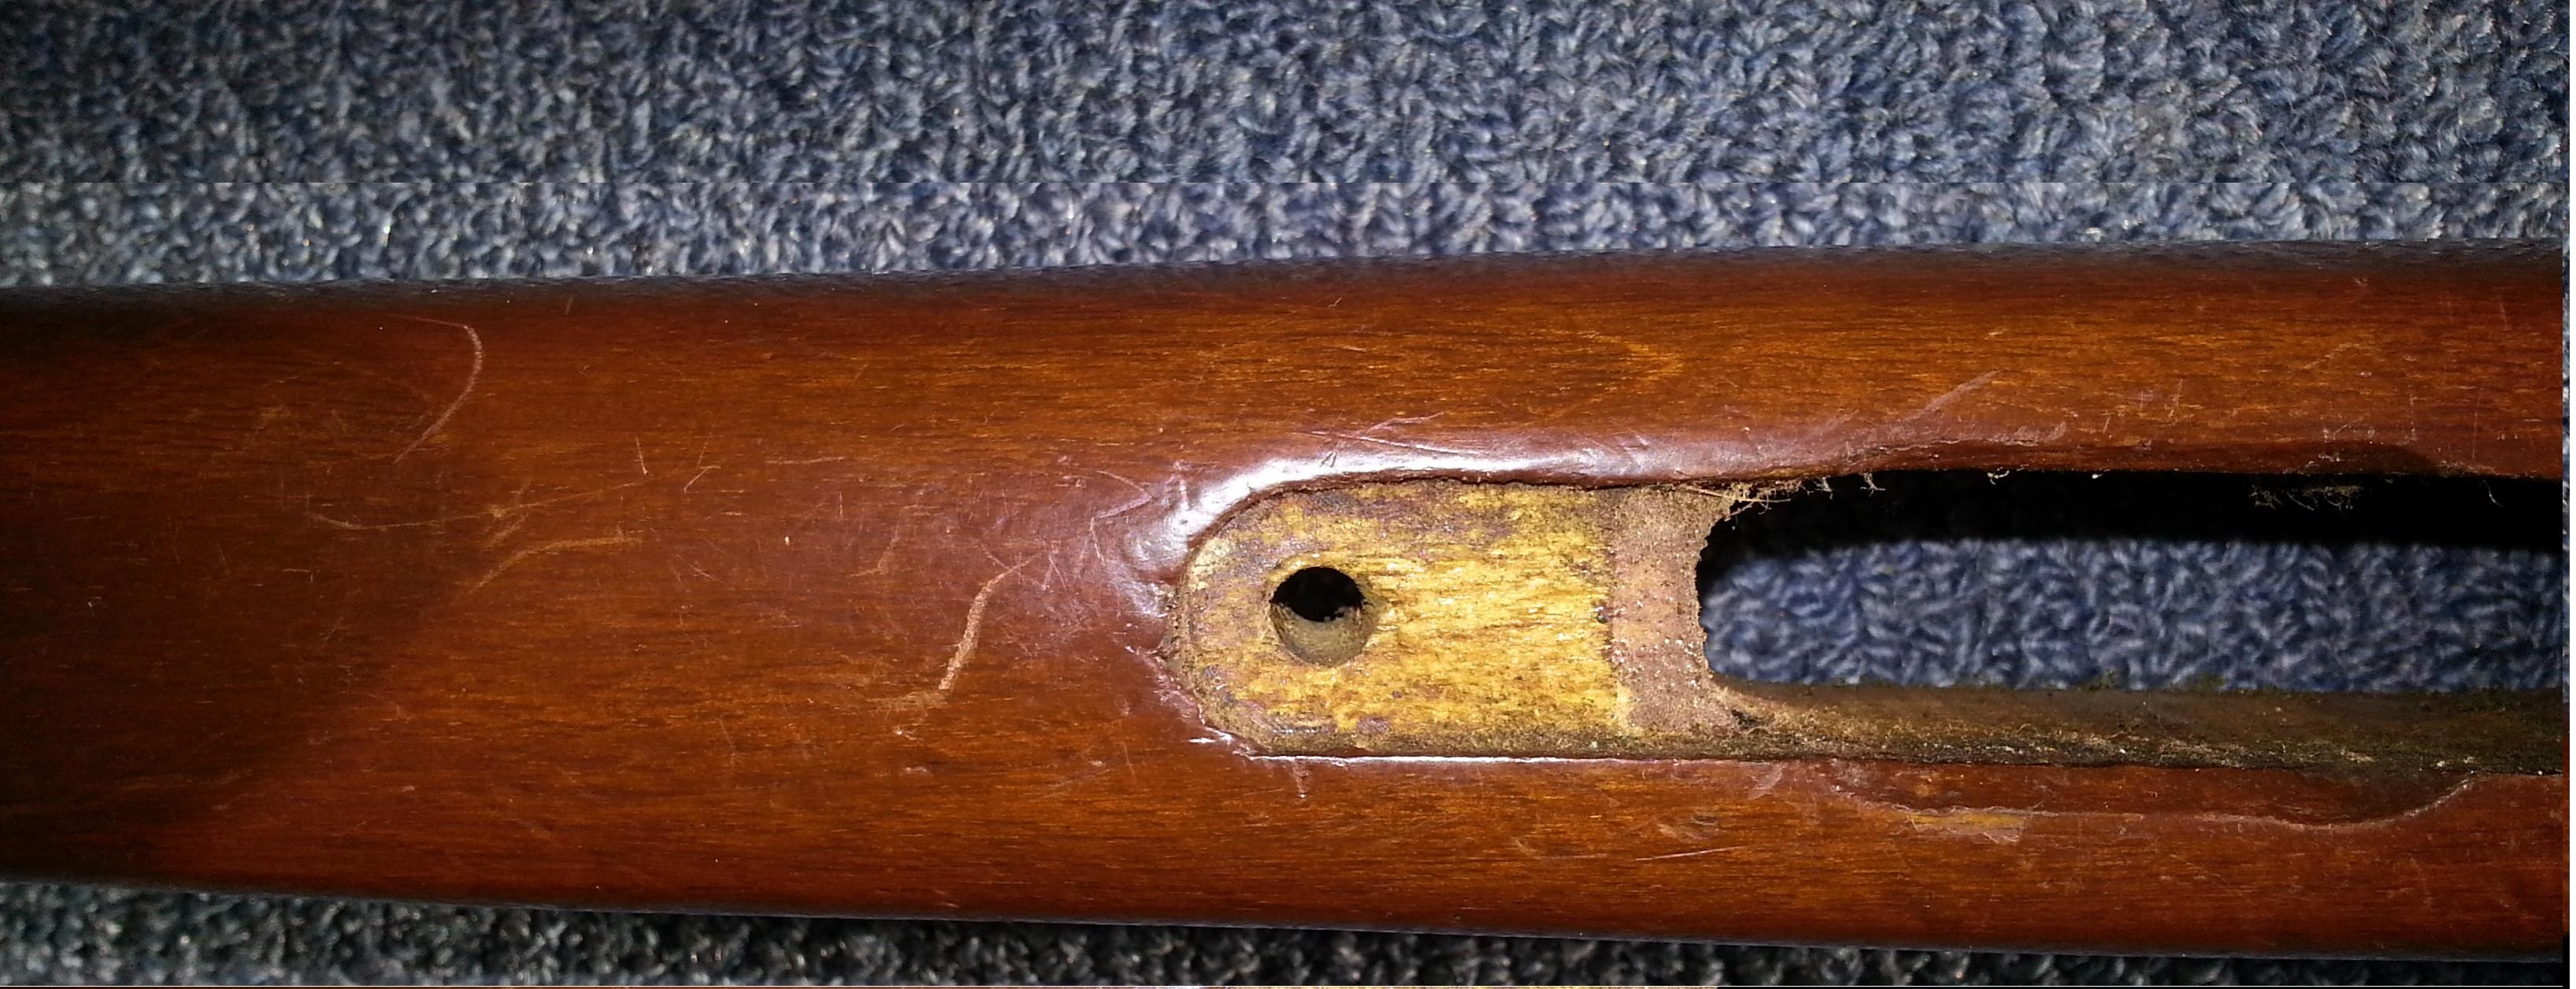
Now I intend on giving the raw timber (internal) a light tidy up, dont want to go sanding in there incase it no longer has a snug fit but i just want to dig all the shit out of there.
Next part I assume is to sand very lightly with a fine grade sand paper and or 000 steel wool....
-
13-09-2012, 08:41 AM #22Member
- Join Date
- Feb 2012
- Location
- in the middle of the bottom of the south
- Posts
- 427
pity you wernt closer, i would give you a hand.
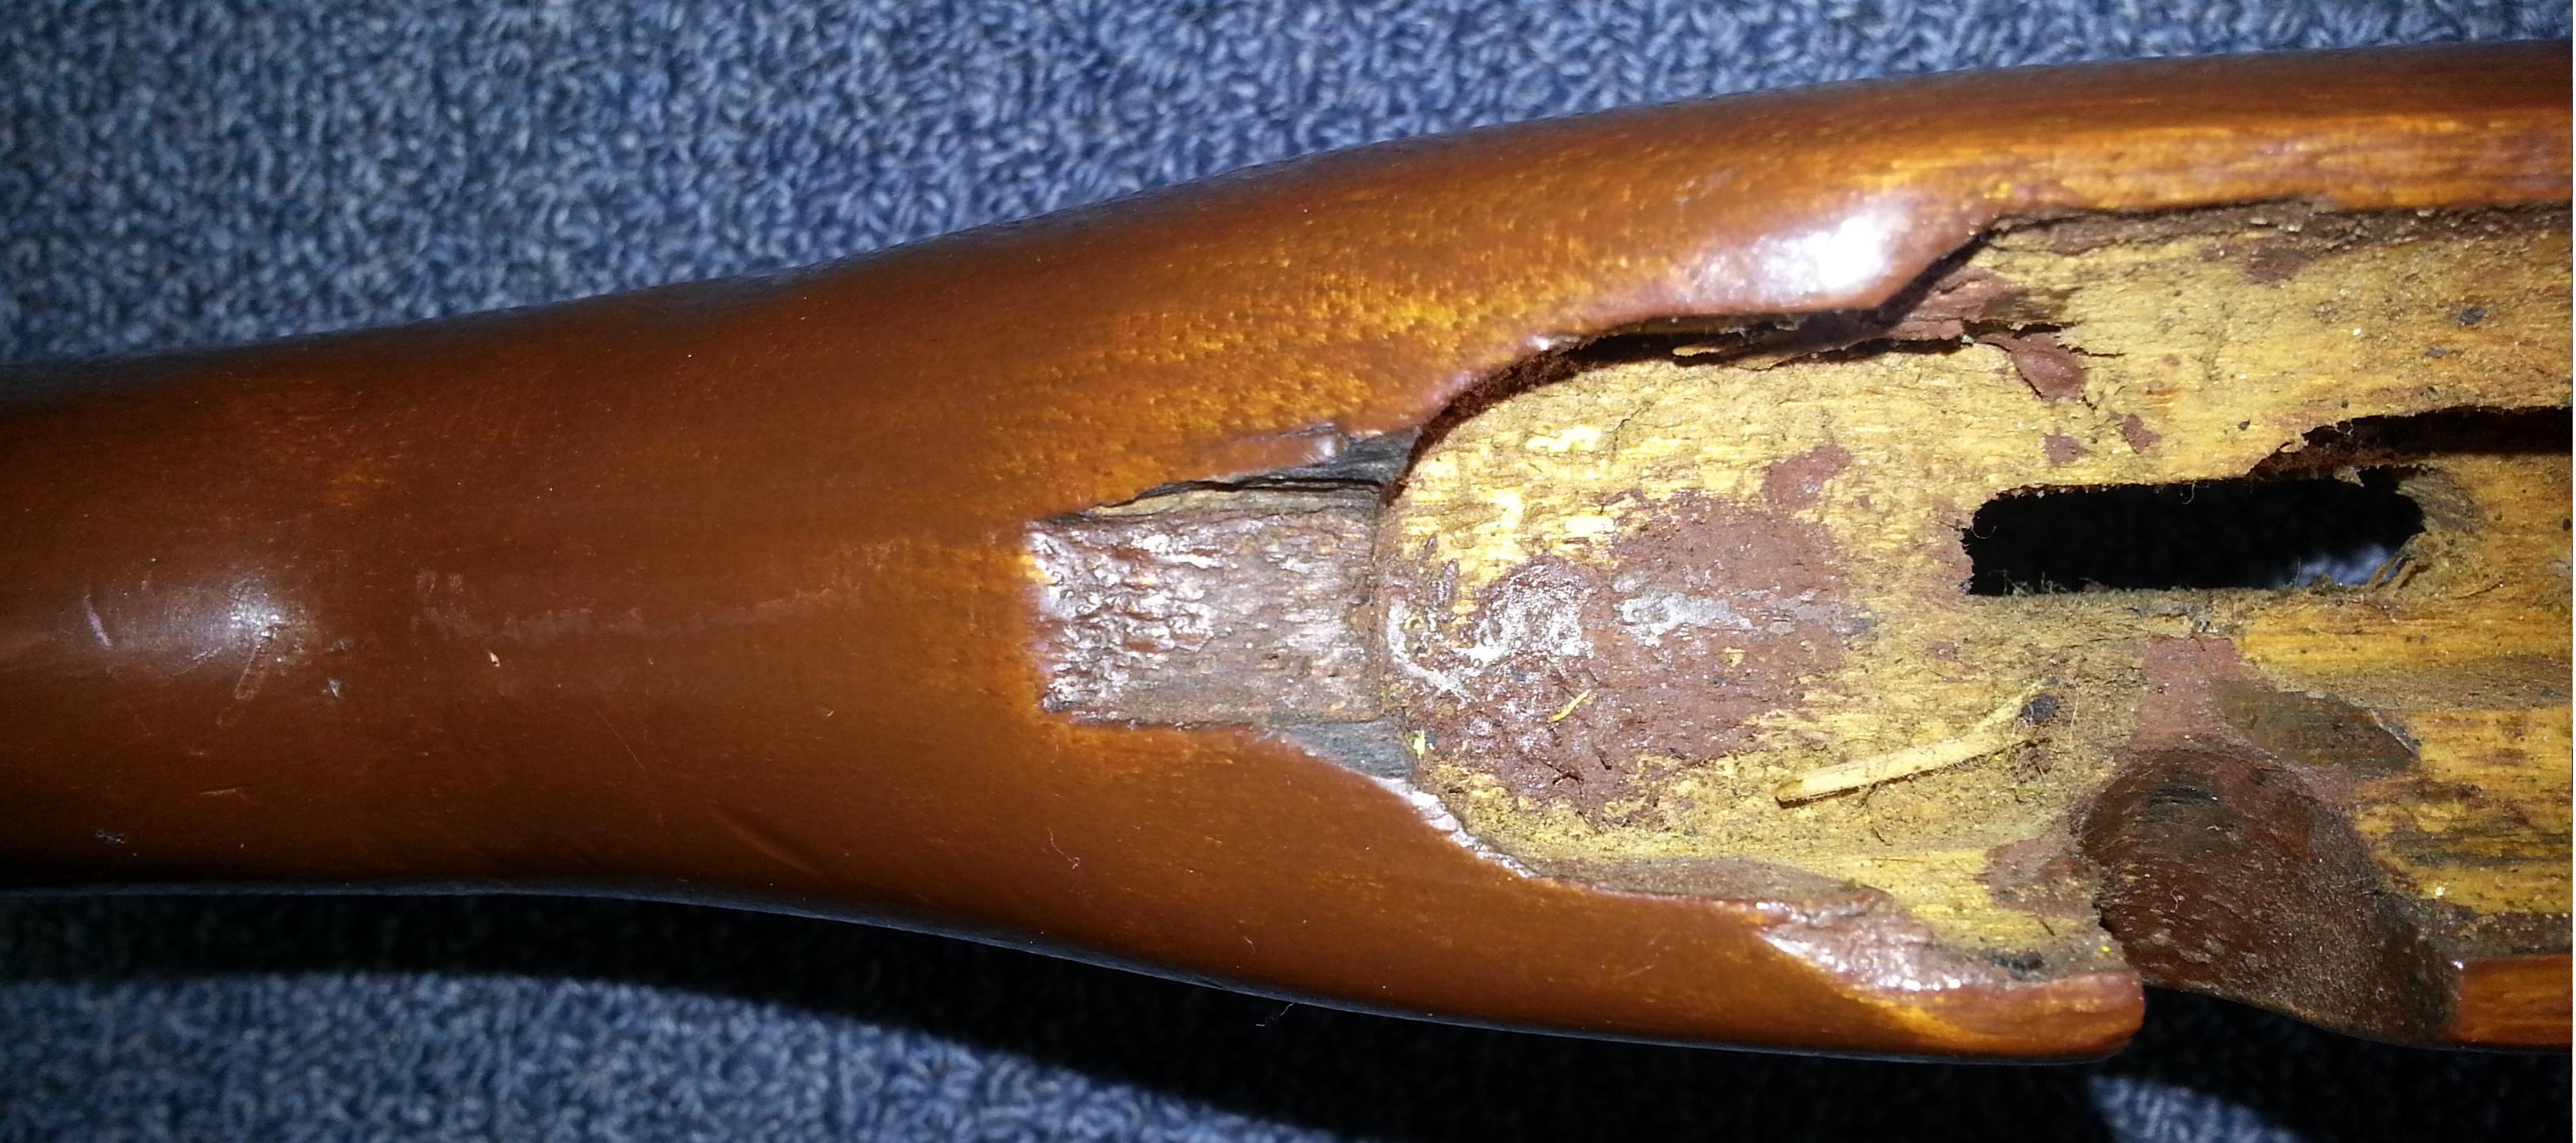
the bedding area is a bloody mess but if it works then so be it, i would remove all that crap and some material then bed the action. but i dont want to over extend your capabilities, just yet
so did you remove the front plastic tip? what is the plan there?
looks like its heading in the rite direction anyway.
greg
-
13-09-2012, 09:06 AM #23Member
- Join Date
- Feb 2012
- Location
- in the middle of the bottom of the south
- Posts
- 427
ok next step,
i would lightly sand with arround 180grit sandpaper. then give it a wipe with a wet cloth to see where the dings and bruises are.
circle with a lead pencil so you get them all then send your wife to look for some new shoes so you can steal the iron
a cotton hand towel works well but a wet towel (not dripping but just about dripping wet) over the bruise and press the hot iron down onto the towel. it will sizzle and steam so be carful not to get hit by the steam. hold for a few seconds then lift off check it it should have raised the bump nicely, if it is not quite back to flush hit it again, keep doing that till your happy with the bumps, you will be supprised how well it will work.
then when your done, leave it someware to dry, then give it another sand with 180 go over it marking any bruises and hit them aain as above.
sanding from 180 to say 400 grit (the higher the number the finer the grade of "sand" ) work carefuly to make sure you remove any scratches caused by the previous grade of paper.
once your happy, the stock should be then cleaned so all sanding dust is removed, i use a damp towel then let it dry again. when wet it will show you what the grain and figure will look like when your done applying the finish you choose.
thats when you start on the finish, what ever type you decide on will depend on the method required.
let us know what you choose and how you go.
greg
-
13-09-2012, 10:22 AM #24Member
- Join Date
- Aug 2012
- Location
- Wellington
- Posts
- 138
Greg.. all this help is very appreciated ....
Ill have more of a crack at it tonight, ran out of time lastnight as the wife was sick of sitting inside by herself while i mucked about in the shed hahaha.
Yeah i dont think ill bother with bedding the action.. its just a cheap 22 for my brother to blast some bunny's at some point.
Yep that plastic bit is gone, dont exactly know what it was... under it was just the same stain/varnish as the rest of the rifle so im just going to leave that as timber in the finished product.
Tonight should see the remaining varnish come off, a quick sand, get the old iron out and have a crack at lifting these dings out. Have a crack at sorting out the raw interanal timber. -- will get a picture up of the raw stock...
I note from previous in the thread the areas I need to be careful with are around the top edge (next to the barrel) as to not round them off.
The area at the rear of the action (where the bolt slides in and out) was abit rough and im hoping to get that back to a nice smooth finish, same with around where the bolt handle pushes down in the cocked position.
I have ordered a Tru-oil stock finishing kit (mainly because im lazy and it comes with everything i should need) - that should arrive early next week
Ive decided not to bugger all with the blueing, i have sent the barrel off to an engineer mate to chop down and re-tread for me - this should remove most of the shit looking areas. Help required on this subject though 16" or 18" barrel? --- still hoping to have some reasnoble accuracy - 150meters would be the max this wee thing will be used out to.
Lastly things like the trigger guard, floor plate and can are all looking abit rough, thinking ill just paint these things, they are easy to remove and maintain if I have to repaint at some point in the future....
Once again thanks to everyone for their input ... I realise this is just an old shitty rifle but as my first little project I am enjoying it thus far... (if i like the finish ill be nagging the farther in law for his old 30-06 since he doesnt use it anymore and look to fix up something that has abit more value than this Norinco)
-
13-09-2012, 03:26 PM #25Member
- Join Date
- Feb 2012
- Location
- in the middle of the bottom of the south
- Posts
- 427
truoil is good gear, i am sure you will love the finish.
barrel length is one of those arguments that realy never ends, esencialy, the shorter you go the more speed you loose. but the longer the barrel the more cumbersome it can be to move thru scrub or in and out of car doors etc.
for my way of thinking a suppressed .22 is best used with subsonic ammo, or why bother to suppress? with that, the realistic range of the rifle and ammo combo is probabaly 60 to 80 mtrs max, the bullet is realy dropping and running out of energy after that.
so why not cut it back to a nice short carbine length so it points nicely and can be used with the suppressor installed whilst not be in the road when getting in and out of the car, etc.
a 16 inch barrel would have the overall length with the suppressor included, over 20 inches. that would be as long as i would want it. so you could go shorter if you wish.
dont worry about loosing velocity or accuracy, the speed drop is not enough to worry about and accruracy is usualy as good or better with a shorter and stiffer barrel.
one thing for your mate to watch when threading the barrel, there is the occaisional norinco barrel that the internal and external walls of the barrel are not true, it is best to cut the barrel then check that the barrel is turning in the lathe with the internal wall of the barrel set true for threading. i have seen one or 2 that were visualy off center to the external by millimeters.
greg
-
13-09-2012, 04:25 PM #26Member
- Join Date
- Aug 2012
- Location
- Wellington
- Posts
- 138
That pretty much confirms my thinking from some reading I did online, will chop to 16" plus the length of the supressor.
The 150m is wishful thinking then ... i have a bulk box of .22LR federal stuff and afew sub boxes, Probably just smash out the bulk box and stick with the sub stuff.
Yep he has done this afew times but ill mention just to make sure he knows what the story is.
Hoping this all comes together nicely.
Ill get some pics up tonight of the progress
-
13-09-2012, 09:51 PM #27Member
- Join Date
- Aug 2012
- Location
- Wellington
- Posts
- 138
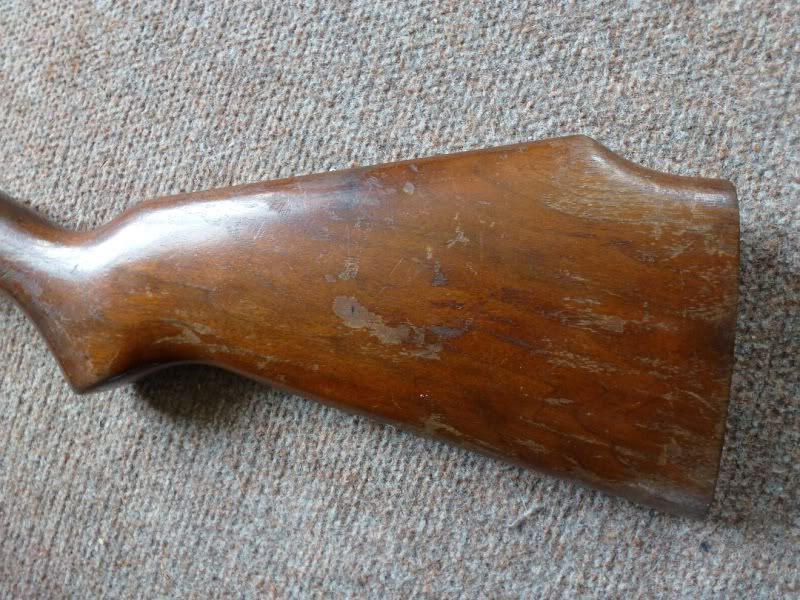
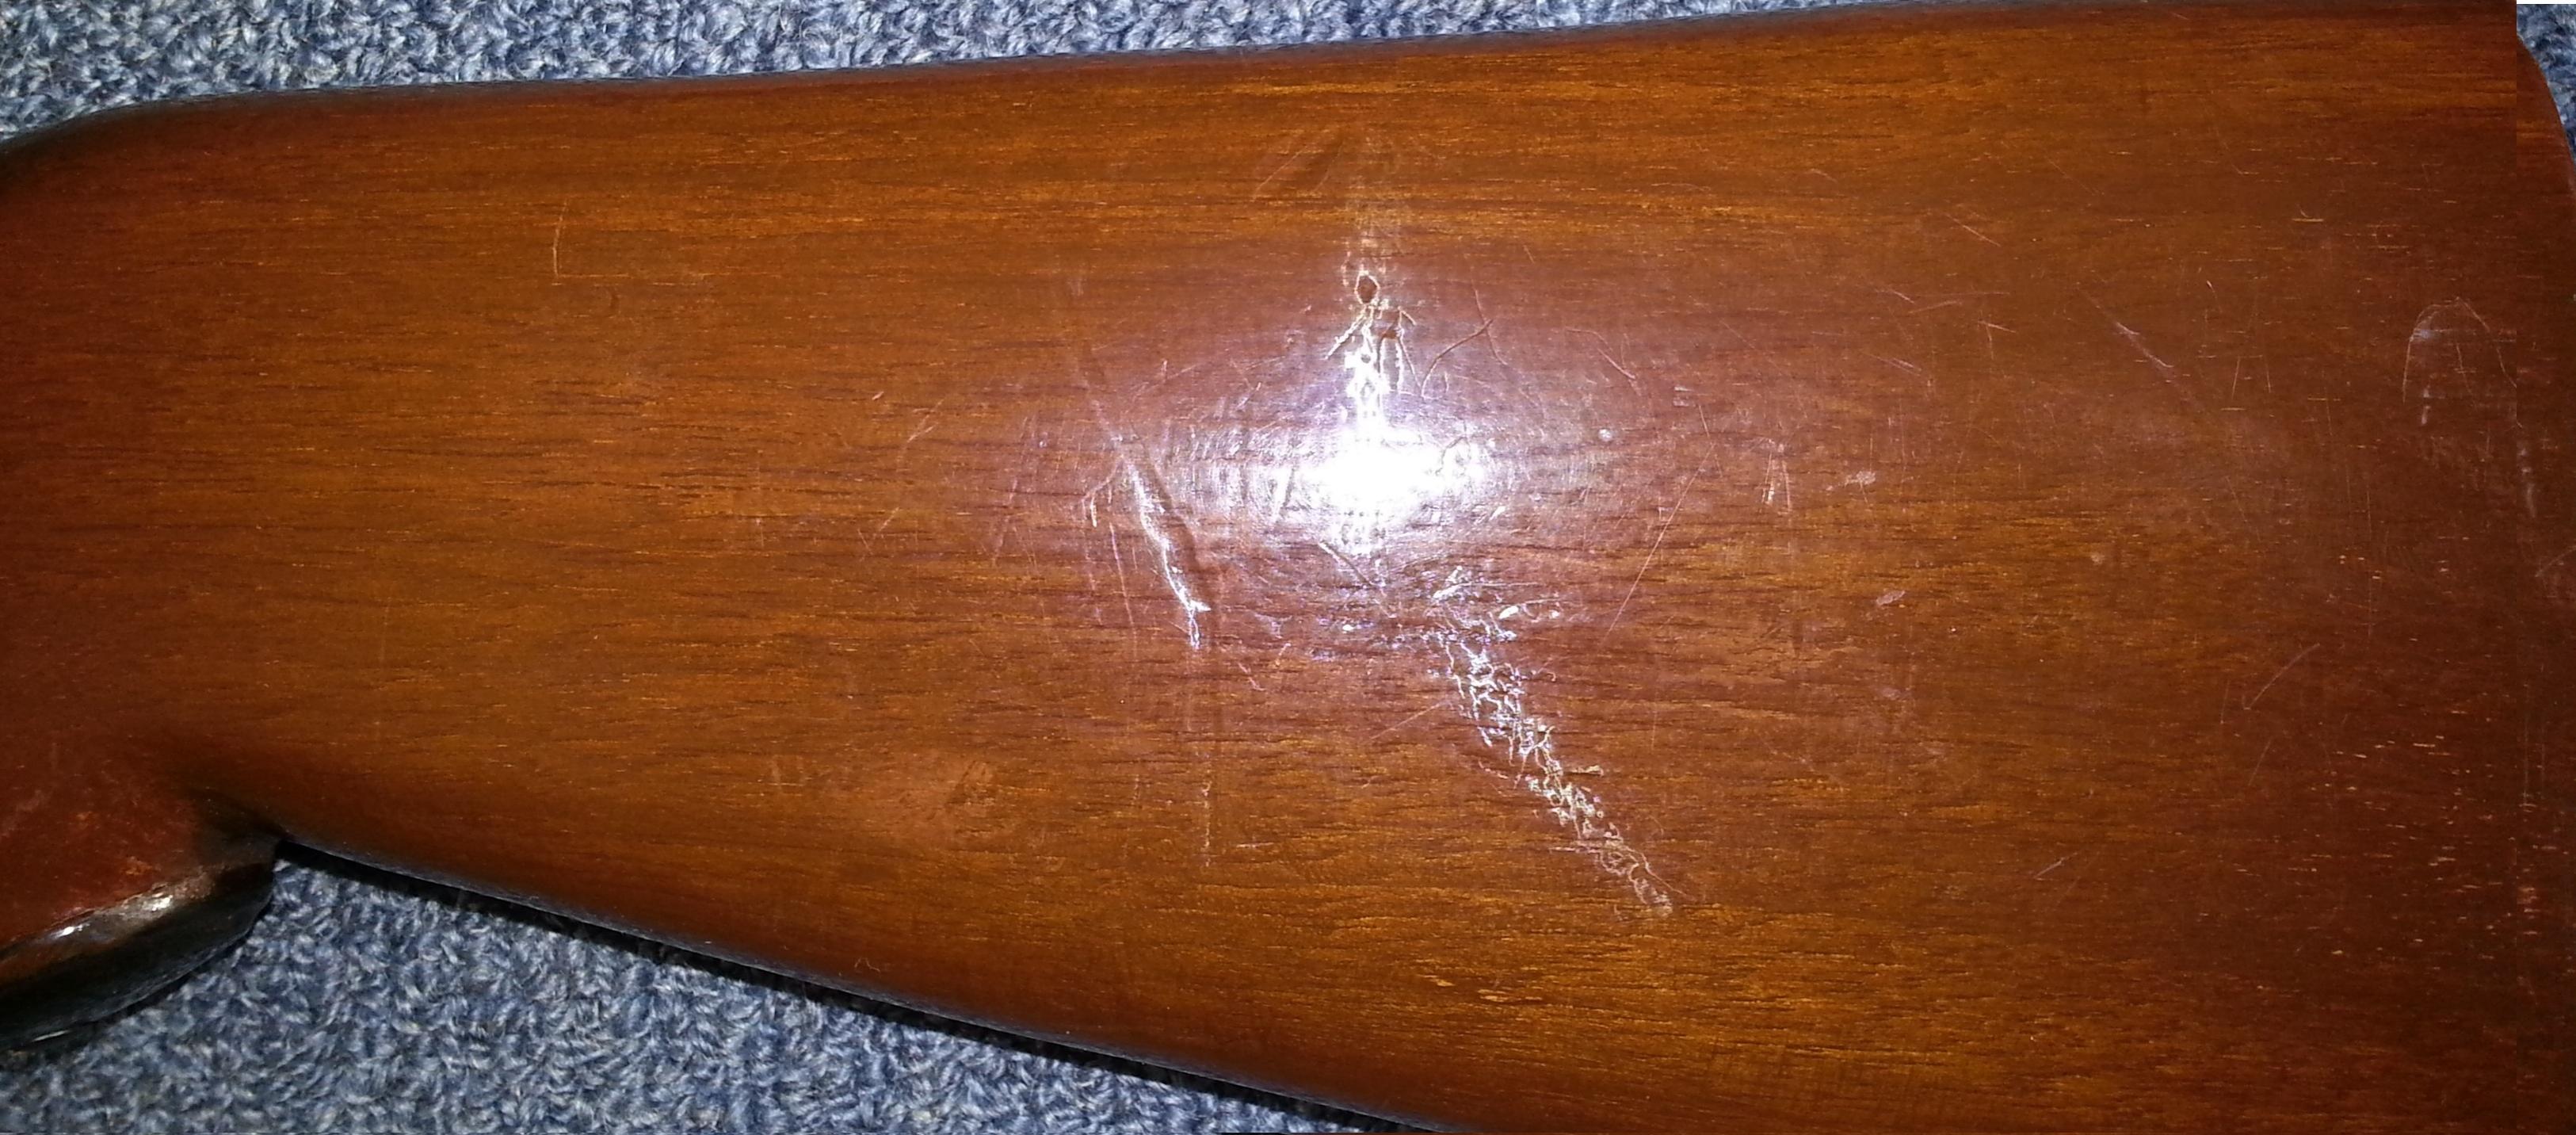
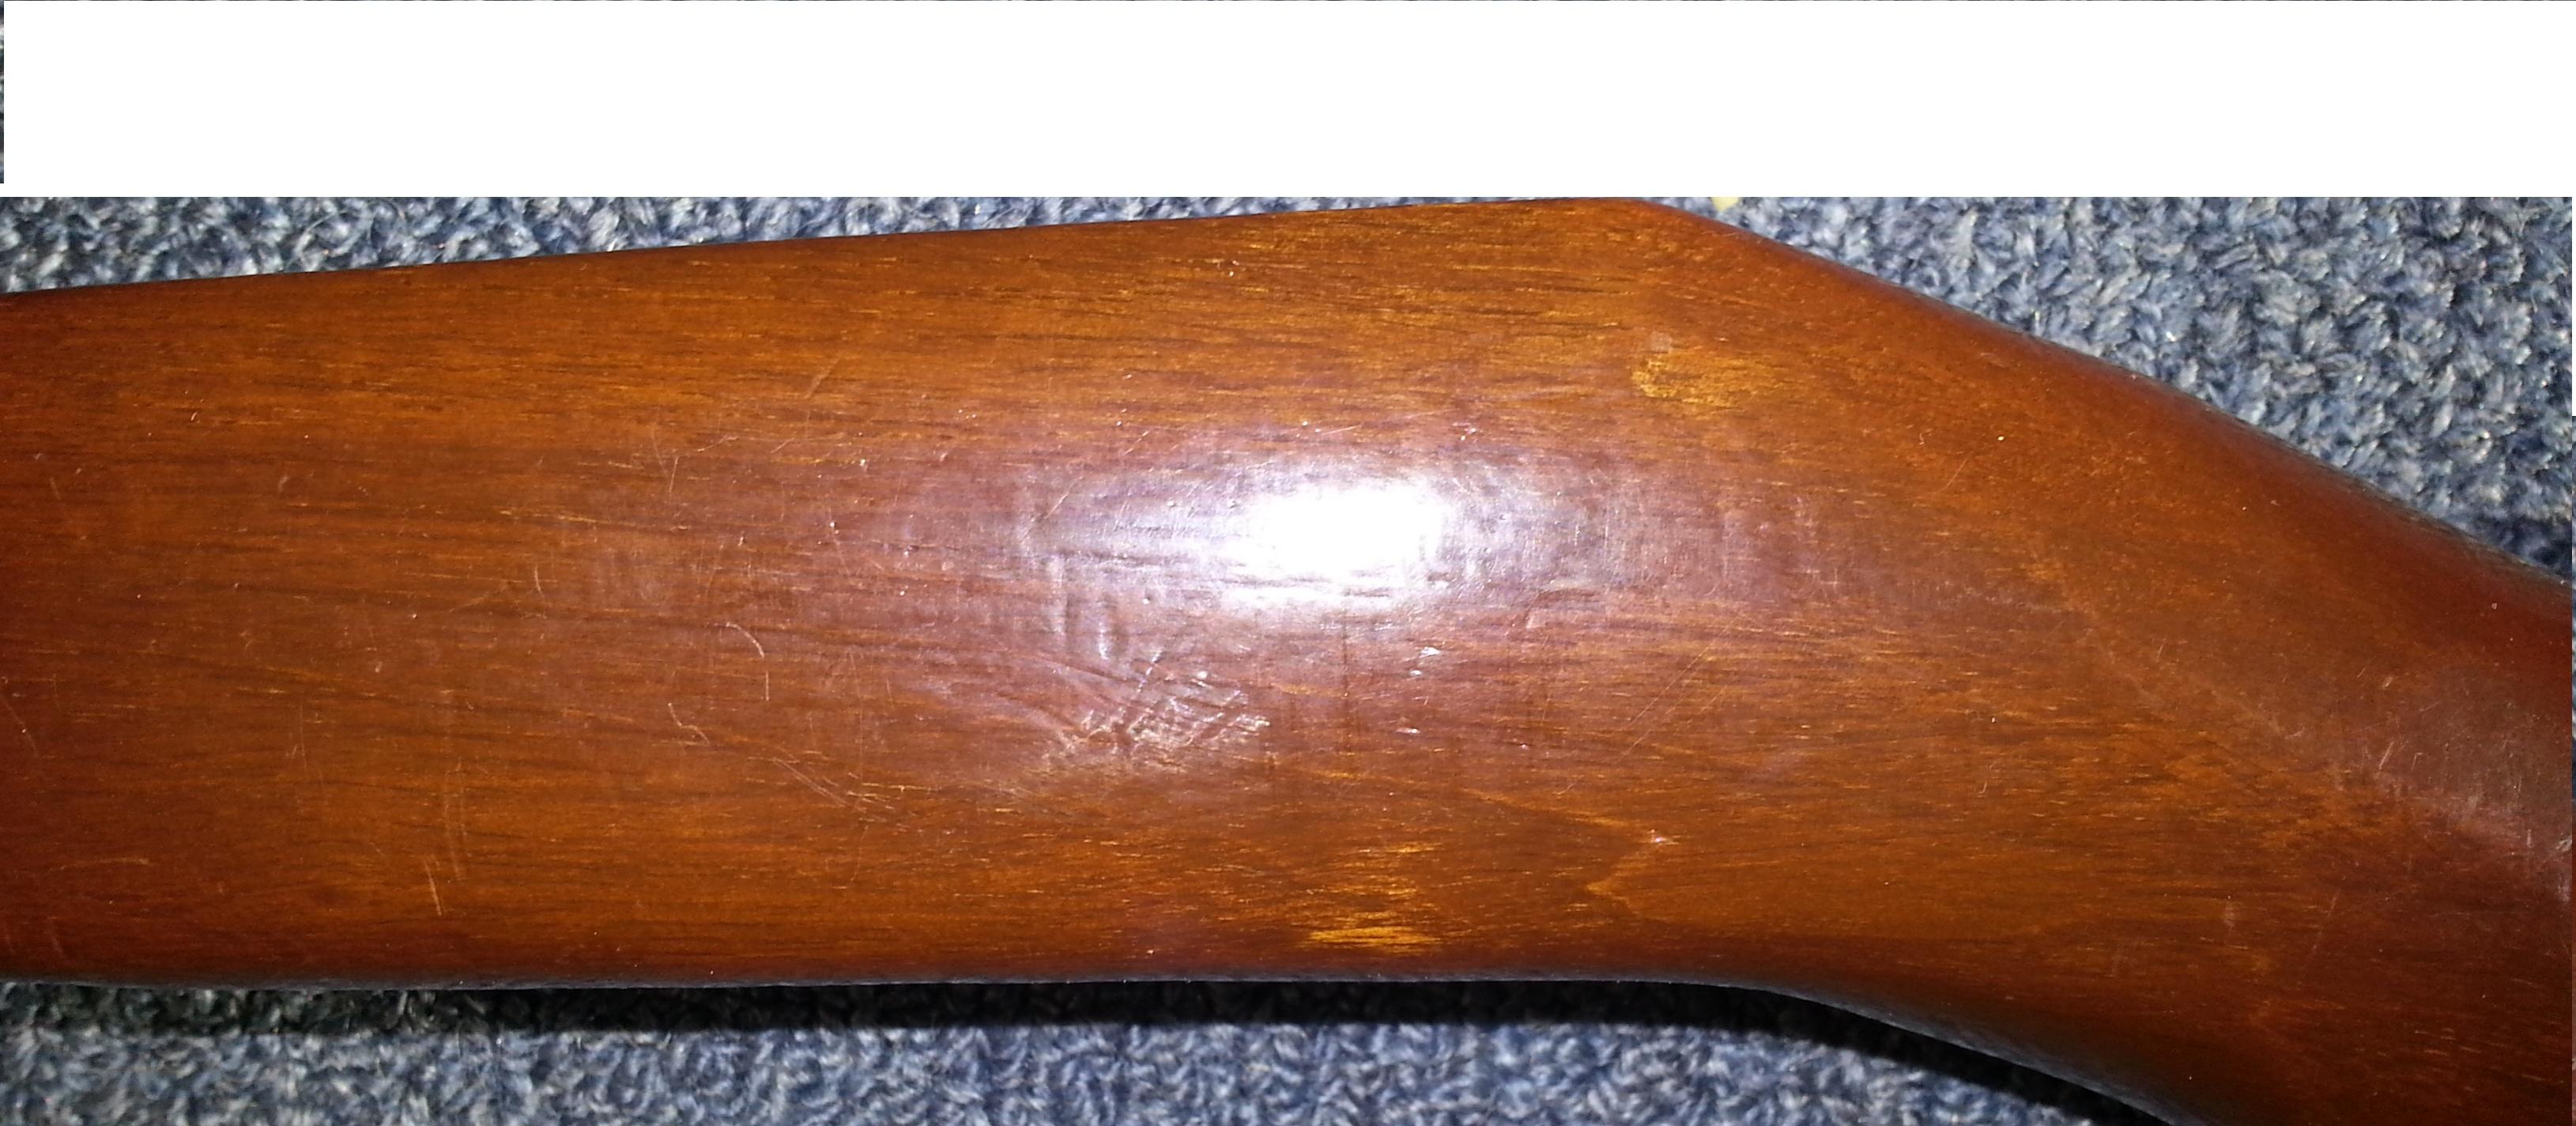
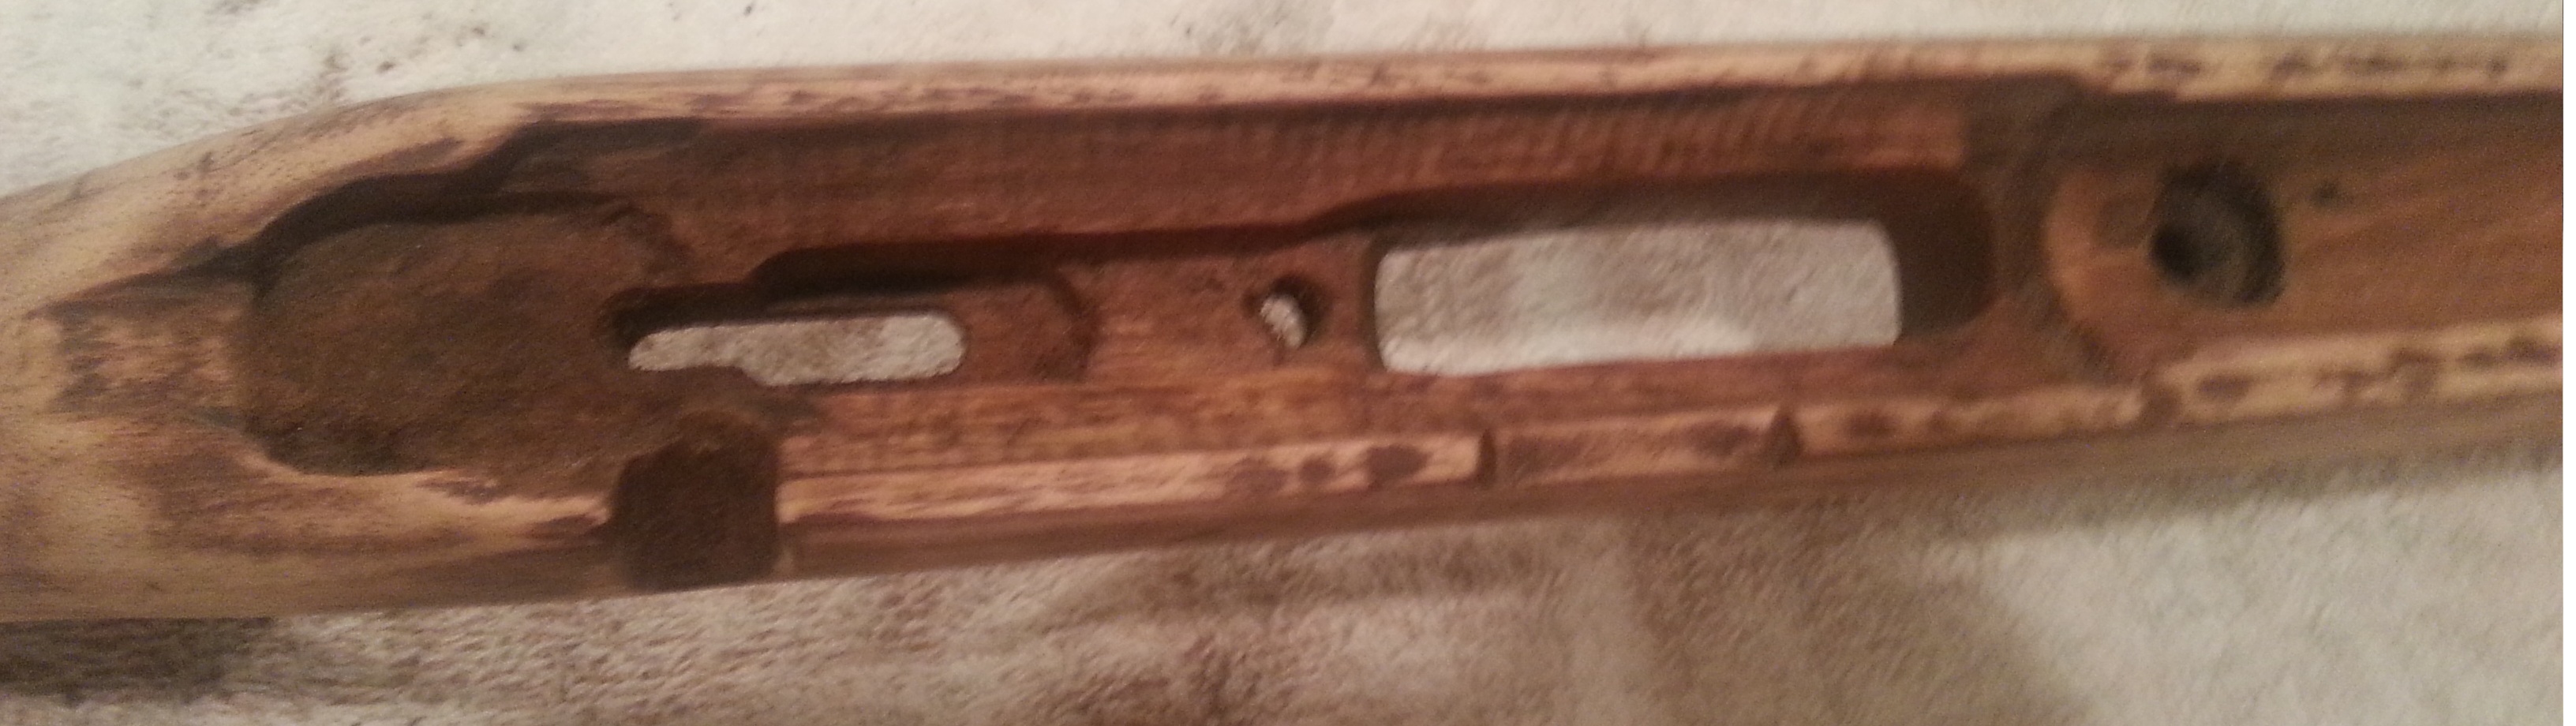
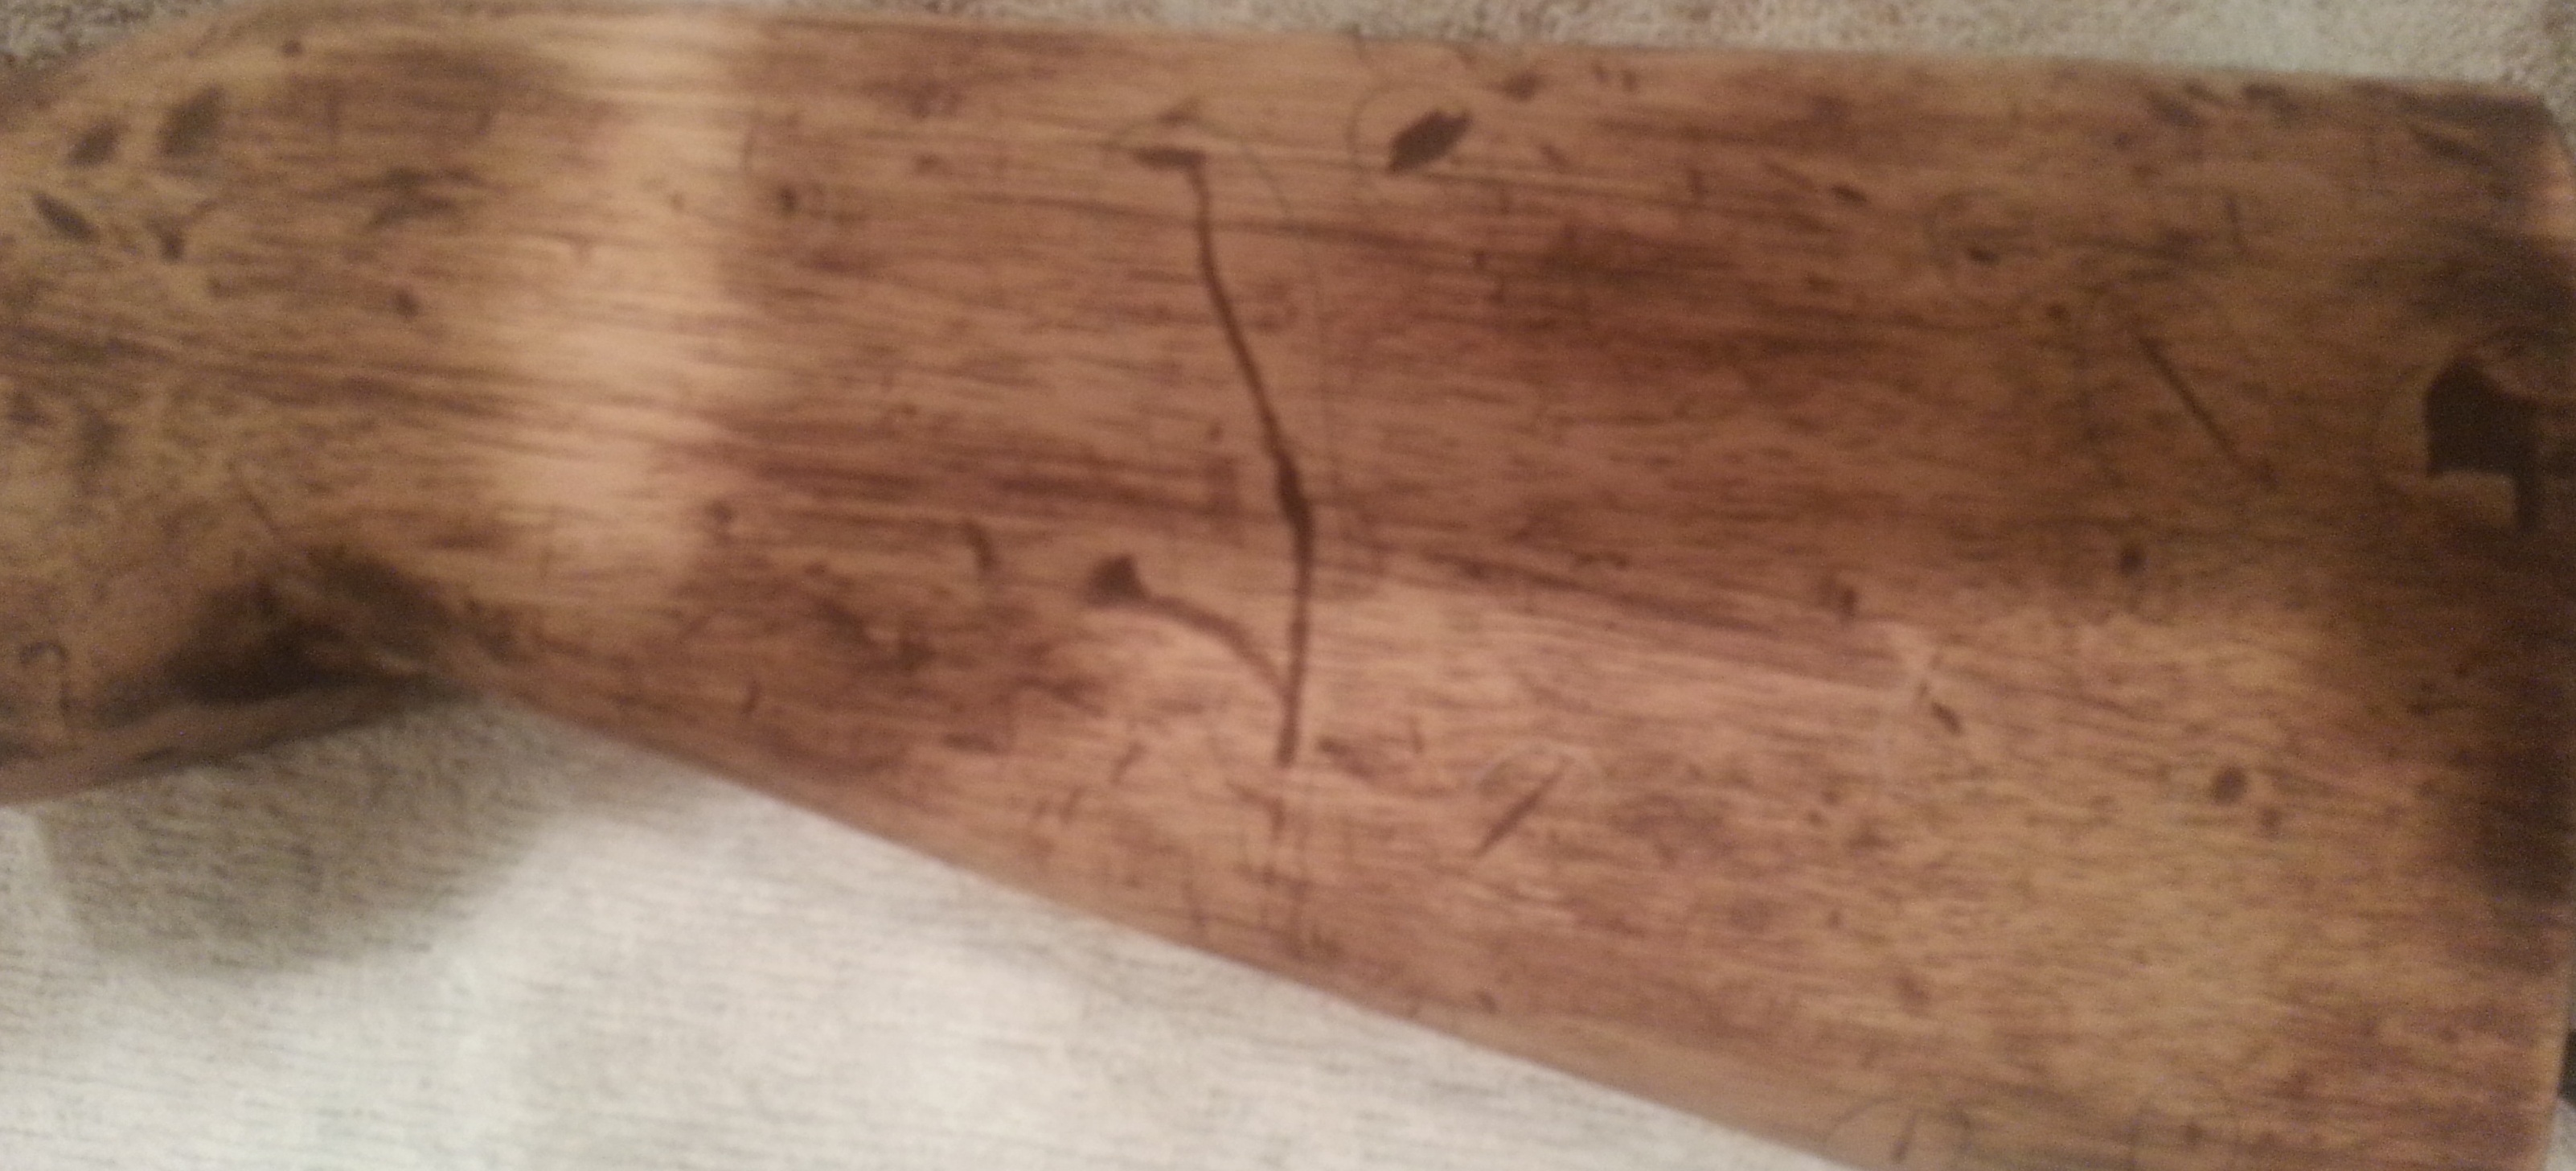 OK, so varnish all gone. Very very lightly sanded.... Identified all the bumps and nicks and ready to have the iron treatment.
Wife to be has arrived home so that will have to wait for tomorrow night.
Here are the pics of the very lightly sanded first step. Not all of the darker spots are actually dents, 90% of them are but I assume some of the dark spots left are just deep oil/varnish that have not been removed from the first light sand ...

-
14-09-2012, 01:20 PM #28Member

- Join Date
- Aug 2012
- Location
- Gorrre
- Posts
- 3,600
150m is a looong way out for a 22, I've taken rabbits and hares out to about 120m with subs and that was aiming about top of the ears to hit them in the chest - in one case a foot out the side for wind as well (trial and error got that one, lucky it couldn't hear me). Just get plenty of practice and gradually push the distance out as you can. Originally Posted by tikka 7/08
Good work on the restoration, I'm sure it will turn out much nicer than original.
-
14-09-2012, 02:47 PM #29Member
- Join Date
- Aug 2012
- Location
- Wellington
- Posts
- 138
Yep it may be a long way off but we all love a challenge haha. Originally Posted by GravelBen
The glass that came with it isnt very flash but i cant afford to upgrade it at the moment.
Thanks for the encouragement... will spend some more time on the weekend getting it ready... apparently the wife was not impressed when she got home i was sanding it up in the kitchen... haha
-
18-09-2012, 10:08 AM #30Member
- Join Date
- Aug 2012
- Location
- Wellington
- Posts
- 138
Morning all,
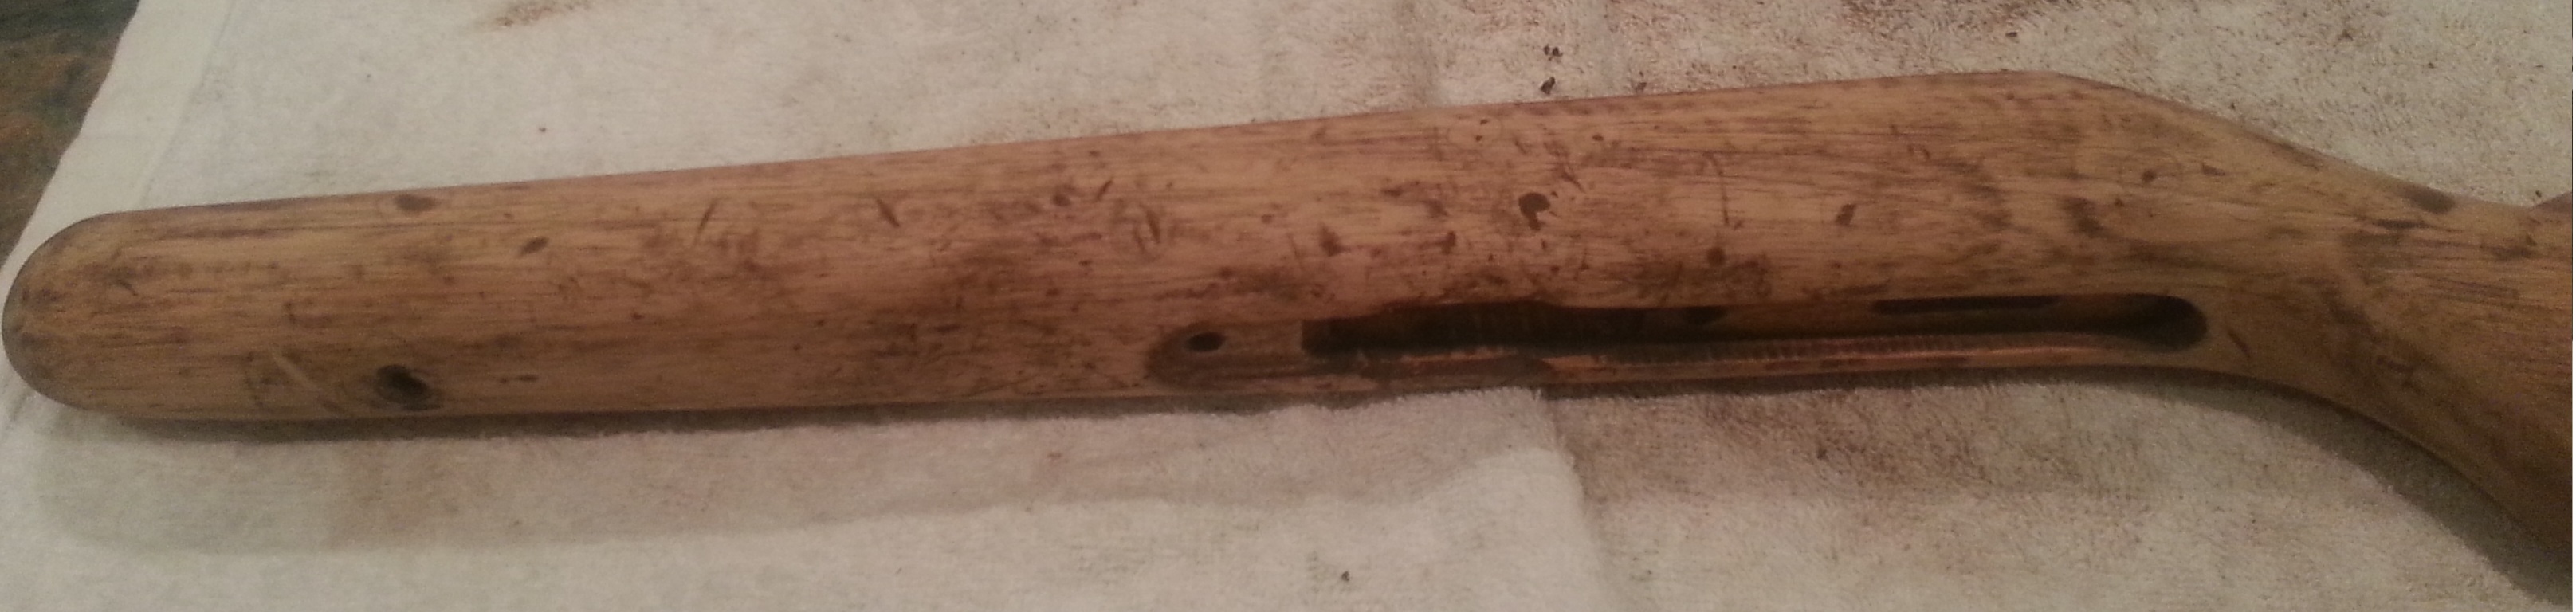
So progress is coming along quite well with the stock.
I have a question though, Lastnight I attacked it with the iron and managed to get 95% of the dents etc out. Gave it another light sand back in preperation for round 2 with the iron.
Question I have is this... after the second light sanding most of the darker spots you can see in the last picture i posted have come off, but i have these horisontal lines that run through various parts of the stock. They are dark in colour (unlike the rest of the now light timber colour on the stock)
Is that stain still in it? they dont appear to be uniform with the rest of the grain..
I dont have a picture right now but the last round of pictures I loaded up show in picture 1 these 'dark lines' I am asking about.. is this just a case of sanding back further to get them out, hit it with more paint stripper? try and steam them out?
Ill try and get a picture up shortly
Cheers
Marty


 Reply With Quote
Similar Threads
-
Norinco NHM90
By gimp in forum Firearms, Optics and AccessoriesReplies: 12Last Post: 07-07-2012, 10:50 PM -
Anyone got one of the NHM 90 Norinco AK47's?
By RimfireNZ in forum Firearms, Optics and AccessoriesReplies: 8Last Post: 18-04-2012, 08:40 PM
Tags for this Thread
- .22,
- .270,
- 223,
- 22lr,
- 30-06,
- action,
- away,
- barrel,
- bolt handle,
- box,
- bunny,
- carbine,
- catch,
- cheap,
- floor plate,
- forend,
- forum,
- grip,
- gun,
- gun shop,
- law,
- length,
- linseed oil,
- load,
- max,
- norinco,
- parts,
- phone,
- photos,
- pistol,
- pistol grip,
- polish,
- press,
- project,
- rabbits,
- recoil,
- rifle,
- rifles,
- road,
- rounds,
- shoot,
- skin,
- sounds,
- stock,
- stocks,
- super,
- supressor,
- techniques,
- thank you,
- top,
- trigger guard,
- turn,
- velocity,
- versa,
- walnut,
- wanted,
- wool
 Posting Permissions
- You may not post new threads
- You may not post replies
- You may not post attachments
- You may not edit your posts
Welcome to NZ Hunting and Shooting Forums! We see you're new here, or arn't logged in. Create an account, and Login for full access including our FREE BUY and SELL section Register NOW!!
All times are GMT +13. The time now is 12:37 PM.

Bookmarks