
 11Likes
 LinkBack URL
 About LinkBacks
Shooting off a concrete bench with a bipod can give less than optimal results. The amount of pre-load that can be applied is limited by the grip of the rubber feet. In spite of the cushioning provided by the feet, rifles may still kick off the hard surface on recoil, and if a forend hold is used to try to control this, then it needs to be applied with consistency. If the bipod has had the feet replaced with spikes then these issues will be more severe and the bipod only considered as suitable for use off the ground (or perhaps a wooden bench with recesses or similar)
An adapter can be built using rubber inserts that allows a spiked bipod to by used off a concrete bench as it would from the ground. Having made such a jig Ill describe it here as this might be something NZHS members may want to try for themselves. Both the pre-load and hard surface issues are addressed by this design with more success than other alternatives Ive tried to date.
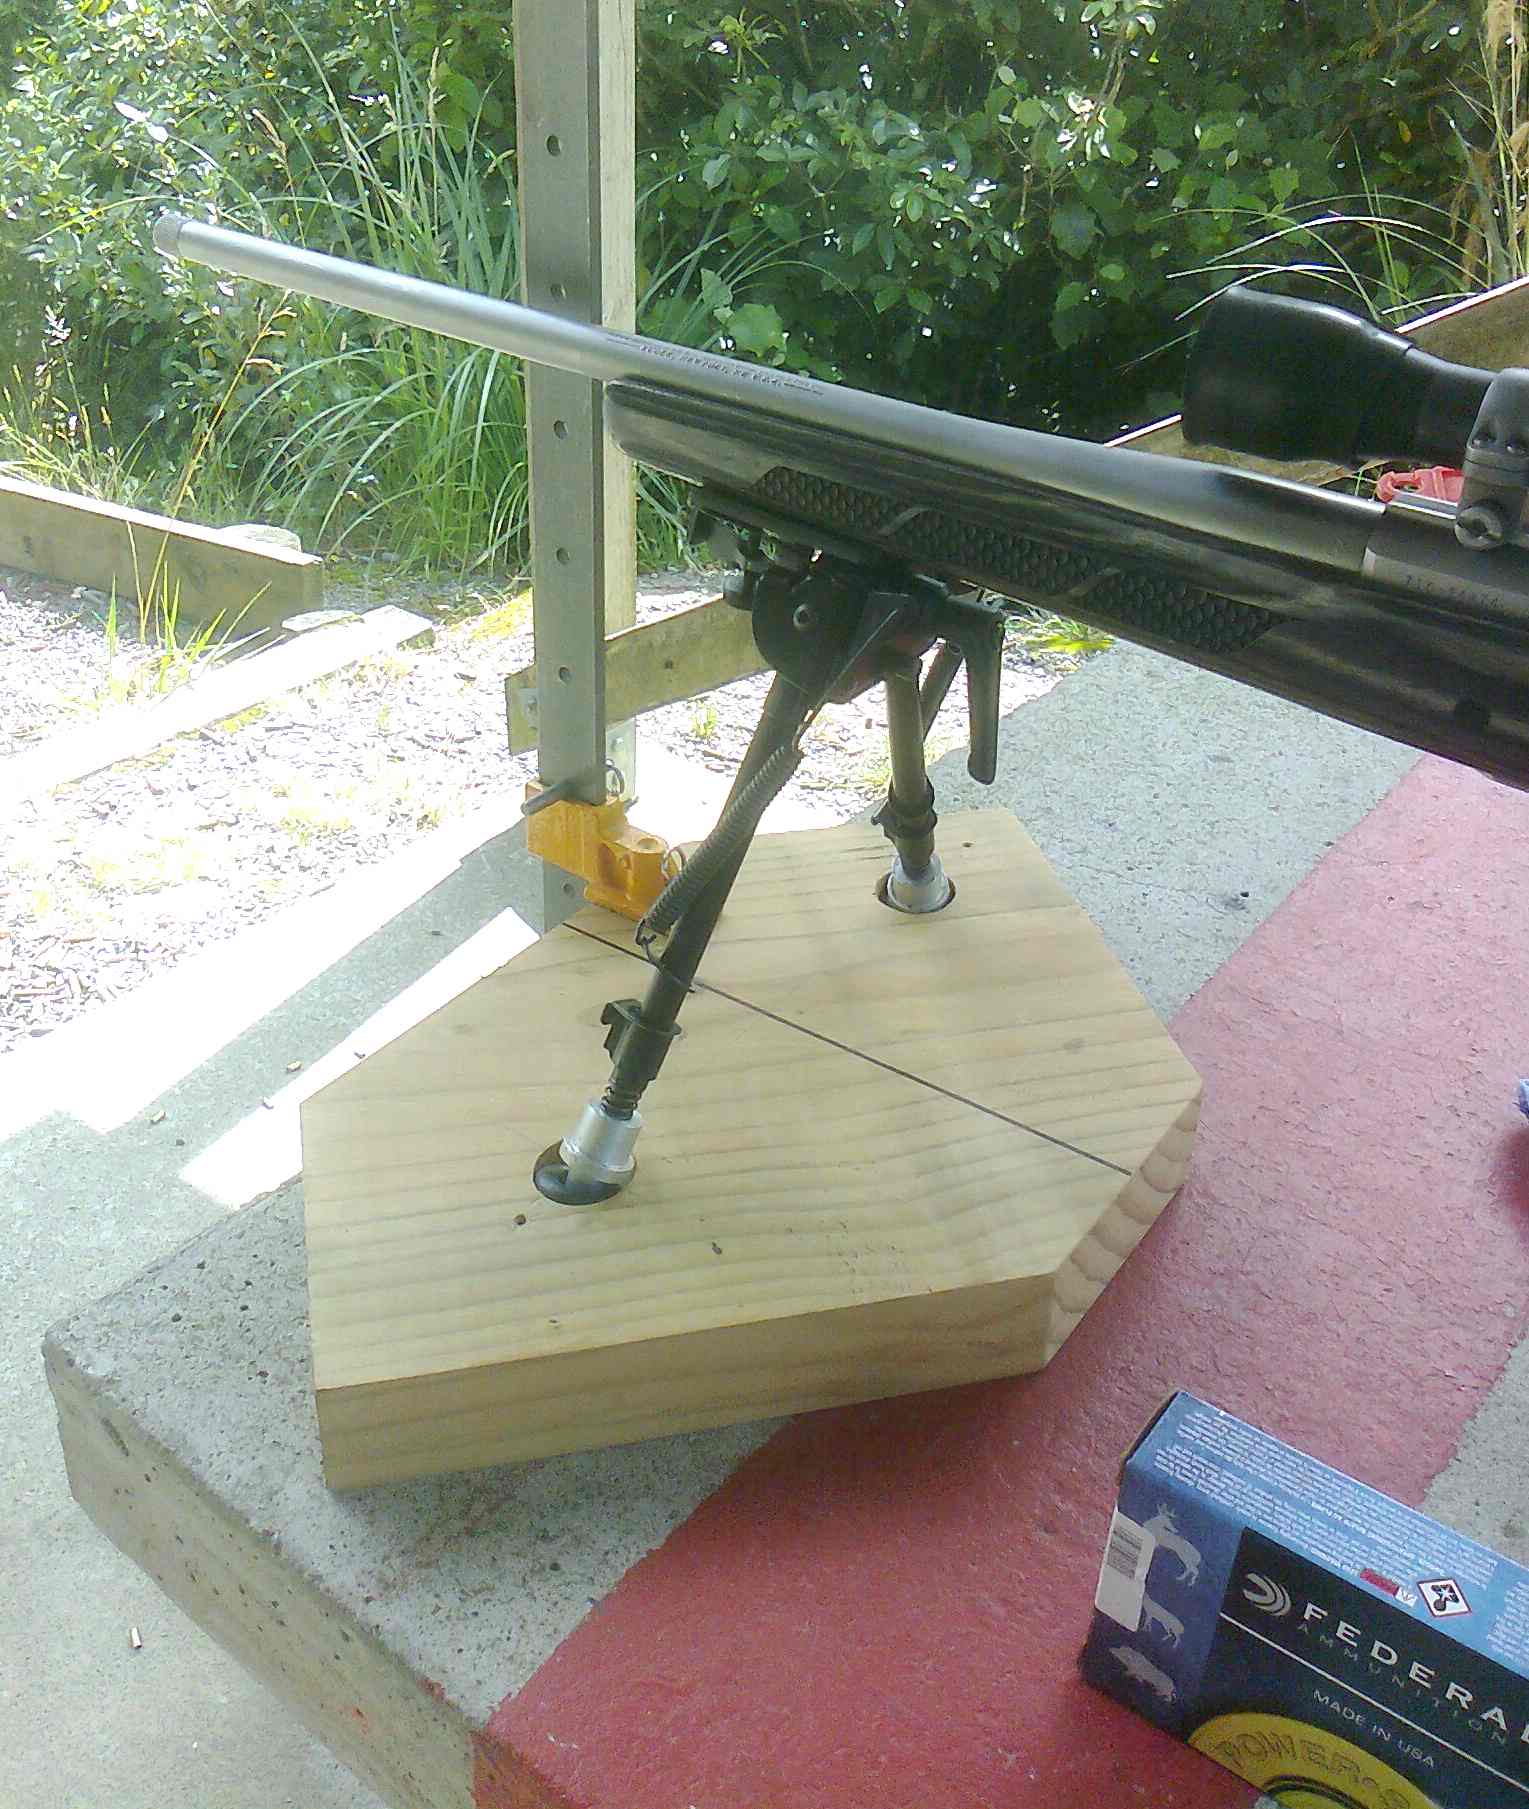
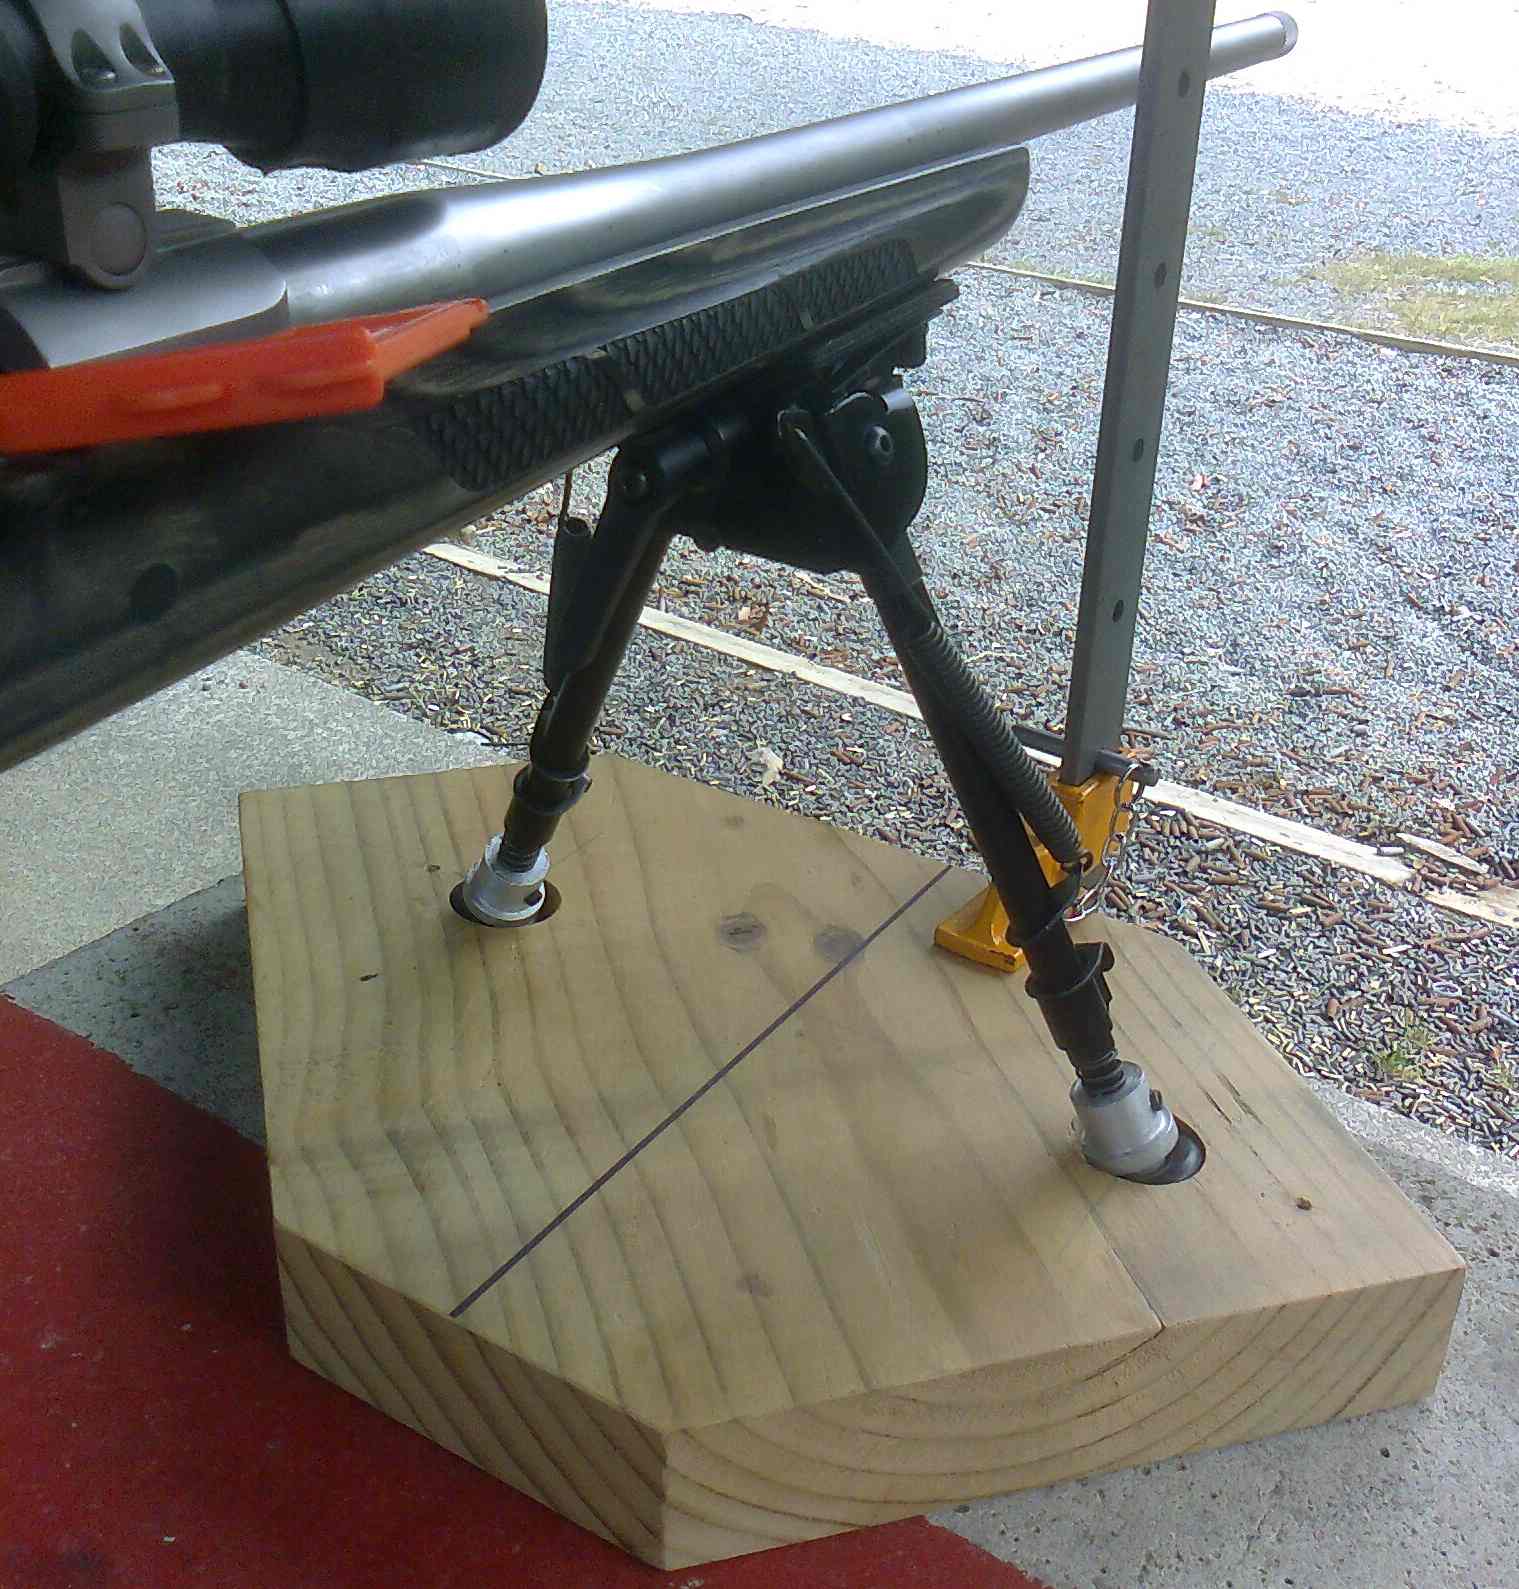
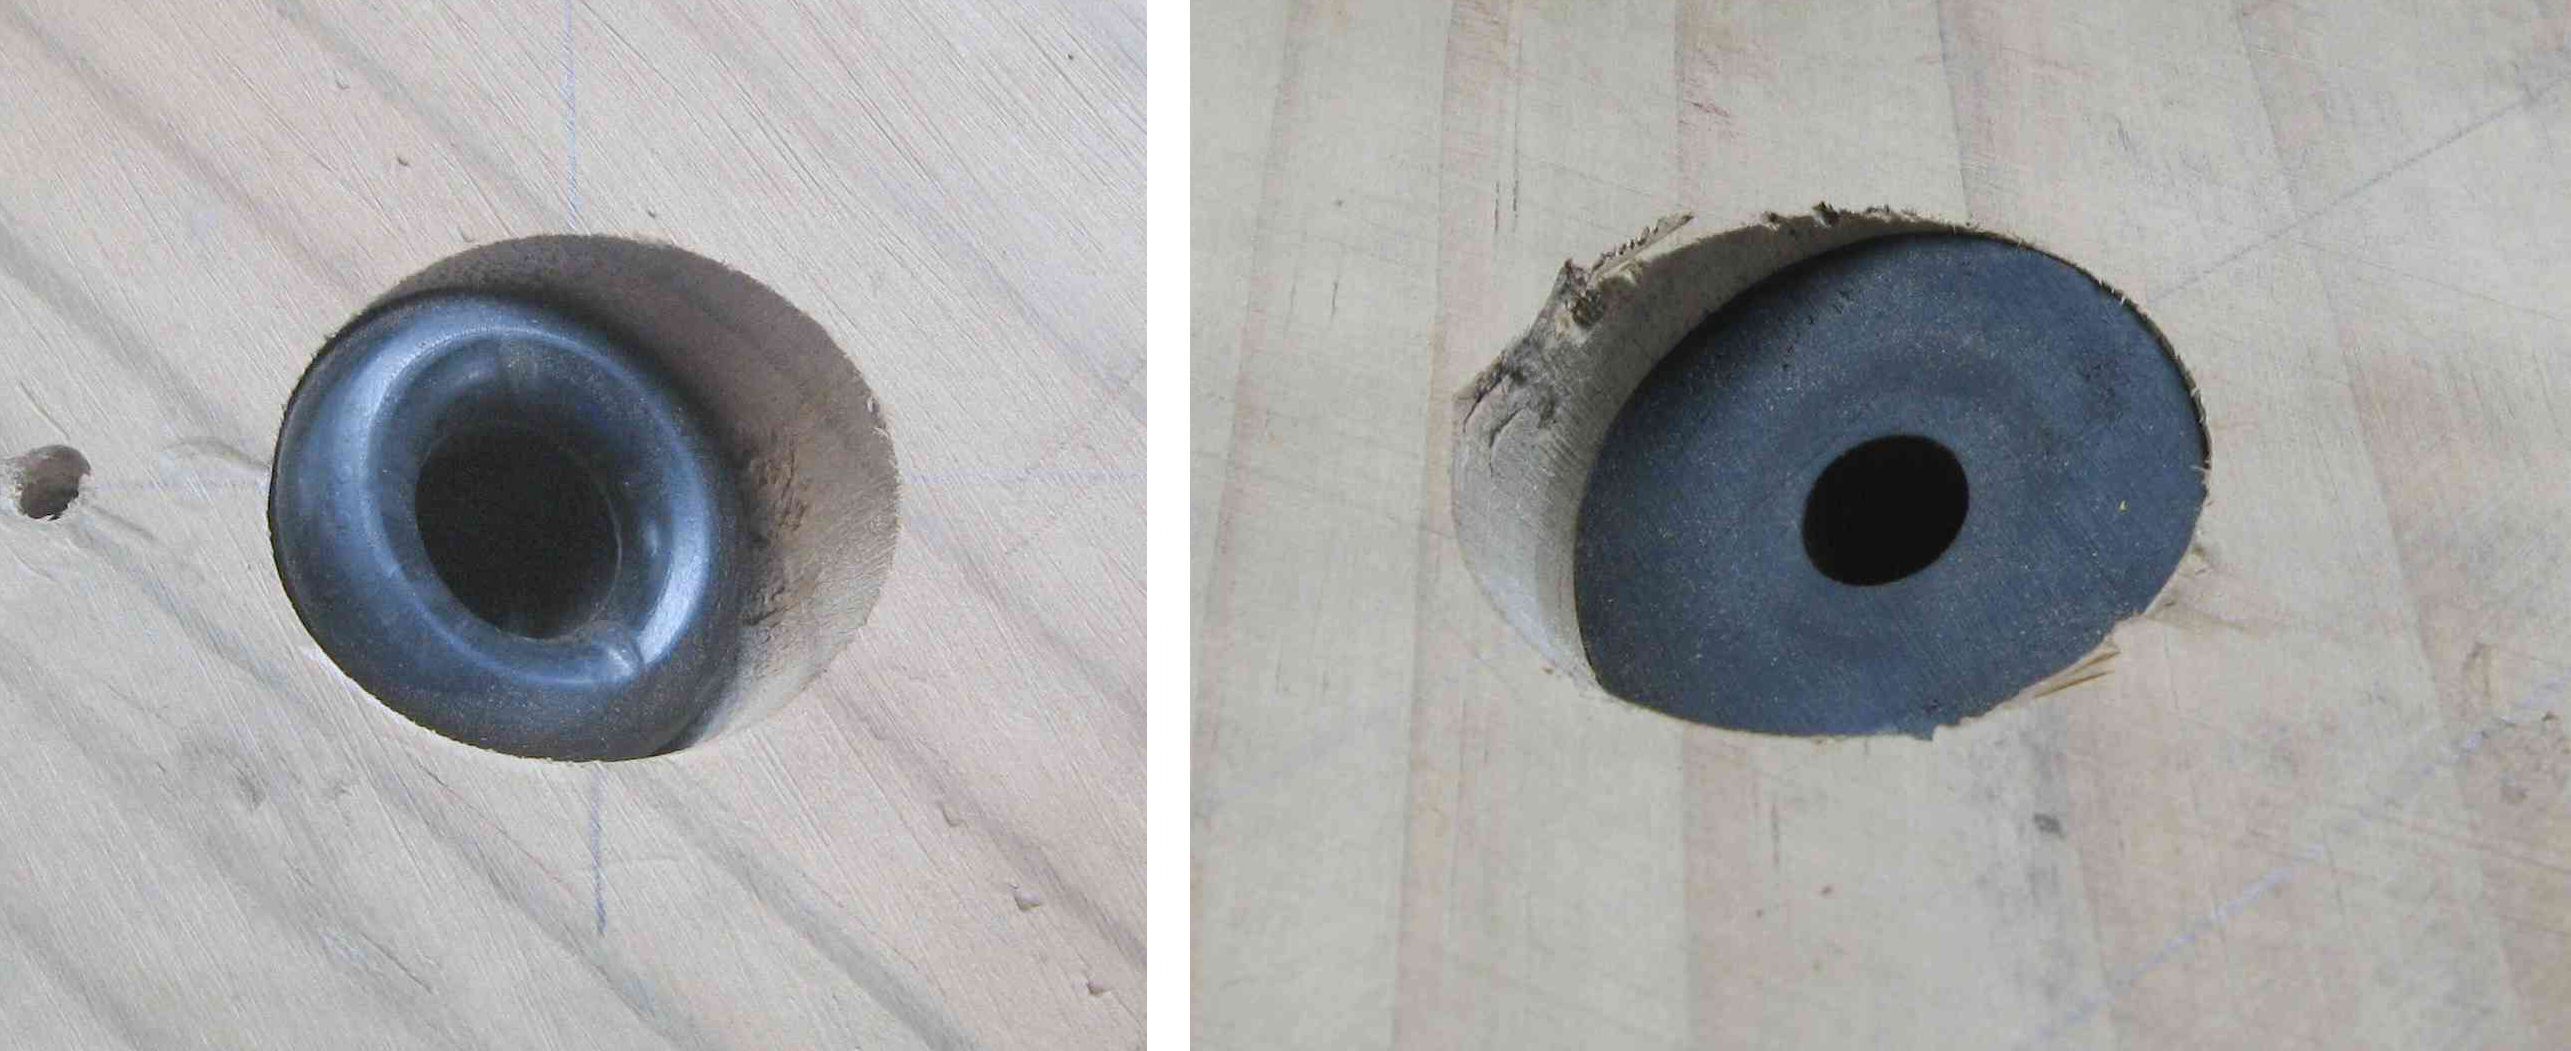
First up, a couple of photos of an adapter board built using a piece of 2 dressed (45mm) timber. The shape of the timber is unimportant and whatever length of plank that is on-hand should be fine. Two holes have been drilled to hold rubber inserts into which the spikes sit. When in use the adapter board is sash clamped to the bench. Here @2post has his M77 in a Boyds stock chambered in 6.5x55 set up to shoot Federal 140gr Power Shok ammo.
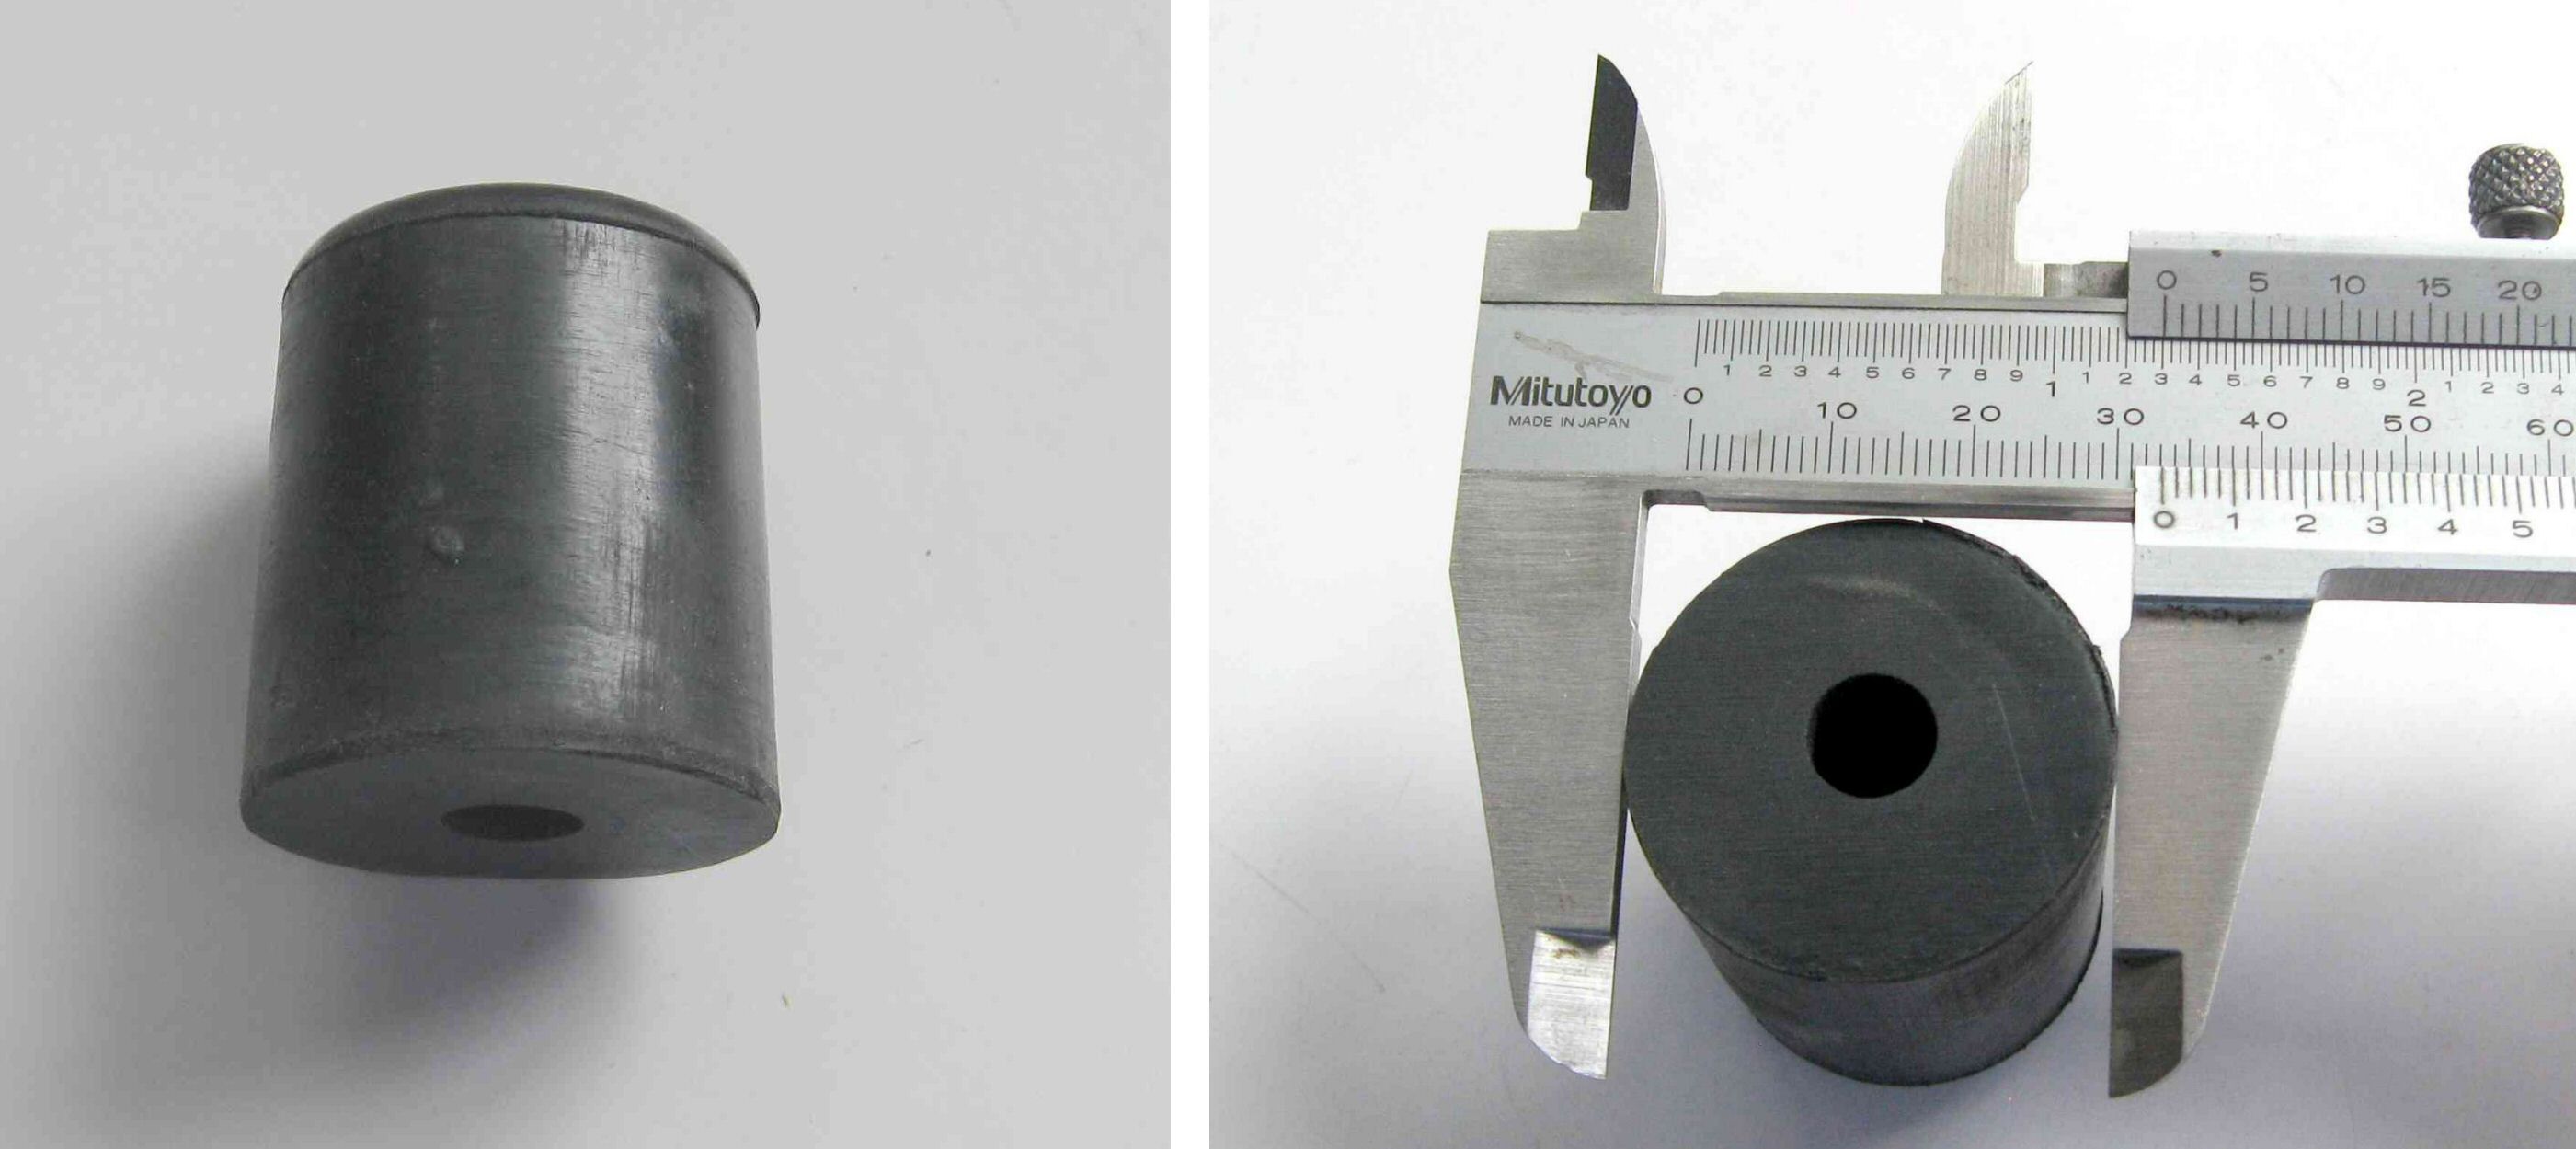
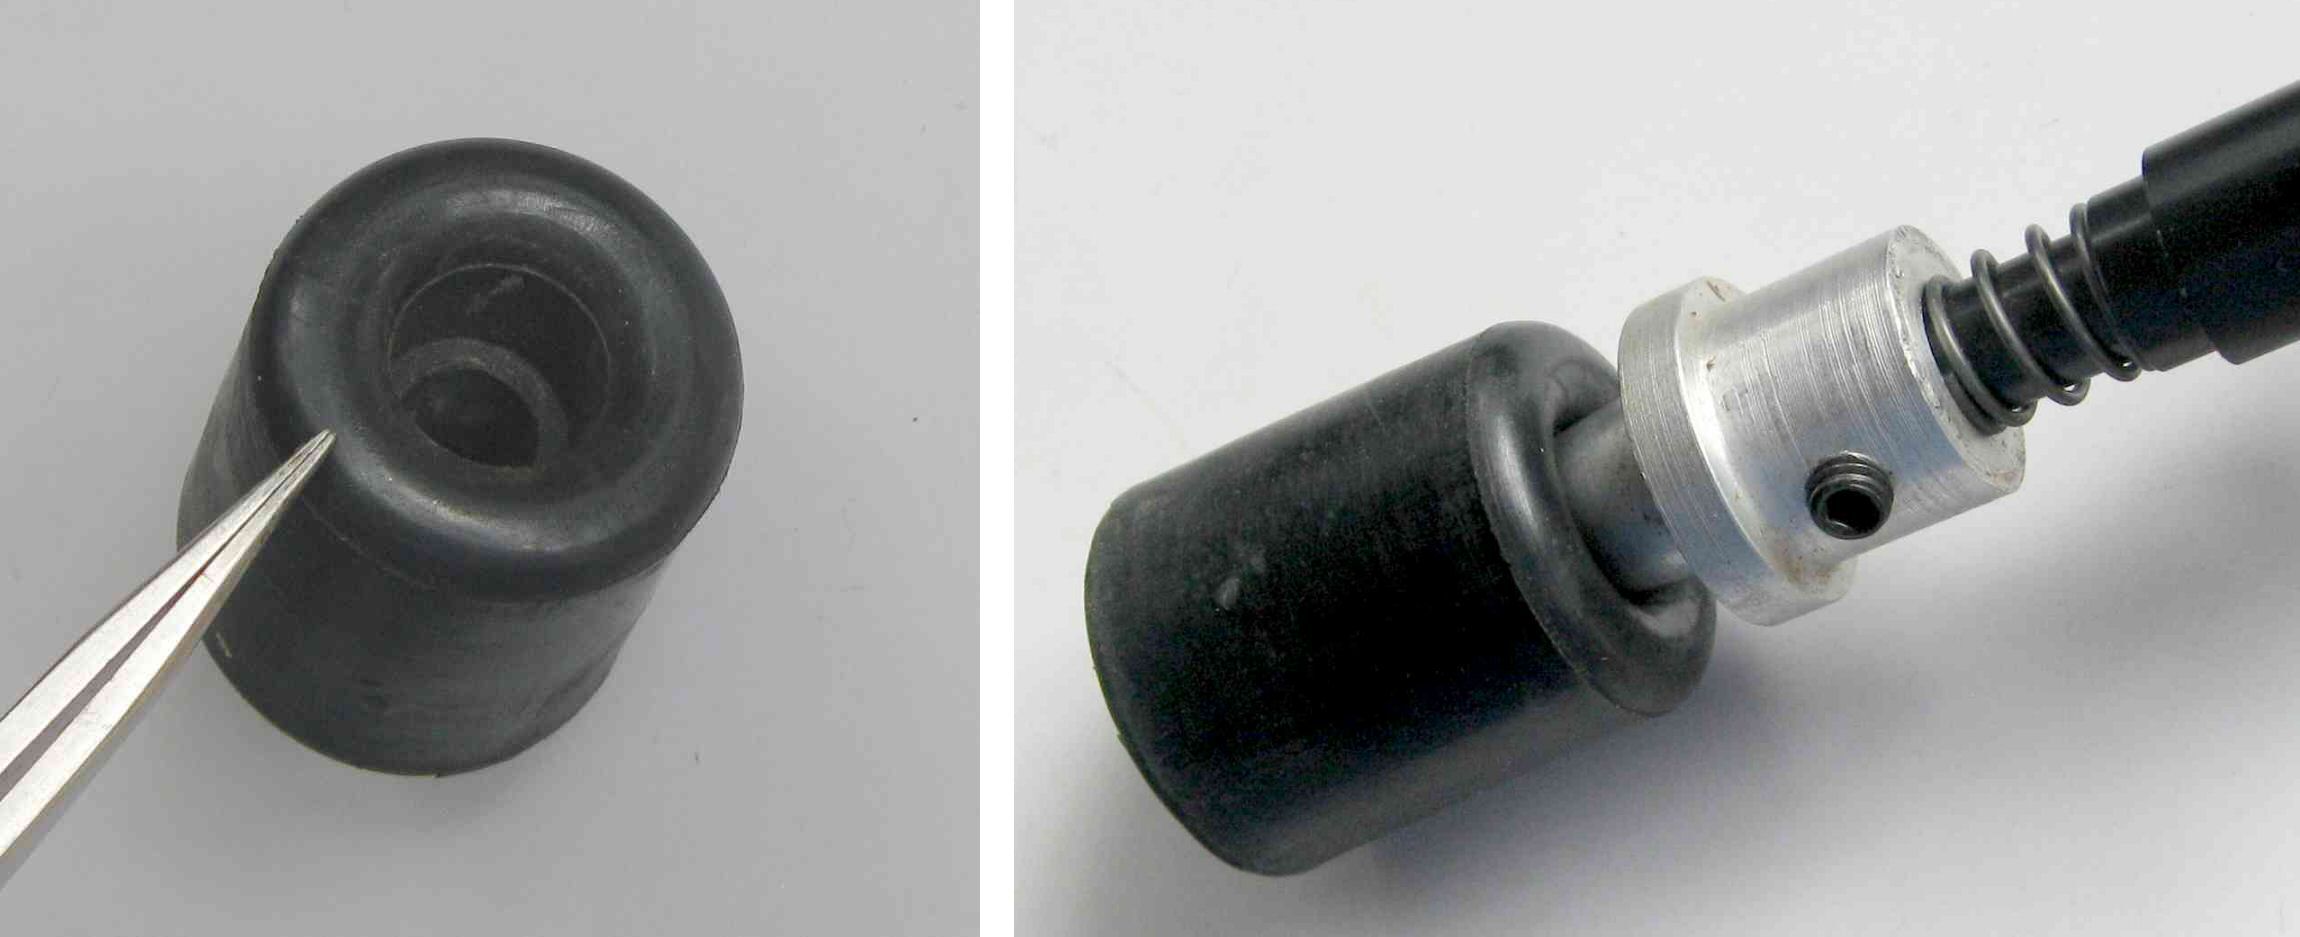
The rubber inserts are inexpensive tapered door stops, 1½ high (38mm) and 33mm in diameter at the base. The bad news is that I picked these up from Bunnings about 2 years ago in a clearance sale youll need to source something similar from elsewhere now.
With these particular door stops the spikes sit in the recessed 9mm diameter centre screw holes.The clearance that has been allowed for the washer & screw is such that the @Happy spikes (familiar to some forum members) only contact the upper rim on pre-load or recoil. One of the reasons the adapter works as it does could be that despite the rubber being quite hard, the take-up on side-ways movement is progressive - first on the 9mm inner hole, then against the rim, and then the tapered end twists over within its mounting hole in the board since this has been sized for the larger diameter base end.
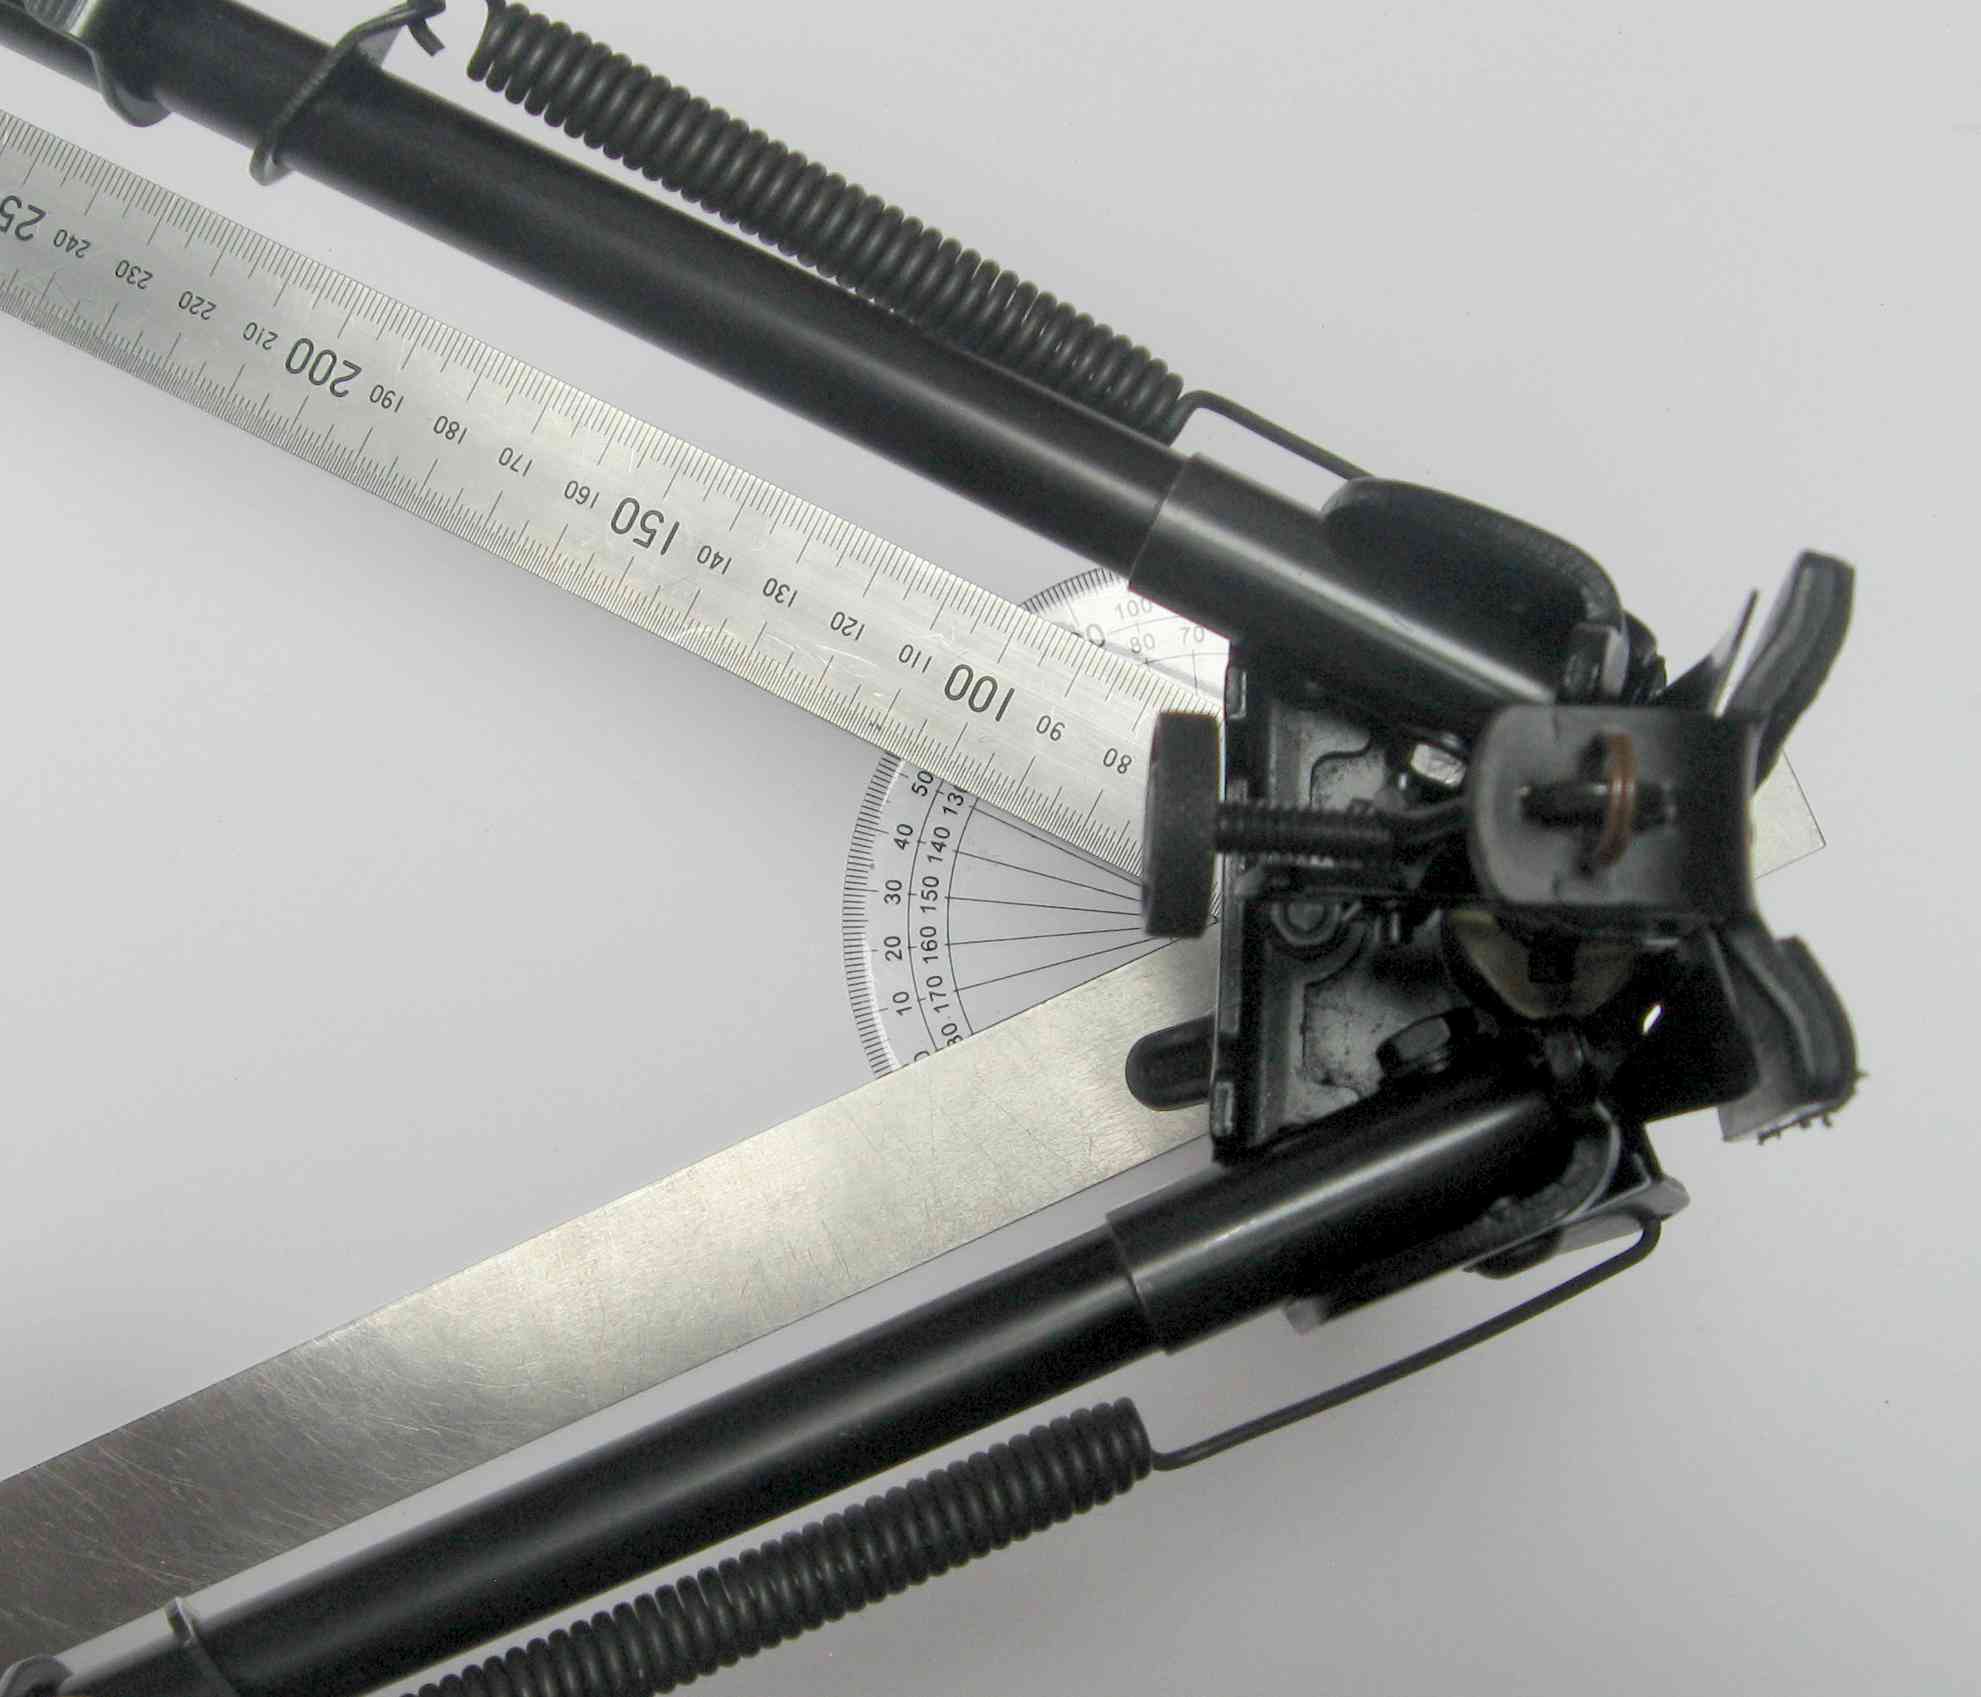
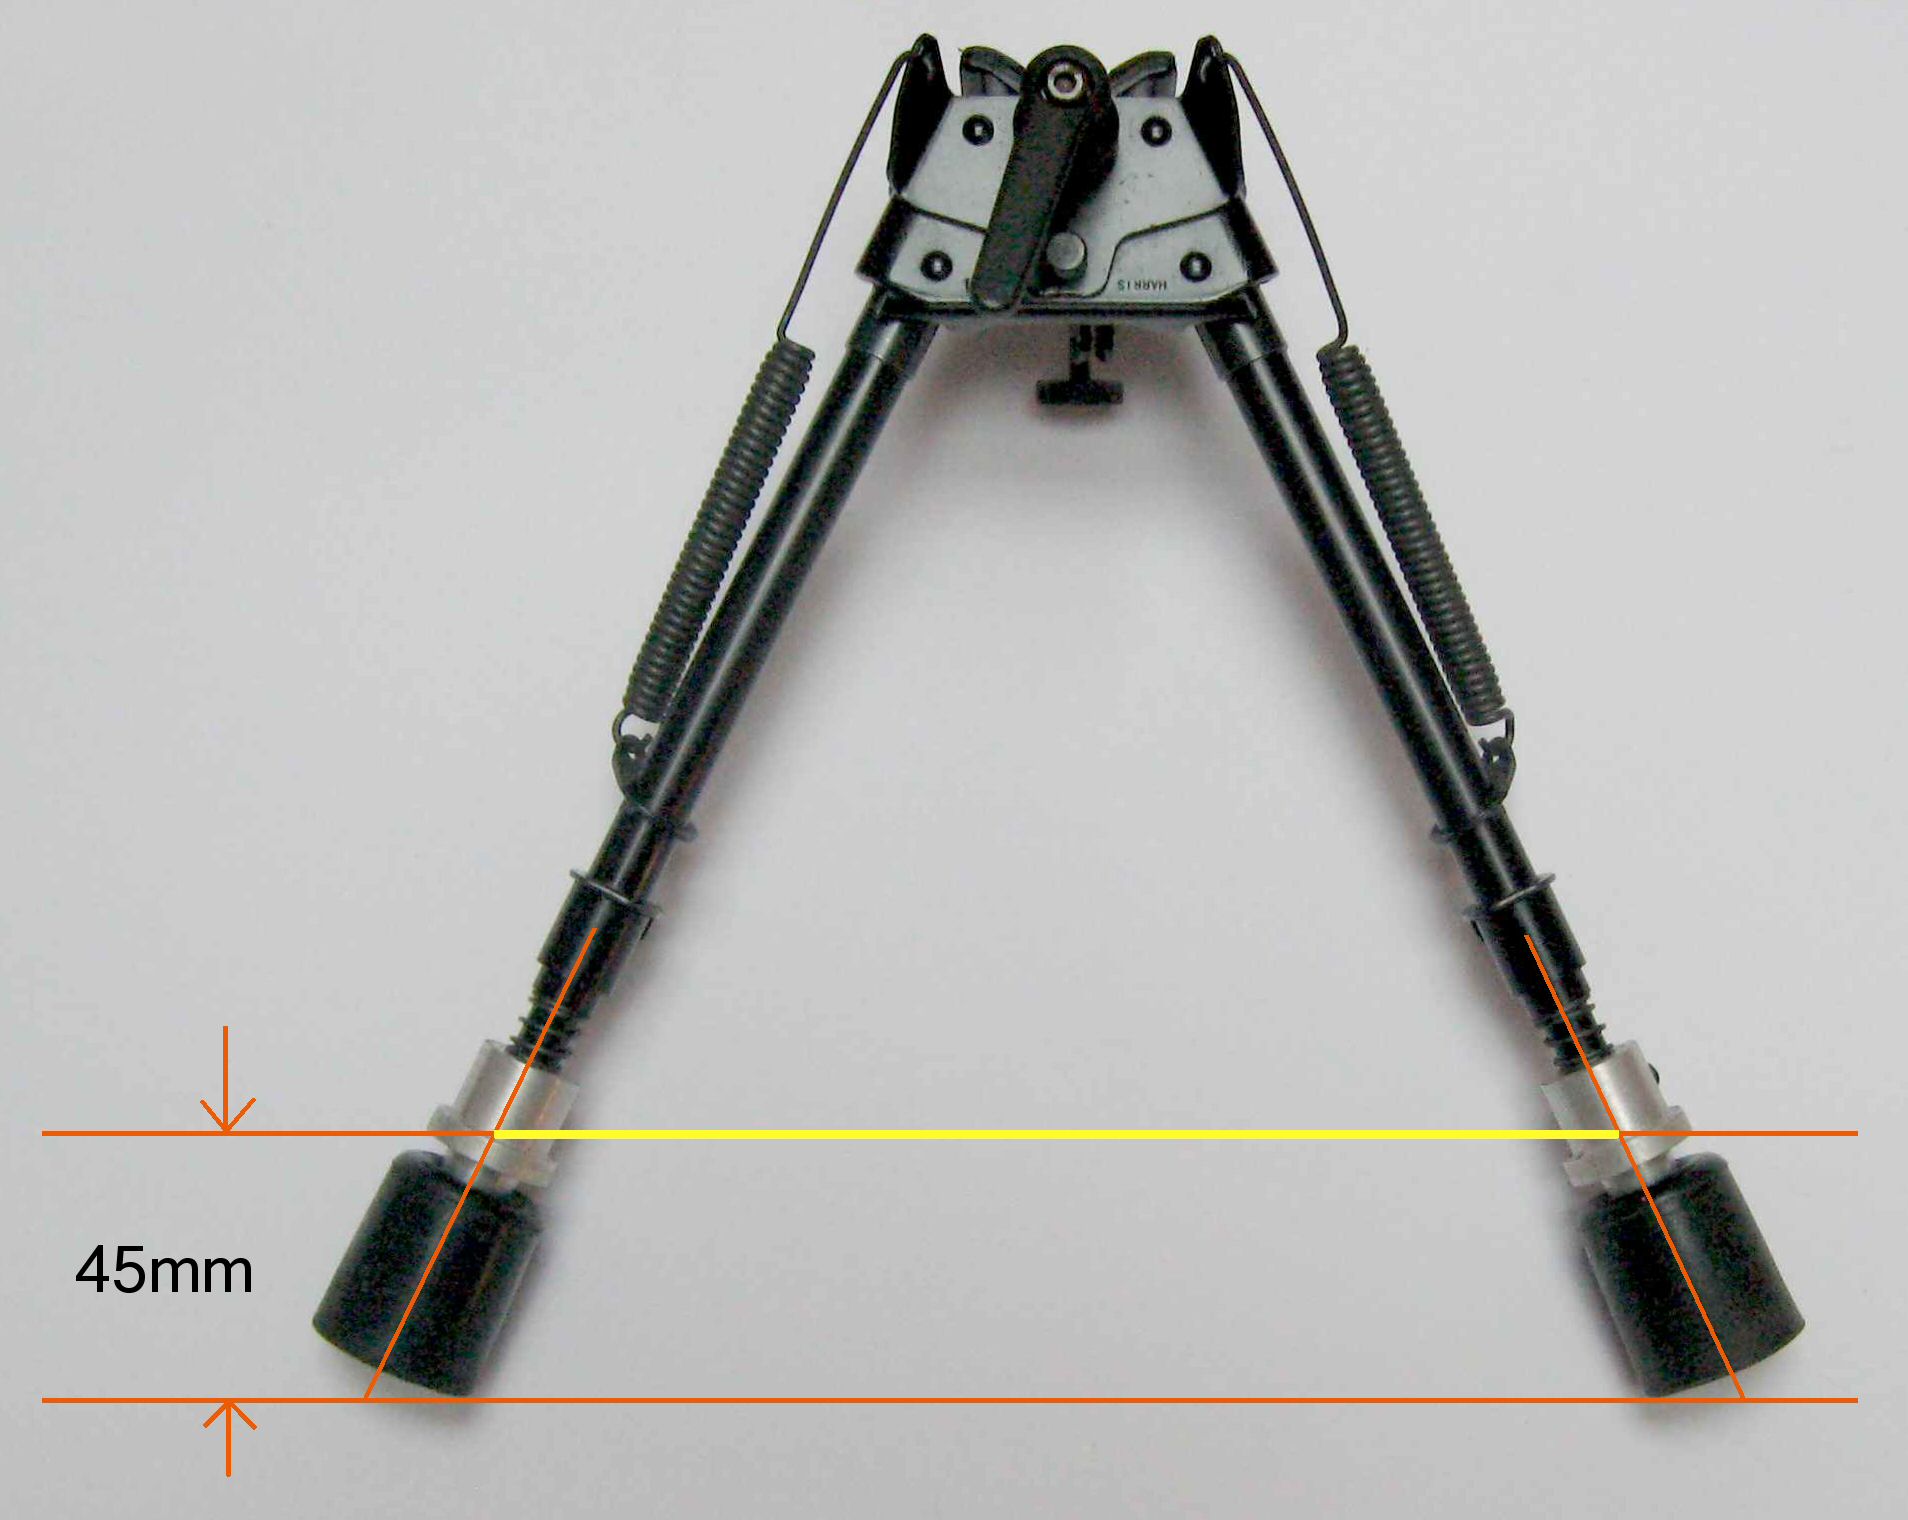
The tricky part to construction is drilling the two holes at suitable angles and locations. First up the splay angle in the bipod legs needs to be measured. The Harris SLM measured 52° so a tilt of half this angle is required per side for the mounting holes.
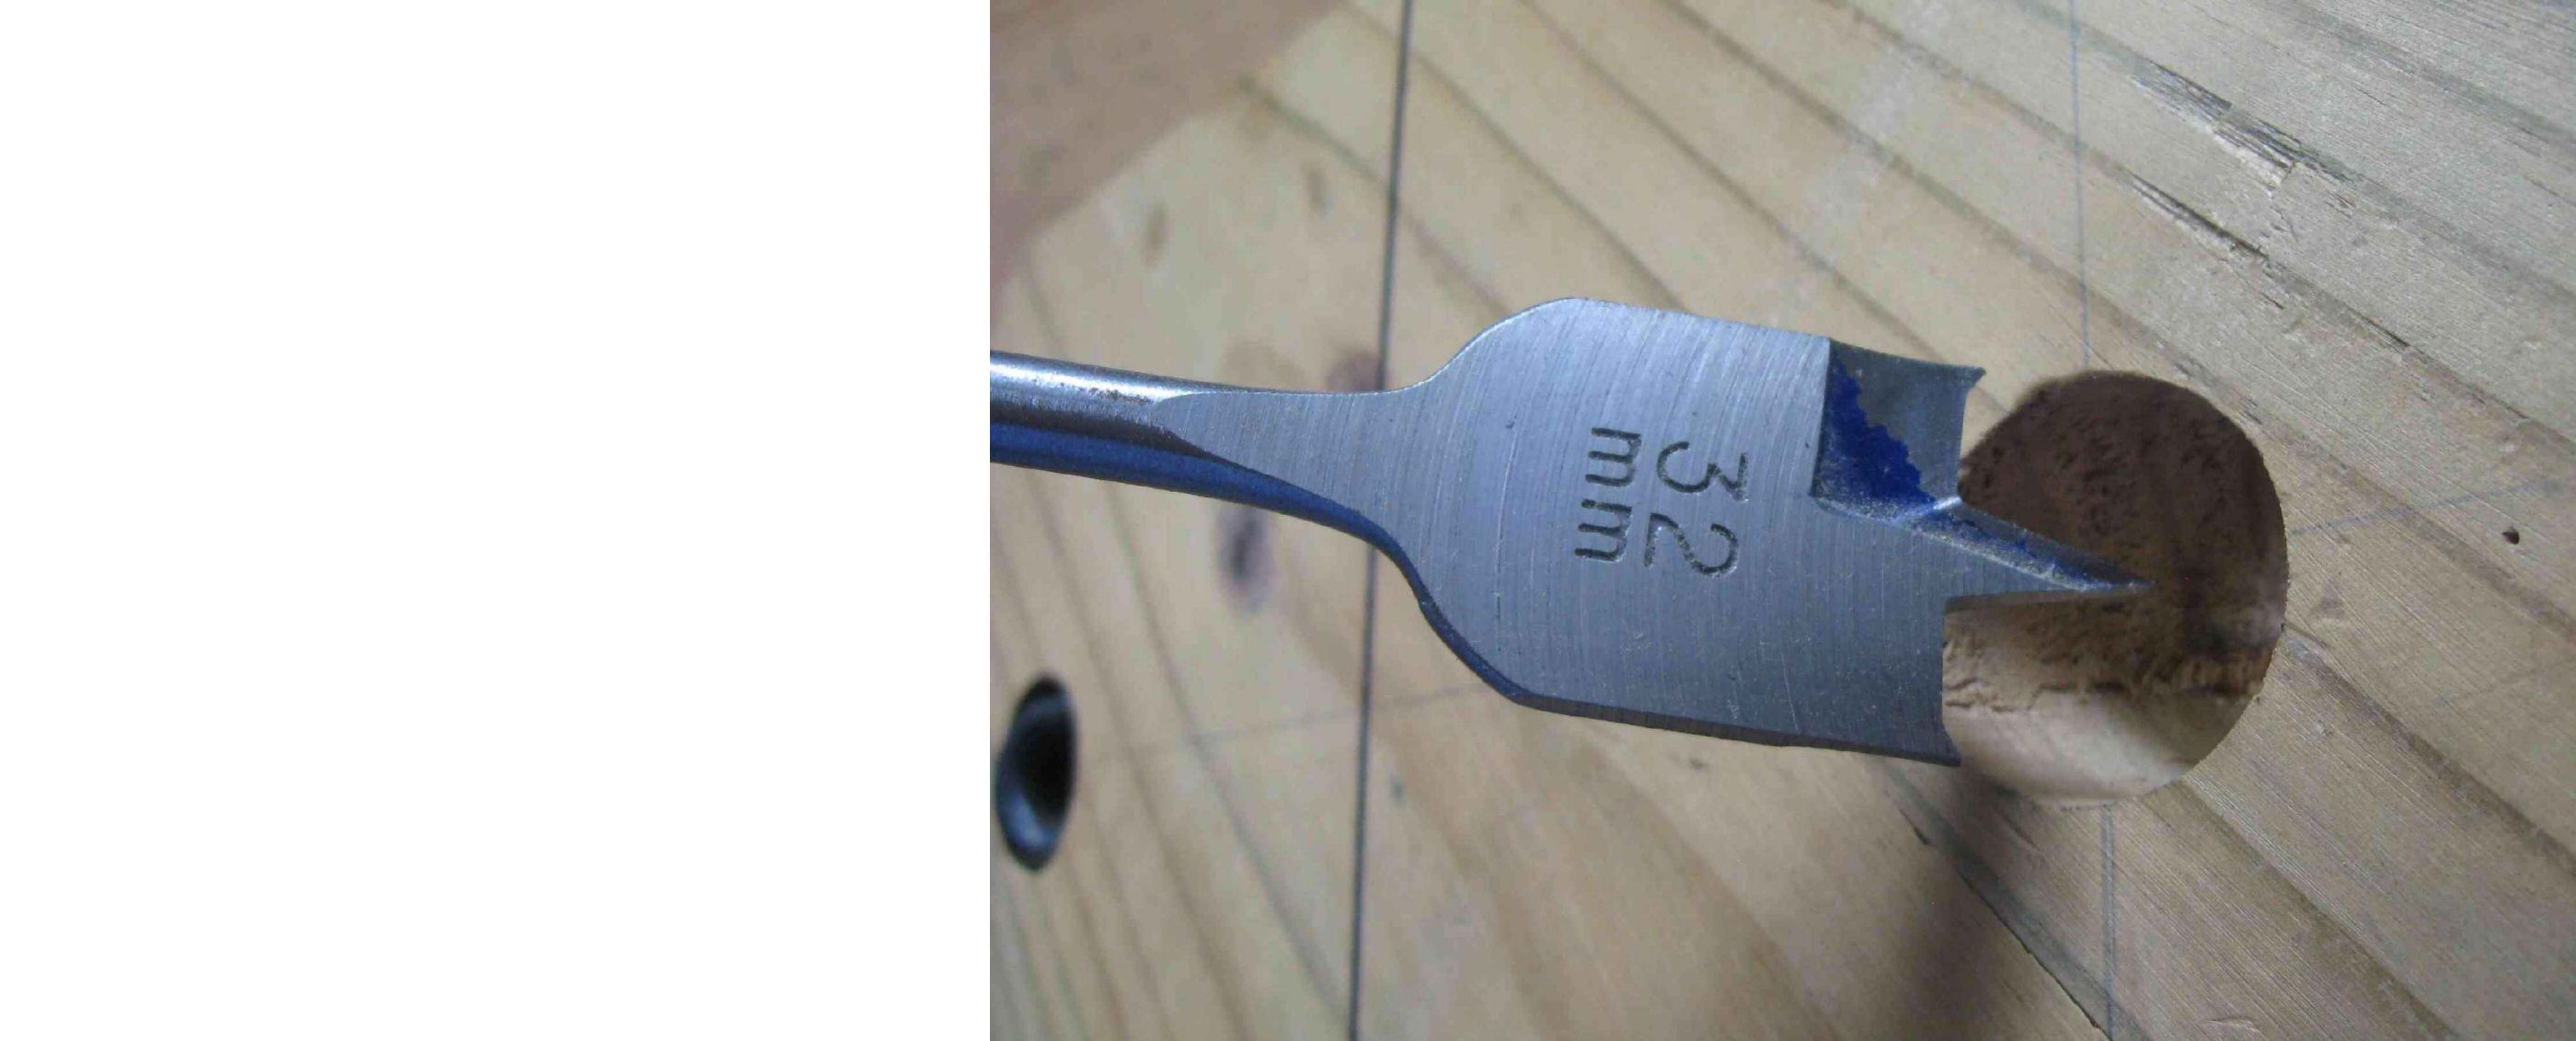
An approach that works is to cut 26° angled timber wedges and temporarily mount these to the adapter board so that the speedbore can begin its cut on timber that is normal to the axis of rotation. What would otherwise be initial angled contact of the cutting spurs would likely skid the drill bit out of position across the timber surface.
Figuring out the locations to position the drill bit for the start of the holes is an exercise in geometry and deserves some thought as it is NOT the tip-to-tip spacing of the bipod.
Assuming the spacing will be marked up on the top surface of the board, figure out at what depth the rubber inserts are going to sit within the timber, and with the spikes firmly in place, measure up the hole spacing shown in yellow accordingly based on the thickness of the timber.
I initially drilled small diameter angled pilot holes at the calculated spacing from the top of the board, and once the above mentioned wedges were in position I used these holes to drill back through the wedges from the underside. That way it was not necessary to factor in the height of the wedges in reducing the spacing. A couple of final points: once completed the bipod has to be partially closed to introduce the spikes into the adapter openings. All going well the bipod will then expand fully open once the spikes have dropped into position. Secondly a higher rear rest will be required to match the increased elevation at the front.
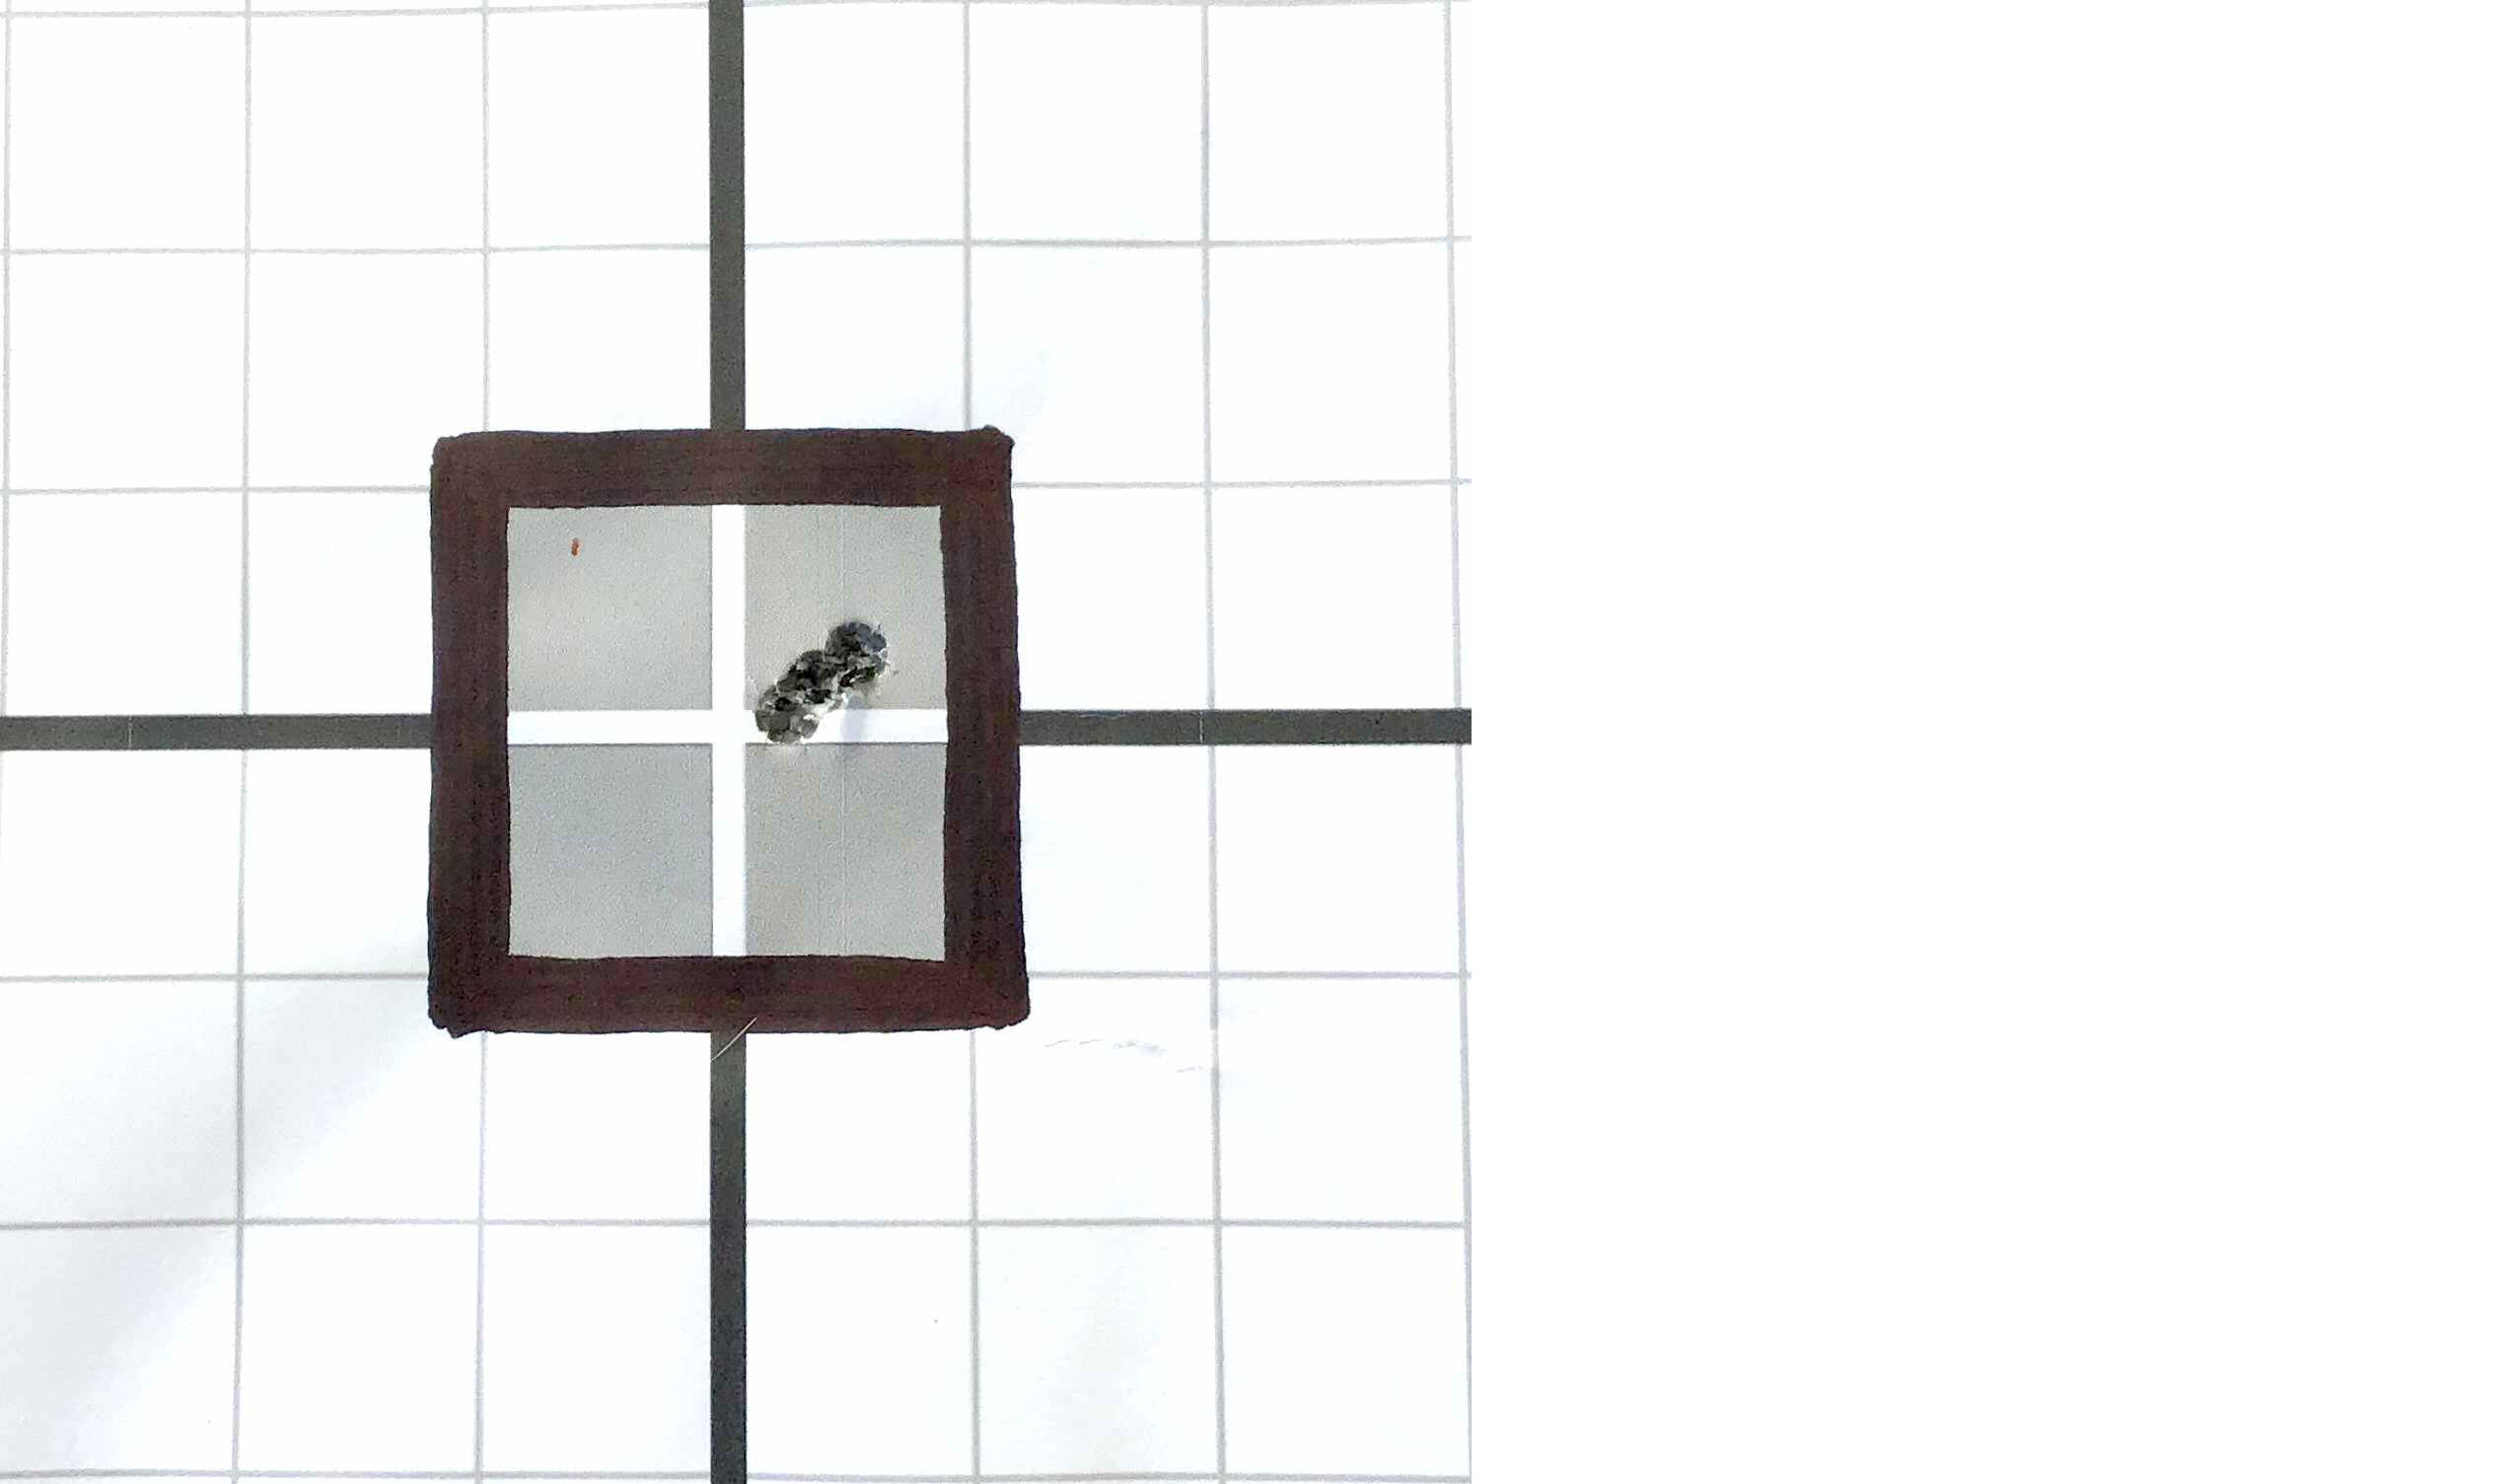
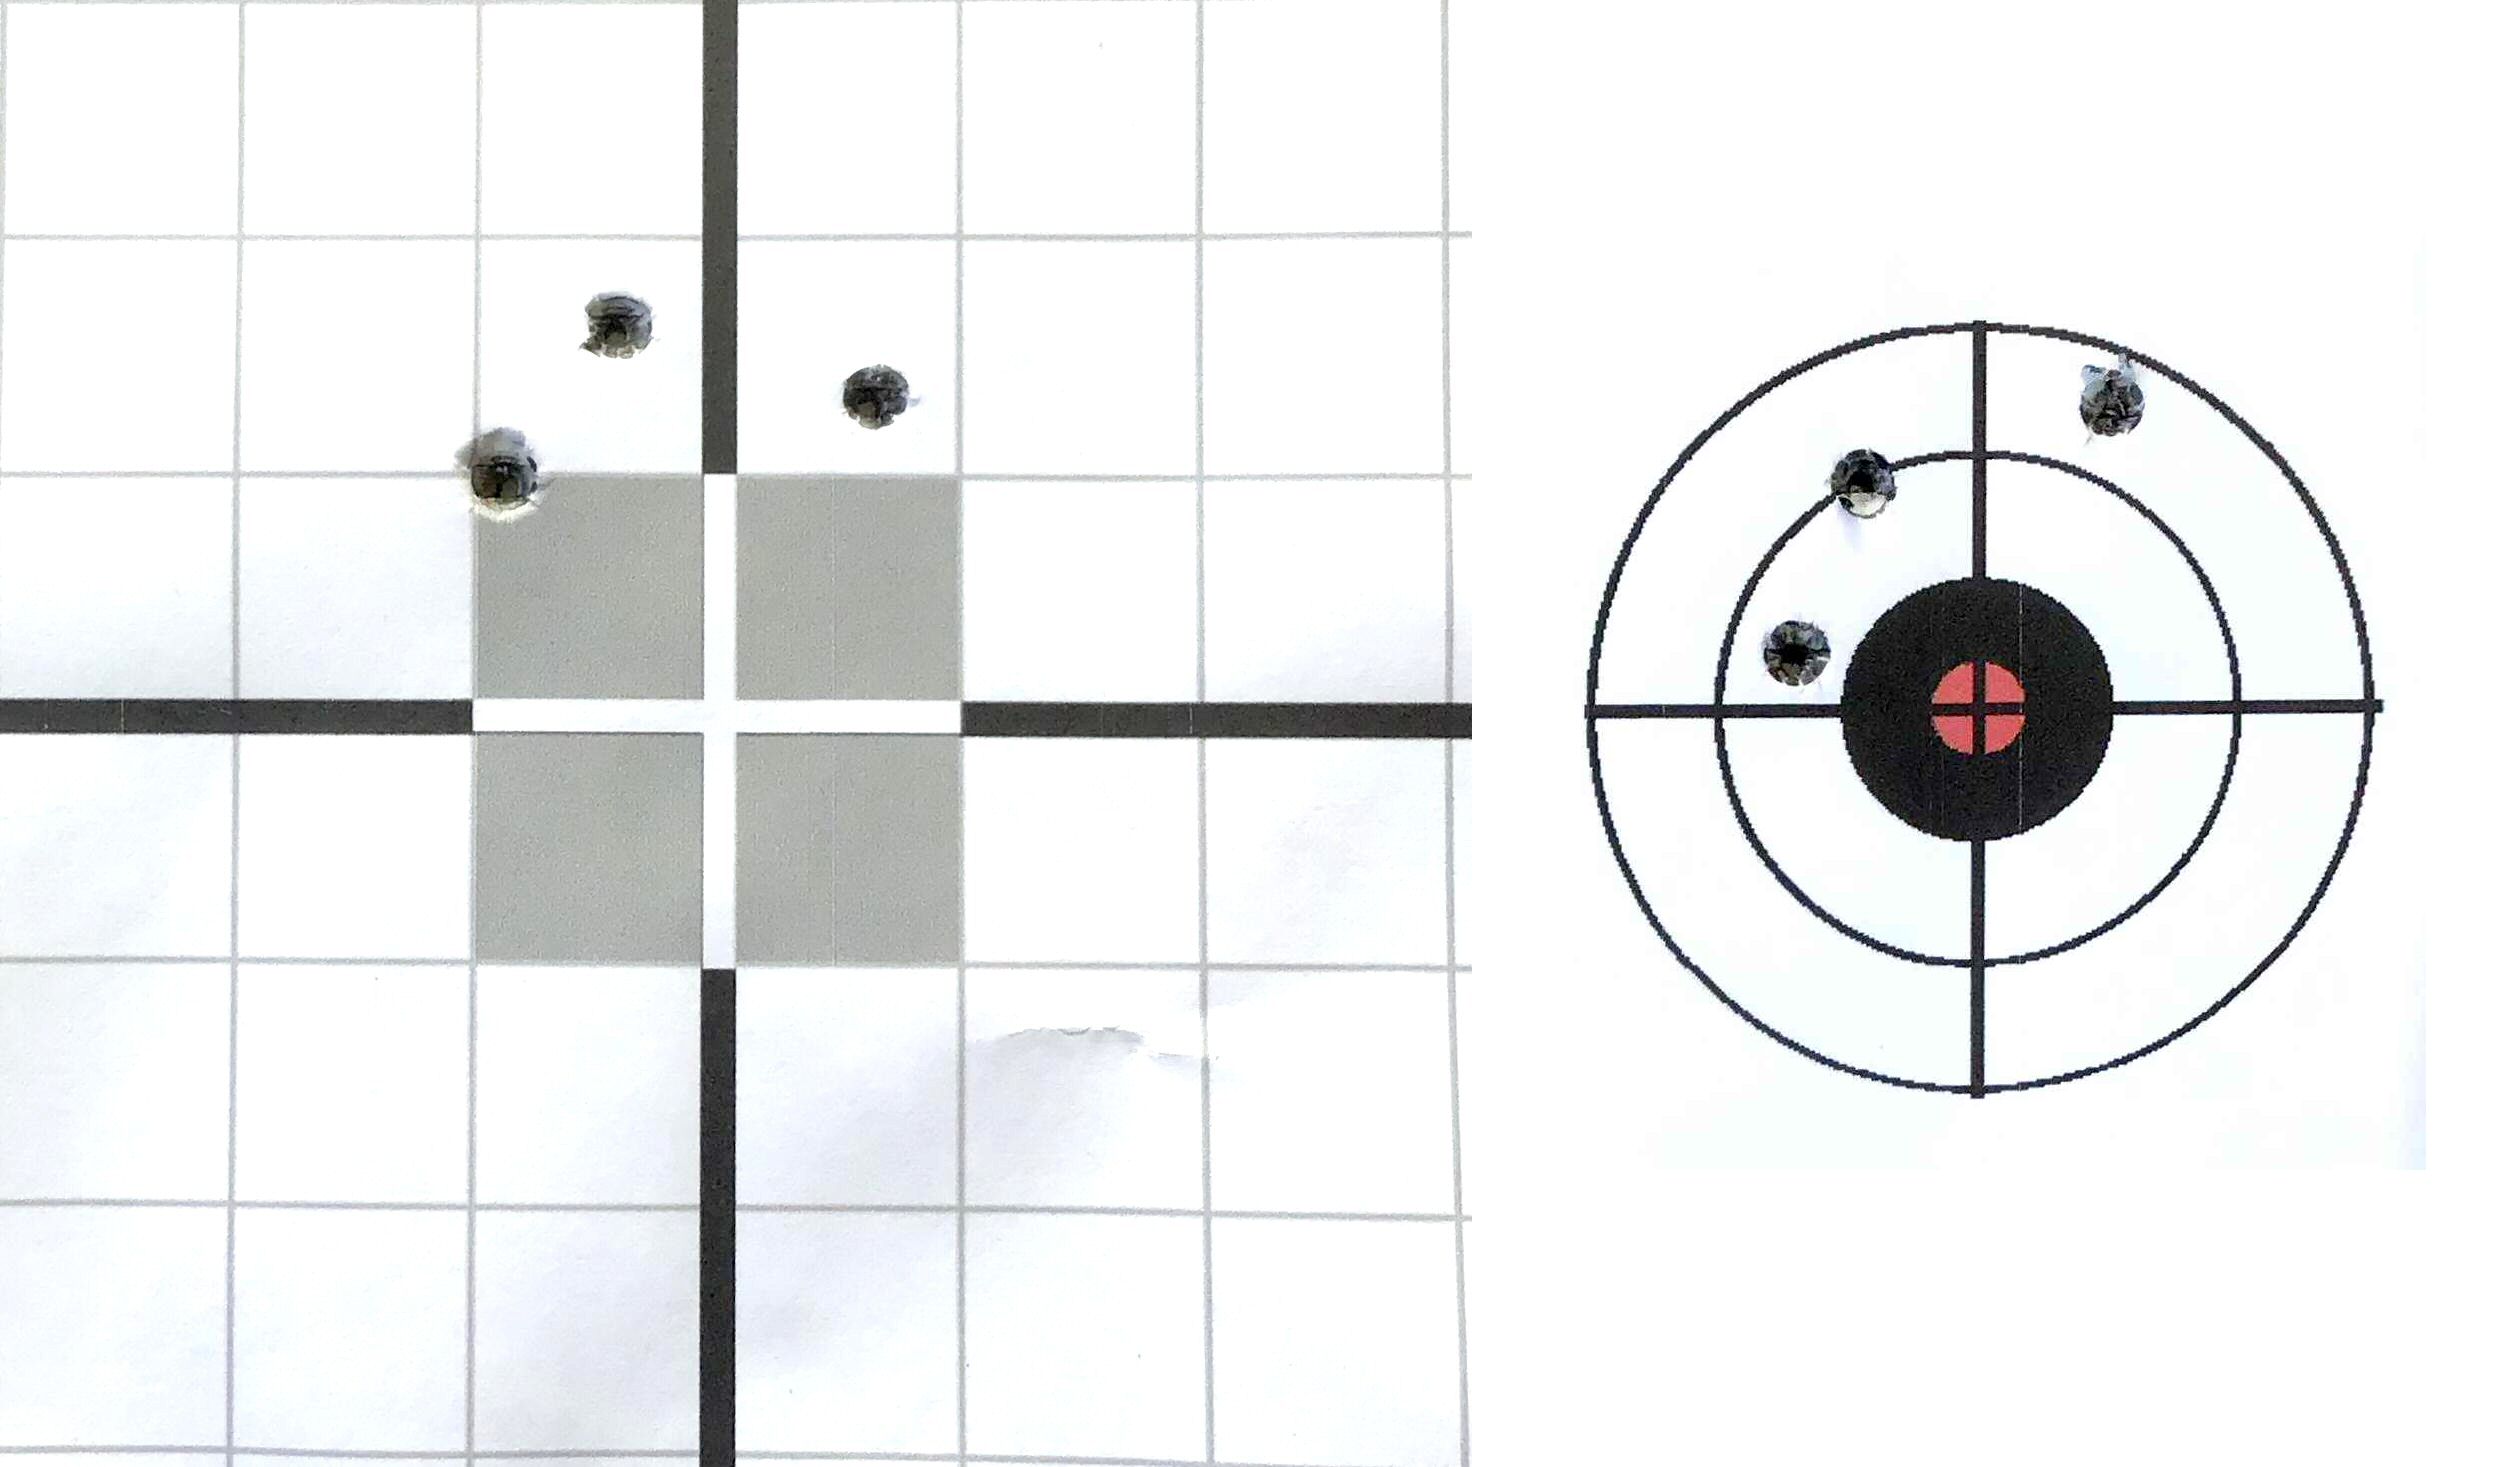
All good construction projects need to end with a reported demonstration of the finished item in action. Returning then to 2posts Hawkeye at the Kaitoke range; initially the rifle was being used with an unmodified Harris bipod with the standard rubber feet, resulting in 1½ - 2 3-shot groups at 100 metres.
The initial thinking was that the rifle didnt like the ammo, but since I had a bipod fitted with spikes and an adapter board on-hand, we thought it should be given a go. Although 3-shot groups are only indicative the result looked promising. With the spikes locked in place, 2post was able to apply firm and consistent pre-load to the bipod, and the adapter inserts appeared more forgiving on recoil movement than the bench surface had been. We also put a black border around the target to help with aim.
Welcome guest, is this your first visit? Create Account now to join.
Welcome to the NZ Hunting and Shooting Forums.
Search Forums


User Tag List
Results 1 to 7 of 7
Threaded View
-
19-01-2019, 11:20 PM #1Member


- Join Date
- May 2012
- Location
- Porirua
- Posts
- 1,039
Adapter for shooting a spiked bipod from a concrete bench.


 Reply With Quote
Similar Threads
-
Bipod for bench stock
By Freezer in forum Firearms, Optics and AccessoriesReplies: 3Last Post: 14-11-2016, 09:35 AM -
Shooting without a bipod
By gimp in forum ShootingReplies: 53Last Post: 28-01-2016, 06:47 PM -
Prone bipod shooting
By deepsouthaussie in forum ShootingReplies: 7Last Post: 22-04-2015, 12:29 PM
Tags for this Thread
 Posting Permissions
- You may not post new threads
- You may not post replies
- You may not post attachments
- You may not edit your posts
Welcome to NZ Hunting and Shooting Forums! We see you're new here, or arn't logged in. Create an account, and Login for full access including our FREE BUY and SELL section Register NOW!!
All times are GMT +13. The time now is 02:08 AM.

Bookmarks