

 54Likes
 LinkBack URL
 About LinkBacks
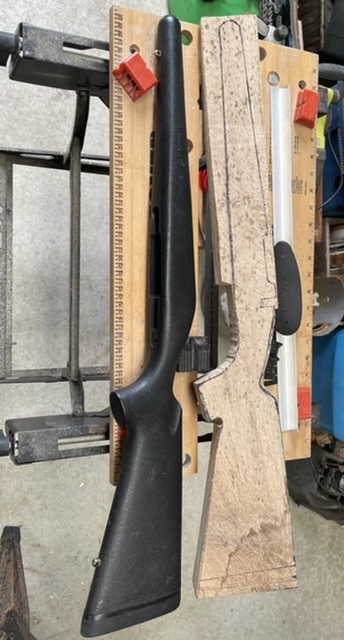
My second effort, this one for a REM Model 7 708. Pretty much copy of Model 7 factory stock but with a longer LOP to suit the shooter (long arms) plus a slightly raised comb and a check swell.
Pictures tell the story easier than words.
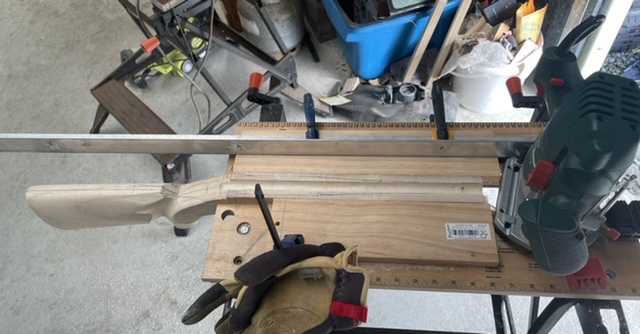
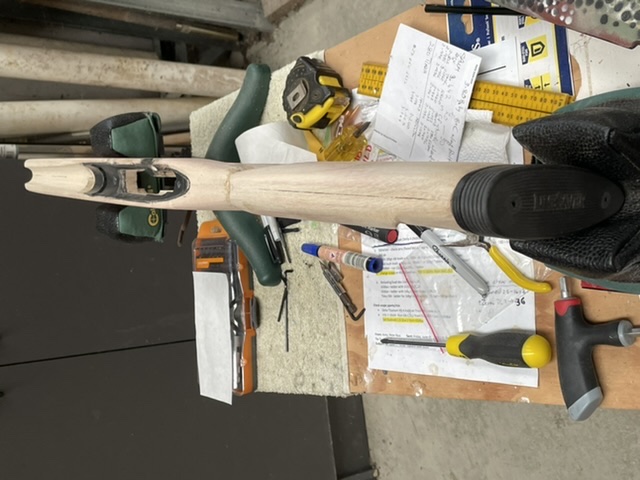
Starting with shaping of the 10x2 Paulownia block, cutting out rough profile, then start shaping the butt section first before working into wrist area.
.
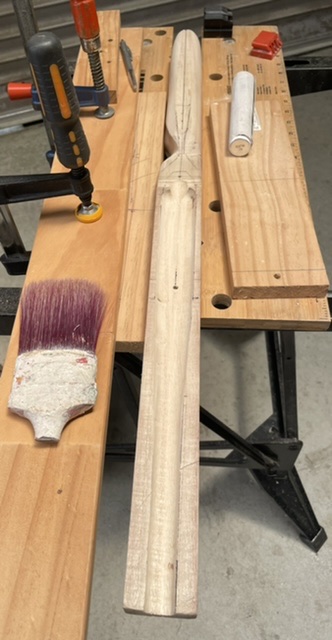
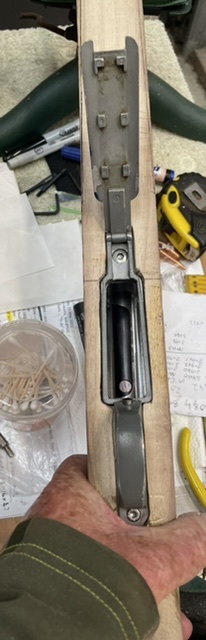
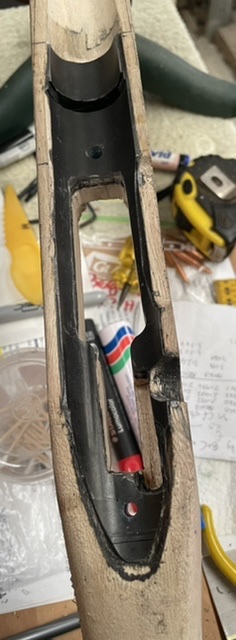
Next marking out and cutting the barrel channel, action and action screws, bottom metal cut out, etc.
Once happy with action and barrel fit then set up bedding pillars before bedding the action using Terminal Ballistics kit. Then final cut out of mag and trigger wells prior to shaping of fore end and final tidy up of wrist & butt sections. At this stage wood stock with bedding job weighed in at 424gms, plus another 132gm for the Limb saver recoil pad.
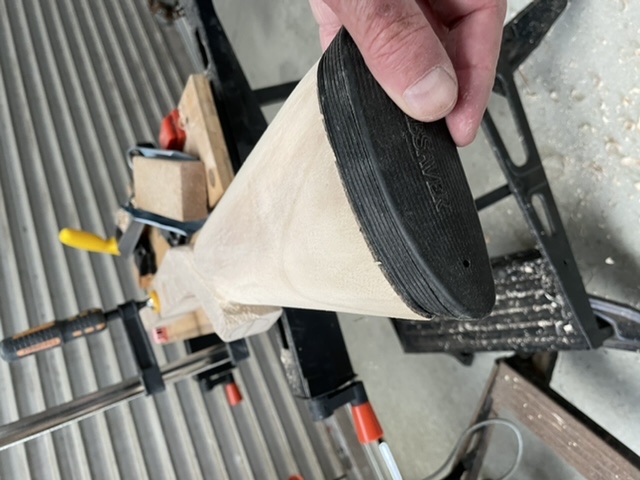
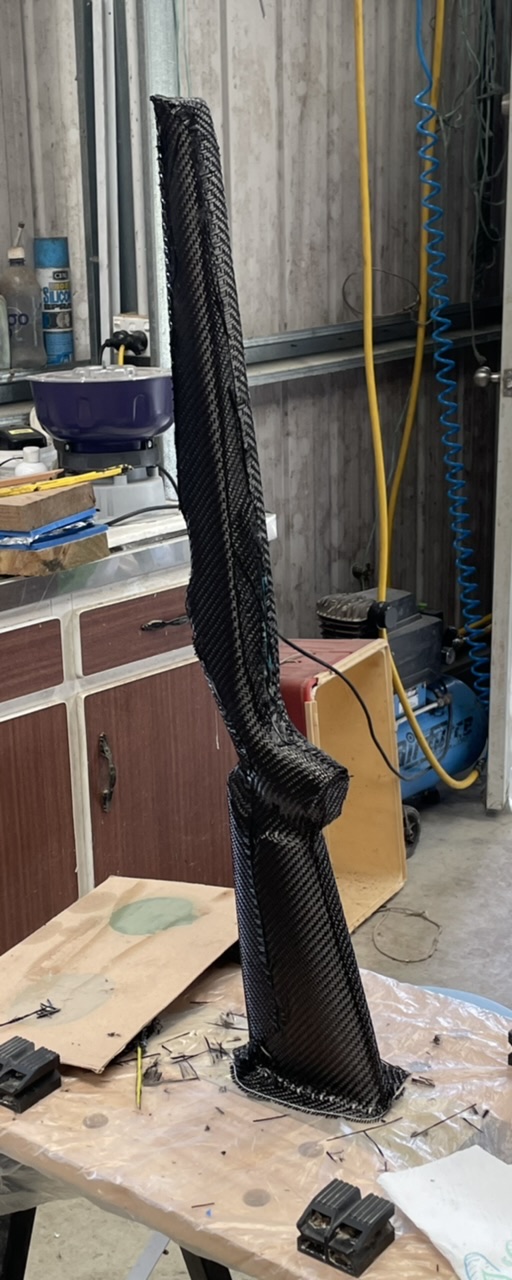
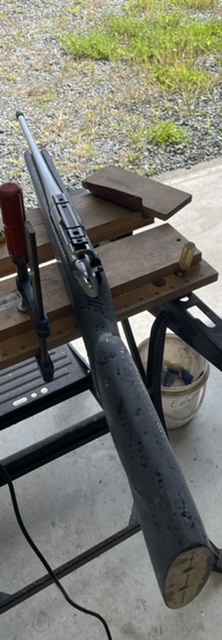
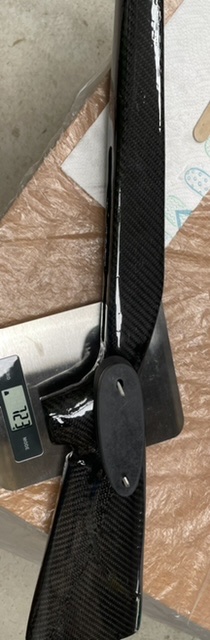
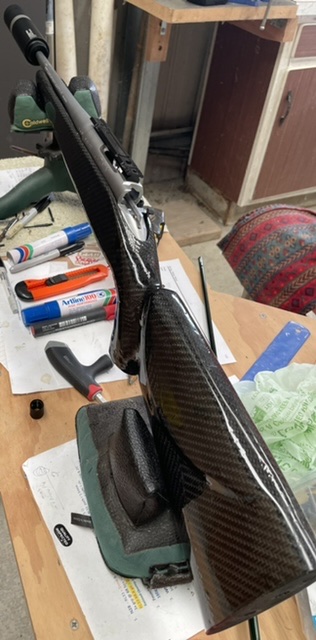
Now the fun starts - filling barrel channel and action areas with plasticine before base epoxy coat then the CF wrap once the base epoxy reaches tack stage. I have yet to find a good way to get the CF to stick down neatly in areas like the wrist and pistol grip. Large flat surfaces & one dimensional curves are pretty straightforward but tight complex curves and ends are tricky. This is the ugly duckling stage , CF on and epoxy coated.
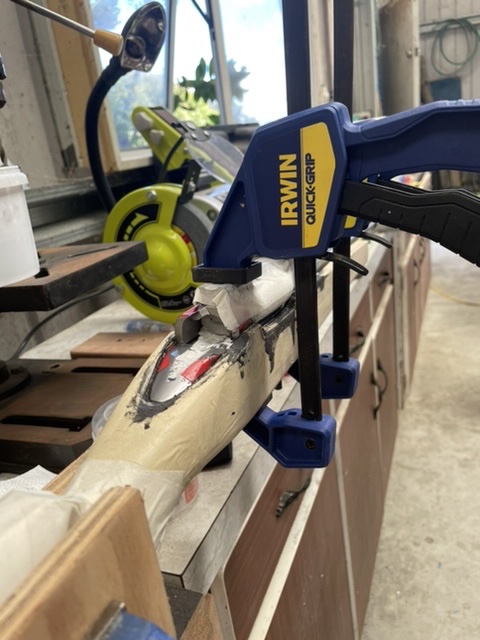
After 24hrs then clean up of the CF epoxy by sanding back the raw edges and joins then full sand with 120 grit before next 2 coats of epoxy. Starting to look better. A few areas around wrist needed patching with epoxy where there were defects from the wrap stage. Fill, sand rinse and repeat.
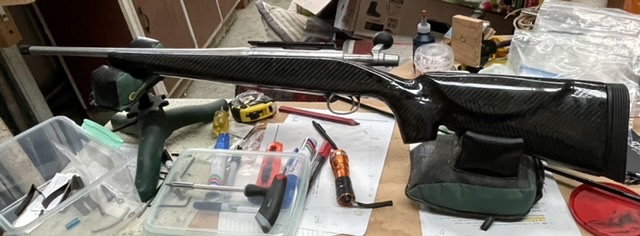
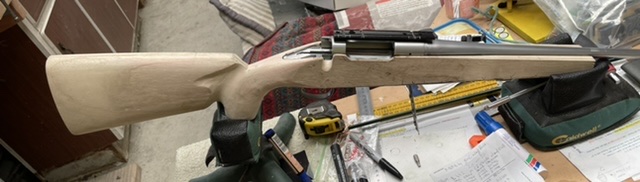
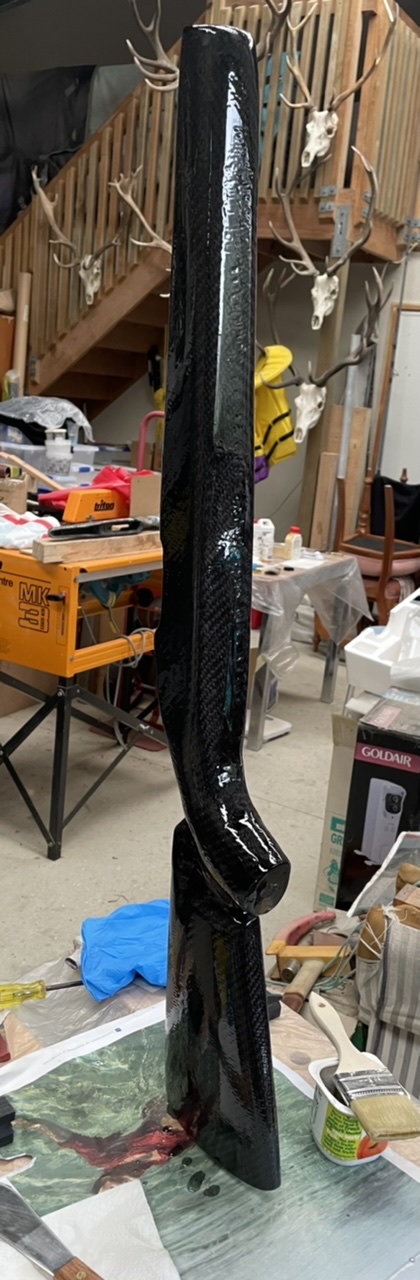
Third coat of expoxy before cutting out the barrel channel, action and bottom metal and removing the plasticine. Then a fine sand (180 & 240 grit) before final coat.
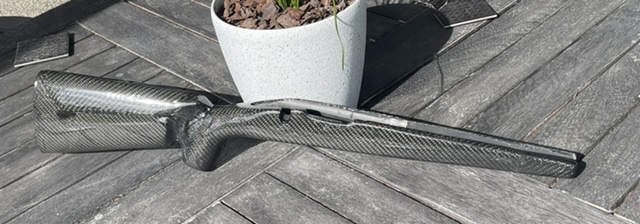
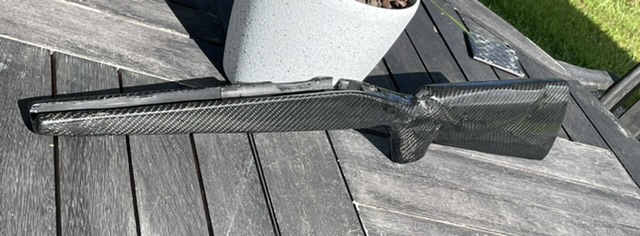
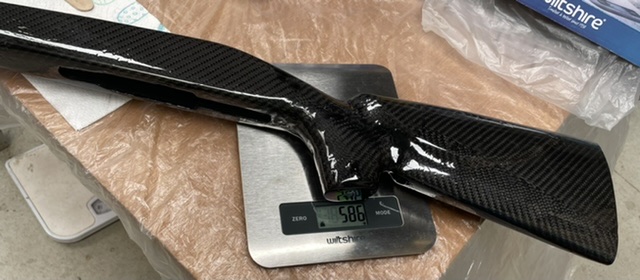
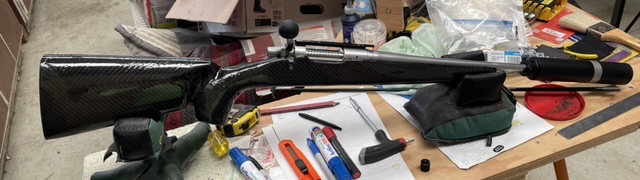
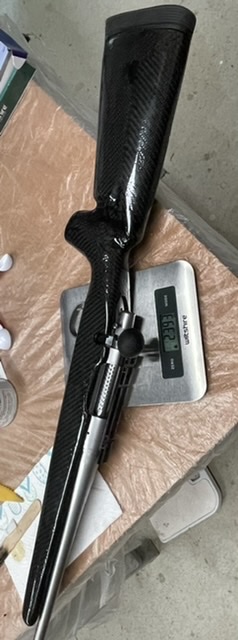
Pretty happy with the end result. Finished stock weighing in at 586g and 723g with recoil pad. The factory stock is around 1100g, so a weight saving of ~400g.
All up with bare rifle weighing 2.393 kg or ~5.3lbs, a 16in bbl.
Welcome guest, is this your first visit? Create Account now to join.
Welcome to the NZ Hunting and Shooting Forums.
Search Forums


User Tag List
+ Reply to Thread
Results 1 to 15 of 23
Thread: Another Paulownia CF stock build
-
26-02-2023, 10:03 AM #1Member


- Join Date
- Jul 2014
- Location
- Norf
- Posts
- 5,458
Another Paulownia CF stock build
-
-
27-02-2023, 07:44 PM #2Member
- Join Date
- Sep 2022
- Location
- Upper Hutt
- Posts
- 362
Awesome work, where are you getting your paulowina from?
How far "undersize" do you make it before you build it back up with carbon?
-
27-02-2023, 08:08 PM #3Member
- Join Date
- Oct 2020
- Location
- Gisborne
- Posts
- 643
Great to see you popping them out. I'm at the CF stage for a sako finnbear, i wasnt going to CF it but gave in lol. I've been giving them a spray coat with a Matt lacquer after a final sand. takes the gloss out all together
-
27-02-2023, 09:14 PM #4Member

- Join Date
- Feb 2012
- Location
- Levin, Horowhenua
- Posts
- 1,005
Looks good

Would there be any problems/challenges in building one of these for a Blaser R8?If my work annoys me, I cull them
-
27-02-2023, 09:34 PM #5Member
- Join Date
- Jul 2014
- Location
- Norf
- Posts
- 5,458
Thanks Originally Posted by makka

Paulownia from Graham Smith info@paulownianz.co.nz
First one I built I made the mistake of not thinning it down enough thru the wrist area. This one worked out much better , the epoxy & CF adds about 1-2mm, but can be more in places if the CF cloth does not bind down tightly to the base epoxy when you apply it. As I mentioned in the write up some areas are hard to get the CF to stick & not distort.
-
27-02-2023, 09:37 PM #6Member
- Join Date
- Jul 2014
- Location
- Norf
- Posts
- 5,458
Thanks Scott, yeah been debating a final matt coat with the rattle can
-
28-02-2023, 06:19 AM #7Member
- Join Date
- Nov 2014
- Location
- Tasman
- Posts
- 675
Awesome job well done
-
28-02-2023, 07:44 AM #8Sending it

- Join Date
- Feb 2013
- Location
- The Hill
- Posts
- 23,208
Or 1200 wet n dry sand paper to take the sheen off Originally Posted by chainsaw
chainsaw and Scott Cowan like this.
-
28-02-2023, 10:10 AM #9Member
- Join Date
- Jul 2014
- Location
- Norf
- Posts
- 5,458
Hi @Rich007 I’m not familiar with Blaser rifles but from memory they have a unique receiver design. I imagine the cut out and fitting of this might be quite tricky. Originally Posted by Rich007
Rich007 and Scott Cowan like this.
-
28-02-2023, 11:03 AM #10Member
- Join Date
- Feb 2022
- Location
- Nz
- Posts
- 996
what are your dimensions for the paulownia?? neighbour's are possibly going to chop down a huge one shortly and it has a good size trunk on it.
-
28-02-2023, 07:23 PM #11Member
- Join Date
- Jul 2014
- Location
- Norf
- Posts
- 5,458
10x2 in
-
28-02-2023, 08:36 PM #12Member
- Join Date
- Jul 2021
- Location
- Top of the South
- Posts
- 465
Have you tried using vacuum bagging for the epoxy, you can make a cheap set up using an old fridge compressor, I use to make kite and surf boards out of paulownia with fliers and fish tails and the vac bagging helped in getting the carbon or FG cloth to fit complex curves. The other benefit of vac bagging is that you will get a lighter finished product as you dont tend to use as much epoxy as hand layups Originally Posted by chainsaw
-
28-02-2023, 08:38 PM #13Member
- Join Date
- Jul 2021
- Location
- Top of the South
- Posts
- 465
Bloody looks good chainsaw, well done I always thought paulownia would make a good stock with glass over it, I have built a few things from paulownia in the past and its a real nice timber to work with
-
28-02-2023, 09:01 PM #14Caretaker

- Join Date
- May 2012
- Location
- Rolleston, Canterbury
- Posts
- 4,871
@Rich007 @chainsaw an R8 stock would be doable but would need to be a bit inventive. The chassis insert wouldn’t be too much of a problem with a router/mill. It is mainly rectangular. The rear bolt into the chassis comes up through the pistol grip, getting the angle right need need some careful alignment. The slots that the bolt rail slide in can get quite thin walls. You would also need to have a threaded sleeve installed for the front “washer” to be screwed down onto.
-
01-03-2023, 10:30 AM #15Member
- Join Date
- Feb 2012
- Location
- Levin, Horowhenua
- Posts
- 1,005
Thanks @stug Originally Posted by stug
If my work annoys me, I cull them


 Reply With Quote
Similar Threads
-
Walnut stock build (done the traditional way)
By Hunter_Nick in forum Projects and Home BuildsReplies: 199Last Post: 21-05-2023, 10:17 PM -
Walnut Stock Build
By PaulNZ in forum Projects and Home BuildsReplies: 80Last Post: 19-01-2023, 08:31 AM -
Build yourself a fibreglass stock
By Hunter_Nick in forum Projects and Home BuildsReplies: 37Last Post: 05-06-2021, 02:57 PM -
Shotgun Stock CNC Build
By Skirch in forum Projects and Home BuildsReplies: 23Last Post: 30-04-2021, 07:36 AM -
Wooden stock build
By Remmodel7 in forum Projects and Home BuildsReplies: 3Last Post: 03-03-2020, 09:57 PM
Tags for this Thread
 Posting Permissions
- You may not post new threads
- You may not post replies
- You may not post attachments
- You may not edit your posts
Welcome to NZ Hunting and Shooting Forums! We see you're new here, or arn't logged in. Create an account, and Login for full access including our FREE BUY and SELL section Register NOW!!
All times are GMT +13. The time now is 02:52 AM.

Bookmarks