
 99Likes
 LinkBack URL
 About LinkBacks
Step eleven
Making the inlet moulds
Now this bit was theoretically easy, but in practice just about broke me! I’ll get to why that was shortly.
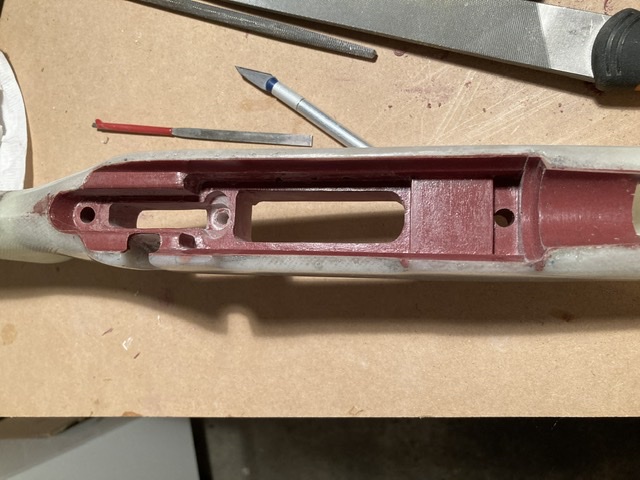
Anyway, the idea with this step is to cast a two piece silicon rubber male mould of the inletting. This is made of an upper and lower part that will eventually be clamped into the hollow stock, and then thickened resin poured in to create the inlet.
What you do is create a plasticine dam around the edges of the inlet and dam up one half in the mag well/trigger well as in the picture. Note the locating indentations in the bottom.
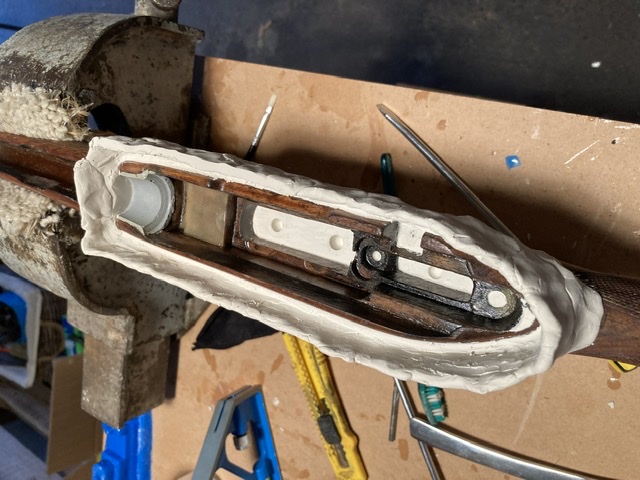
Once that is done mix up your silicone and pour in as directed by the manufacturer. I used Mold Star pourable silicone.
Once cured, build plasticine dams for the bottom half, remove the plasticine dams in the mag well etc, and pour the bottom. Make sure you use a release agent designed for silicone to ensure the two halves do not stick together.
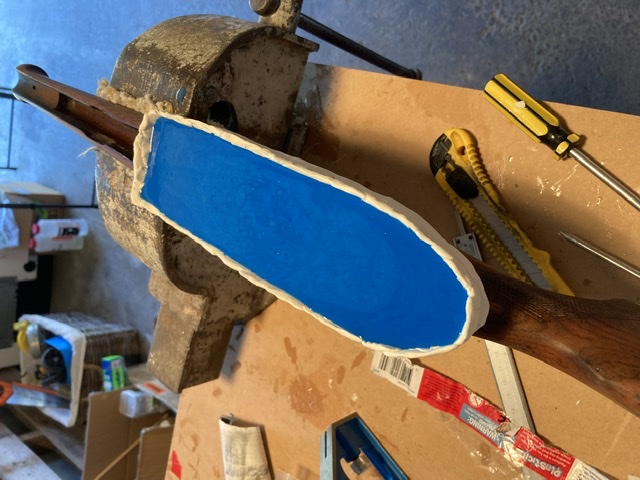
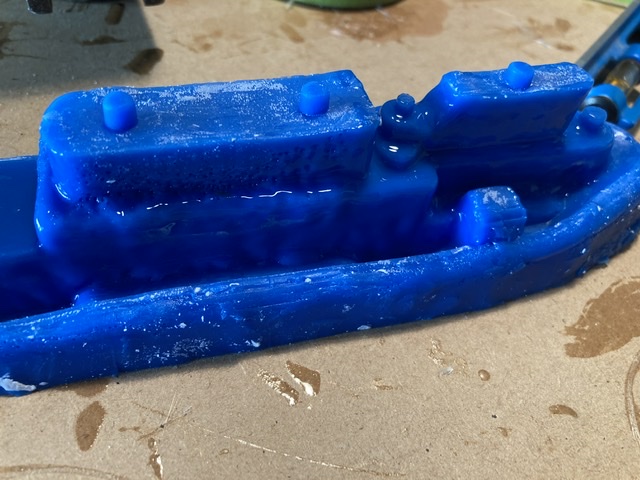
Once it’s cured, you can remove both halves out of the stock and you should have a perfect imprint of the inletting. Not like this however!!!!
For some reason the silicon cure was inhibited. Sulphur is the main culprit, but I didn’t expect that to happen on a walnut stock. I spent hours cleaning off the gooey residue, and cleaned the inlet thoroughly with Acetone. I then painted on a thin coat of clear acrylic lacquer, and tried the whole thing again. Much to my dismay it failed to cure a second time! Albeit better than the first attempt. It was at this point I almost gave up...... but instead used the castings I had to ‘roughly’ cast the inlet on MK1 and then carefully hand filled and sanded the inlet to the right dimensions after it cured. I also bedded the action into the MK1 composite to get a good basis to silicone mould from. It was laborious work, but got there in the end.
Welcome guest, is this your first visit? Create Account now to join.
Welcome to the NZ Hunting and Shooting Forums.
Search Forums


User Tag List
Results 1 to 15 of 38
Threaded View
-
02-06-2021, 10:09 PM #22Member

- Join Date
- Aug 2019
- Location
- Manawatu
- Posts
- 1,063


 Reply With Quote
Similar Threads
-
Shotgun Stock CNC Build
By Skirch in forum Projects and Home BuildsReplies: 23Last Post: 30-04-2021, 07:36 AM -
Wooden stock build
By Remmodel7 in forum Projects and Home BuildsReplies: 3Last Post: 03-03-2020, 09:57 PM
Tags for this Thread
 Posting Permissions
- You may not post new threads
- You may not post replies
- You may not post attachments
- You may not edit your posts
Welcome to NZ Hunting and Shooting Forums! We see you're new here, or arn't logged in. Create an account, and Login for full access including our FREE BUY and SELL section Register NOW!!
All times are GMT +13. The time now is 01:05 AM.

Bookmarks