

 41Likes
 LinkBack URL
 About LinkBacks
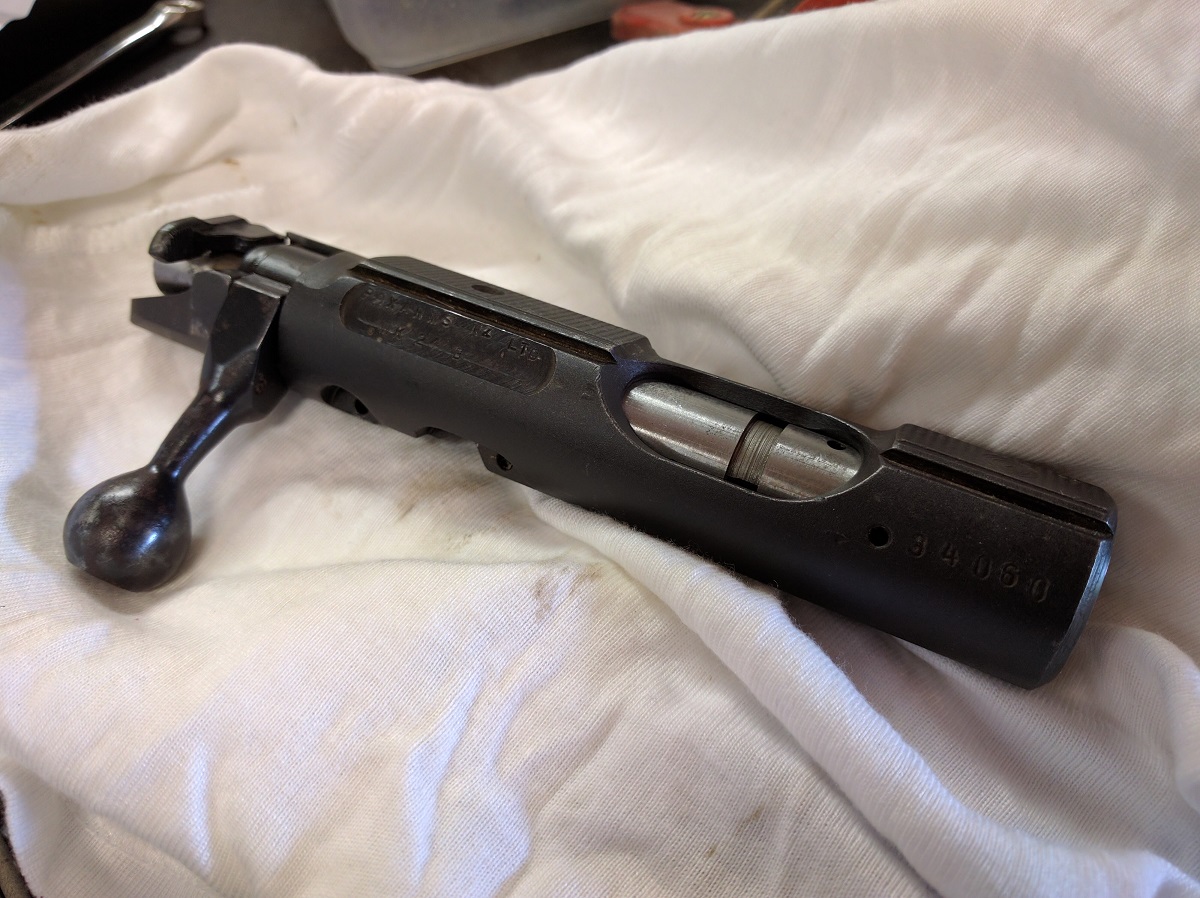
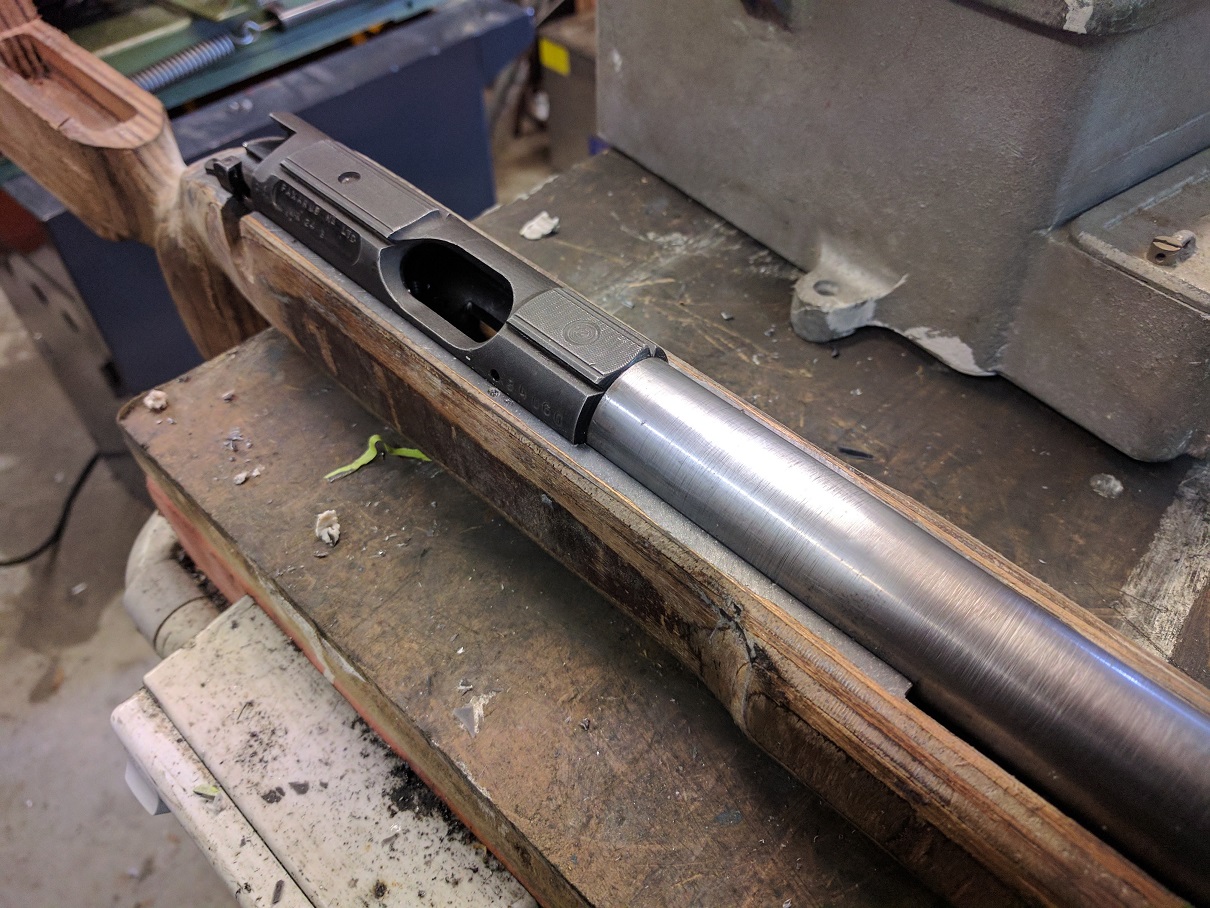
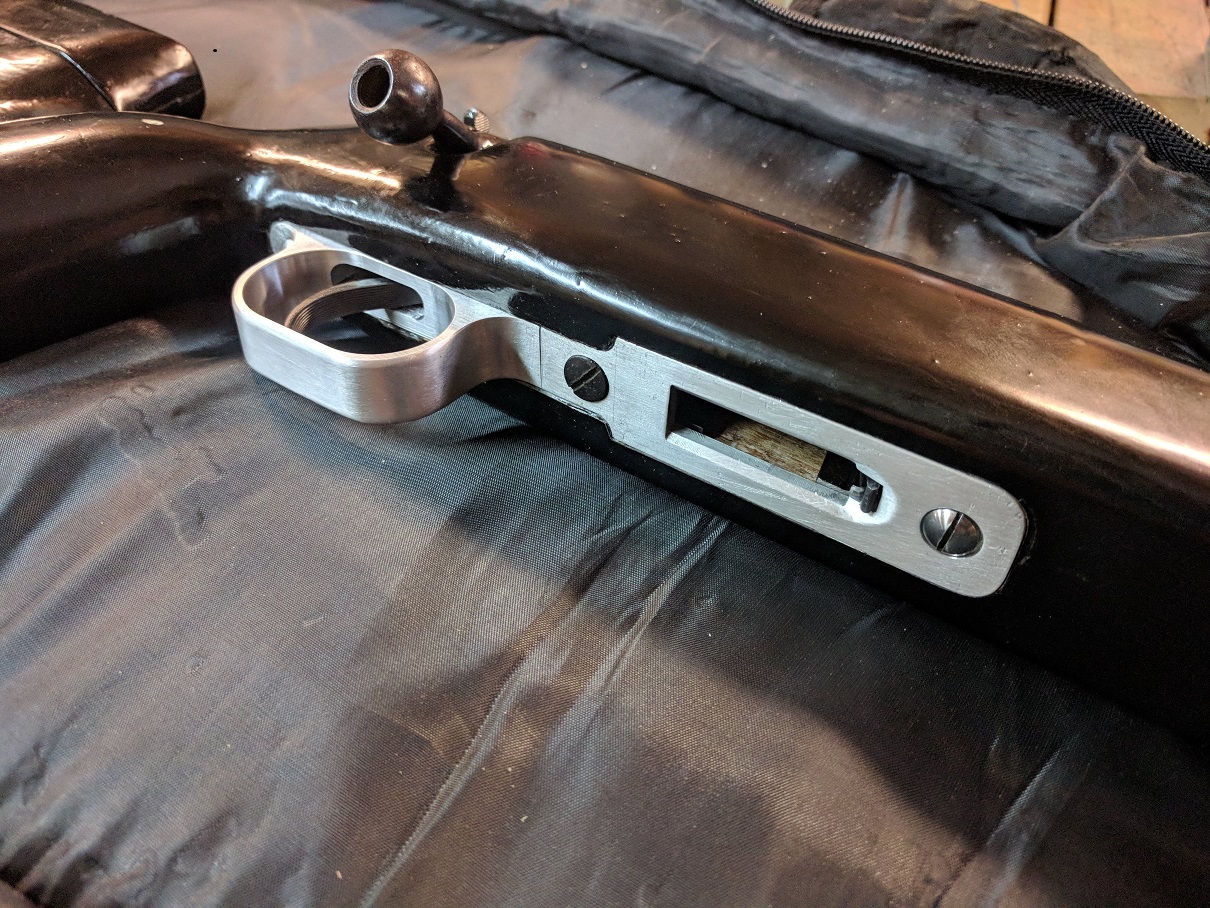
Hi everyone, I have been working on this project on and off for about a year, along with a bunch of other projects. The idea was to build a heavy barrel 22lr "precision" training rifle. I wanted it to be as close to my long range rig as possible. I managed to get my hands on what I believe is an old Brno Model 2 action and bolt. From what I can find, Pax Arms was importing the rifles in the 70s and converting them to take tranquilizer darts. This action came with a barrel stub that had a gas valve of some sort and has "Pax Arms" stamped on the action. I also had a Tony Hawkins 22lr barrel blank that was waiting to be turned into a bull barrel.
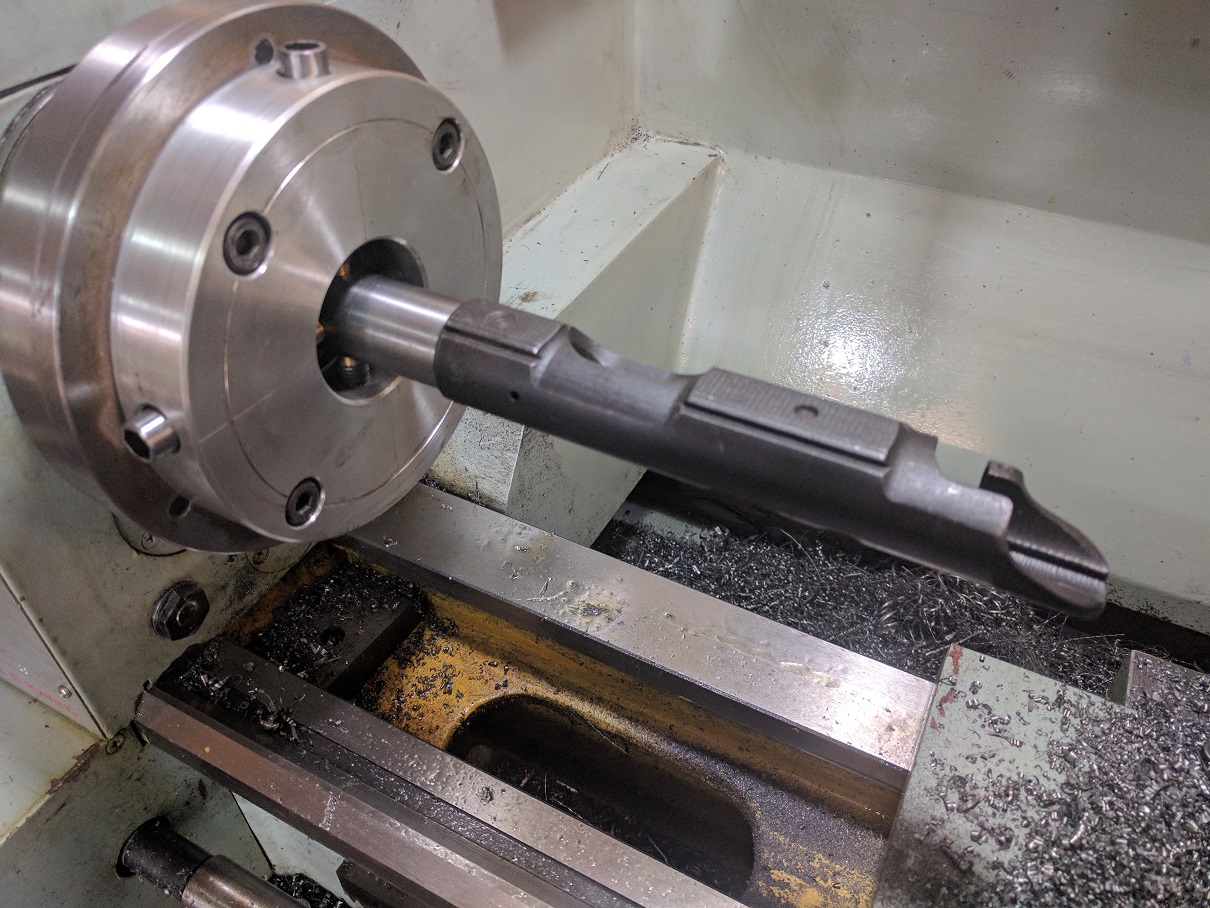
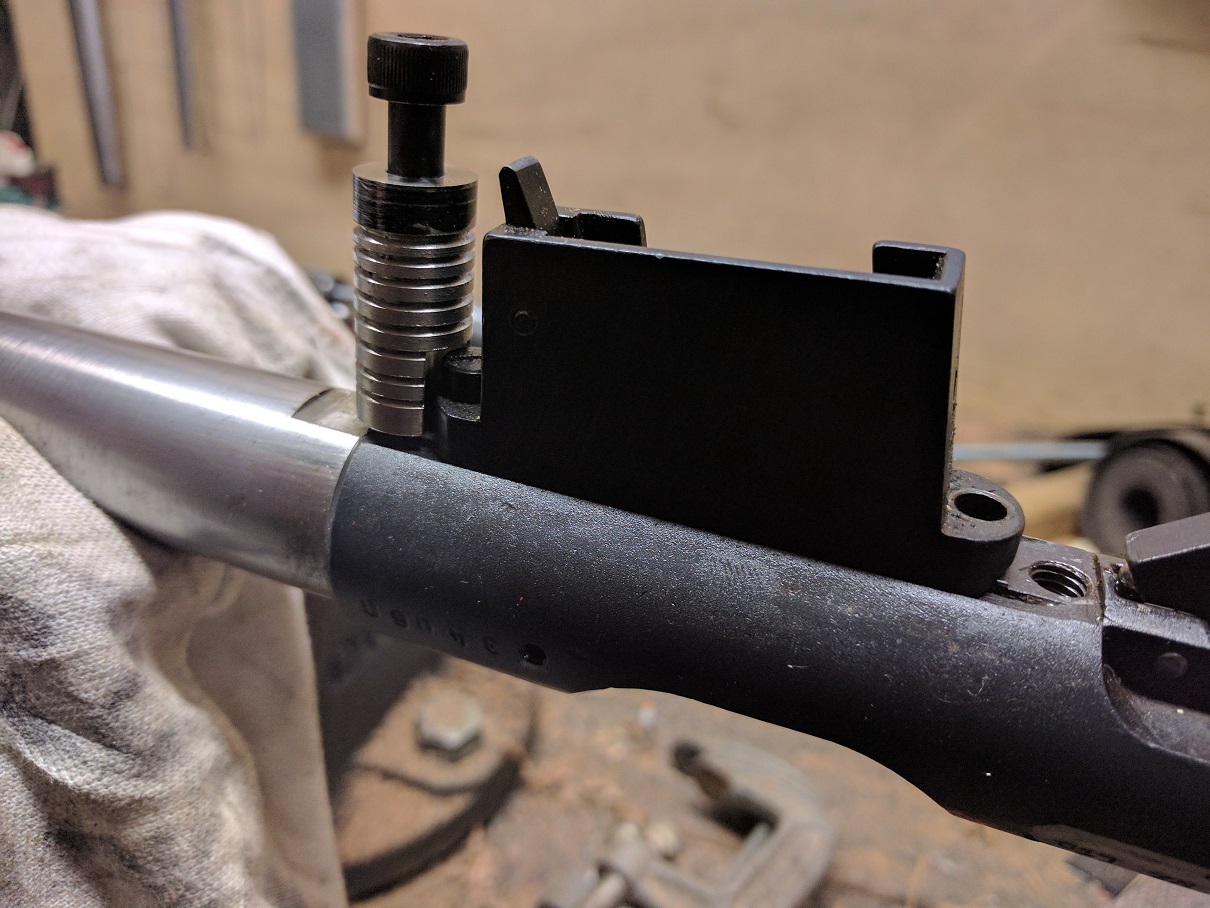
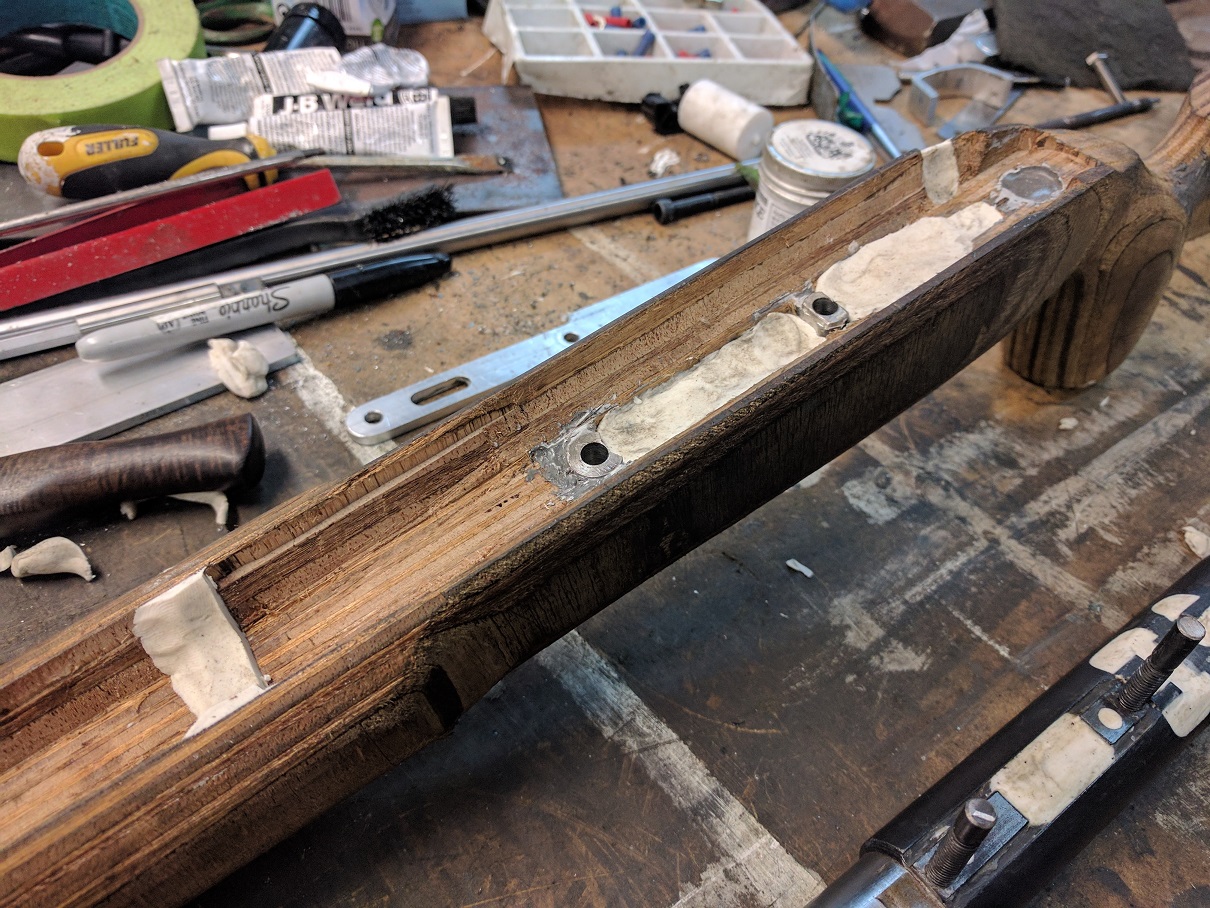
By the time I took this photo, I had removed the barrel, mag well, trigger and extractor/ ejector
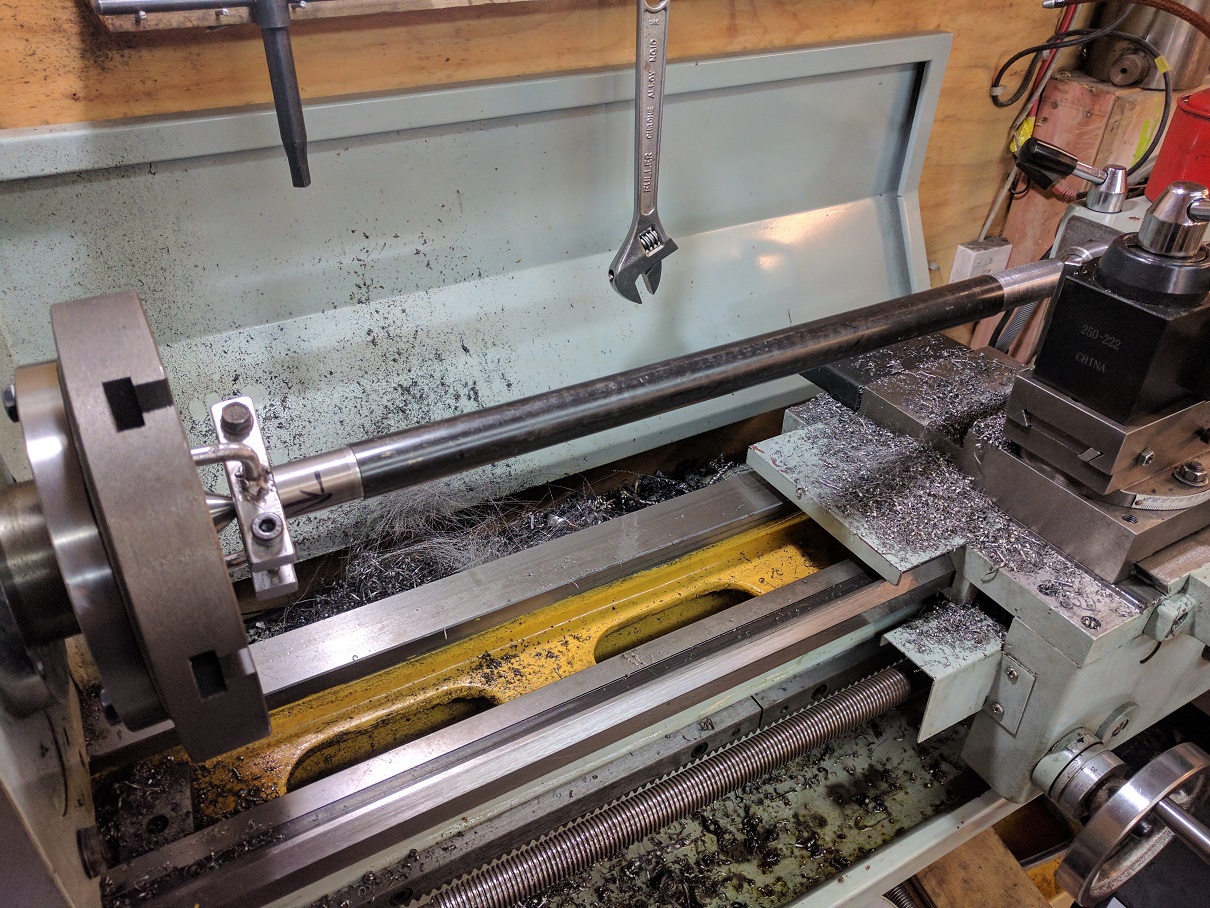
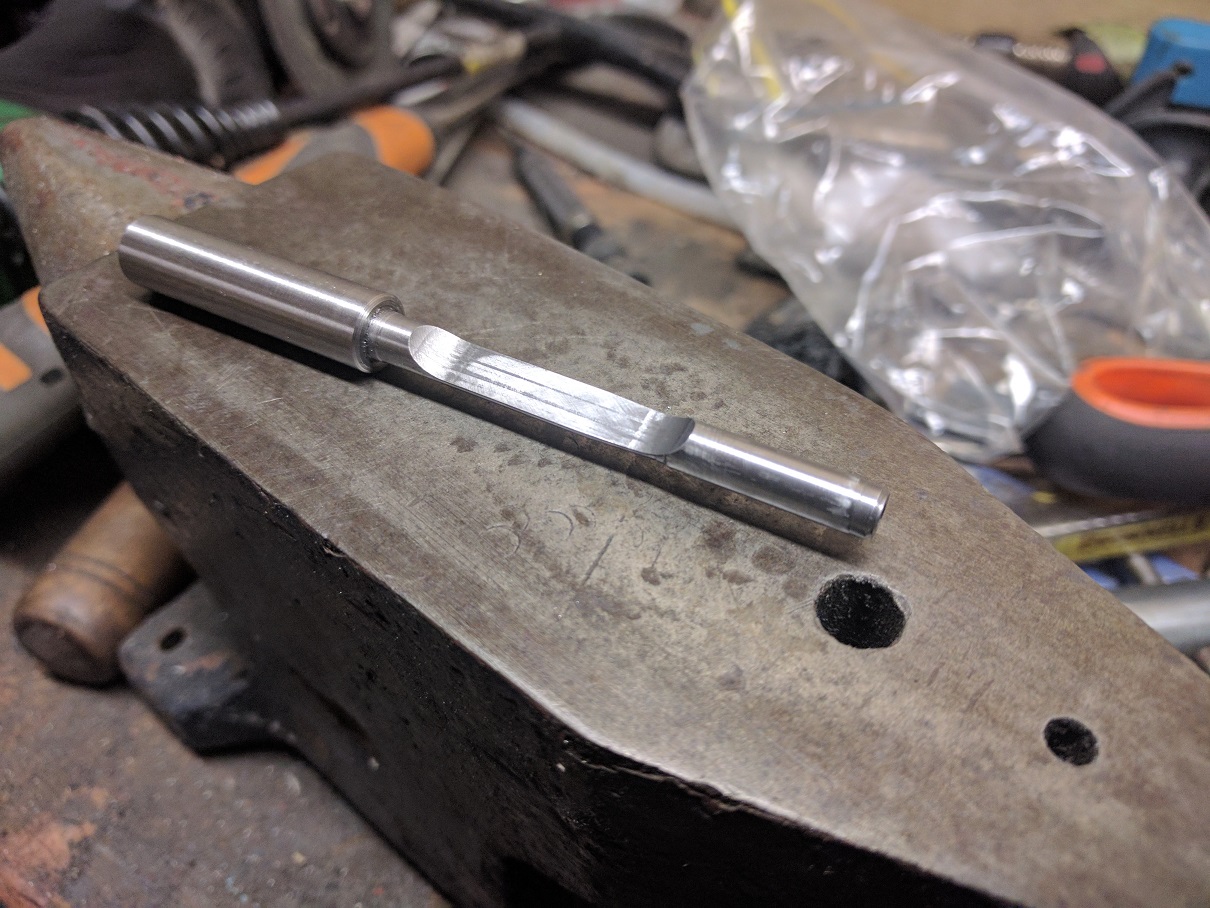
The First job to do was contour the barrel. My lathe was only just long enough. I went for a heavy straight taper contour, I like the way they look.
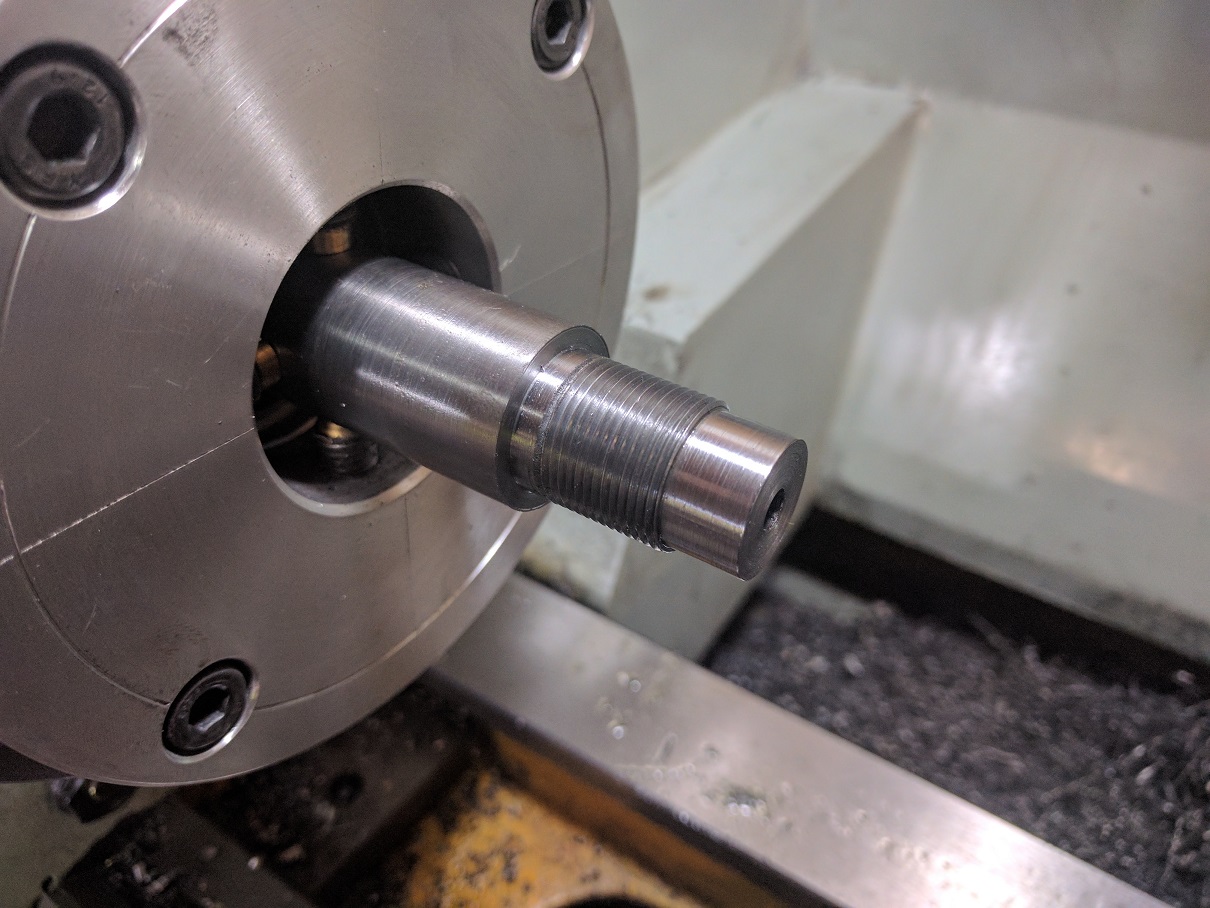
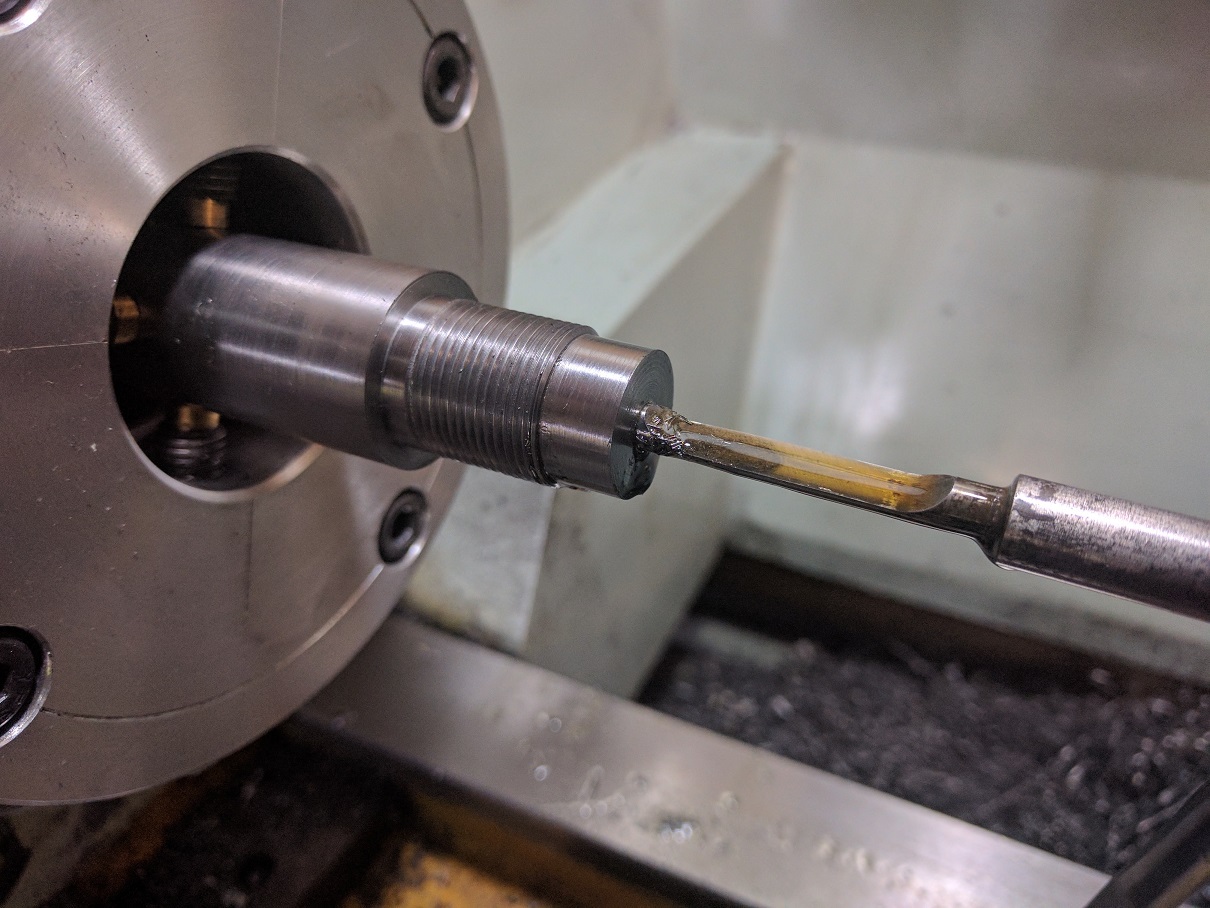
Next was to thread and fit the barrel to the action. I used my low profile 4 jaw chuck that I made specifically for barrel work. There is another 4 jaw unit in the other end of the headstock to hold it steady. With this system I can adjust the bore of the barrel perfectly in line with the lathe.
I did a test barrel shank on some scrap steel just to check all my measurements were correct and my threading process on the lathe was good. It turned out mint so on I went with the real one.
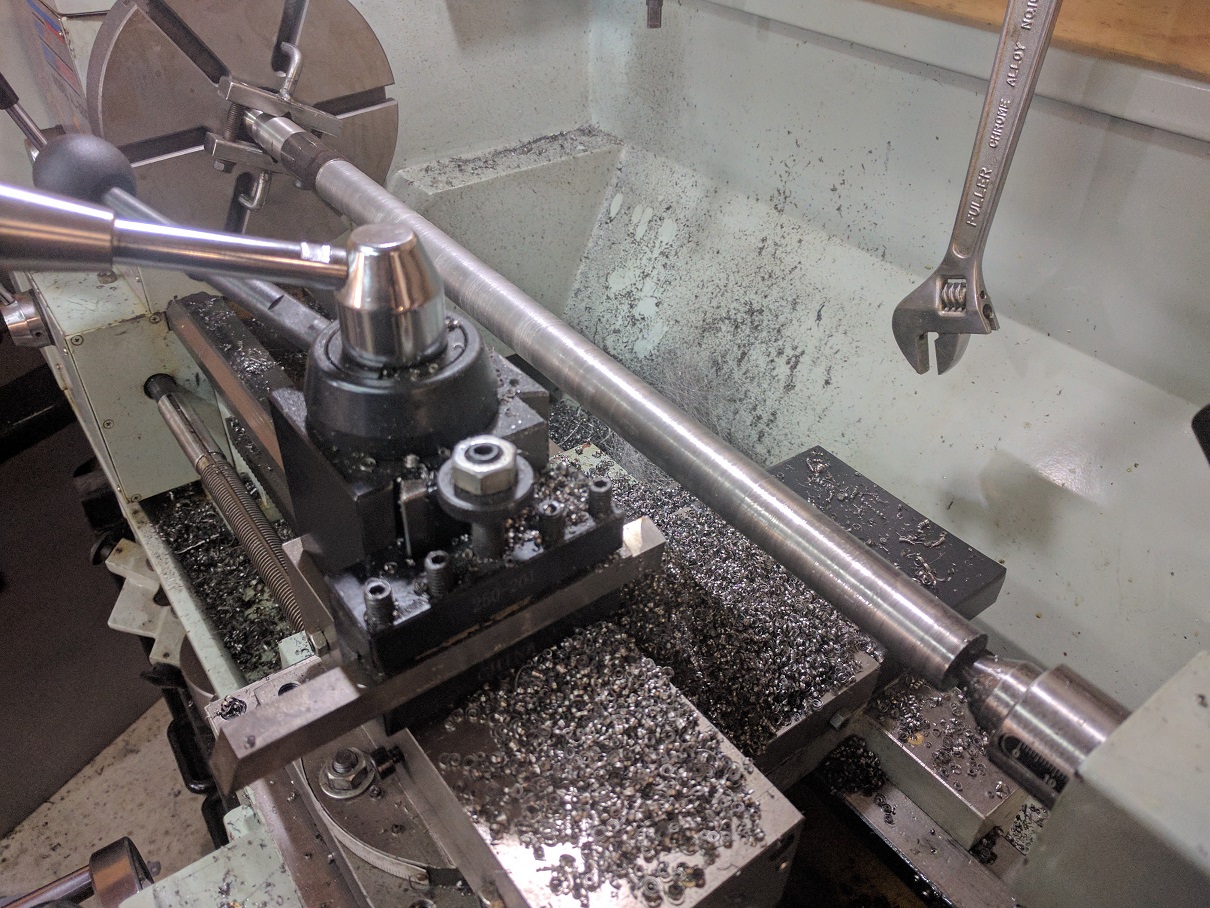
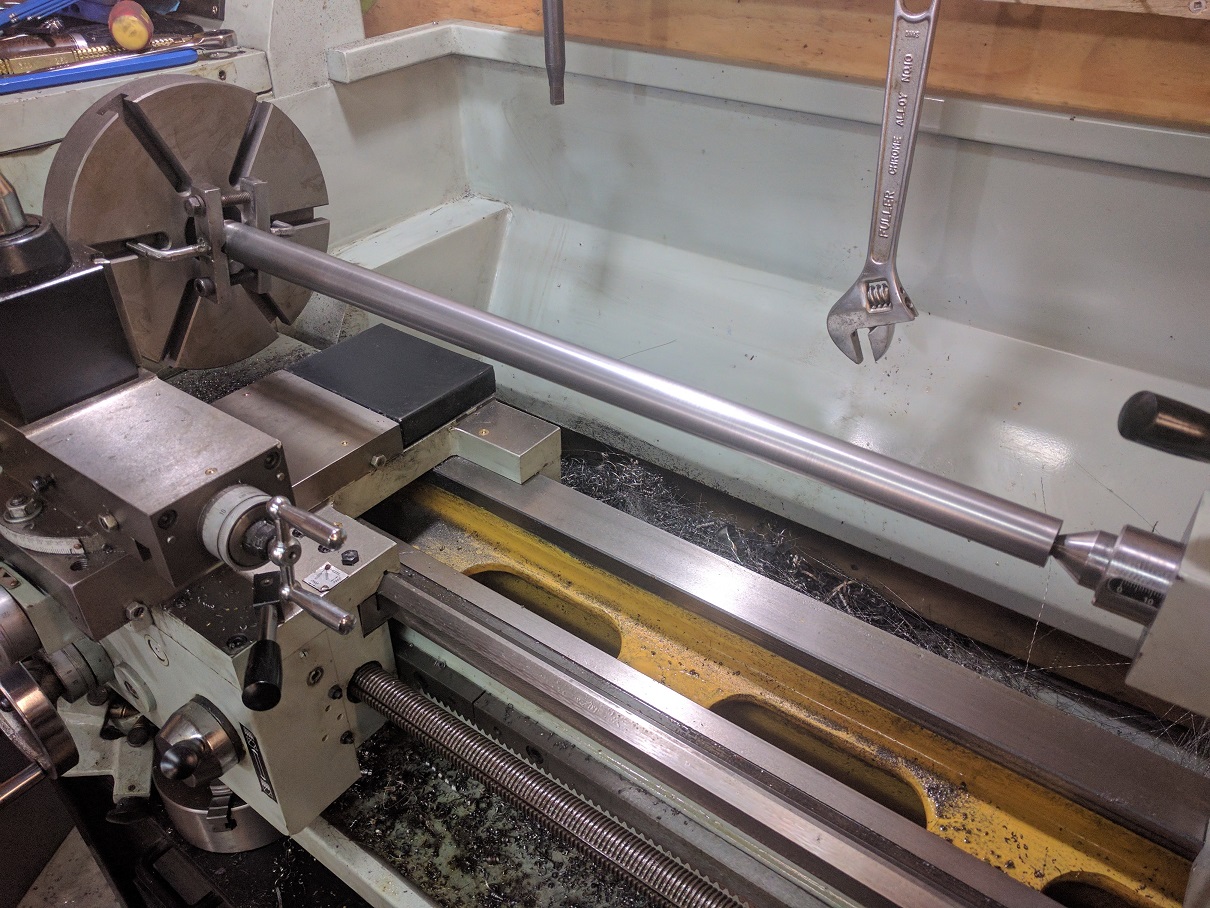
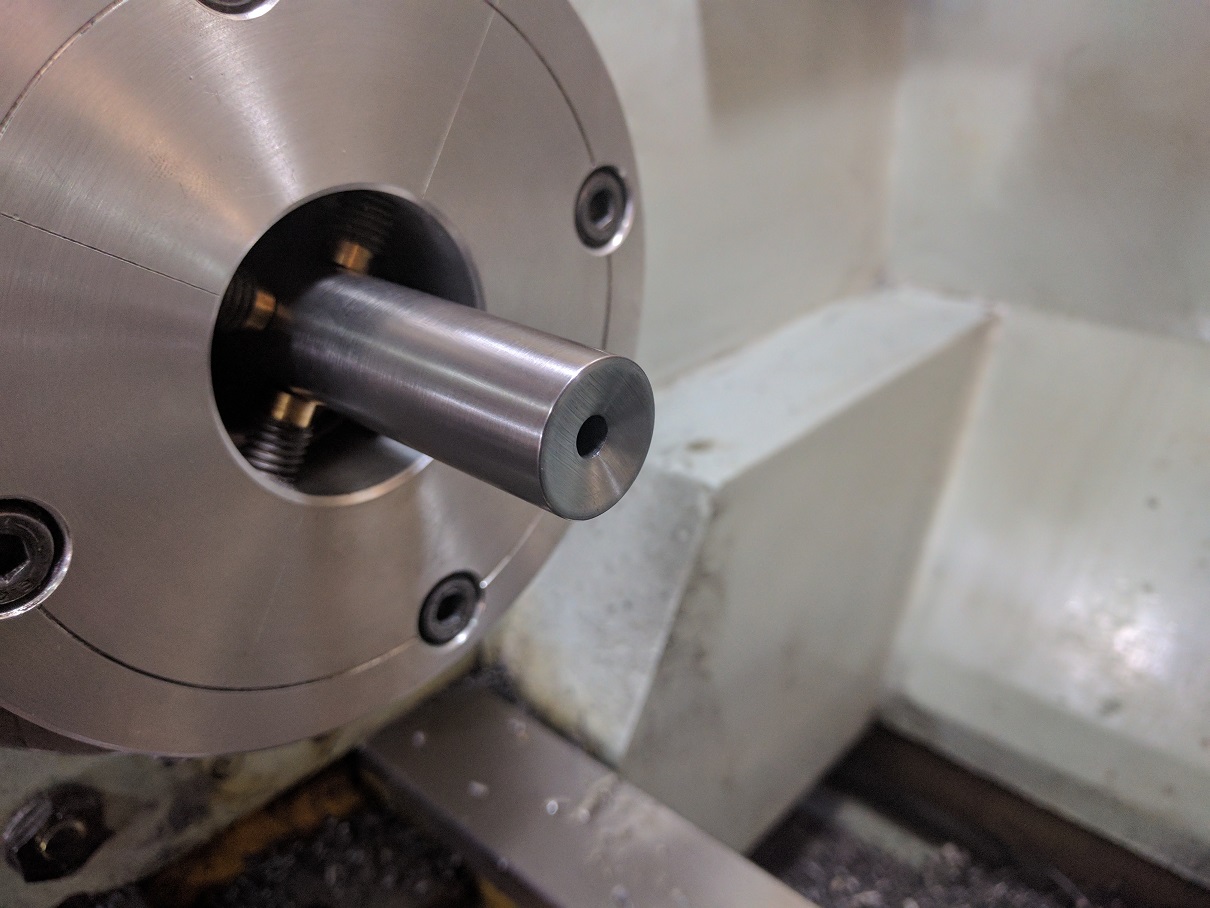
Once the action was fitted I turned the barrel around and cut the Muzzle, using the same fixtures to hold the barrel. I didnt bother threading it as I have no intention of mounting a suppressor.
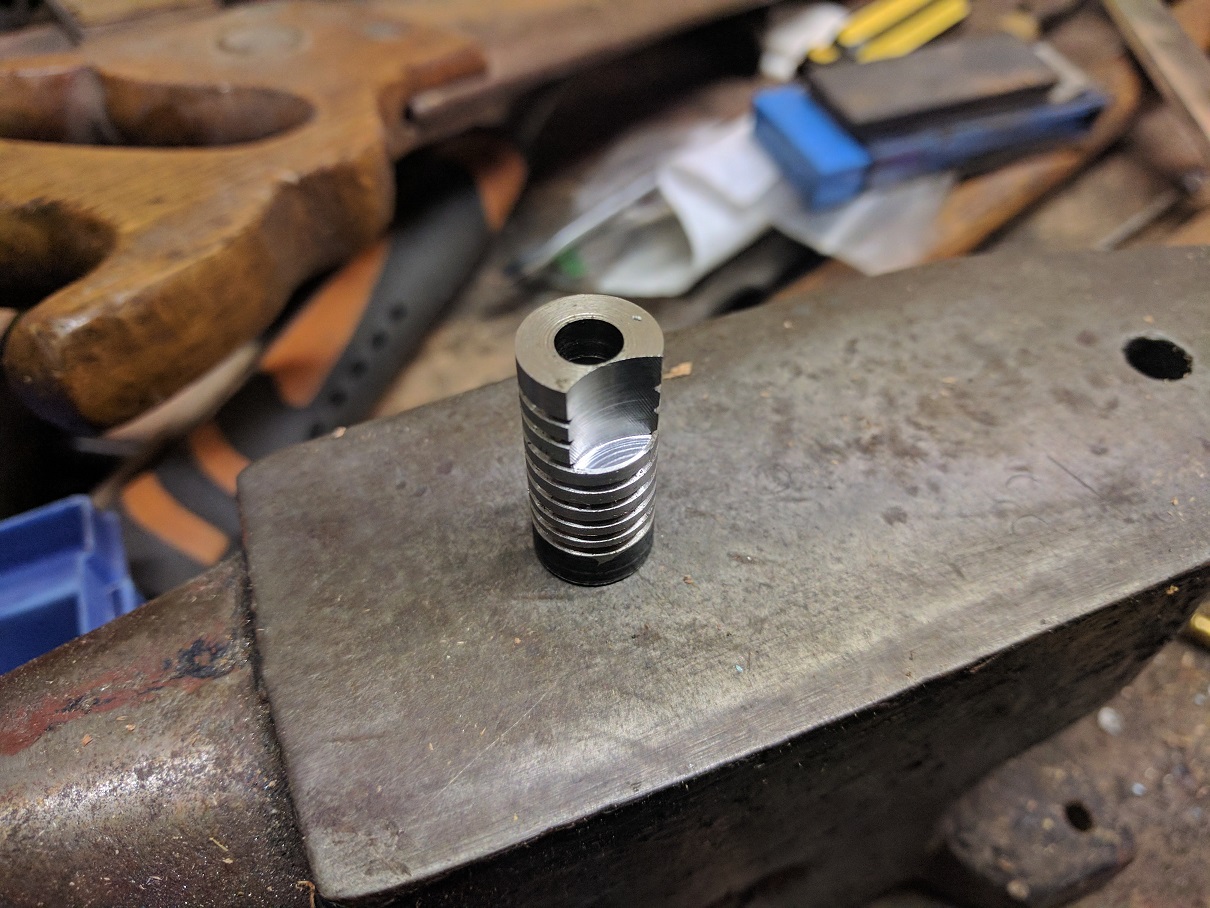
The next stage was to make a 22lr chamber reamer. I could have bought one but did not want to deal with the USA export bullshit or wait for a few weeks while it arrived.
So instead, I found the dimensions for a 22lr match chamber and turned a piece of drill rod to the right size.
The pilot on the reamer was made to be a snug but sliding fit on the bore of this particular barrel.
Once it was turned and polished I cut half of it away using the mill and heat treated it.
I had a little warpage from the quenching but I was ready for that and quickly bent it back straight before the steel could "set" after quenching. You have about 1 or 2 min to do this depending on the steel and cross section.
After polishing it back up I stoned the flat face until it was about 0.05mm over halfway and then stone some relief just behind the cutting edge.
Total time to make the reamer was probably no more than 3 hours.
This is a very effective way to make reamers and with a little care, they work just as well as commercial ones. Just much slower. I have used this same method for making centerfire reamers as well.
Once I had the reamer I cut the chamber to be a slight crush fit for match ammo, The idea is that the bullet is touching the lands ever so slightly and this helps with consistency. As a result this rifle will not easily chamber most jacketed or bulk ammo.
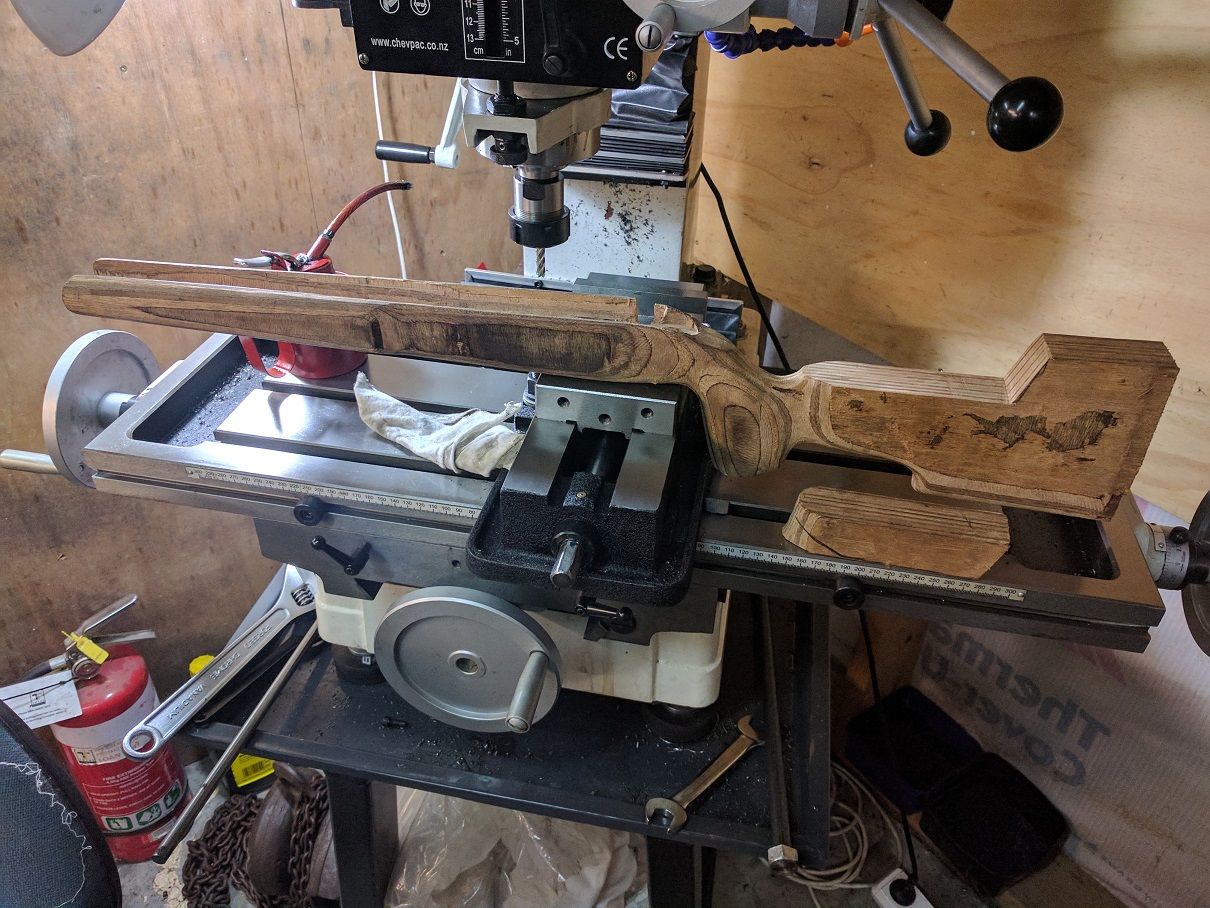
Next came the stock. Unfortunately I dont have any photos of the actual stock making process as I had started on it some time ago to be used on my CZ 452. I had lost interest in the idea and the stock was sitting around inletted but unfinished. Just so happens Brno actions are pretty much identical to CZ 452s.
The stock is based on the McMillan A5 pattern and this is the same as my long range rig. It is made from several layers of 9mm marine ply glued together with epoxy. I can now say without hesitation that it is not a good idea to make rifle stocks from this stuff. It is a right bastard to work with. I got there in the end though, and it works.
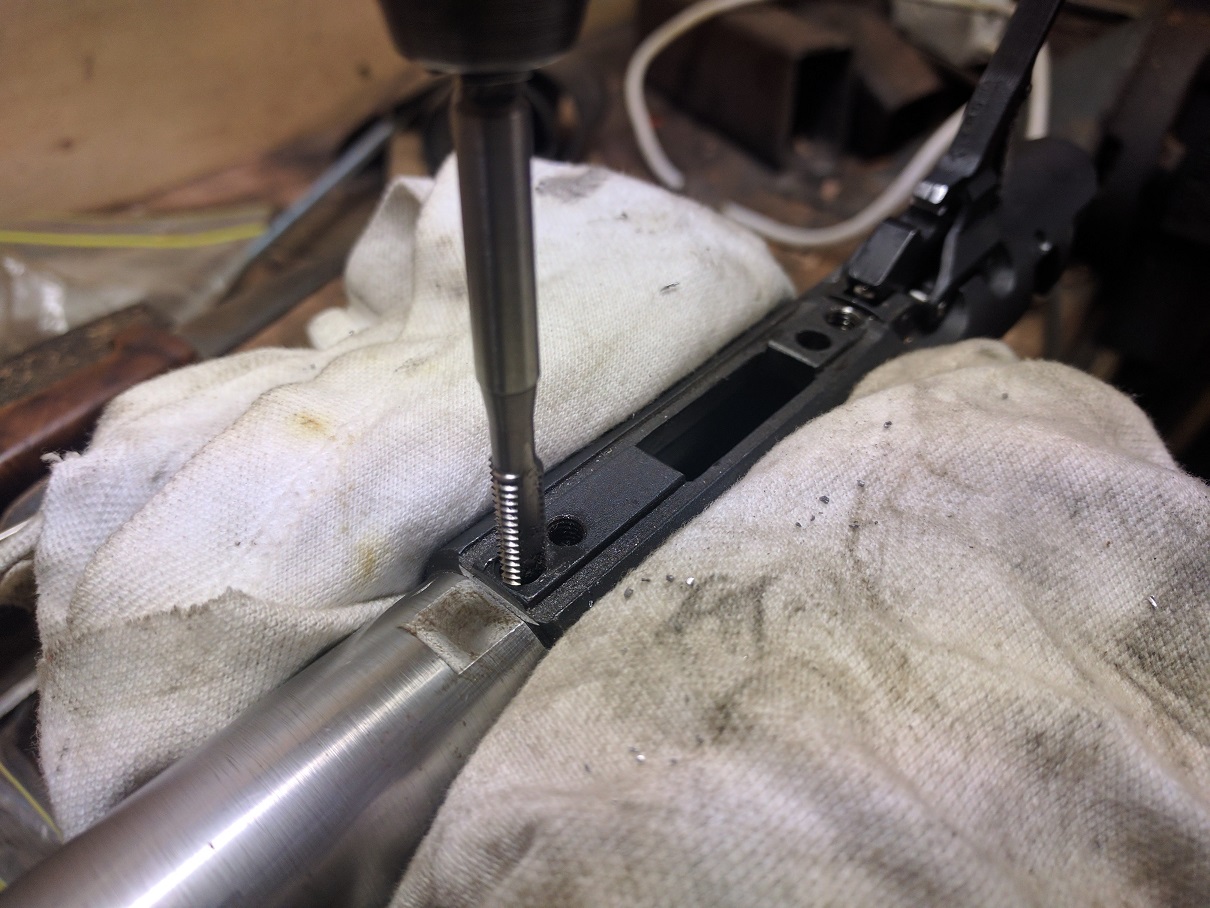
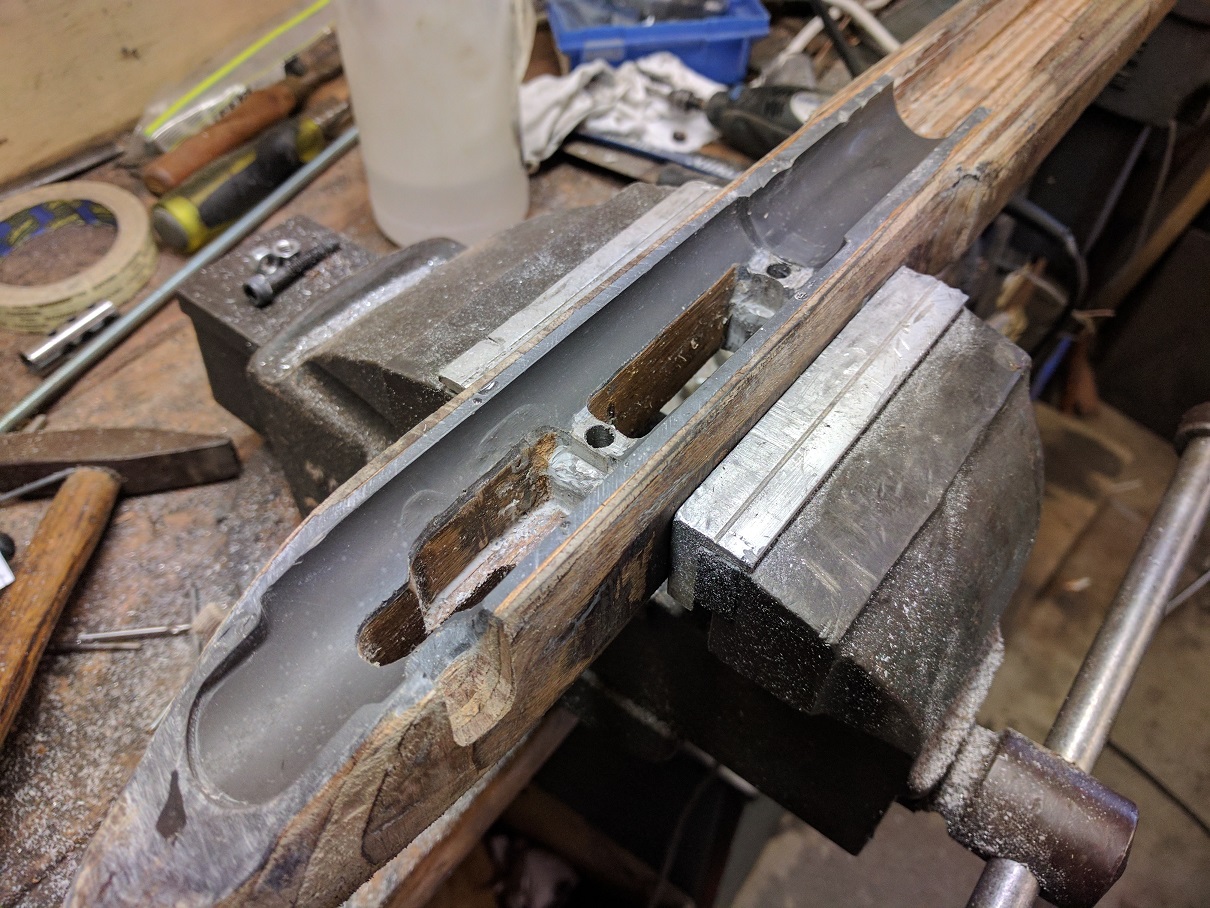
Once the stock was inletted properly for the Brno I could start on the pillars and the bottom metal.
I drilled and tapped the front of the action for another action screw as this model had only one in the middle and the second screw was mounted on the barrel.
I made a pillar that has a cutout for the magwell, this works well and is a good way to do pillars for CZ rifles and even JW15s
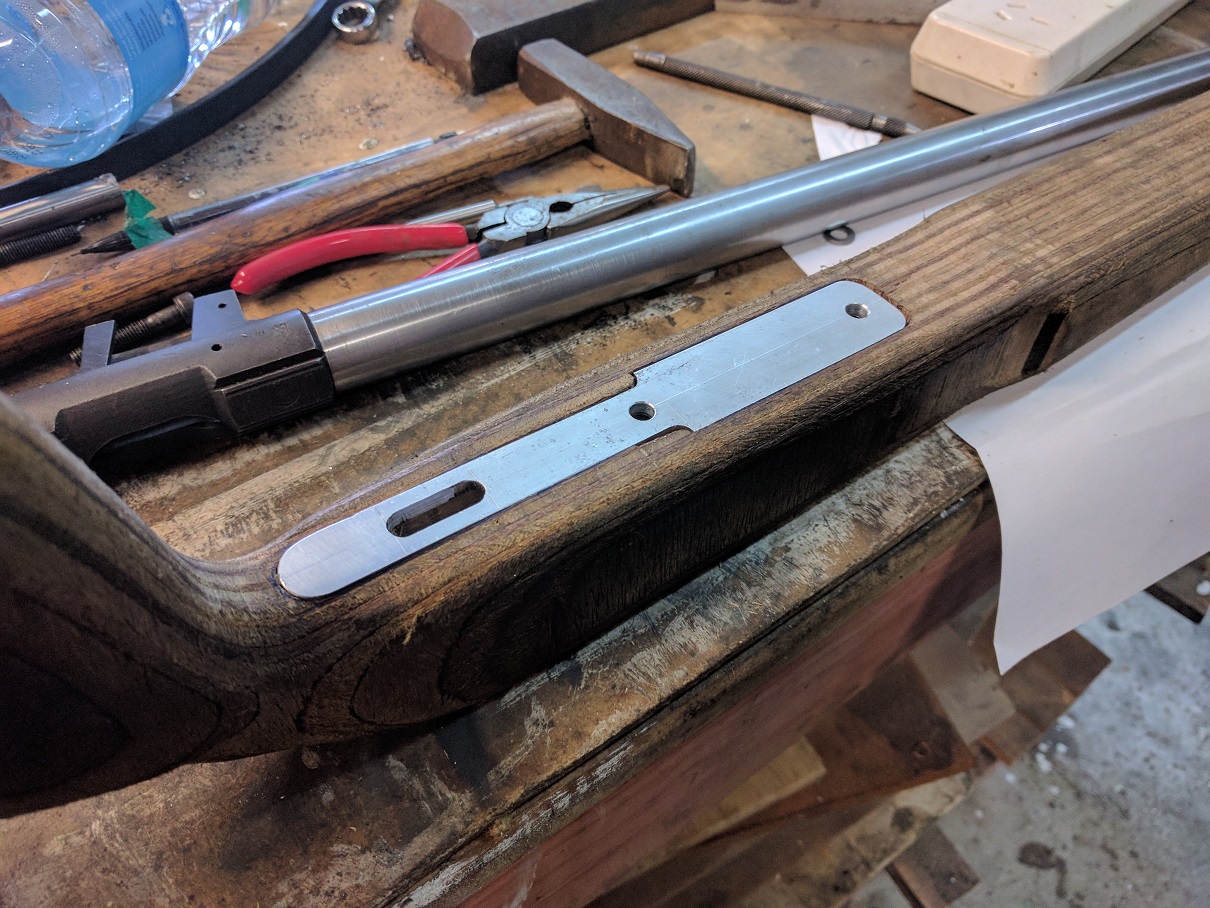
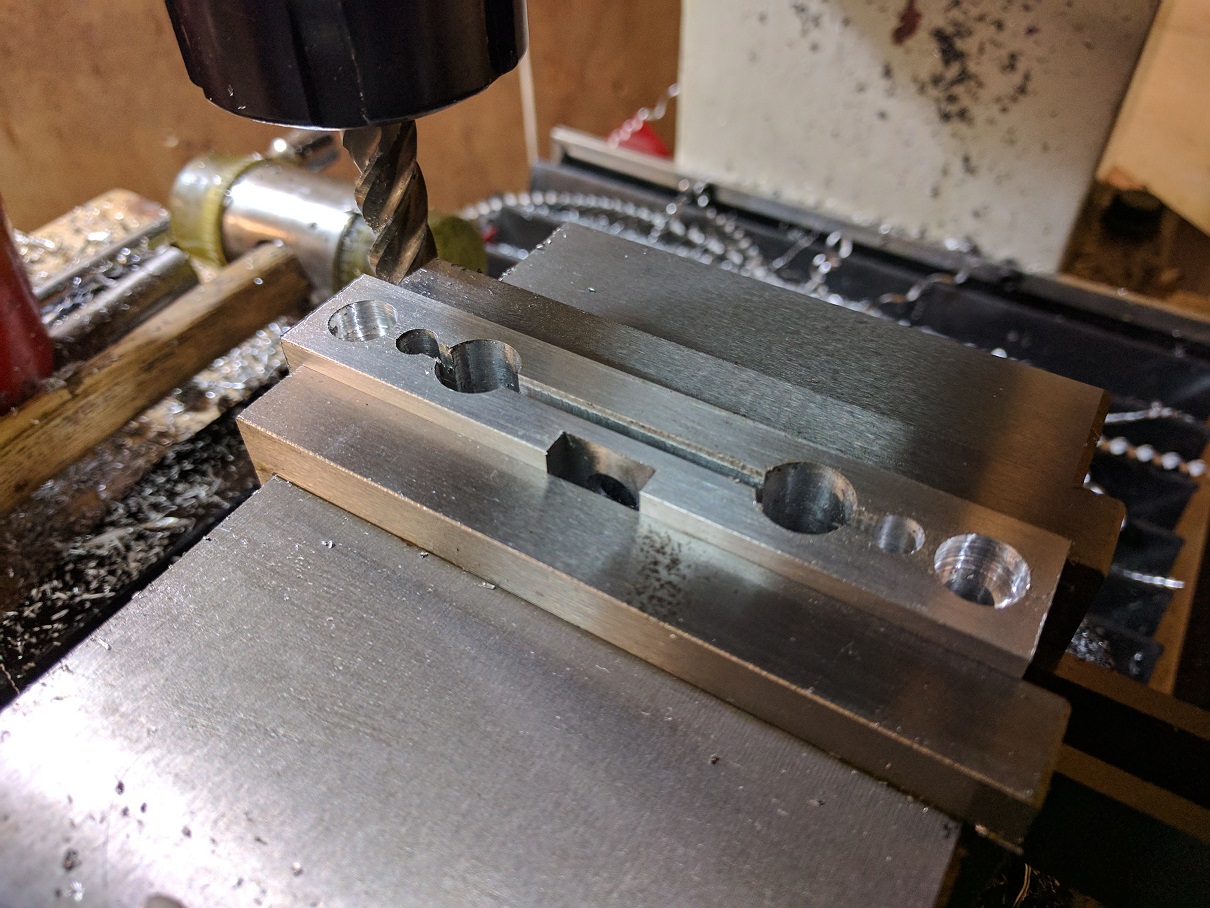
The bottom metal is just a piece of aluminium with cutouts and holes in the right place. My plan was to weld on a bent section for the trigger guard but found out later that was not going to work.
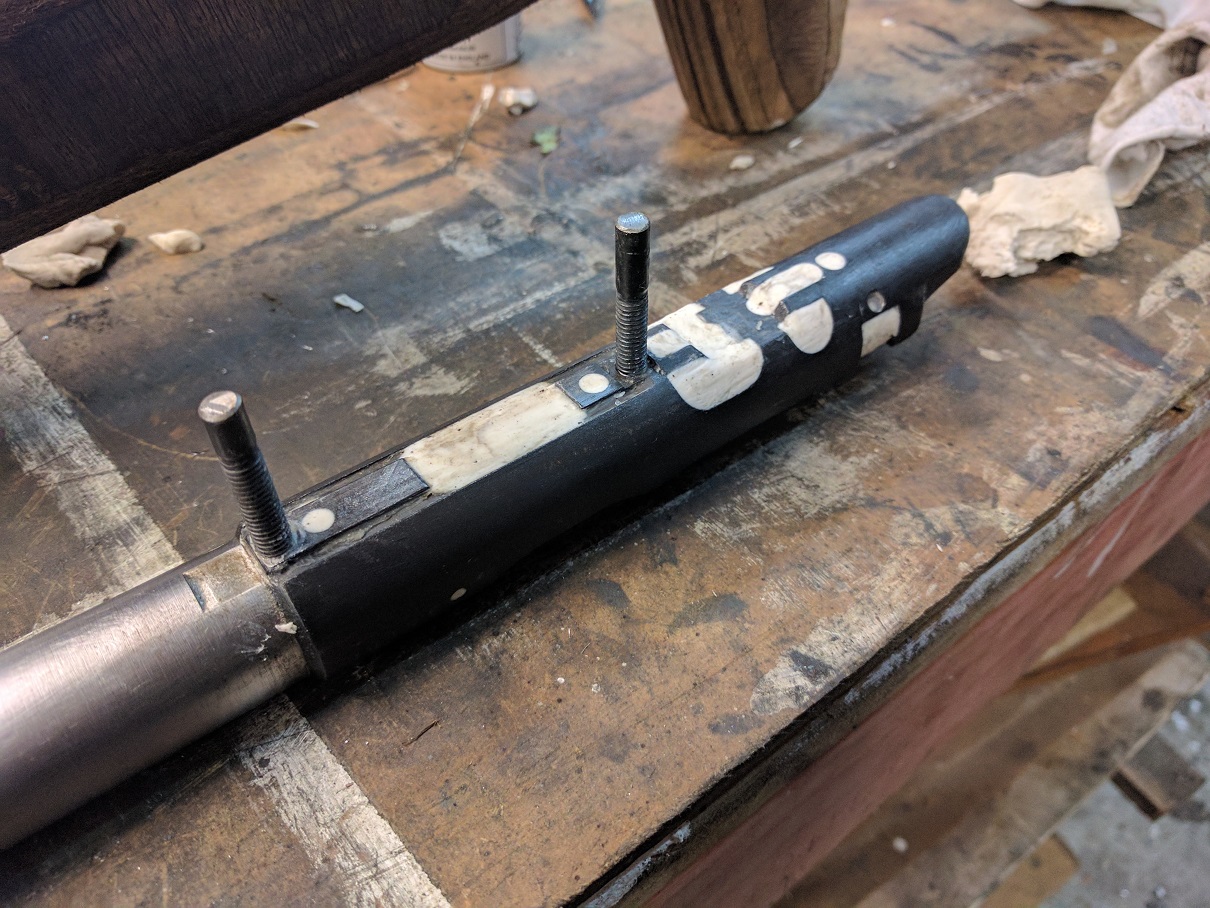
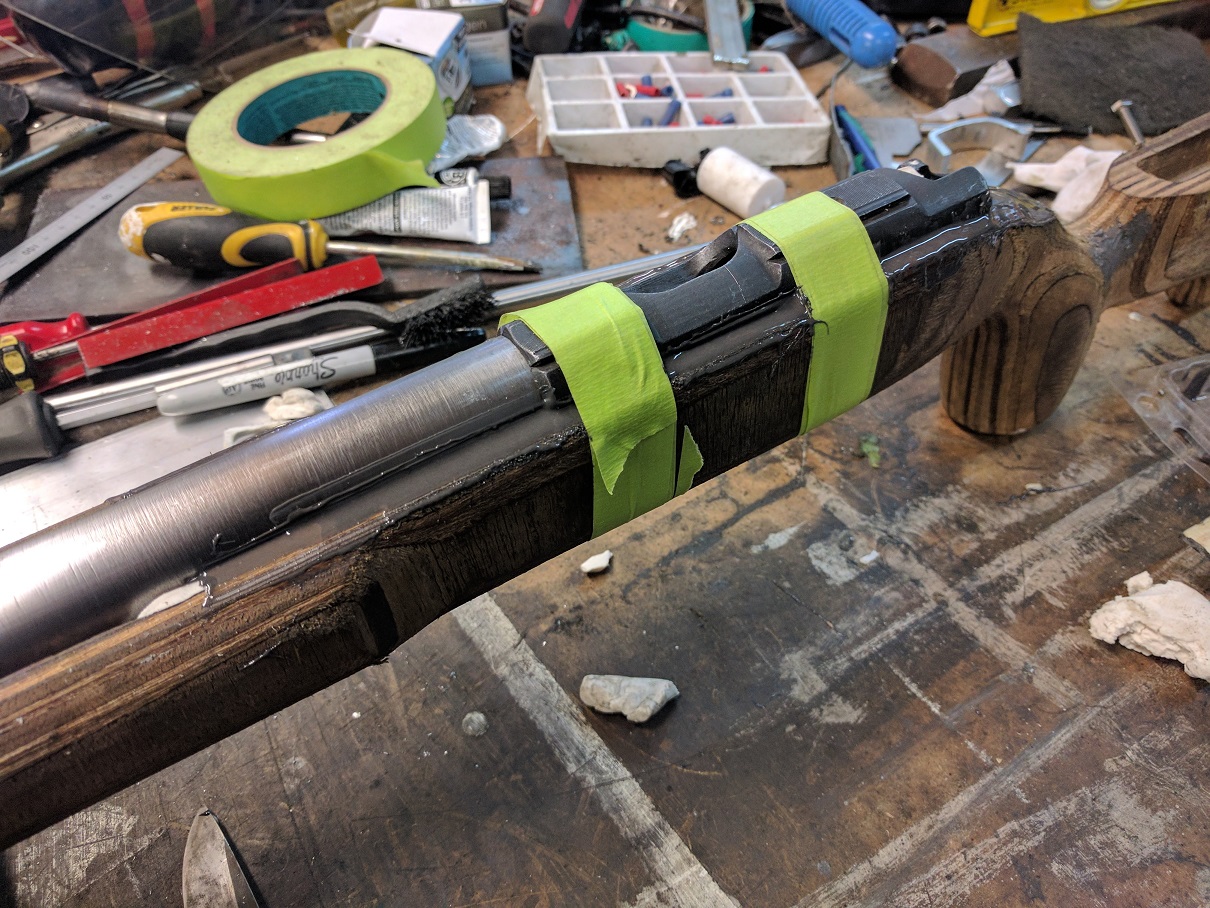
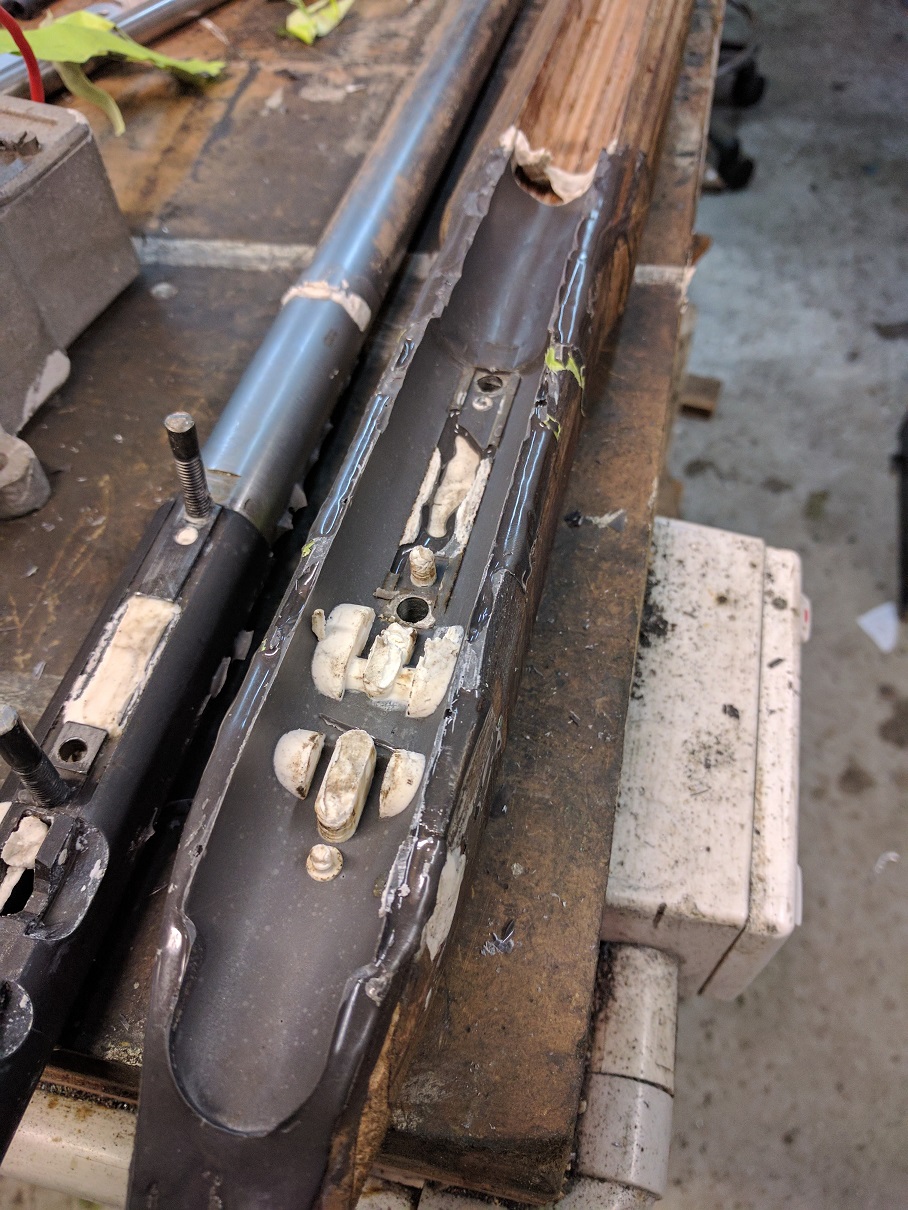
Now for stock bedding. I filled all the parts I did not want full of glue with Plasticine both on the action and stock, I then waxed the action and barrel very well and made a dam around the barrel for the compound. I mixed the glue, buttered it all up and slapped it in. I tend to leave a fairly large bead of glue on top of the stock and knock most of it off once it is hard and brittle but not completely set. I used Devcon steel putty and can highly recommend it.
I ended up with some chips around the left hand side of the barrel because I was impatient and pulled it before the glue was completely hard. Not really an issue, I caught it up while painting the stock.
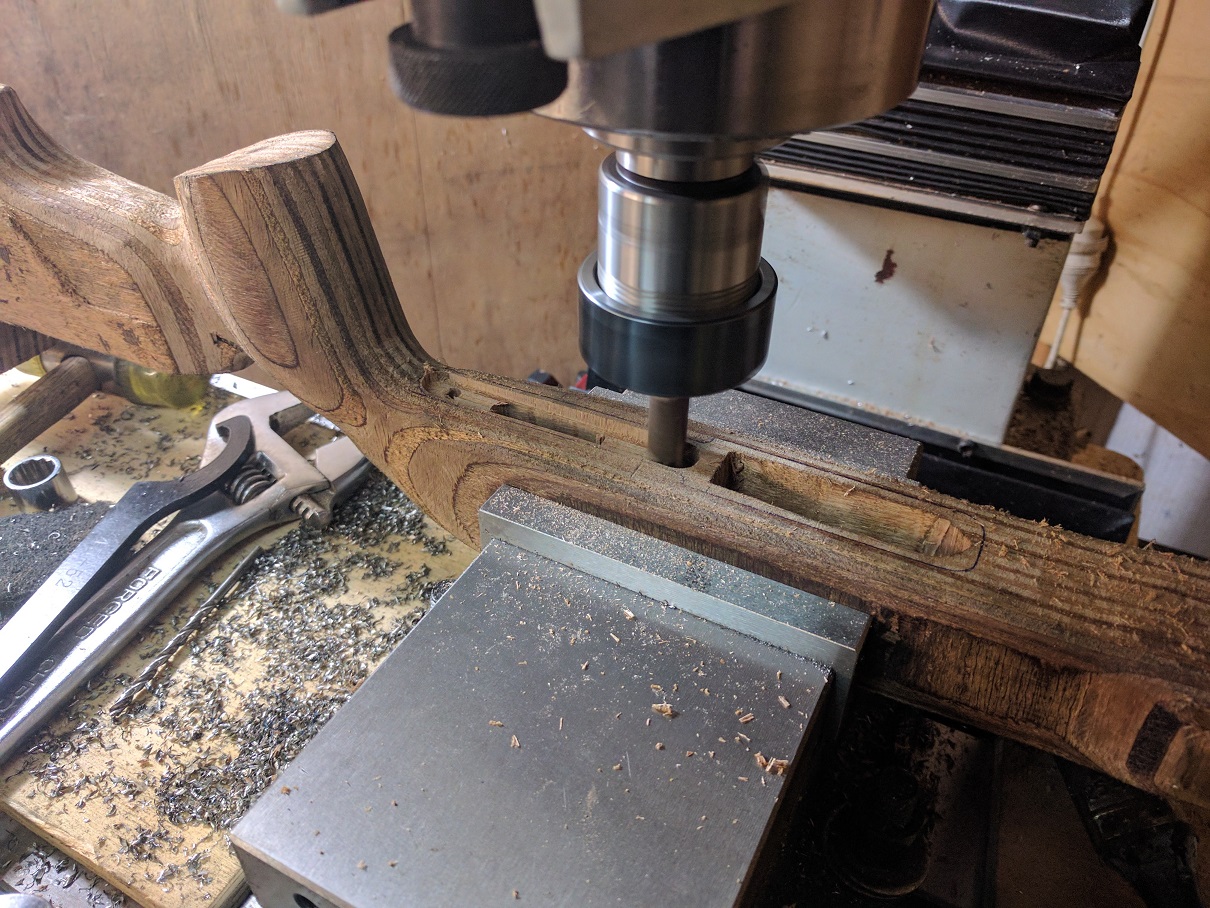
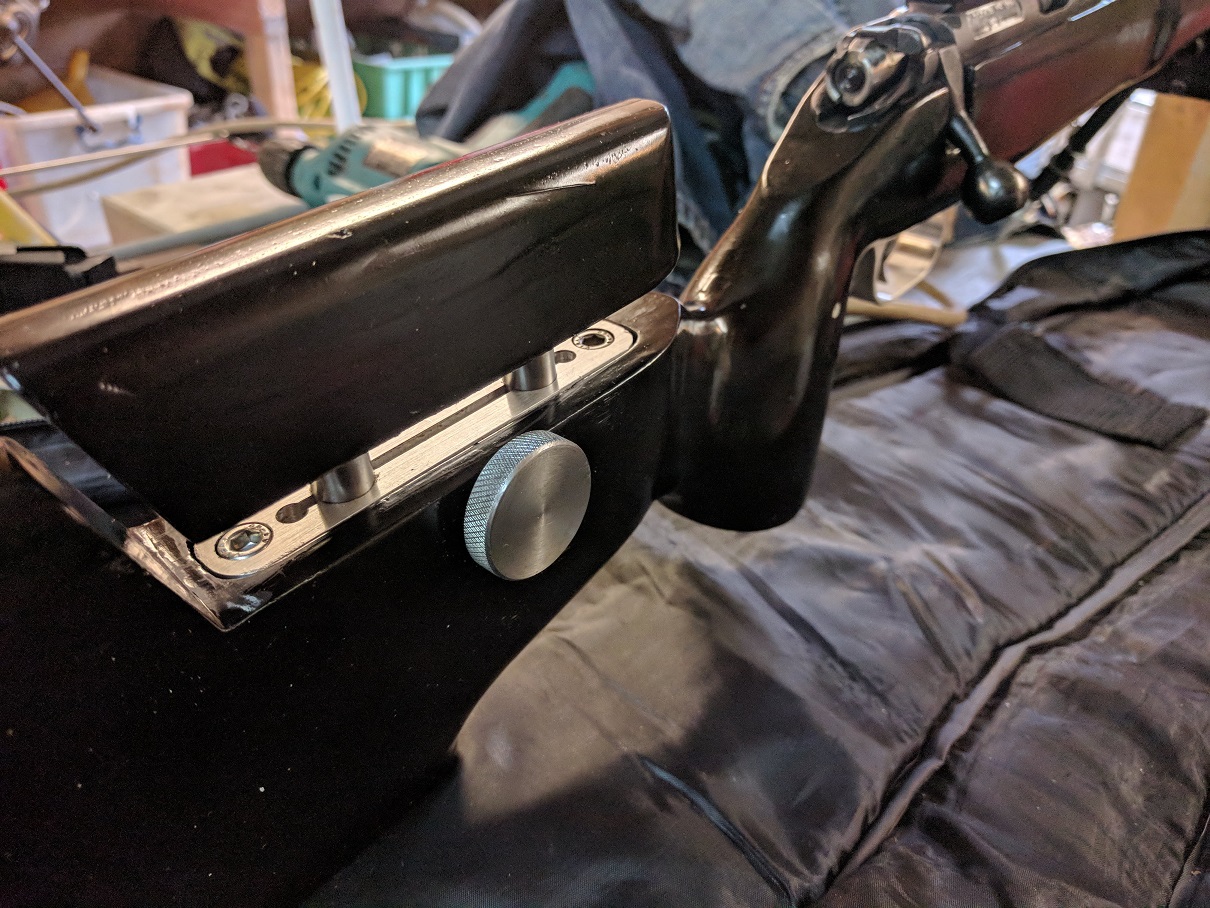
I wanted an adjustable comb on this stock but could not find decent hardware to buy for a decent price so I figured "I have a mill, might as well use it"
I proceeded to draw up a design based on what I could find online and started making chips. This is what I ended up with.
At the same time I made a trigger guard, I ended up milling it from solid billet and fastening it to the existing bottom metal using a couple of countersunk screws. Came out pretty nice.
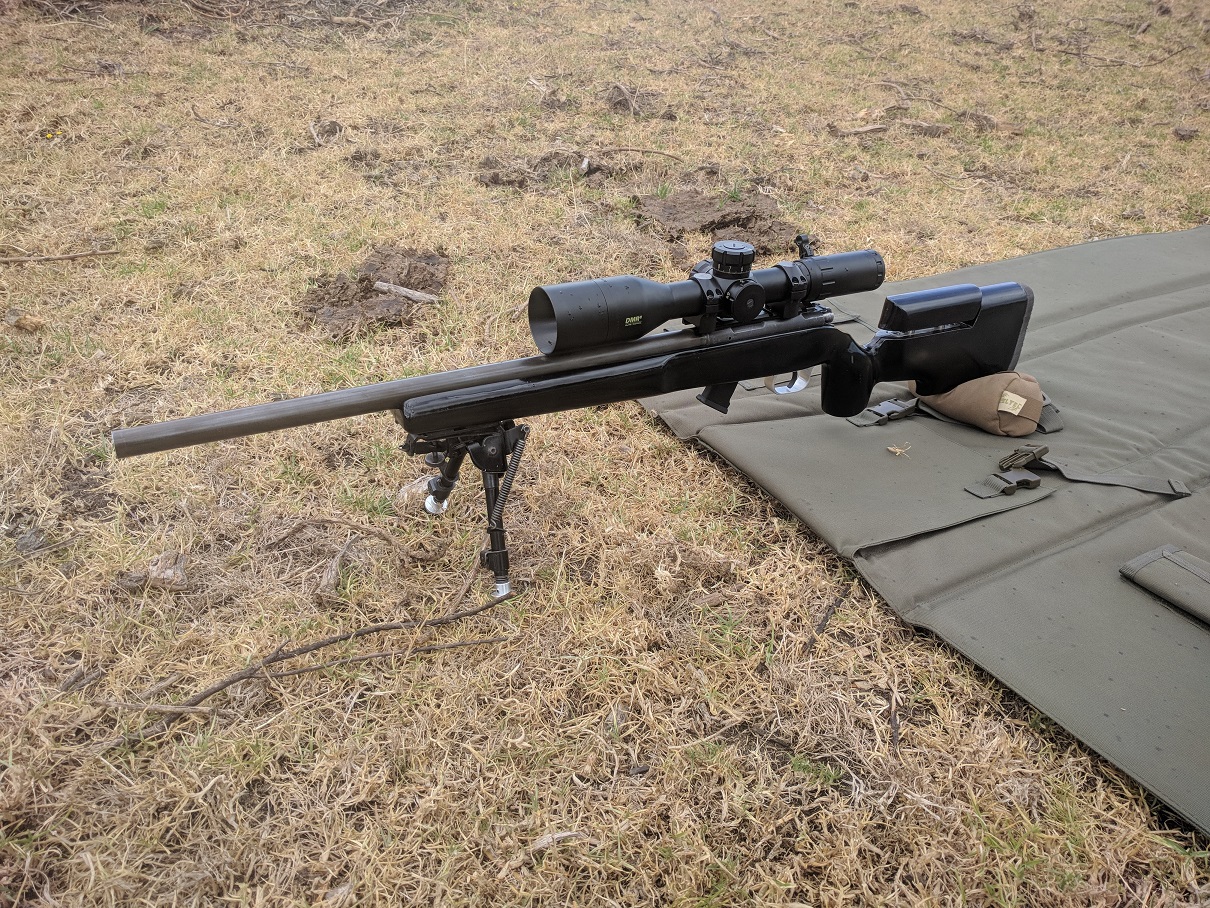
I then mounted a rail and bolted on my Bushnell DMR which was sitting around doing nothing as my main rifle is out of action at the moment.
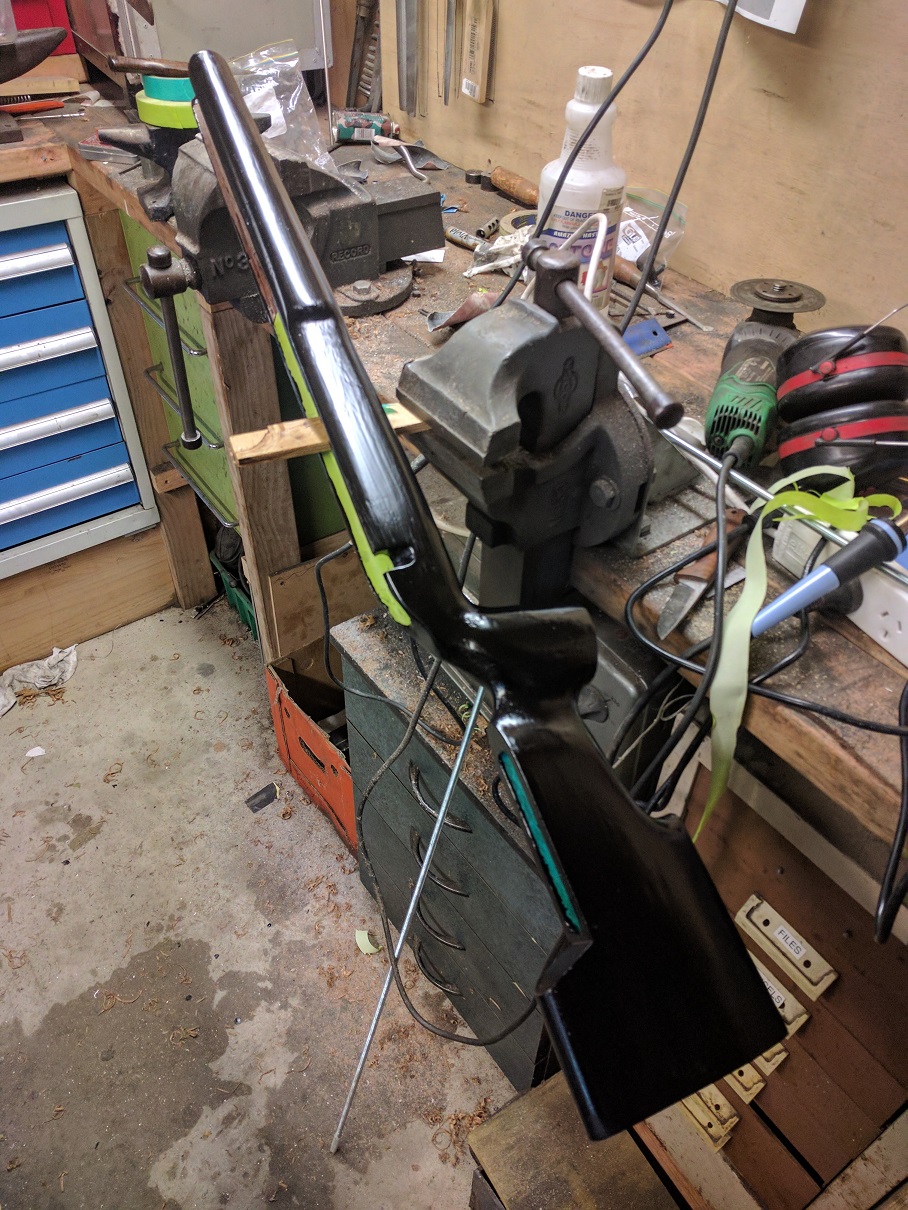
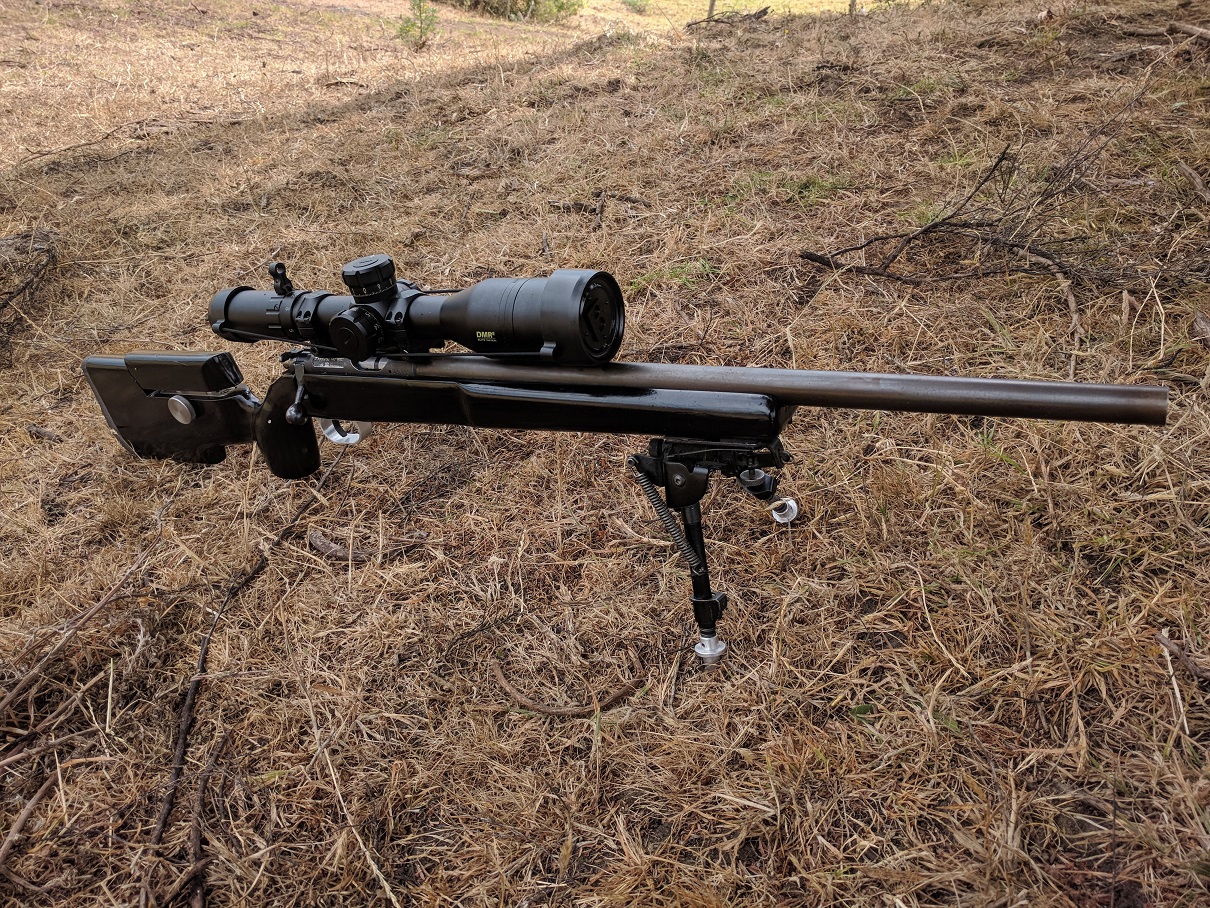
At the Range
The stock is not completely finished but it has had a couple of primer coats and some fairing done, good enough to shoot for now. I am using a marine 2 pack epoxy paint for the primer and I will most likely finish it with either a Coyote Brown or FDE. milspec or cerakote. I will also have the barrel and action cerakoted.
I did have some extraction issues the first time I went to the range. It would not extract about 6 out of 10 fired rounds and I was ready to make a new reamer and recut the chamber when I thought "if its not extracting, maybe its actually the extractor" So I did some searching around the internet and found some info on squaring up the inside face of Brno extractors. 2 min with a small stone and problem solved. I have put about 200 rounds through it without a single problem now.
Accuracy is good. Not amazing, but I have not tried anything other than CCI Std yet. It shoots pretty much exactly the same as my CZ 452 American (which has a lot of work done to it) maybe once I try some proper ammo in it, it should tighten up a bit.
And it is heavy as hell, especially with a big scope on it. Which was kind of the point of the project. Very similar handling to a full size match gun.
Im going to be posting some of my other projects on here in the future so stay tuned.
Welcome guest, is this your first visit? Create Account now to join.
Welcome to the NZ Hunting and Shooting Forums.
Search Forums


User Tag List
+ Reply to Thread
Results 1 to 15 of 28
Thread: Custom Brno 22lr
Hybrid View
-
18-01-2018, 05:43 PM #1Member


- Join Date
- Dec 2015
- Location
- Papakura, Auckland
- Posts
- 601
Custom Brno 22lr
Last edited by SixtyTen; 18-01-2018 at 05:50 PM.
-
18-01-2018, 05:58 PM #2Member
- Join Date
- Sep 2016
- Location
- Waikato
- Posts
- 184
nice work, that is a nifty looking chuck. Is it a homebrew chuck?
-
18-01-2018, 06:02 PM #3Member
- Join Date
- Dec 2015
- Location
- Papakura, Auckland
- Posts
- 601
Sure is. You can buy them in the states but they are relatively simple to make and I would have needed to make an adaptor for my lathe faceplate anyway. Originally Posted by Guypie

-
18-01-2018, 06:04 PM #4Member

- Join Date
- Jun 2015
- Location
- Central Otago
- Posts
- 1,265
well done . .. look forward to more of your projects in the future
R.without a picture . .. it never happened !
-
18-01-2018, 06:21 PM #5Member

- Join Date
- Sep 2013
- Location
- Tasman
- Posts
- 7,423
Awesome work.
Experience. What you get just after you needed it.
-
18-01-2018, 06:50 PM #6Member

- Join Date
- Nov 2014
- Location
- W-BOP
- Posts
- 6,587
Good read, cheers
Identify your target beyond all doubt
-
18-01-2018, 07:37 PM #7Member

- Join Date
- Oct 2015
- Location
- Canterbury, home of the big Rakaia Red Stag
- Posts
- 4,596
Cheers for posting, awesome effort!
Sent from my GT-I9192 using Tapatalk
-
19-01-2018, 09:58 AM #8Member
- Join Date
- Feb 2013
- Location
- Mangakino
- Posts
- 1,864
Interesting read thanks
-
19-01-2018, 11:11 AM #9Member
- Join Date
- Apr 2015
- Location
- Pukekohe
- Posts
- 381
Awesome work there, id love to have kit like that at home to tinker with.
great read, and look forward to the next project
-
19-01-2018, 11:51 AM #10Member
- Join Date
- Jul 2016
- Location
- Earth
- Posts
- 767
-
19-01-2018, 06:16 PM #11Member
- Join Date
- Mar 2012
- Location
- Christchurch
- Posts
- 1,515
Thanks for this post. Really enjoyed it: well written and great photos.
-
19-01-2018, 07:51 PM #12Member

- Join Date
- Aug 2014
- Location
- NZ
- Posts
- 3,784
just wow!
Warm Barrels!
-
19-01-2018, 11:44 PM #13Member

- Join Date
- Apr 2012
- Location
- Southland/Otago
- Posts
- 3,736
Wow awesome

Sent from my iPhone using TapatalkI'm drawn to the mountains and the bush, it's where life is clear, where the world makes the most sense.
-
20-01-2018, 08:11 AM #14Bah, humbug !

- Join Date
- Nov 2013
- Location
- Auckland, until I can escape south....to Southland.
- Posts
- 1,701
Great skills
 He nui to ngaromanga, he iti to putanga.
You depart with mighty boasts, but you come back having done little.
Sounds like a typical hunting trip !
-
28-04-2018, 08:50 PM #15Member
- Join Date
- Apr 2018
- Location
- Auckland
- Posts
- 1
Mate I have a brno MK24B PAXARMS rifle. BUT its missing the Gas valve. I would be super keen to purchase the lefts overs from you.
My number is 02102498462


 Reply With Quote
Similar Threads
-
Brno 581 Auto .22LR - value?
By 10-Ring in forum Firearms, Optics and AccessoriesReplies: 15Last Post: 17-02-2017, 02:23 PM -
Brno 581 Auto .22LR - value?
By 10-Ring in forum Firearms, Optics and AccessoriesReplies: 0Last Post: 14-02-2017, 09:44 AM -
Value of BRNO model 1 22lr??
By LJP in forum Firearms, Optics and AccessoriesReplies: 45Last Post: 07-12-2014, 11:17 AM
Tags for this Thread
 Posting Permissions
- You may not post new threads
- You may not post replies
- You may not post attachments
- You may not edit your posts
Welcome to NZ Hunting and Shooting Forums! We see you're new here, or arn't logged in. Create an account, and Login for full access including our FREE BUY and SELL section Register NOW!!
All times are GMT +13. The time now is 10:22 PM.

Bookmarks