

 13Likes
 LinkBack URL
 About LinkBacks
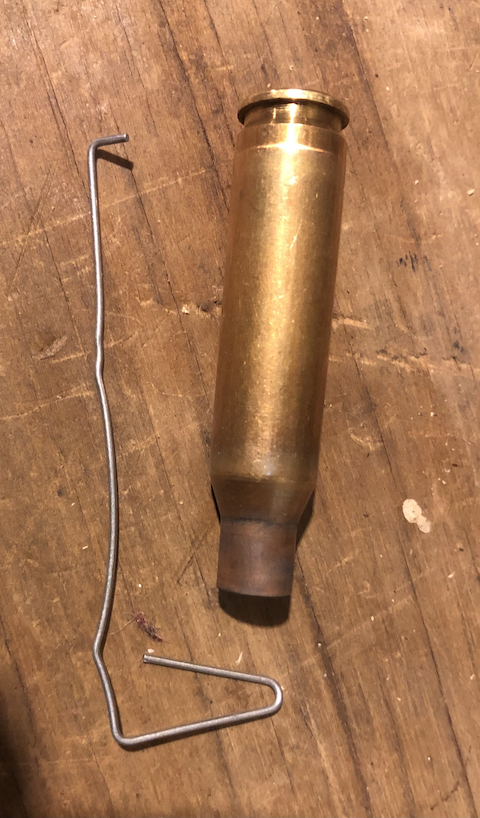
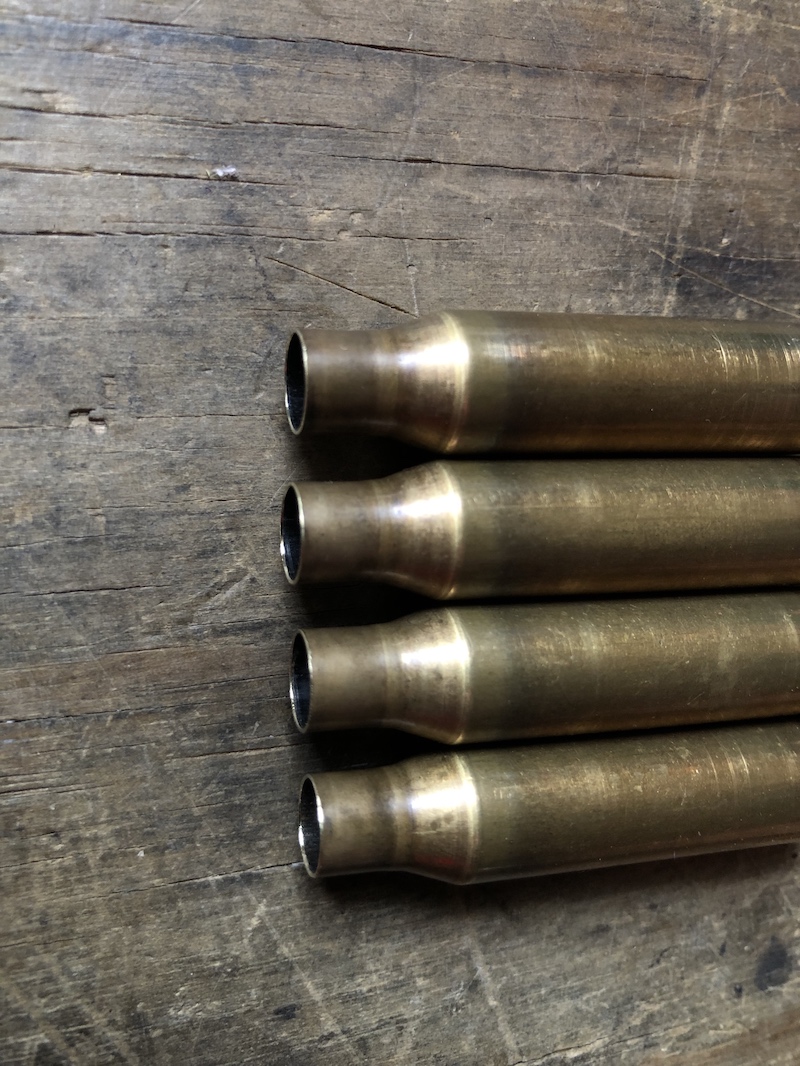
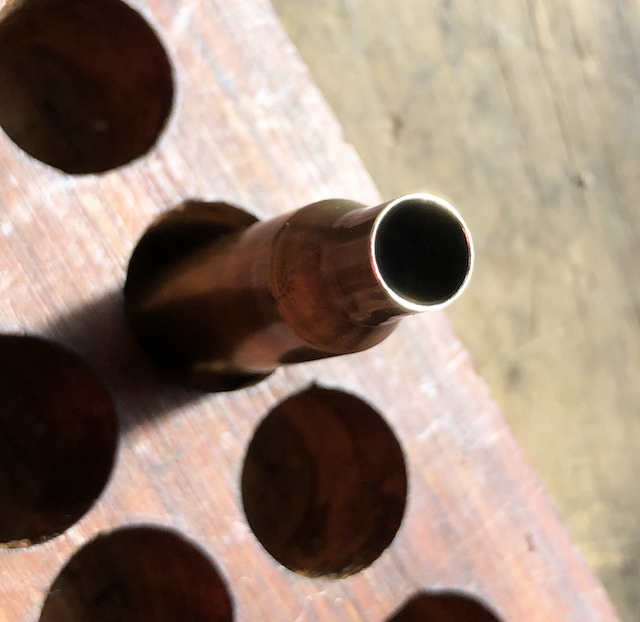
The necks
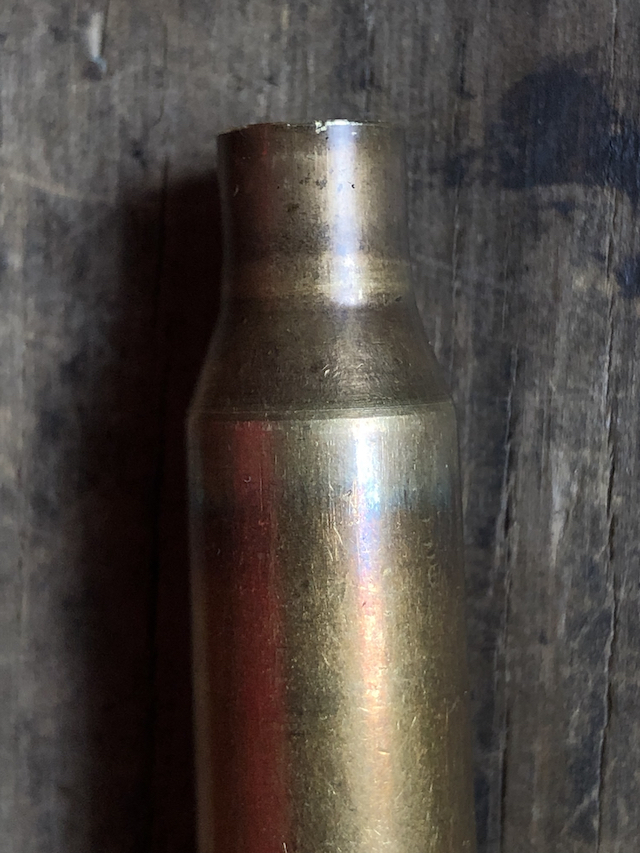
A case mouth
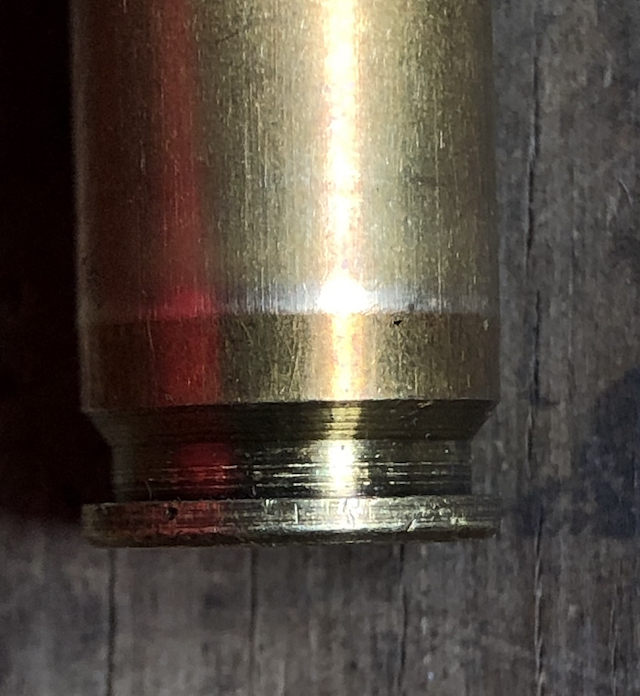
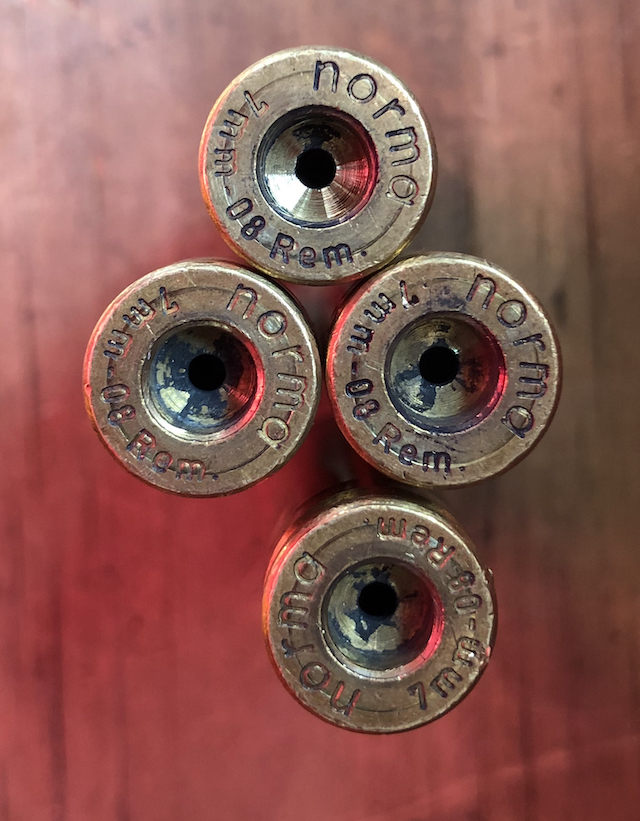
Base showing usual separation site
(Actually, I've never had a case base separate on this rifle.)
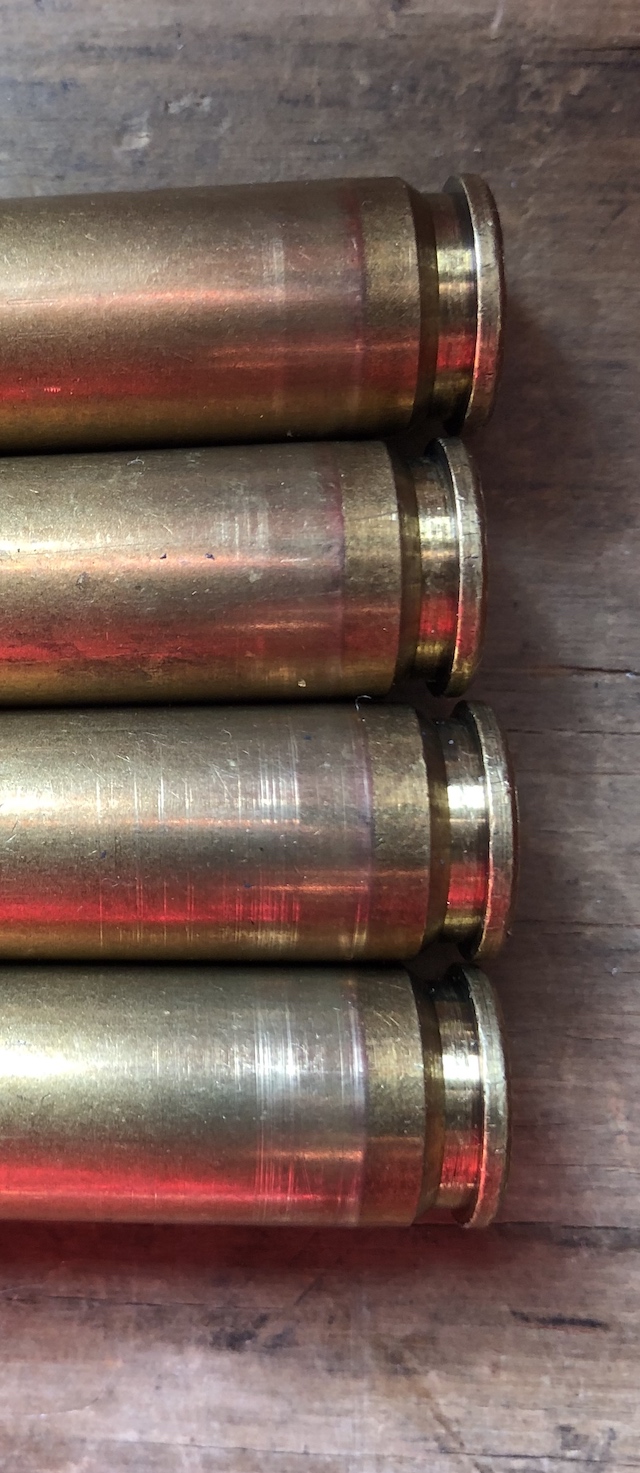
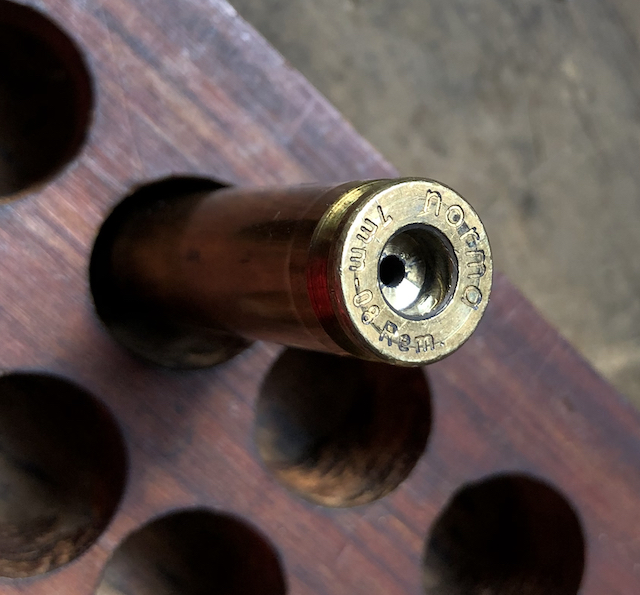
The primer pockets
More and more of these have felt loose seating over the years and 90% are now real easy to slip the primer into but they seem firm and never fall out.
Cases have been reloaded about 15x and annealed once about 5 shots ago.
They're still shooting fine and there are very few split necks or other problems.
Just looking for any comments, advice, any problems visible ...
Welcome guest, is this your first visit? Create Account now to join.
Welcome to the NZ Hunting and Shooting Forums.
Search Forums


User Tag List
+ Reply to Thread
Results 1 to 15 of 24
-
31-08-2022, 09:29 PM #1Member

- Join Date
- Mar 2012
- Location
- Waikato
- Posts
- 1,956
Case Inspection. Anything of note here, folks ?
Micky Duck likes this.
-
-
02-09-2022, 07:50 AM #2Member
- Join Date
- Feb 2021
- Location
- Winton
- Posts
- 31
If I was you I would cut a couple of them in half. Then you will see how thin they are getting
-
02-09-2022, 08:55 AM #3Member

- Join Date
- Feb 2014
- Location
- Hawkes Bay
- Posts
- 2,420
Yeh, the bent tip paperclip should be employed when they get to this age.
General observations from the pics:
The trimming on the neck is a bit so-so, some rough edges.
The neck/shoulder junction is pretty indistinct- ? from partial neck sizing
The marks at the "200 line" are really just scrapes from the die, don't tell you much.
I'd give the die a good cleanout as there's a suggestion there's some fine grit in it
-
02-09-2022, 10:34 AM #4Member
- Join Date
- Feb 2020
- Location
- Scotland
- Posts
- 1,051
Have you cleaned them?
I'd say take a good look at a fired one to see how well the neck is sealing.
Also, brass grows (forward) with every firing. So, assuming you are trimming the brass, it means the area around the web is getting thinner with each firing.
Case head seperation is inevitable.
-
02-09-2022, 12:42 PM #5Member
- Join Date
- Jun 2014
- Location
- CNI
- Posts
- 5,789
What is causing the groove around the base outside the primer pocket?
Micky Duck likes this.Summer grass
Of stalwart warriors splendid dreams
the aftermath.
Matsuo Basho.
-
03-09-2022, 06:29 PM #6Member
- Join Date
- Mar 2012
- Location
- Waikato
- Posts
- 1,956
Hi Woody,
It's the pocket reamer turning round on the base.
Cuts them to the same 0.130" depth each time but I have to push hard to get it to remove all the soot and see shiny metal.
-
04-09-2022, 01:22 PM #7Member
- Join Date
- Mar 2012
- Location
- Hastings
- Posts
- 2,370
Anneal every firing. Trim only to maxi length. The sizing is as commented is more neck rather than FLS. Run your brass thru a good SSM wash with big dollop of Armourall car wash, big dollop of citric acid and big splash of creme of tartar. Run for 2 hours. Originally Posted by 6x47
 DeadReds likes this.
-
04-09-2022, 07:21 PM #8Member
- Join Date
- Dec 2021
- Location
- Tauranga
- Posts
- 3,719
Or maybe US clean, which does the same thing less polishing and pin impacts. The comment about life is pretty much spot on, I'd be cleaning them up and doing the case length trim and checking case weights. After that I'd do the water capacities by weight (plug the primer pockets with something like a fired primer) and anything at the extremes of the range either more closely inspect or section. And after that the paperclip test for any impending seperation or internal defects.
Also, at that many primer pocket cleans with a reamer it might just be a case that you've managed to ream the pockets slightly looser - going forwards measuring and recording case head expansion with the replacement lot of brass will possibly be a better way of tracking wear? But at 15 firings - that's free brass...Micky Duck likes this.
-
04-09-2022, 08:31 PM #9Member
- Join Date
- Jul 2012
- Location
- Tauranga
- Posts
- 2,463
If you have "loose pockets" but still feel you can get more life from the cases, you could change primer types. For example if you are using Feds you could go to CCI that give a tighter fit.
Consider changing to small primer brass, for more firings, but at 15 you have done well really.
There is no real defintion for neck / shoulder junction, do you get hard to chamber on the brass now? or are you in the FLS every X reloads. For having 15 reloads and only one anneal the brass has done very well.
Stainless pins, meh, shiny peened up brass is not for you if you want to clean the carbon off for smaller outlay that doesnt involve a mechanical wash / bath try a product called never dull. its a cotton wadding thats impregnated with cleaner that saddlers use on horsey brass stuff. It is / was about $50 and cleans the carbon off necks and cases....... but its a one at a time in the drill chuck type of job...... you could do it in conjunction with trimming if you use a chuck mounted method for that.
Oh and just to be picky you need a new wooden block as that one is way too big for those cases.
-
06-09-2022, 12:37 PM #10Member
- Join Date
- Nov 2021
- Location
- Waikouaiti
- Posts
- 607
Everything looks normal really. The mark around the base where they separate, well, I dont think it means anything. I have those marks on all my brass after the first couple of reloads. The only case head separations I have ever had were from cartridges that were stupidly over loaded with the wrong powder. I have not had anything separate from being over worked. And although I have employed the bent paperclip from time to time, I have never caught anything unusual. (I am not saying it doesnt happen, I am just saying the shiny marks up from the base don't indicate that its going to happen.)
One question: How far down the case are you annealing them?
-
06-09-2022, 04:41 PM #11Member
- Join Date
- Jul 2012
- Location
- Tauranga
- Posts
- 2,463
I had a case seperation, in a .243 Savage 99E. It was after a fair few reloads but they had been done in a whackamole Lee so no FL sizing done at all, I was a very novice reloader and it was my first centerfire and first attempt at reloading.
If it happens on a hunting trip and you dont have any gear it can wreck your trip.
It seperated at the web mark as shown, by the marks.It was a full seperation and the case head tumbled out onto the bonnet of the cruiser I was shooting across, I couldnt figure out why the next round wouldnt chamber. As I had "heard" the case eject. As luck would have it I got it out with a pocket knife.Moa Hunter and Micky Duck like this.
-
12-09-2022, 08:09 PM #12Member
- Join Date
- Mar 2012
- Location
- Waikato
- Posts
- 1,956
@6x47 what is the 200 line ? 200 thou from the base, where they usually separate ? Originally Posted by 6x47
Point taken about the rough case mouths. I couldn't see them without my reading glasses and they look shocking in the close up photo don't they ?
What do you think about that neck/shoulder junction ?
Looks like the neck part of the die never reached it to me, yet the shoulder is sized back neat and tidy, not growing out. It's a full length die.
-
12-09-2022, 08:26 PM #13Caretaker
- Join Date
- Dec 2011
- Location
- Hawkes Bay
- Posts
- 8,855
At 15 times reloaded I would have thrown them out 5x reloads back
10 times is well enough for me and I’m probably throwing brass away after 8 reloads maximumMicky Duck likes this.A big fast bullet beats a little fast bullet every time
-
12-09-2022, 08:28 PM #14Member
- Join Date
- Feb 2014
- Location
- Hawkes Bay
- Posts
- 2,420
Yes, correct on the "200 line" interpretation.
I'm surprised you were using an FL die with such an indistinct neck/shoulder junction. This isn't a bushing FL die??
-
13-09-2022, 09:41 PM #15Member
- Join Date
- Mar 2012
- Location
- Waikato
- Posts
- 1,956
I've felt the insides with the bent paper clip and there's no groove or unevenness, specially at the shiny 200.
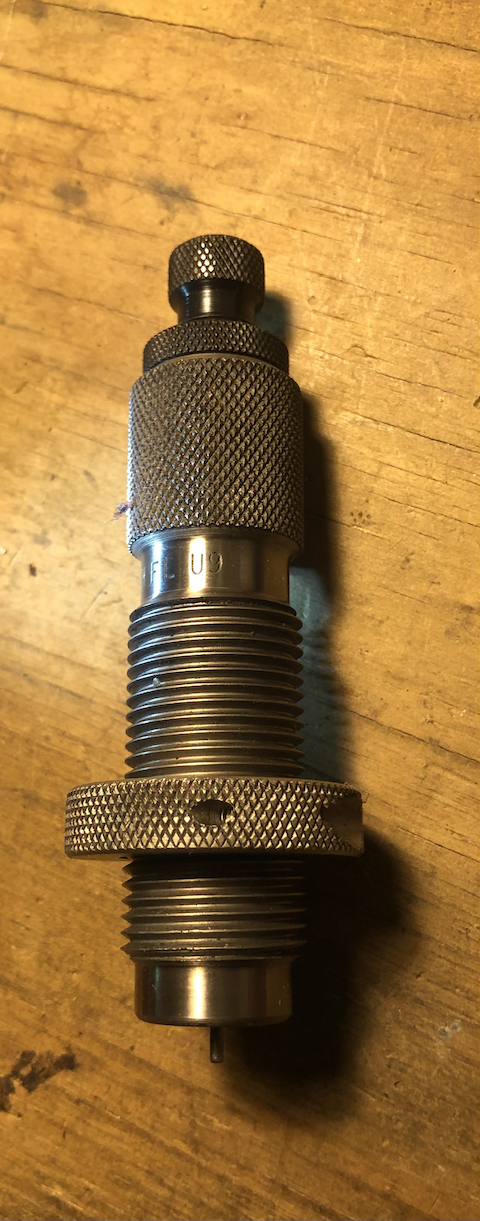
Looking at the die, it just says Redding 7mm08 FL U9
I wonder what the U9 is ?
I haven't put any bushing into it and I take it apart after each session to clean out with Hoppes then dry and a thin layer of waterproofing oil (Mobil DTE).


 Reply With Quote
Similar Threads
-
Extra Cabinets Inspection
By subserver in forum Firearm SafetyReplies: 21Last Post: 23-08-2022, 05:55 PM -
Positive inspection recently
By Trigger in forum Firearm SafetyReplies: 4Last Post: 27-01-2019, 10:33 PM -
E-cat gun safe. Will it pass inspection????
By jackbowring in forum Firearm SafetyReplies: 21Last Post: 09-11-2017, 01:16 PM -
Firearms Storage Inspection ....
By kiwi39 in forum Firearm SafetyReplies: 156Last Post: 31-01-2017, 09:07 AM -
VTNZ or AA pre-purchase inspection?
By Wildman in forum Outdoor TransportReplies: 8Last Post: 26-12-2015, 10:48 PM
Tags for this Thread
 Posting Permissions
- You may not post new threads
- You may not post replies
- You may not post attachments
- You may not edit your posts
Welcome to NZ Hunting and Shooting Forums! We see you're new here, or arn't logged in. Create an account, and Login for full access including our FREE BUY and SELL section Register NOW!!
All times are GMT +13. The time now is 11:54 AM.

Bookmarks