Is this thread dead? I just ordered my board with the UNO pre-programmed from MGNZ and waiting for it to show up so I can start my build. Did anyone think about adding an optical sensor above the case to measure the temp of the brass?
Printable View
Is this thread dead? I just ordered my board with the UNO pre-programmed from MGNZ and waiting for it to show up so I can start my build. Did anyone think about adding an optical sensor above the case to measure the temp of the brass?
Out of interest sake read Alex Finlays book about his journey Into making his annealer.Quote:
Originally Posted by jake8587
by the time you have fucked up a whole lot of brass it would be cheaper to by one of his and get perfect results first time every timehttps://uploads.tapatalk-cdn.com/202...c0a5188eb3.jpg
Sent from my SM-A226B using Tapatalk
Just wondering has anyone built this annealer using the RC servo to drop the case? How did you adjust the degree ?
If I had an extra $1500 I could buy a lot of brass to fuck up. I do believe it is a very nice tool, but I know a lot of F-class shooters got buy with flame annealers before the Amp came out, yes they has sense replaced it with a AMP. But they had tobstart some where.
I have built multiple induction annealers using induction boards, power supplies and timers from Ebay. Total cost in parts to make one is generally around $400NZD
Latest one has an auto feed with case sensor that can be adjusted to feed anything from pistol cases to large ultra mag cases. Case is made from plywood and painted to look nice, water cooling on the induction coil using a small water pump and radiator.
Anyone who is interested, google the GinaErik induction annealer. There are also other designs using Arduino boards for the timing and control, which if you are going to use an auto feeder, I would recommend.
The AMP is a cool machine and good on the guys for getting them out internationally. However, in my opinion, they are overstating and overcomplicating the annealing process, which is pretty simple really. Using 2 different temp grades of Tempilaq, you can fine tune the annealers I have made to get perfect and consistent results for a new case in a few min, risking only 1 or 2 pieces of brass, and often not ruining even one. I keep a log book of the settings for different cases and can reset the machine to a different case in about 1min.
In my experience, the flame annealers are a pain in the ass to setup every time, induction is so much better.
Spend a few dollars on Alex's book.Quote:
Originally Posted by SixtyTen
You will enjoy it guaranteed.
Sent from my SM-A226B using Tapatalk
I have read a bunch about the AMP annealer and it seems they are using a hardness test to determine at what time the brass reaches the same hardness as the new piece. I am not a programmer so I have no idea how they have this look-up file setup, but there has to be a table the computer uses. This is an interesting watch if you have the time. Care to share your copy? I will pay the shipping to and back?Quote:
Originally Posted by andyanimal31
https://youtu.be/SF0YmmeEJK4
Hello, I'd like to get into reloading and looked at some DIY solutions online. I came across this thread after quite a bit of browsing, and would like to say that this solution looks great! I tried to download the schematic but the dropbox link says it's deleted. I like DIY projects, and wanted to know if there is a PCB file available for download so I can get the PCB created and start building this.
Appreciate responses and your time.
Cheers.
https://www.mgnz-makes.com/ you can order the pre-made board here with or without the UNO.
Just to add if anybody is interested, I built an annealer a while back that's very similar to the one described using the same parts etc. I wanted to take the guess work out of temps and the trial and error involved.
I decided to use an IR temp sensor mounted above the coil to measure the case temp. I used the MLX90614 IR temperature sensor which gives you a range of -70 to 380C. The coil is on constantly, but the brass drops when it reaches 380C.
If anybody has found a reasonably priced IR temp sensor that goes higher I'd like to know about it.
In the final stags of building my annealer. However, I have run into a problem connecting the negative (-) side of the induction board to the Amp probe, the suggested wire size is >2mm² but this diameter wire is way to large to connect to the probe. What and how did you connect it?
Ok, I need some help. I got everything connected and powered up but I get nothing on the display none of the less on the switches light up. Doubled checked and triple checked all the connection and they are correct. There is 12v going to the Arduino shield board and the green LED is lit. Any suggestion what to test for next? I even tried a new UNO and reflashed the UNO that came with the shield.
That's a real achievement eh. Well done!
Do you get any volts on any of the arduino outputs Can you press the strat button to get any V change. Sounds like something is shorted out. Where is the 12 V supply for the arduino coming from. what is supplying the ZVS portion with its higher voltage.
This thread has been pretty inactive i would suggest a look at accurate shooter there is an active (150 page) thread on the gina attric that these builds were designed off.
https://forum.accurateshooter.com/th...3908353/unread
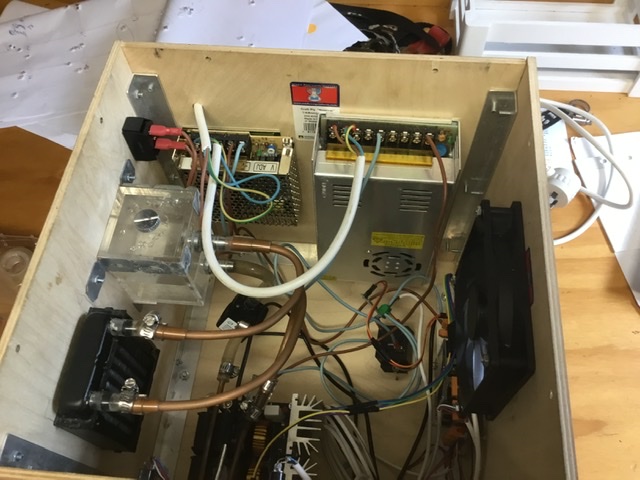
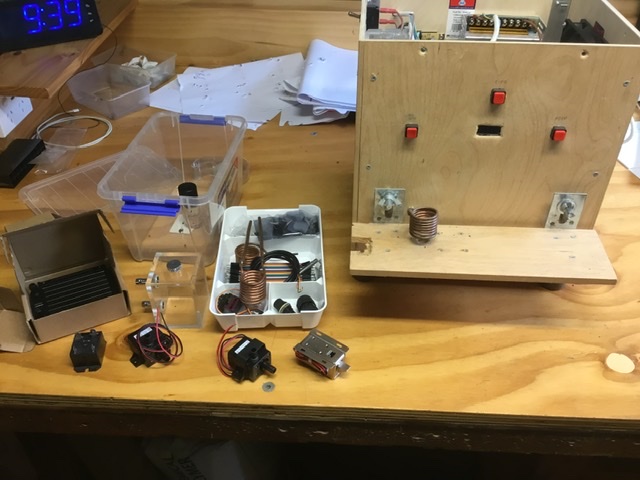
Anyone thinking of building one I have a working one I built including spare parts that is sitting gathering dust as basically when I finished it a mate picked up an amp annealer second hand so we are using that.
From memory I had over $500 of parts including the spares and the box.
Would sell it for $350
Attachment 218061
Attachment 218062
So who else has one gathering dust or an incomplete project. If I can scrape up some bits I will make one up for a friend.