

 27Likes
 LinkBack URL
 About LinkBacks
First up big props to me ol mate @Freezer for for all the advice on products and techniques, also for the inspiration to have a crack at it with his successful model 7 style howa mini stock.
I contacted Aiden at VTP and ordered a Howa mini action core.
I then picked up some P.E foam core from a company in Christchurch for the princely sum of $10.
I ordered resin, f/glass cloth and carbon fiber tape from NZ fiberglass supplies.
I wanted a stock with a longer L.O.P and a more vertical pistol grip to suit my sasquatche hands.
Here's a pic of my concept template.
Welcome guest, is this your first visit? Create Account now to join.
Welcome to the NZ Hunting and Shooting Forums.
Search Forums


User Tag List
+ Reply to Thread
Results 1 to 15 of 20
Thread: VTP action core stock build
-
02-09-2022, 04:12 PM #1Unapologetic gun slut


- Join Date
- May 2018
- Location
- Oxford, North Canterbury
- Posts
- 8,571
 VTP action core stock build
-
-
02-09-2022, 04:18 PM #2Unapologetic gun slut
- Join Date
- May 2018
- Location
- Oxford, North Canterbury
- Posts
- 8,571
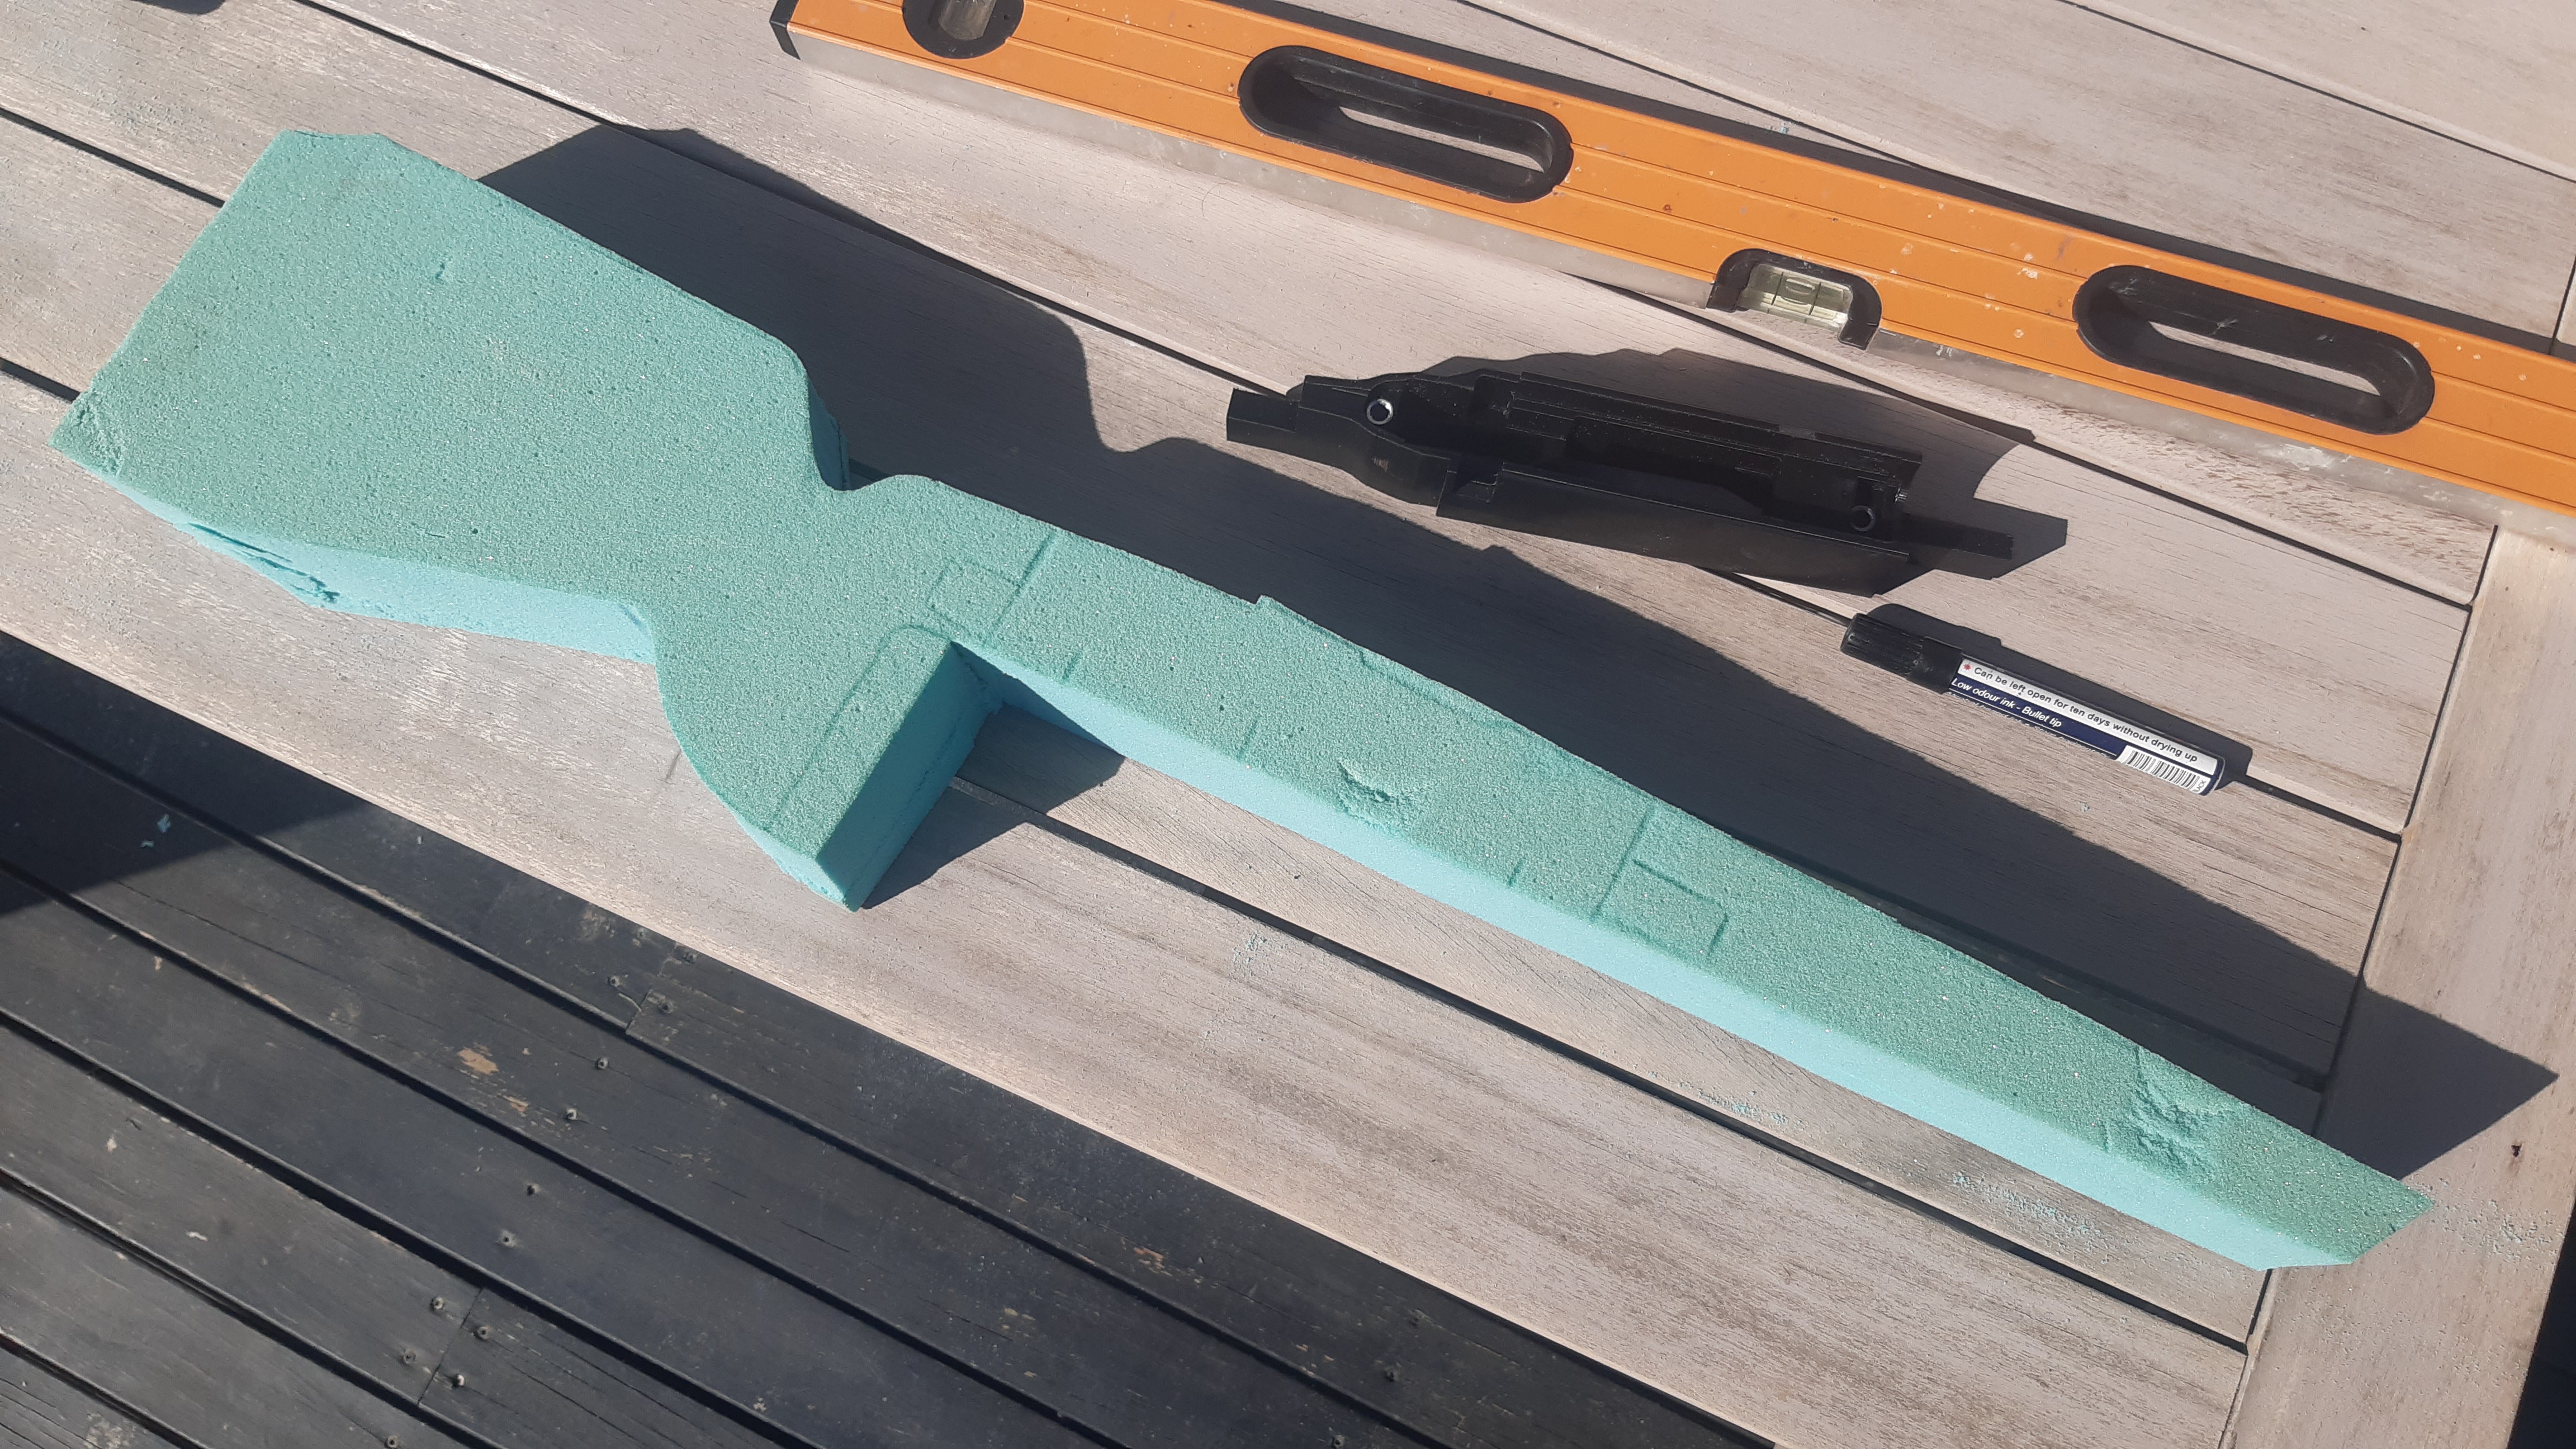
Next up was cutting out the rough shape with a bandsaw and a lot of green dust.
 Micky Duck likes this.#DANNYCENT
-
02-09-2022, 04:28 PM #3Unapologetic gun slut
- Join Date
- May 2018
- Location
- Oxford, North Canterbury
- Posts
- 8,571
I started shaping with a rasp and 80grit sand paper, in retrospect it would have been easier glueing the fore and butt to the action core first as i cocked up the fore and it was a little crooked when i glued it on, luckily there was enough meat in it to true it up.
I also tweaked my original design of the comb somewhat as it was ridiculously high.
Here is where I'm currently up to.
I still need to tweak the wrist, palm swell and shape the fore. I also need to cut out the barrel channel.
Once all that is done i will seal all the foam with lightweight body filler then once it's smoothed out it'll be glassing time.
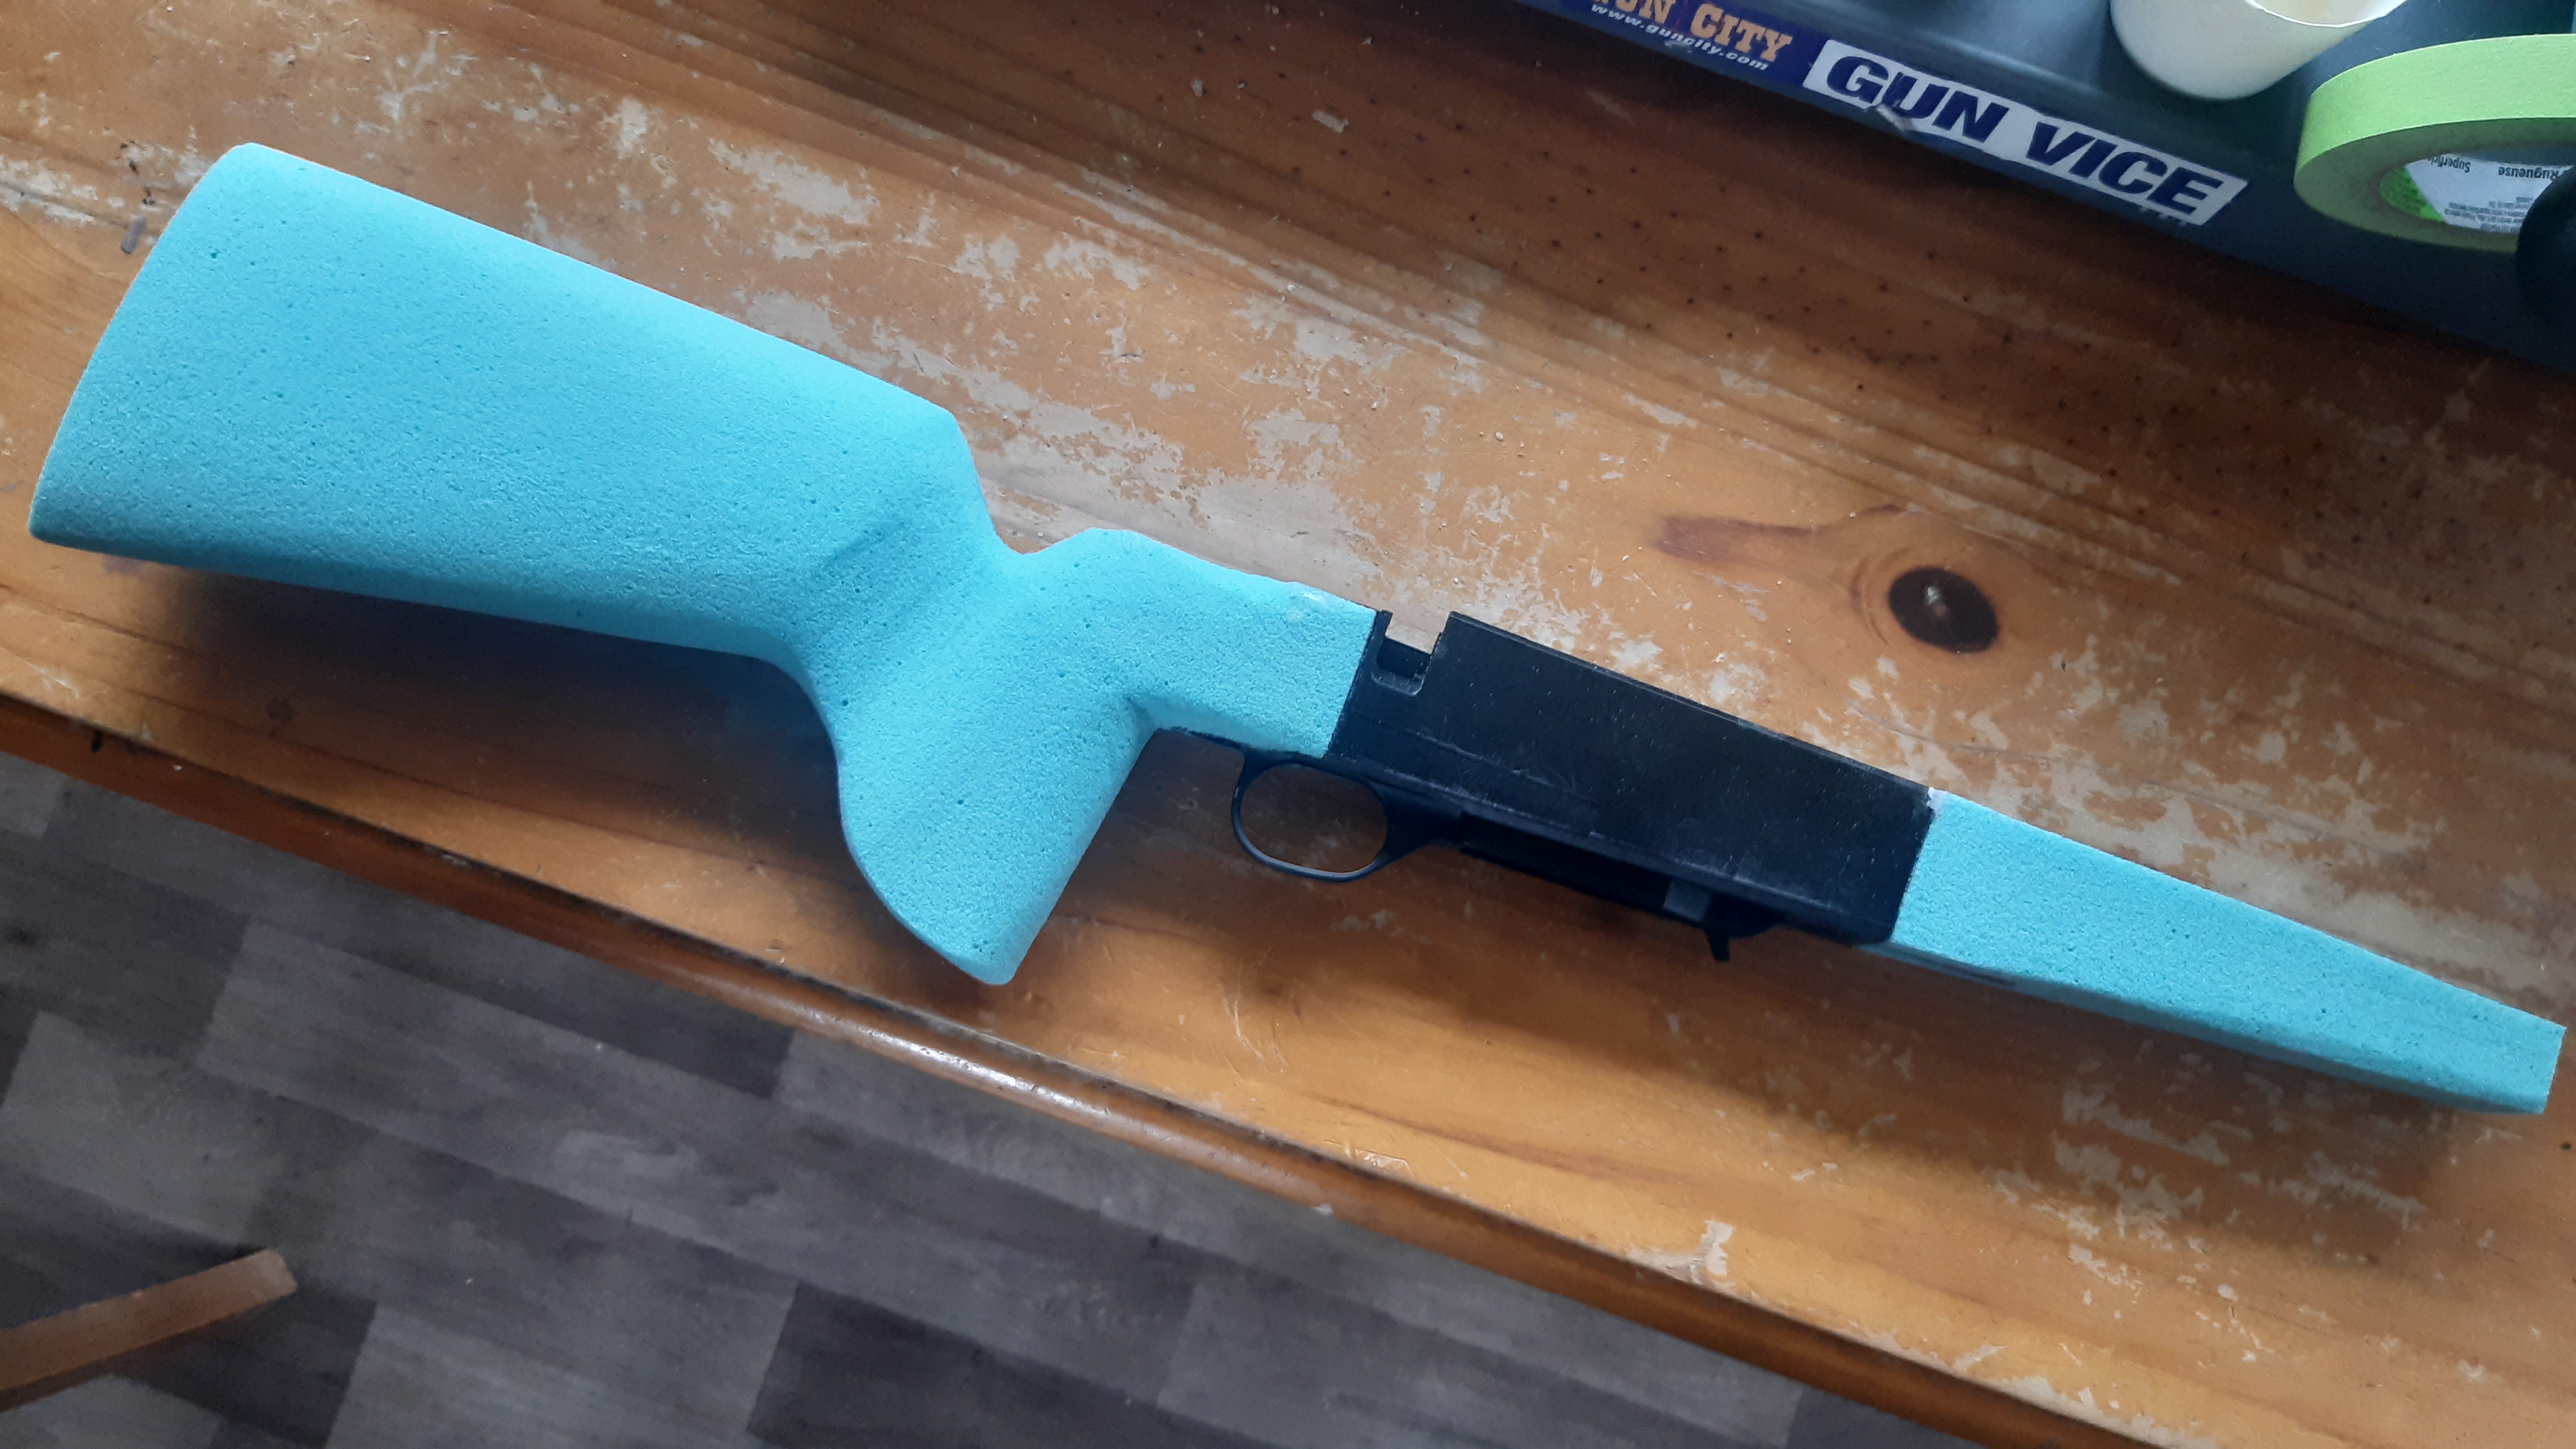
Here it is sitting on top of the factory stock for size comparison
 #DANNYCENT
-
02-09-2022, 04:32 PM #4Member
- Join Date
- Apr 2019
- Location
- Canterbury
- Posts
- 67
looking forward to see how this comes out mate!
dannyb likes this.
-
02-09-2022, 07:47 PM #5Member
- Join Date
- Mar 2018
- Location
- Turangi
- Posts
- 1,366
-
02-09-2022, 07:51 PM #6Unapologetic gun slut
- Join Date
- May 2018
- Location
- Oxford, North Canterbury
- Posts
- 8,571
Well it fits the factory bottom metal so I would think so Originally Posted by Preacher
 Preacher likes this.#DANNYCENT
-
02-09-2022, 07:57 PM #7Unapologetic gun slut
- Join Date
- May 2018
- Location
- Oxford, North Canterbury
- Posts
- 8,571
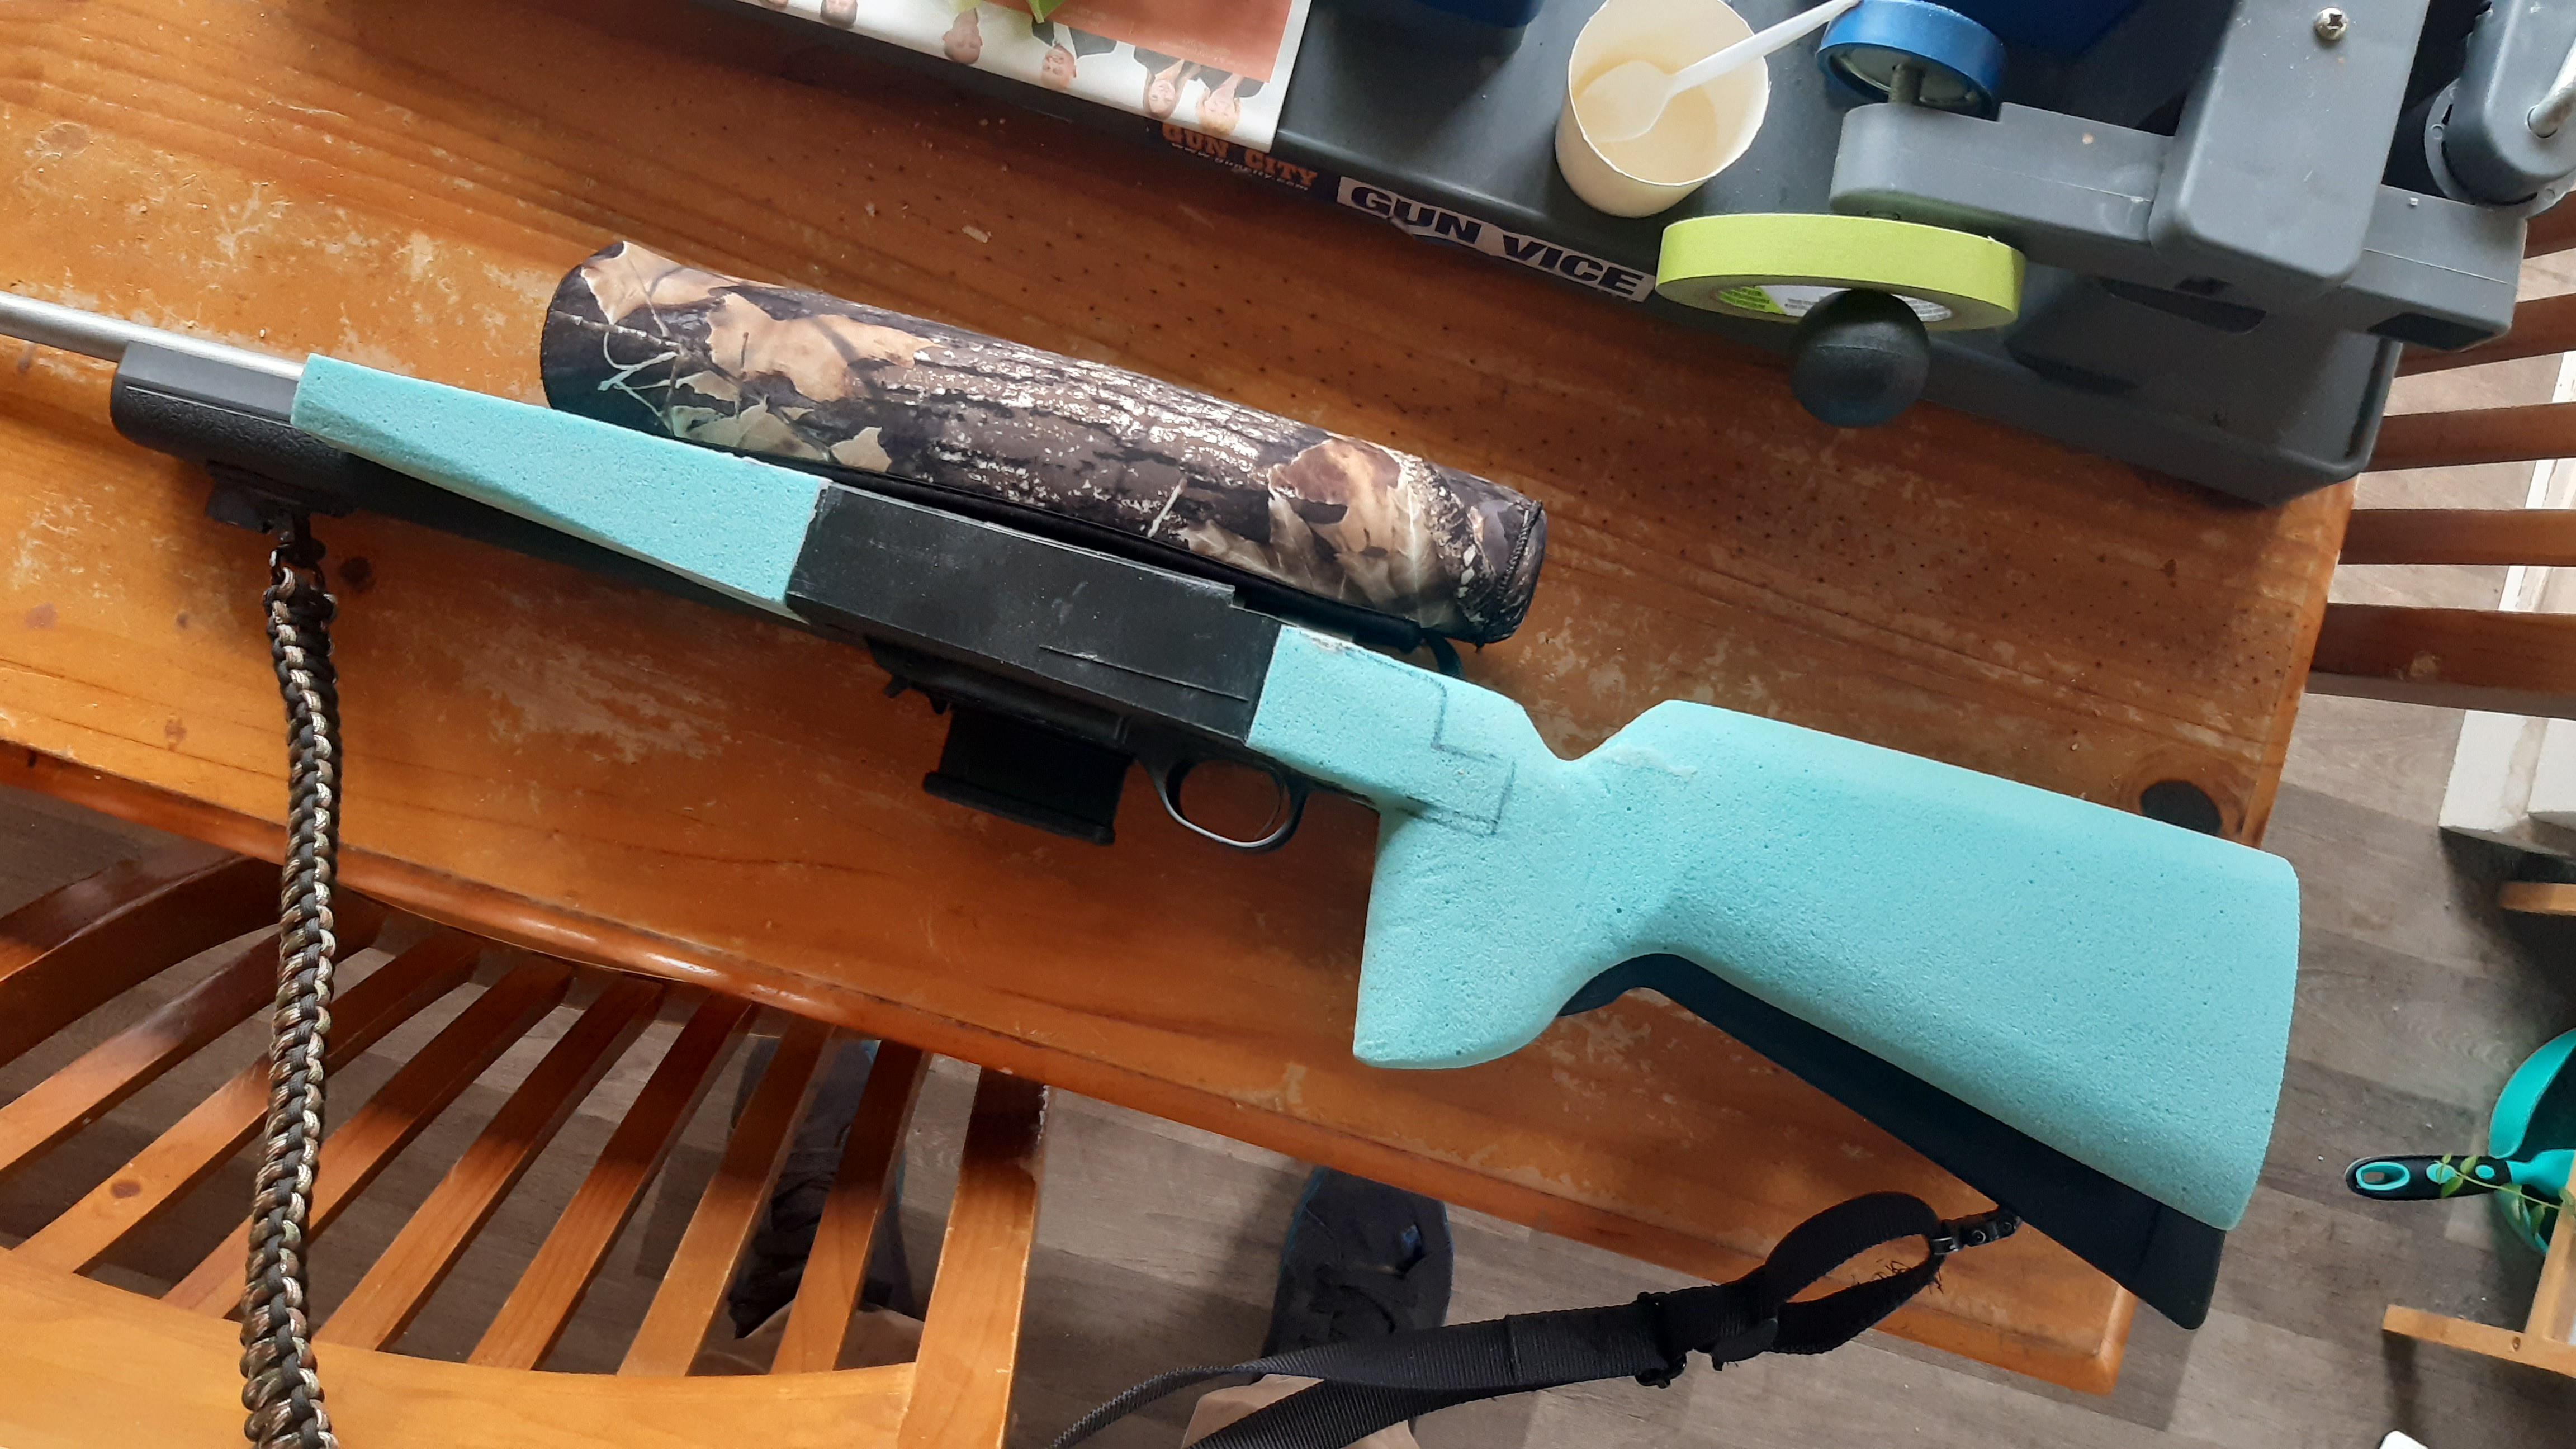
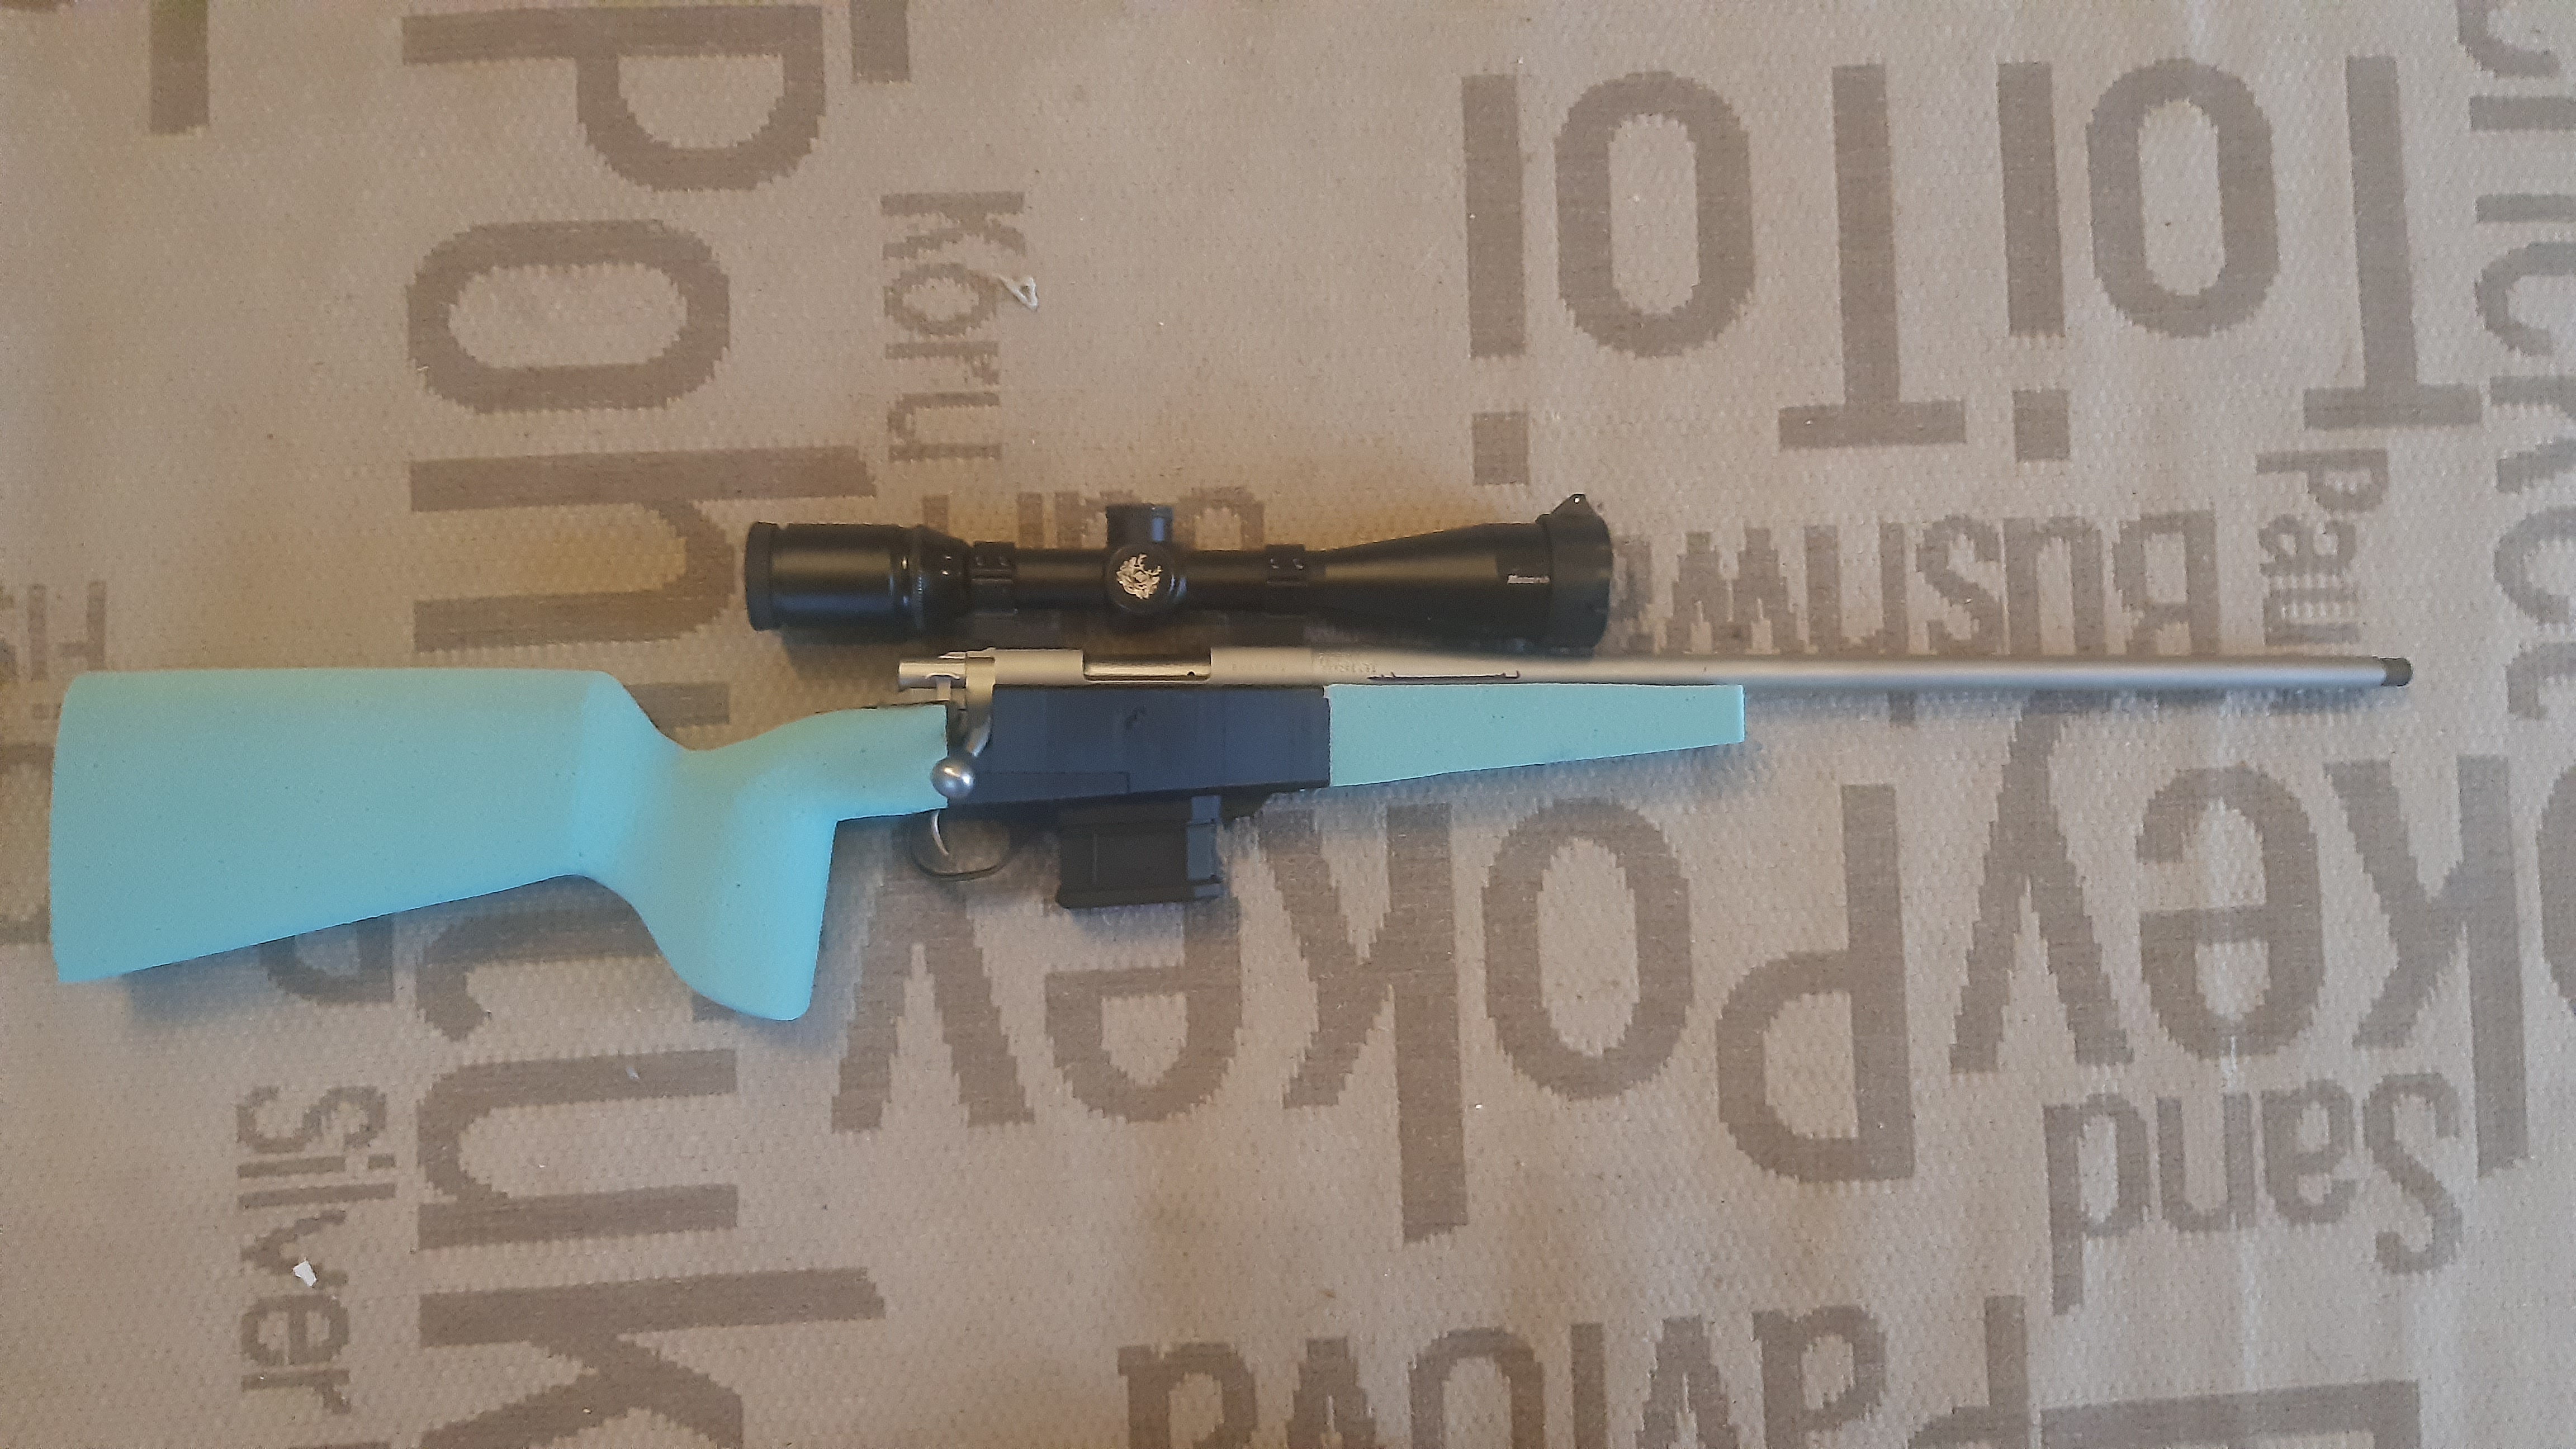
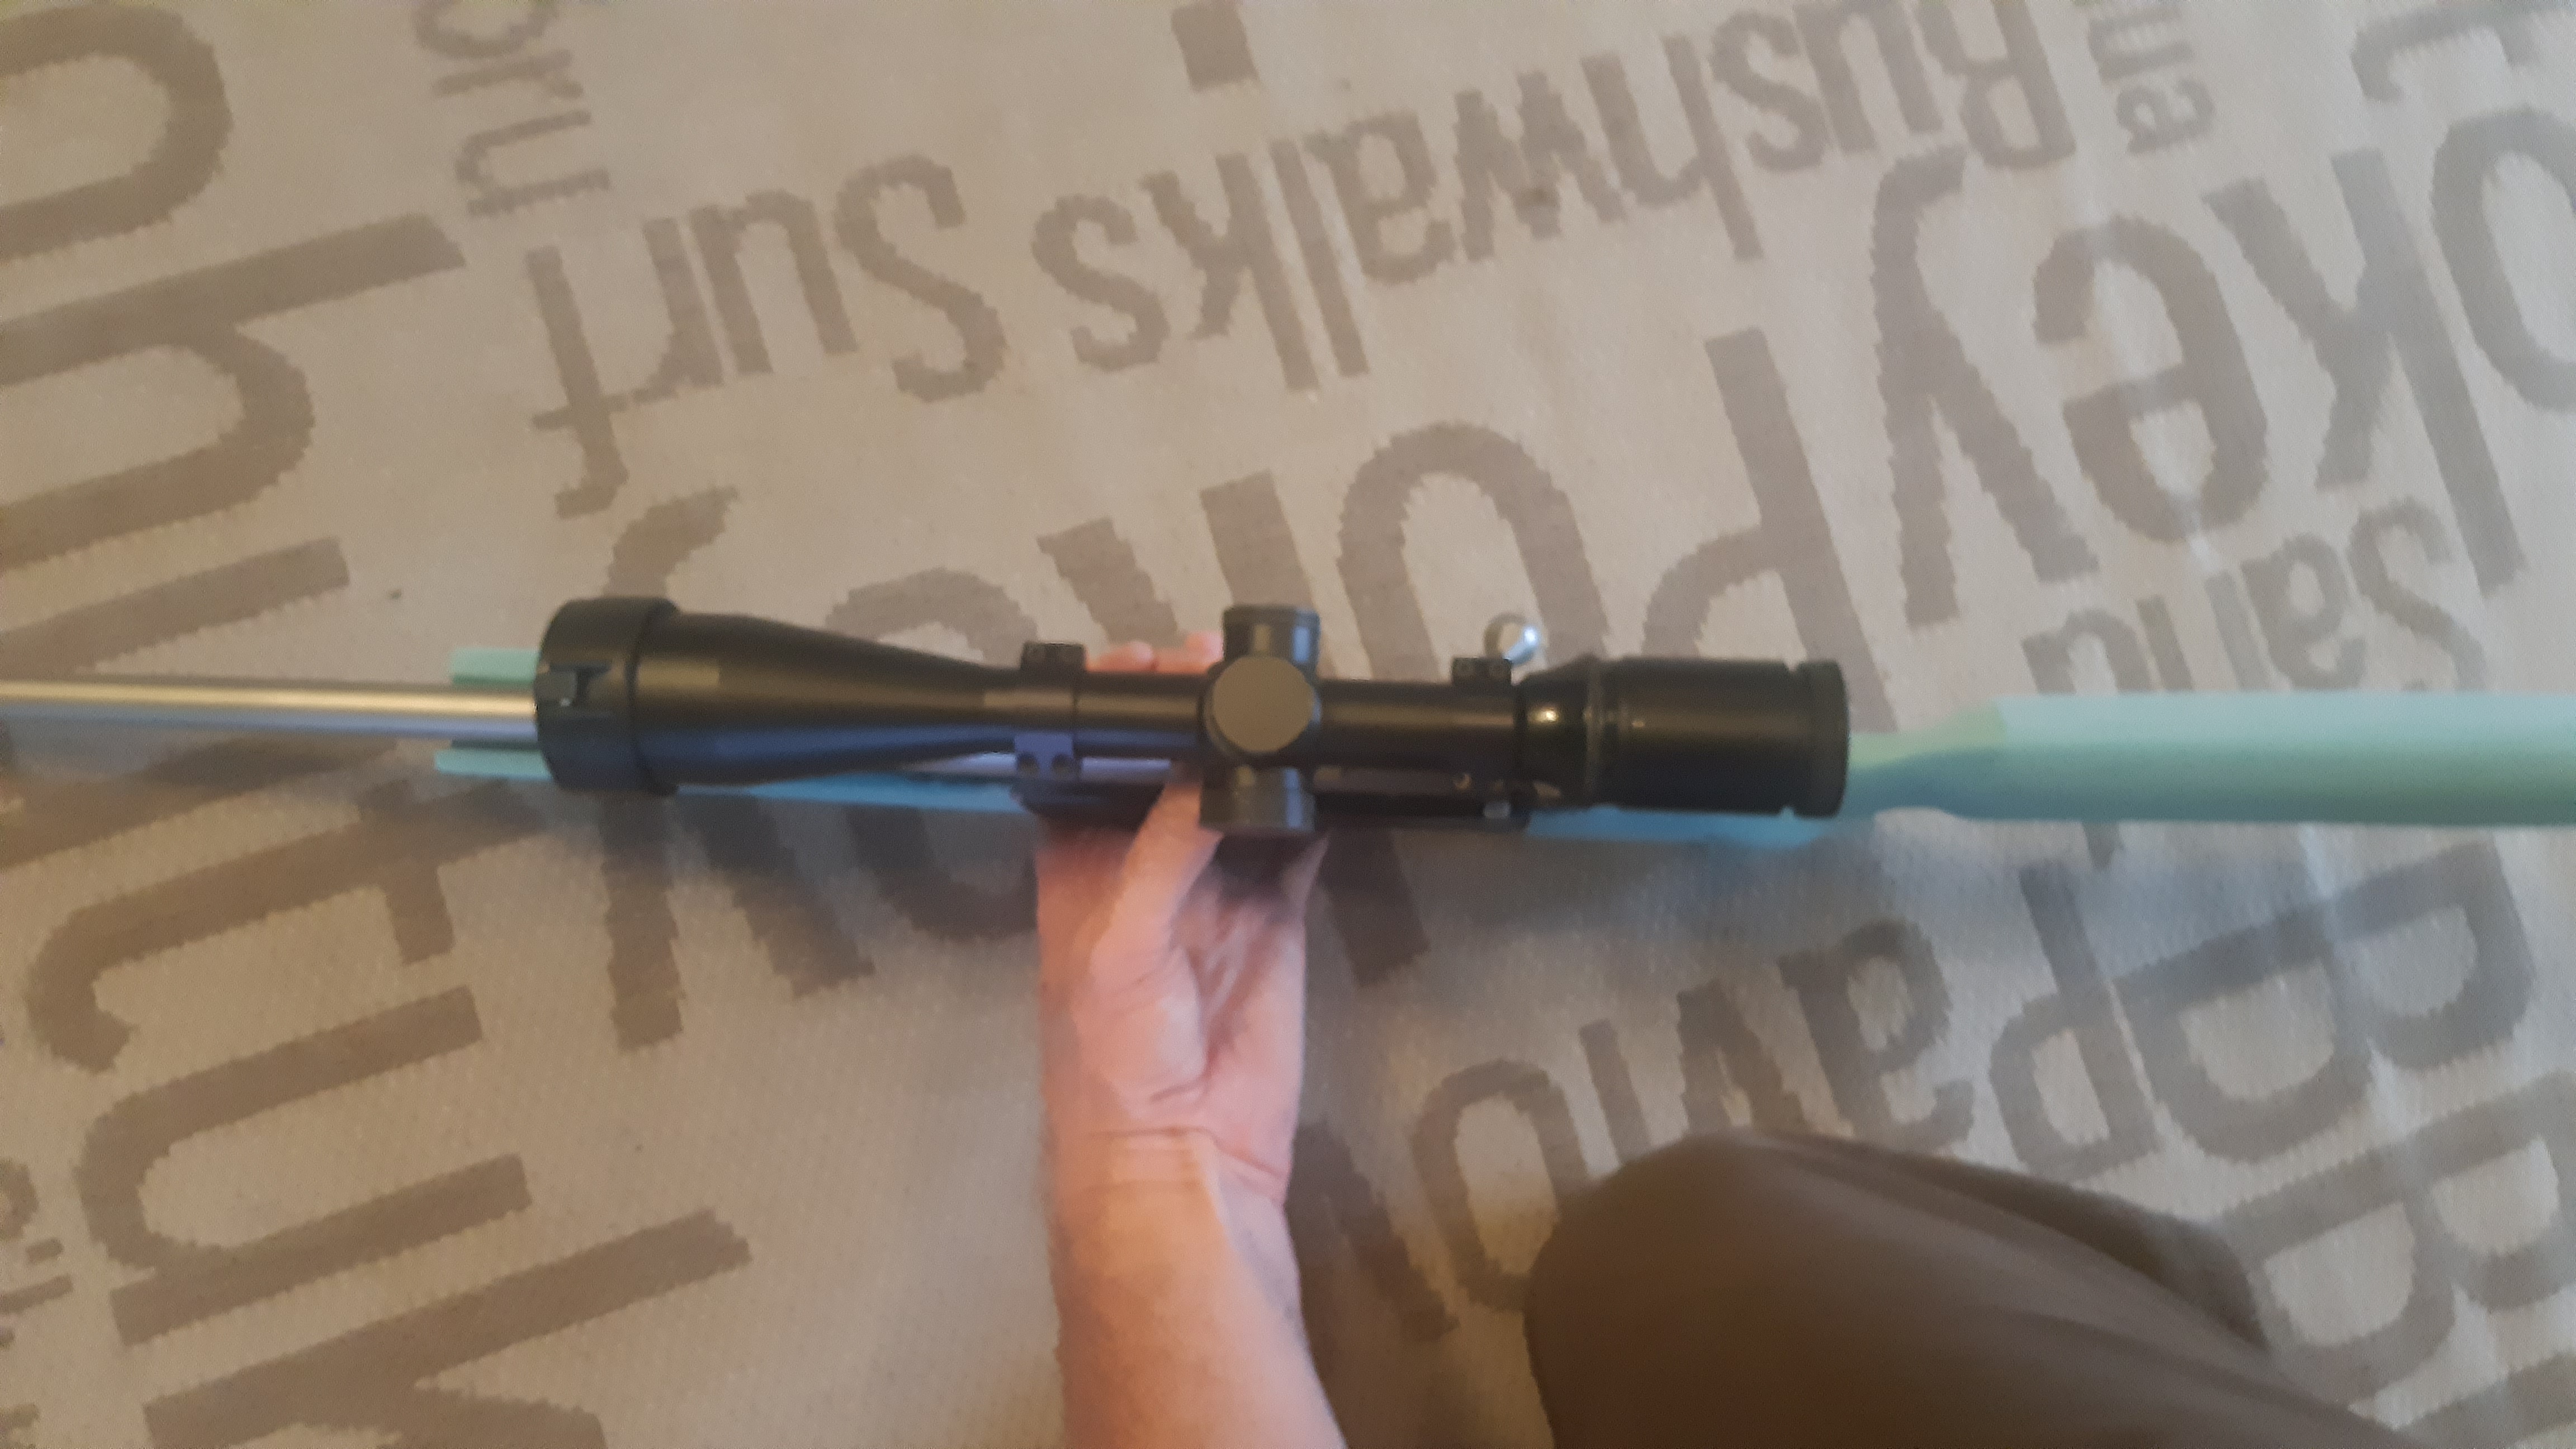
More progress today.
I spent some more time shaping the comb, the wrist and palm swell/pistolgrip areas.
I also did the barrel channel, I'm finally happy with everything from the action back it's a really good fit for me and eye sits perfect for scope relief.
I need to build up a little bit on one side of the fore before I do any shaping in the fore which I'll do with lightweight auto filler.
Then once I'm completely happy I'll seal all the foam with a thin coat of lightweight filler then it's glassing/carbon time.
Really happy with how it's all coming together and other than the bandsaw it's all been done with a rasp and sand paper.
Last edited by dannyb; 02-09-2022 at 08:13 PM.
#DANNYCENT
-
02-09-2022, 07:58 PM #8Member
- Join Date
- Mar 2018
- Location
- Turangi
- Posts
- 1,366
Kinda why I thought it would be a dumb question. But it's making me think moderately expensive and time consuming thoughts so I don't see harm in asking!
dannyb likes this.
-
02-09-2022, 08:00 PM #9Unapologetic gun slut
- Join Date
- May 2018
- Location
- Oxford, North Canterbury
- Posts
- 8,571
-
02-09-2022, 08:19 PM #10Member

- Join Date
- Apr 2015
- Location
- Geraldine
- Posts
- 22,767
so why did you make the forend so short????
being so light,I would have thought you would have made it right out to the suppressor...75/15/10 black powder matters
-
02-09-2022, 08:22 PM #11Member
- Join Date
- Apr 2015
- Location
- Geraldine
- Posts
- 22,767
also...consider poking two bits of tube through butt section so you can attach the rear of sling on the side rather than the bottom like normal.
it make the rifle sit flatter if across back which avoids the jutty out bits digging in the back etc...Preacher likes this.75/15/10 black powder matters
-
02-09-2022, 08:23 PM #12Unapologetic gun slut
- Join Date
- May 2018
- Location
- Oxford, North Canterbury
- Posts
- 8,571
A couple reasons, it's unnecessarily long on the mini stock and I cocked it up a bit and that was as long as I could keep it when I trued it up. Originally Posted by Micky Duck
I like it short, I could lengthen it easily by glueing a bit of foam on but I don't think it will be necessary.Micky Duck likes this.#DANNYCENT
-
02-09-2022, 09:36 PM #13Member
- Join Date
- Mar 2018
- Location
- Turangi
- Posts
- 1,366
-
03-09-2022, 12:20 AM #14Unapologetic gun slut
- Join Date
- May 2018
- Location
- Oxford, North Canterbury
- Posts
- 8,571
Having a few teething issues with the inlet core
 at first I couldn't close the bolt as the handle fouled on the inlet....easy I'll dremel the bit its fouling on......should've clicked the action screws were out by about 2mm and the tang wasn't fitting flush at the back of the inlet by 2mm....bingo the shelf the recoil lug beds against is 2mm too far forward.
Will have a yarn to a mate of mine to see if he can mill it back a couple mm cause I think trying to dremel it will end up a mess.
Will talk to Aiden at VTP and let him know as the core is still a prototype hopefully I can mod mine to work otherwise it'll be start from scratch again..... Micky Duck likes this.#DANNYCENT
-
03-09-2022, 12:53 PM #15Unapologetic gun slut
- Join Date
- May 2018
- Location
- Oxford, North Canterbury
- Posts
- 8,571
@Preacher, hold off ordering the action inlet, I have judt spent the morning dremelling clearance for various parts of the inlet as it was binding and sitting high (the tang was way too high), also the pillers and action lug aren't quite right, I could with a few more hours get it right ish but that eould also add a lot more finishing to mske it tidy on top of a ull glass bedding (was likely gonna bed it anyway). But yeah the idea of the printed inlet was that I wouldn't have to spend hours geting everything to line up and basically inlet it myself. Originally Posted by Preacher
I will talk to Aiden on Monday and see if we can get another prototype sorted. It's a little frustrating butvat the same time I've learnt heaps about shaping and design so not a complete wasted effort. I've only wasted a bit of time and some foam at this stage which is cheap as chips but it seems futile to throw any more time and resources at this version.
I will definitely be able to smash out mk2 much quicker once the inlet core prototype is sorted.Micky Duck and Preacher like this.#DANNYCENT


 Reply With Quote
Similar Threads
-
Tikka M55 action build
By Andrew46826 in forum Firearms, Optics and AccessoriesReplies: 14Last Post: 20-04-2020, 09:01 AM -
I'm trying not to but - 280 AI build action
By Tentman in forum Firearms, Optics and AccessoriesReplies: 9Last Post: 09-04-2017, 09:08 AM -
Looking for an action for a build
By silentscope in forum Firearms, Optics and AccessoriesReplies: 32Last Post: 12-04-2016, 12:19 AM
Tags for this Thread
- action,
- advice,
- barrel,
- body,
- build,
- carbon,
- christchurch,
- freezer,
- glass,
- grip,
- howa,
- howa mini,
- lightweight,
- meat,
- mini,
- mini action,
- model 7,
- part,
- pistol,
- pistol grip,
- stock,
- supplies,
- tac,
- techniques,
- wanted
 Posting Permissions
- You may not post new threads
- You may not post replies
- You may not post attachments
- You may not edit your posts
Welcome to NZ Hunting and Shooting Forums! We see you're new here, or arn't logged in. Create an account, and Login for full access including our FREE BUY and SELL section Register NOW!!
All times are GMT +13. The time now is 11:46 AM.

Bookmarks