

 47Likes
 LinkBack URL
 About LinkBacks
Remington 788 adjustable trigger mod.
For those of you with 788s and a few tools here is a great mod to make a sweet adjustable trigger out of your factor unit.
Timney is the only trigger maker building a replacement trigger for the Rem 788 but they are not that easy to find any more and personally I don’t think they are that much better than the OEM one.
I'm posting what info I have on "fixing" the factory trigger. I did one according to the info below.
A few simple modifications to the basic 788 trigger assembly will convert it into a reliable, safe, functional assembly that will adjust to approximately 10-12 ounces, provide safe sear engagement, and the safety will work – which makes it suitable for precision varminting or target work such where a safety catch is still required.
First, remove the trigger from the rifle by relaxing the locking screw and driving out the retainer pin. Completely strip the trigger of all levers, pins, springs, etc. To function consistently there must be no binding of any of the parts, and friction should be reduced to a minimum. If necessary, lap the pins and levers with lapping compound (clean thoroughly after lapping), remove all mill marks from the levers, and completely de-burr the casting. With these chores out of the way we’re now ready to make the necessary modifications for a lighter, more consistent pull and let-off.
Iin the standard 788 trigger a single spring serves for both sear engagement tension and trigger pull tension. Although inexpensive to manufacture, and suitable for hunting, the disadvantage is that fairly heavy tension must be applied to the sear to assure striker engagement while trigger tension must be light if a light pull is to be obtained. Except for the considerable differences stemming from leverage, the single spring exerts equal pressure; there is no safe means of adjustment, for shortening the spring to reduce trigger tension would also reduce necessary sear tension.
In essence, the modification consists of separating sear tension and trigger tension by the addition of a second spring, plus adding a sear engagement adjustment. In the modified version the sear spring drives only the sear; the shortened spring now seats on the shank of the sear engagement adjustment screw rather than on the trigger lever. Trigger lever tension is now applied by the new spring, which bears against the front of the trigger lever. The strength of the spring and amount of tension applied by the screw control trigger pull once the sear engagement has been set.
Using the suggested dimensions from the drawing, locate, drill and tap the casting for the sear engagement and trigger pressure screws. The use of expensive equipment to modify the screws isn’t necessary. Simply chuck the screws in a ¼-inch drill and file the ends to the proper size. Selecting the trigger pressure spring will be the toughest chore. Choose a very light spring at a spring supplier or gunsmith and file the 6-32 screw to fit the spring. Then carefully epoxy the spring to the screw; if necessary to substitute the spring, application of heat (about 300 degrees) will break the epoxy bond.
The sear spring must be shortened to compensate for the new spring seat. If you have a vernier or depth micrometer, measure the distance to the original seat and shorten the spring accordingly for the new one. It’s very important to stone and polish the sear surfaces without rounding the corners. All polish and stone marks must run from breech to muzzle. Any cross marks will affect the action of the trigger.
Reassemble the trigger and lightly lube the pin fulcrums. Then install it on your rifle. Insert the bolt in the action and cock the rifle; push the safety to the “on” position and we’re ready to adjust our work of art. Screw in the sear engagement adjustment screw until the trigger lever touches the safety button. Stop. This is the minimum sear engagement attainable to assure operation of the safety. Next you’ll want to move the safety to the “off” position and adjust the trigger spring for the lightest possible let-off that will assure safe operation. Depending upon the spring you selected, the trigger should let-off in the 10 to 12-ounce range.
This simple trigger modification gives a lot of satisfaction and a large sense of accomplishment. It’s safe, reliable, and it works.
Welcome guest, is this your first visit? Create Account now to join.
Welcome to the NZ Hunting and Shooting Forums.
Search Forums


User Tag List
+ Reply to Thread
Results 16 to 23 of 23
Thread: .30BR Rem 788 Chassis build
-
17-04-2020, 10:25 AM #16Member


- Join Date
- Aug 2018
- Location
- Waikato
- Posts
- 2,053
-
-
17-04-2020, 02:13 PM #17Member
- Join Date
- Aug 2018
- Location
- Waikato
- Posts
- 2,053
Next mission was to address the over all length of the bedding block. I knew when I started it was going to be too short but rather than waist a nice bit of billet (and machine time) I planned to extend it with a second block of alloy.

The second block was squared off and mated to the front of the chassis with some pretty serious aluminium epoxy adhesive and a couple of cap 4mm screws to hold it in place. The epoxy I used was some we used in the aircraft industry and it is crazy strong stuff. Once cured it can actually be machined as one block even without my use of extra cap screws, it dries as hard as the alloy itself.
I counter bored the cap screws quite deep as this section will be machined out to house the recoil lug.
The mating surfaces got a good scuffing to provide the epoxy with a good key to bond to.


Once cured and milled square the join virtually vanished and will be 100% hidden once duracoted.

From this stage it was time to machine the recoil lug and start trimming some fat and adding some shape.

 Tommy likes this.
-
17-04-2020, 02:26 PM #18Member
- Join Date
- Aug 2018
- Location
- Waikato
- Posts
- 2,053
More machining of final shape


-
17-04-2020, 02:26 PM #19Member
- Join Date
- Aug 2018
- Location
- Waikato
- Posts
- 2,053
Fitting pistol grip, trigger guard and bottom metal


Last edited by Wingman; 17-04-2020 at 02:35 PM. Reason: added pics
-
17-04-2020, 02:47 PM #20Member


- Join Date
- Dec 2014
- Location
- NZISTAN
- Posts
- 5,291
I wounder if 3D printing a model and then sand casting would be a go?
-
17-04-2020, 05:04 PM #21Member
- Join Date
- Aug 2018
- Location
- Waikato
- Posts
- 2,053
So all up the chassis block weighs 440 grams.. not a lot.

I pre-assembled it to see how it all looks and feels and it didn’t disappoint.
Figured it would make a cool little brief case take down too


The owner wanted a matte battle ship grey and matte black contrast Duracoat finish so I mixed a custom colour from matte black and urban mirage white until he was happy with the shade.
The parts were prepped, degreased, sprayed and baked before final assembly.


-
17-04-2020, 05:33 PM #22Member
- Join Date
- Aug 2018
- Location
- Waikato
- Posts
- 2,053
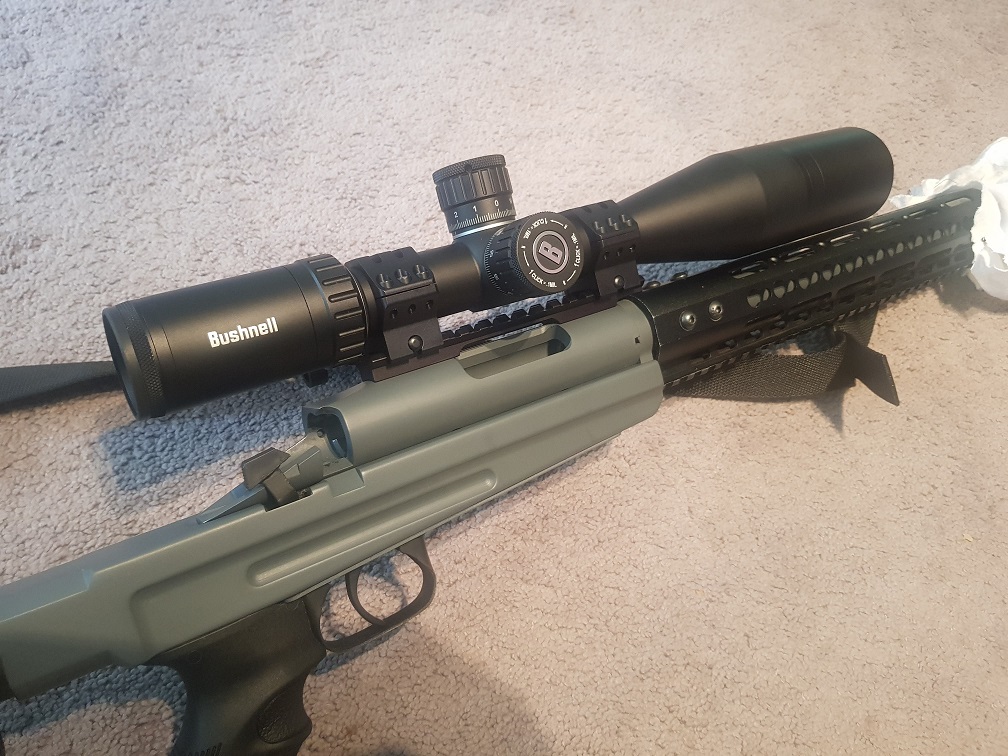
All that was left to do was scope it and develop a load for it.
The owner dropped off a new Bushnell Forge FFP scope for it which I fitted up and got to the loading bench.

I necked up 50 new Lapua 6BR cases and neck turned them.
I have a few old tried and true loads for my previous rifles but wanted to try some new powders too.


BM 8208 showed promise with the 125gr TMK but didnt quite match my old loads, it topped out in velocity at just over 2800.

After a bit of chrono work and fine tuning of my old tried and true AR2207 load it was off to the 100m range for 5 rounds on paper.


Another .30BR that failed to disappointing in the accuracy department!
-
17-04-2020, 06:18 PM #23Member
- Join Date
- Jul 2017
- Location
- Auckland
- Posts
- 165
After a while of waiting for a scope rail to come from USA, Couldn't find it locally, so had to deal with the permit issues/Getting lost in customs for about 4 months, My new scope rail arrived. It fitted perfectly, and looked a lot nicer being a once piece unit.
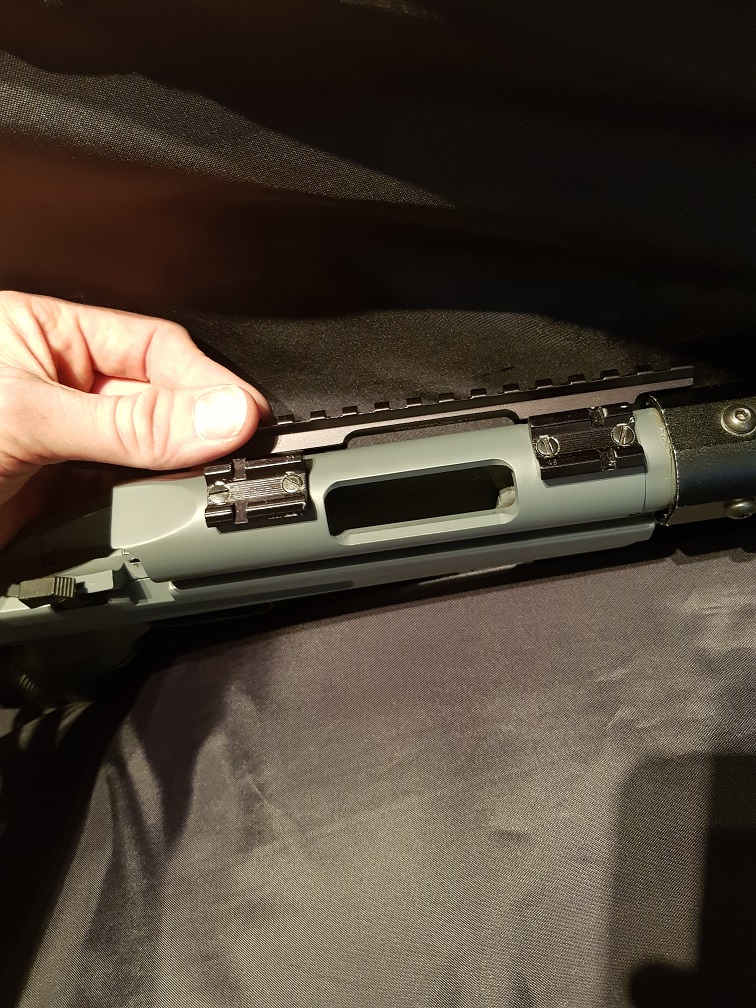
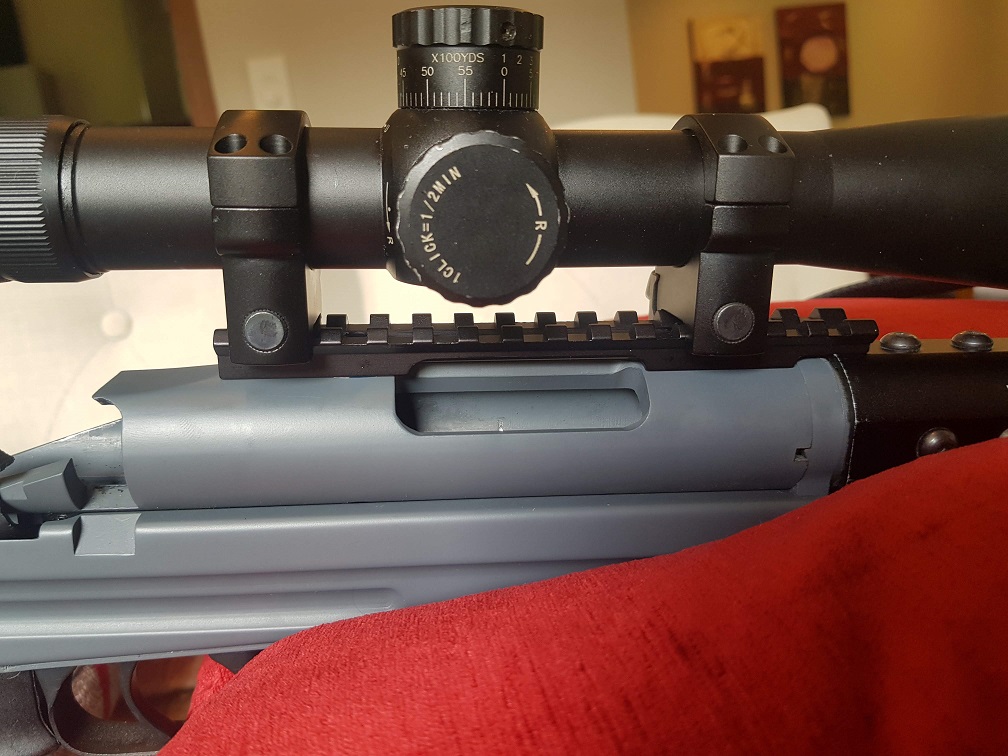
Benefit of the new rings and rail, It now sits super low removing the need for a cheek riser to get into a comfortable shooting position.


 Reply With Quote
Similar Threads
-
Carbon / Aluminium Chassis Build
By SixtyTen in forum Projects and Home BuildsReplies: 15Last Post: 15-04-2020, 03:18 PM -
Remington 700 Bullpup chassis build
By Wingman in forum Projects and Home BuildsReplies: 32Last Post: 18-12-2018, 05:01 PM
Tags for this Thread
- 243win,
- action,
- ballistics,
- bolt handle,
- build,
- bullet,
- calibre,
- case,
- chassis,
- competition,
- deer,
- desert tech,
- drive,
- edge,
- hunting,
- lightweight,
- lock,
- powder,
- pressure,
- projectiles,
- rem,
- remington,
- remington model 7,
- rifle,
- rifles,
- round,
- shoot,
- stock,
- trigger guard,
- versa,
- walnut.,
- whisper
 Posting Permissions
- You may not post new threads
- You may not post replies
- You may not post attachments
- You may not edit your posts
Welcome to NZ Hunting and Shooting Forums! We see you're new here, or arn't logged in. Create an account, and Login for full access including our FREE BUY and SELL section Register NOW!!
All times are GMT +13. The time now is 01:54 PM.

Bookmarks