
 41Likes
 LinkBack URL
 About LinkBacks
Sharpening a D2 knife blade: some photos, observations, and opinions
I ended up with a couple of small chips out of the edge of my re-handled Spyderco Junction after my post-lockdown trip. The PSF27 in that knife is a variant of D2 tool steel. The edge was snagging a little on paper although I couldnt by eye see the reason for this. I have a cheapie fixed magnification 100x microscope however - courtesy of AliExpress for $10 - that despite the price was sufficient to quickly identify the cause.
Having decided to take these chips out as part of a re-sharpen, I thought Id also take a few photographs of the surface of the edge as I went along, linking them to the size of the abrasive being used, and then post them here for forum members who are interested in this sort of thing. The abrasives were all diamond water stones from Venev that I reviewed here a few months back.
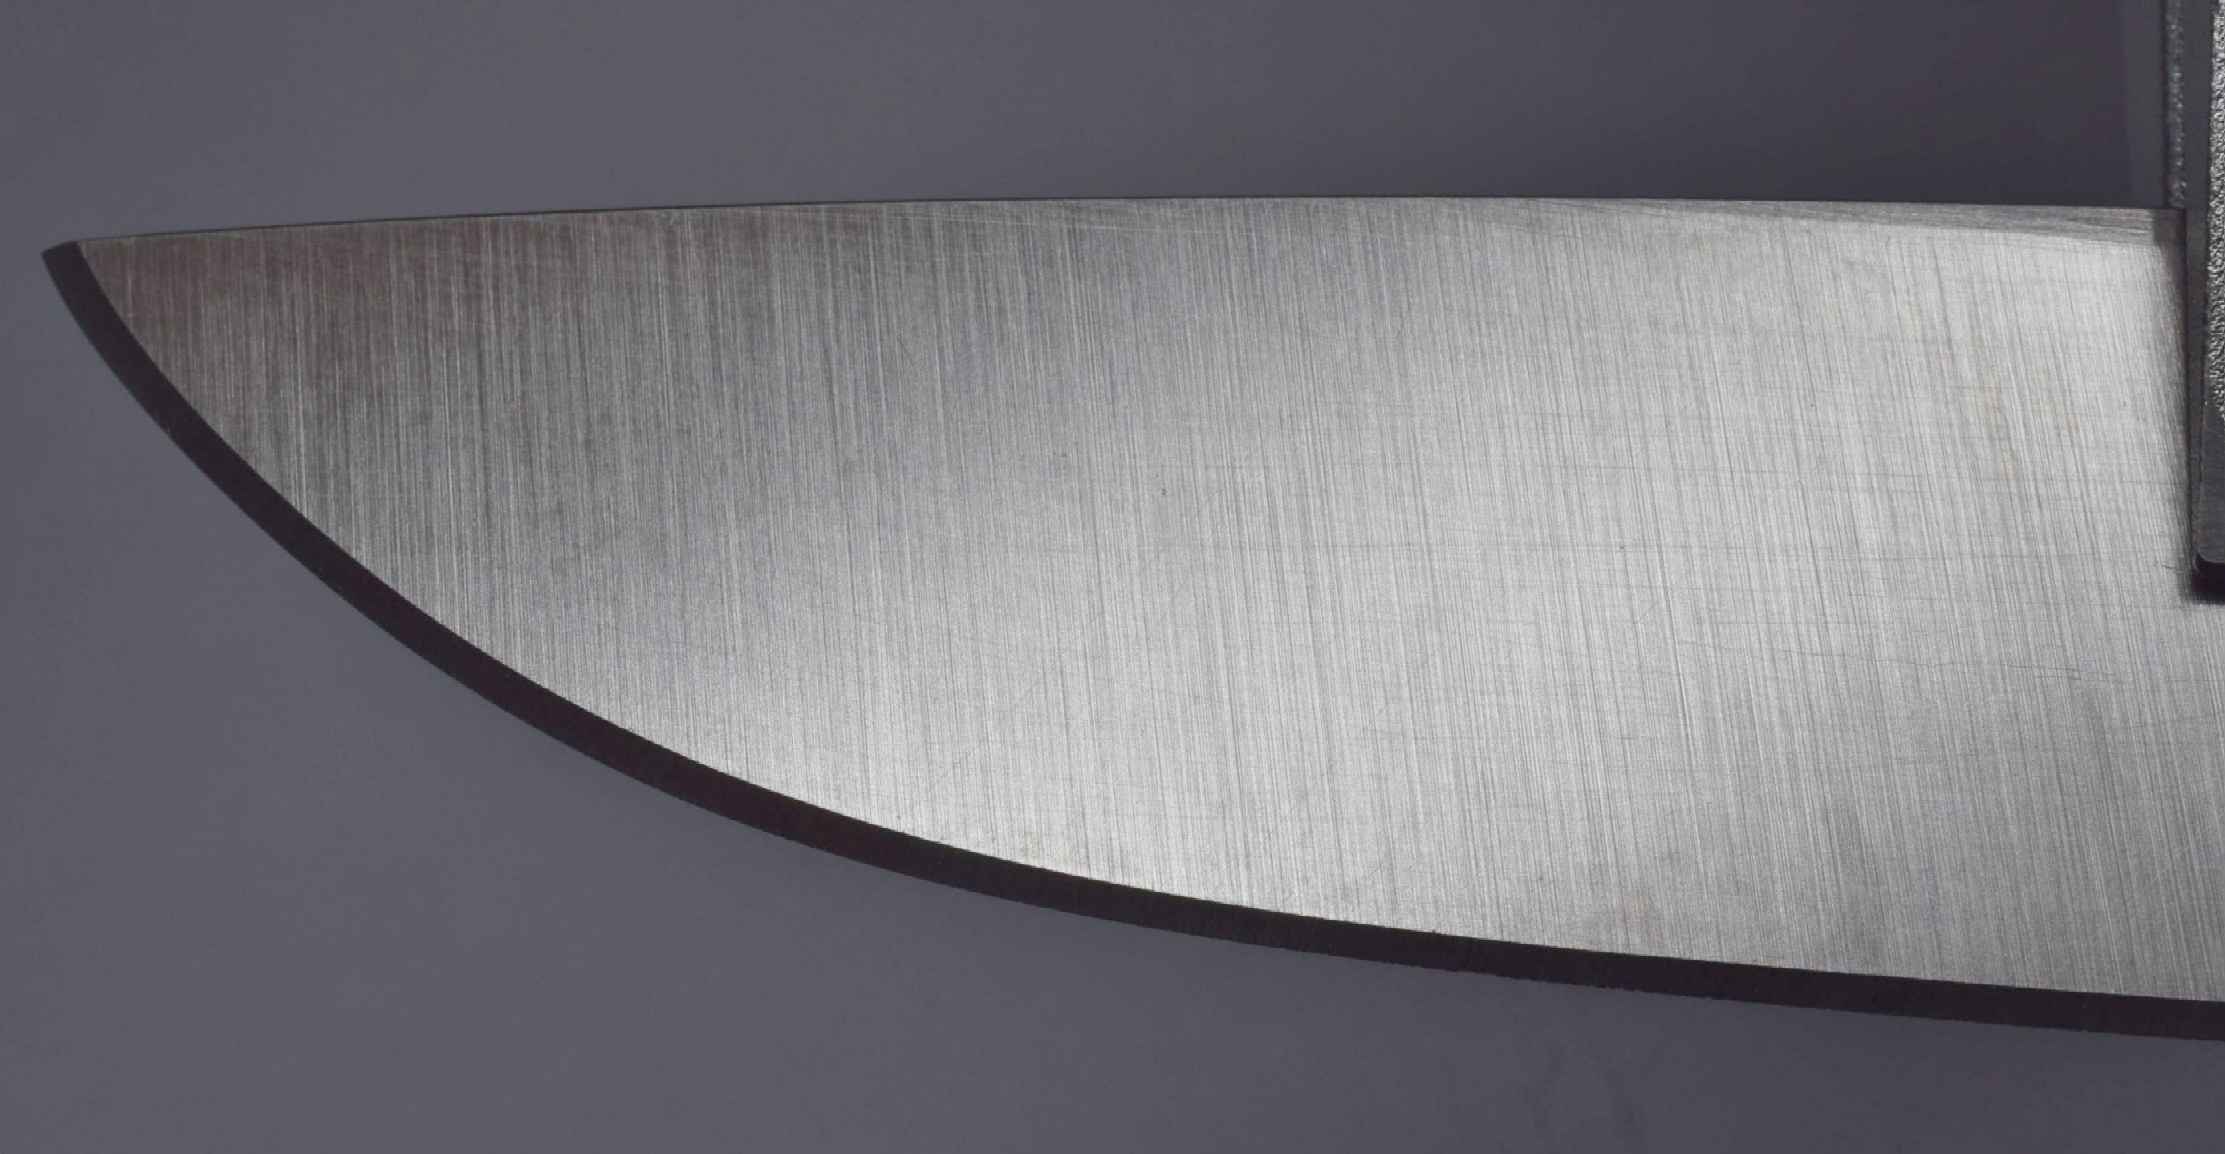
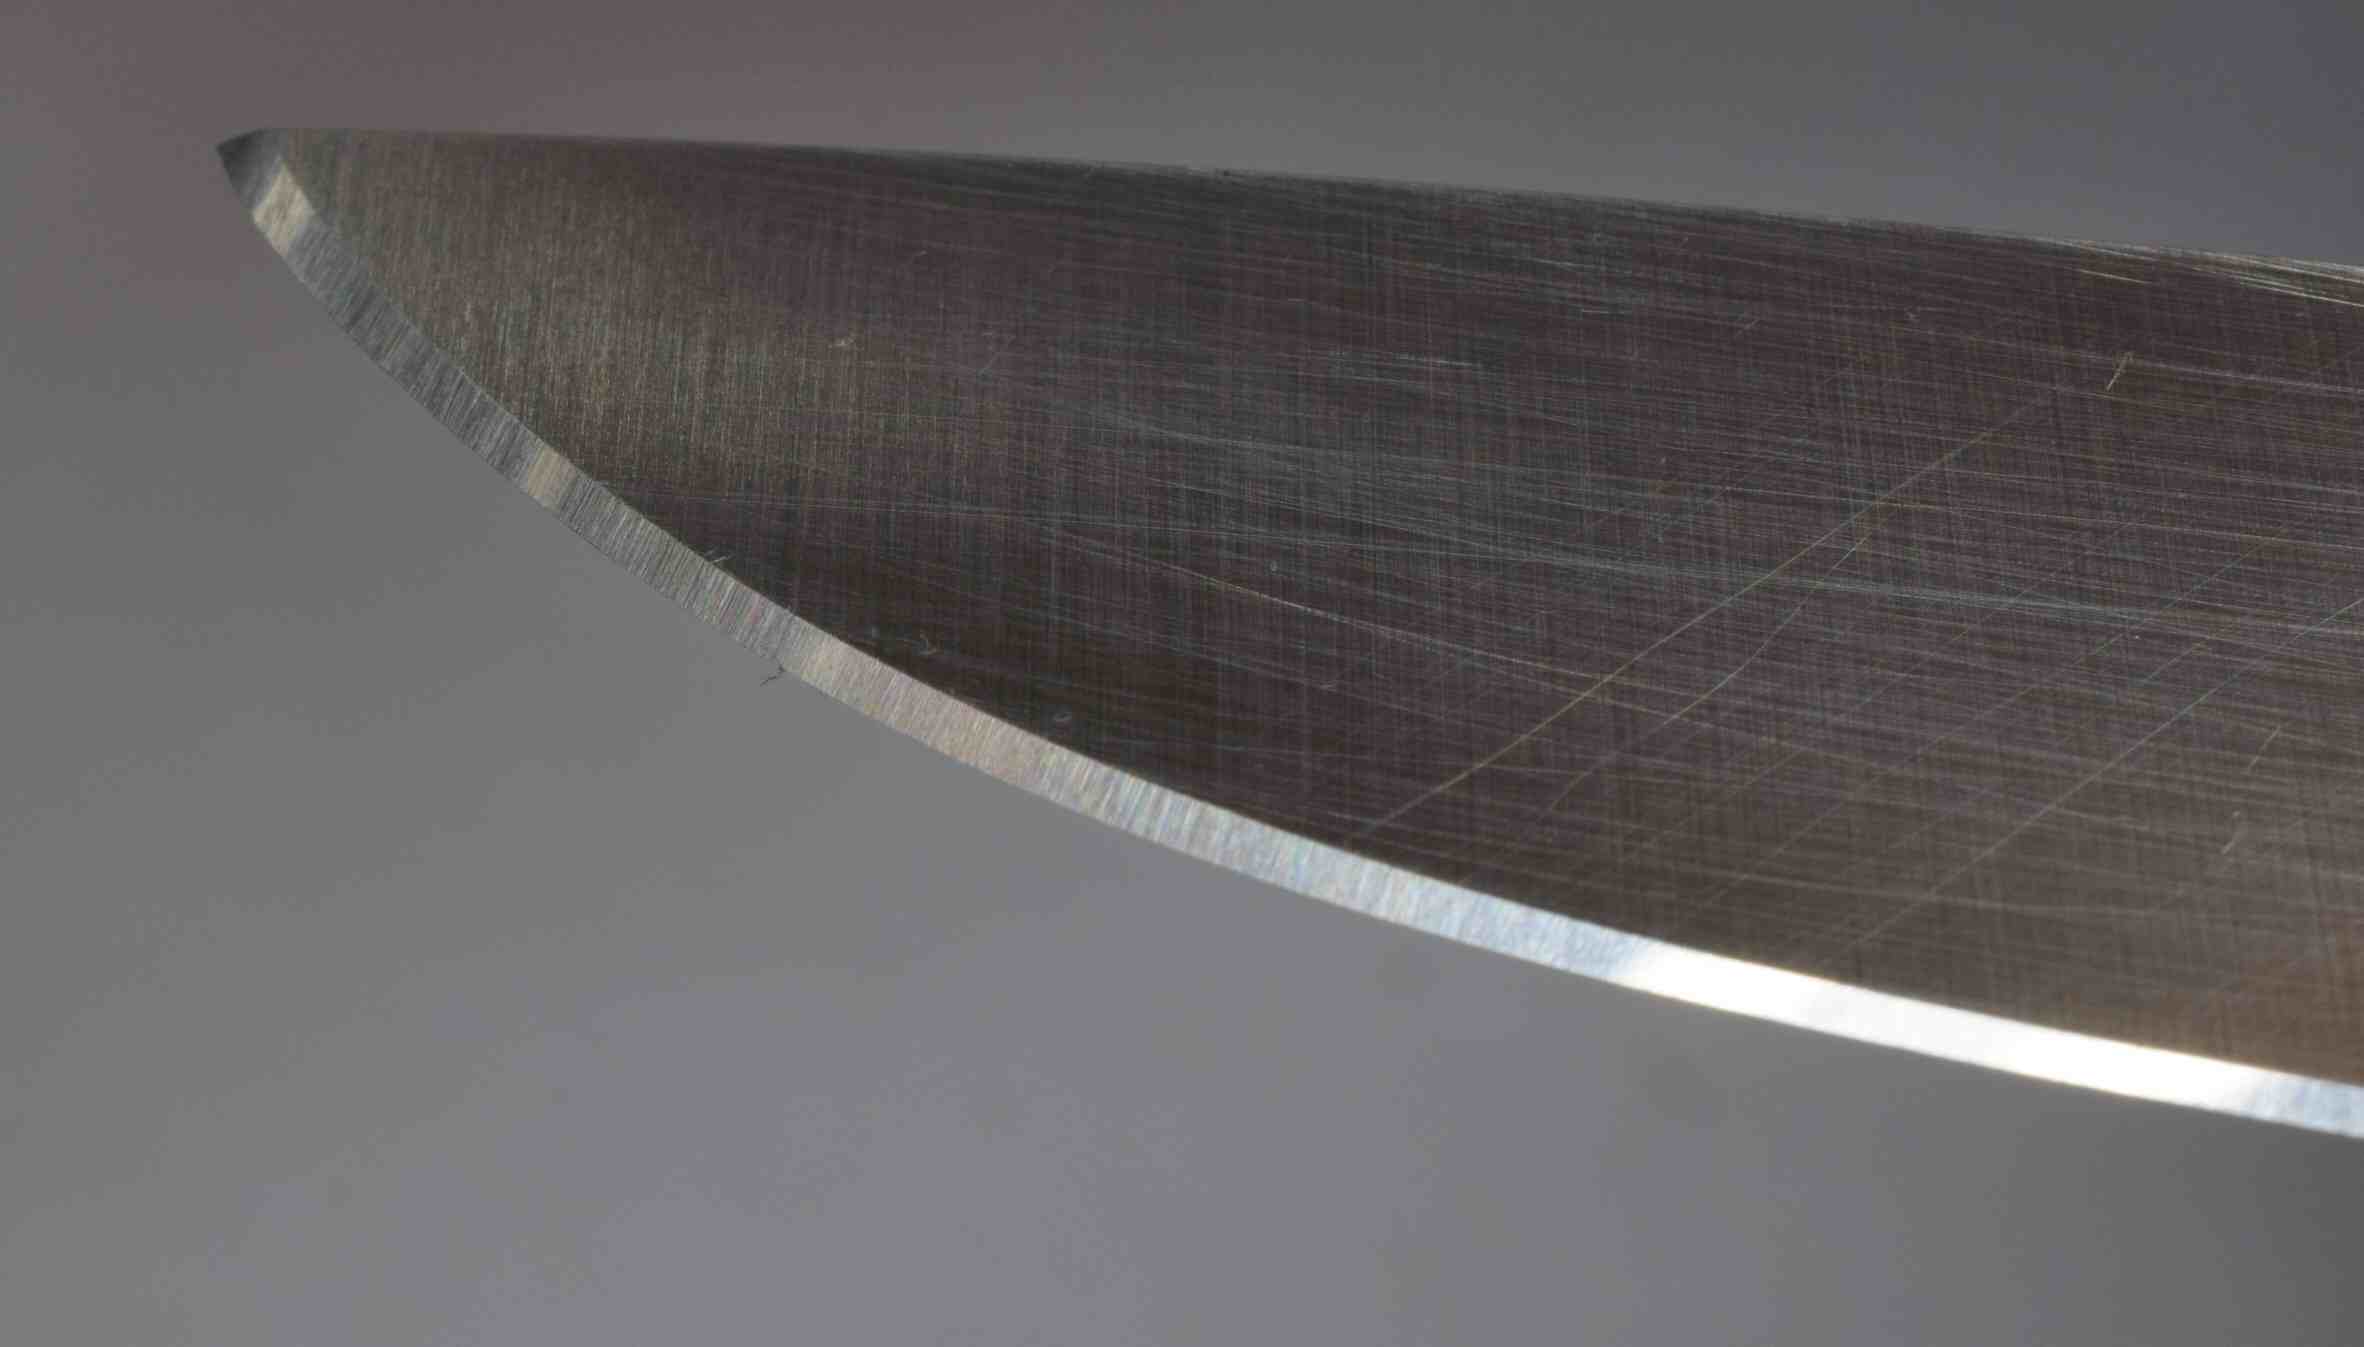
For starters, this is the front end of the blade being sharpened. The blade is a full flat grind, about 0.55mm behind the edge, and overall 25mm deep. I apply a 15° edge, so the bevel according to my calculations should average a little over 1mm in width. These dimensions will give a sense of scale to some of the photos. The close-up images of the scratch patterns show about 0.7mm of the bevel.
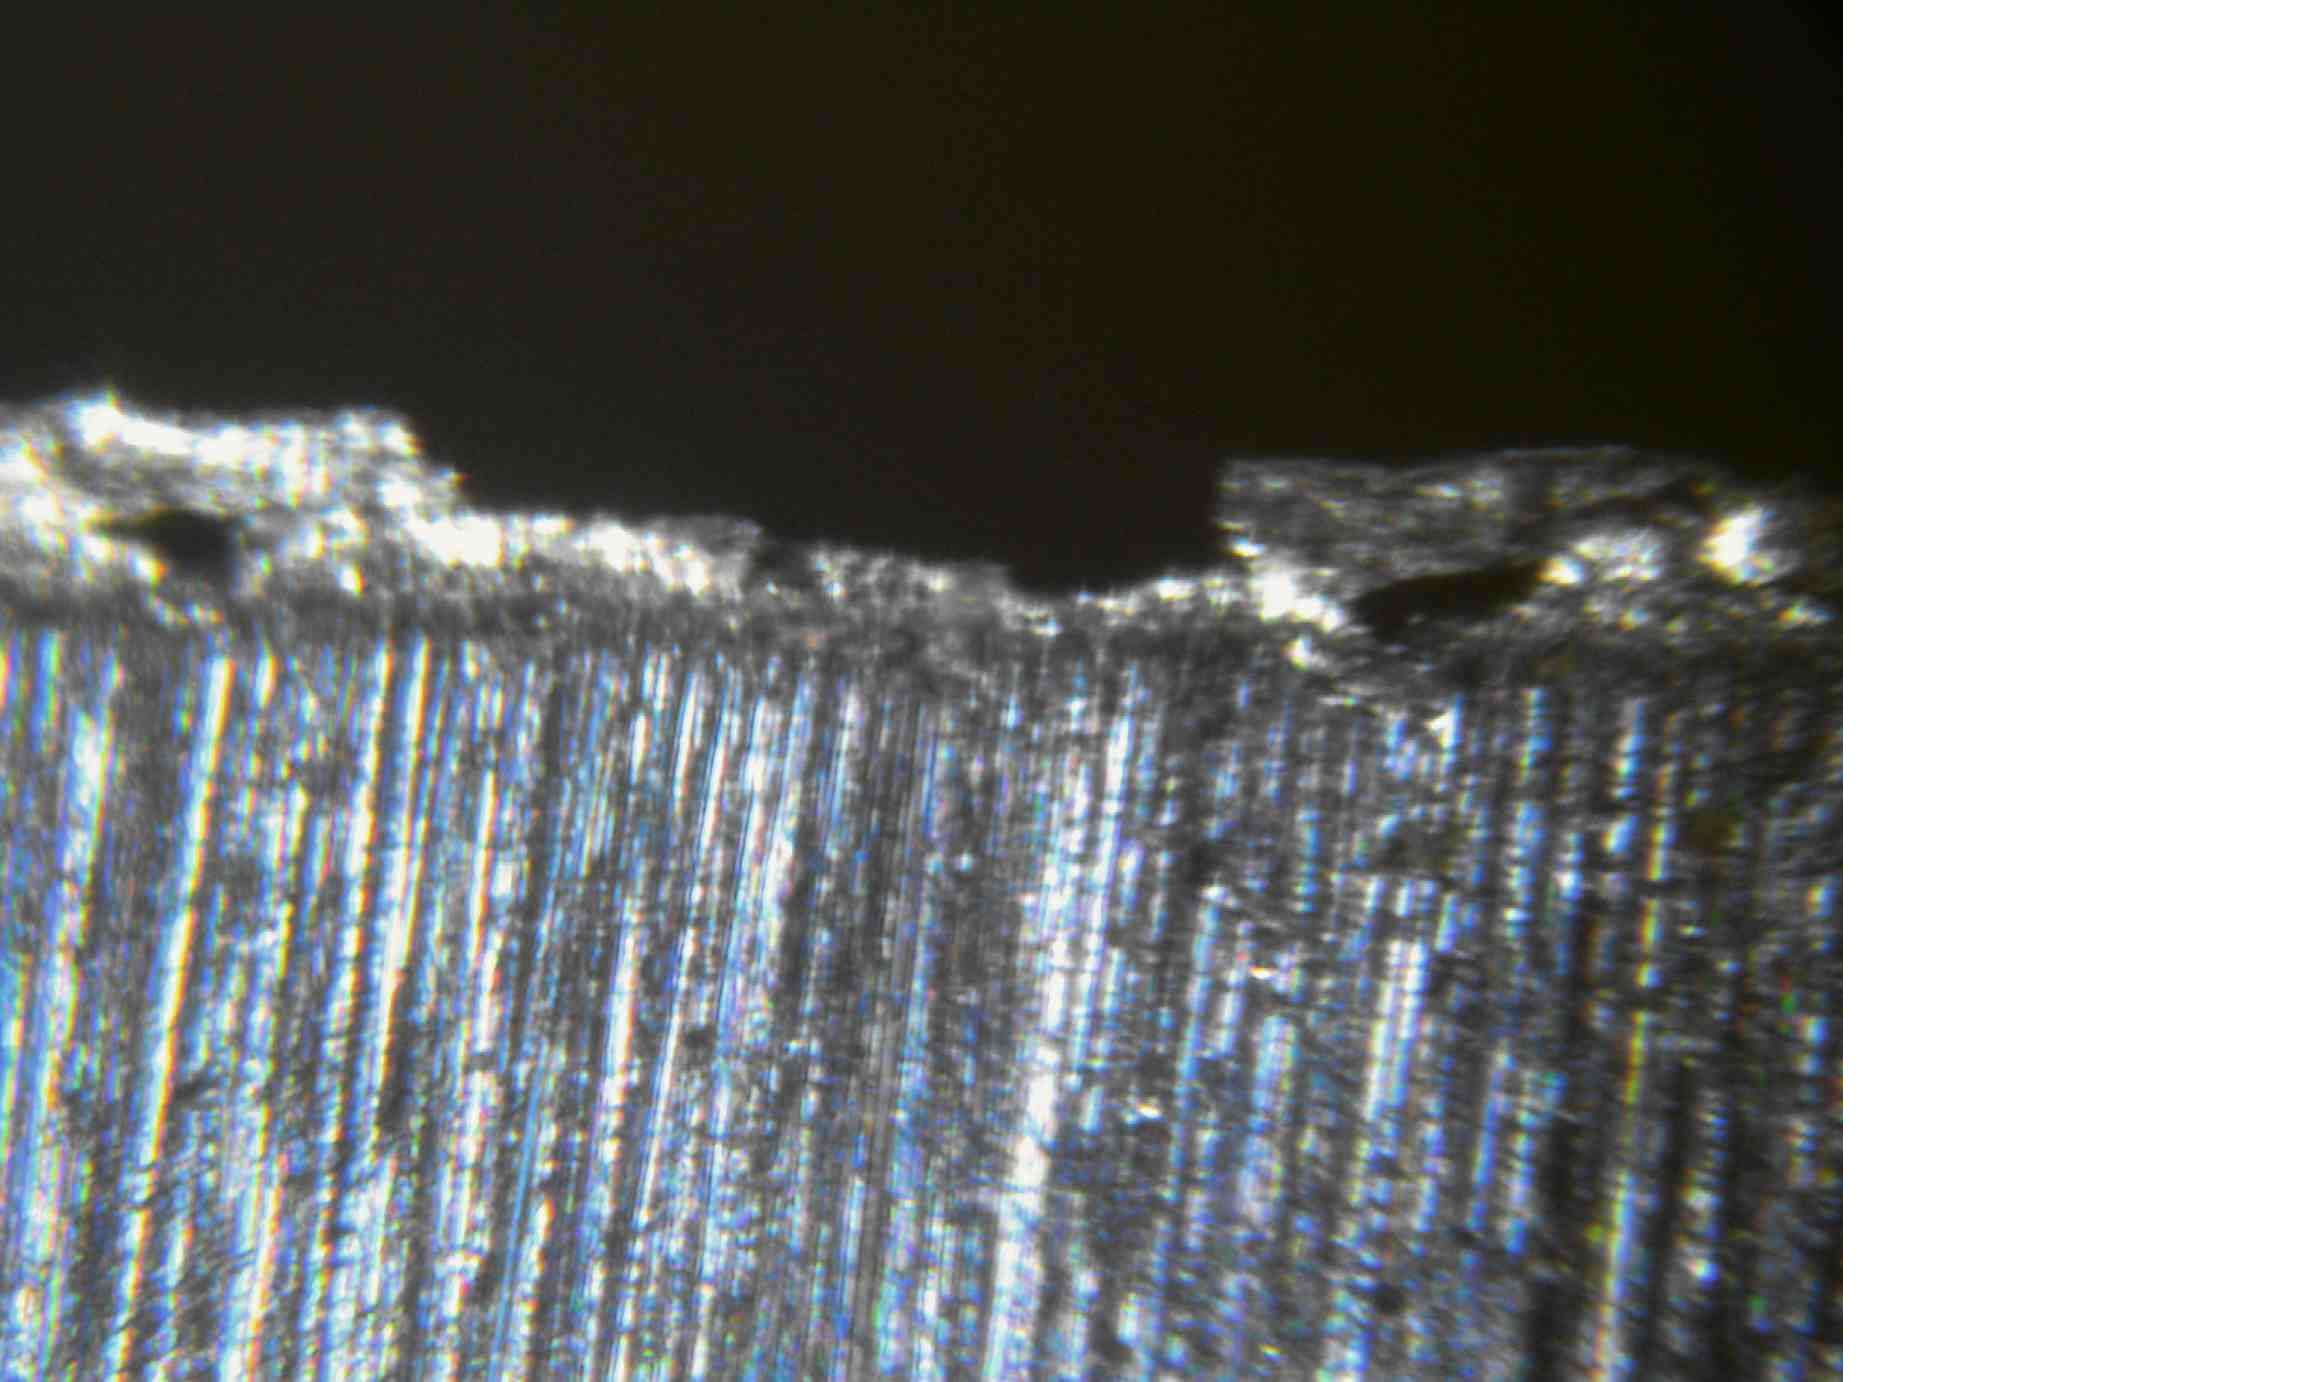
Below is the edge following removal of the chipping with an 80-100 micron stone.
I included this so that the edge finish may be compared to the brushed finish on the primary grind.
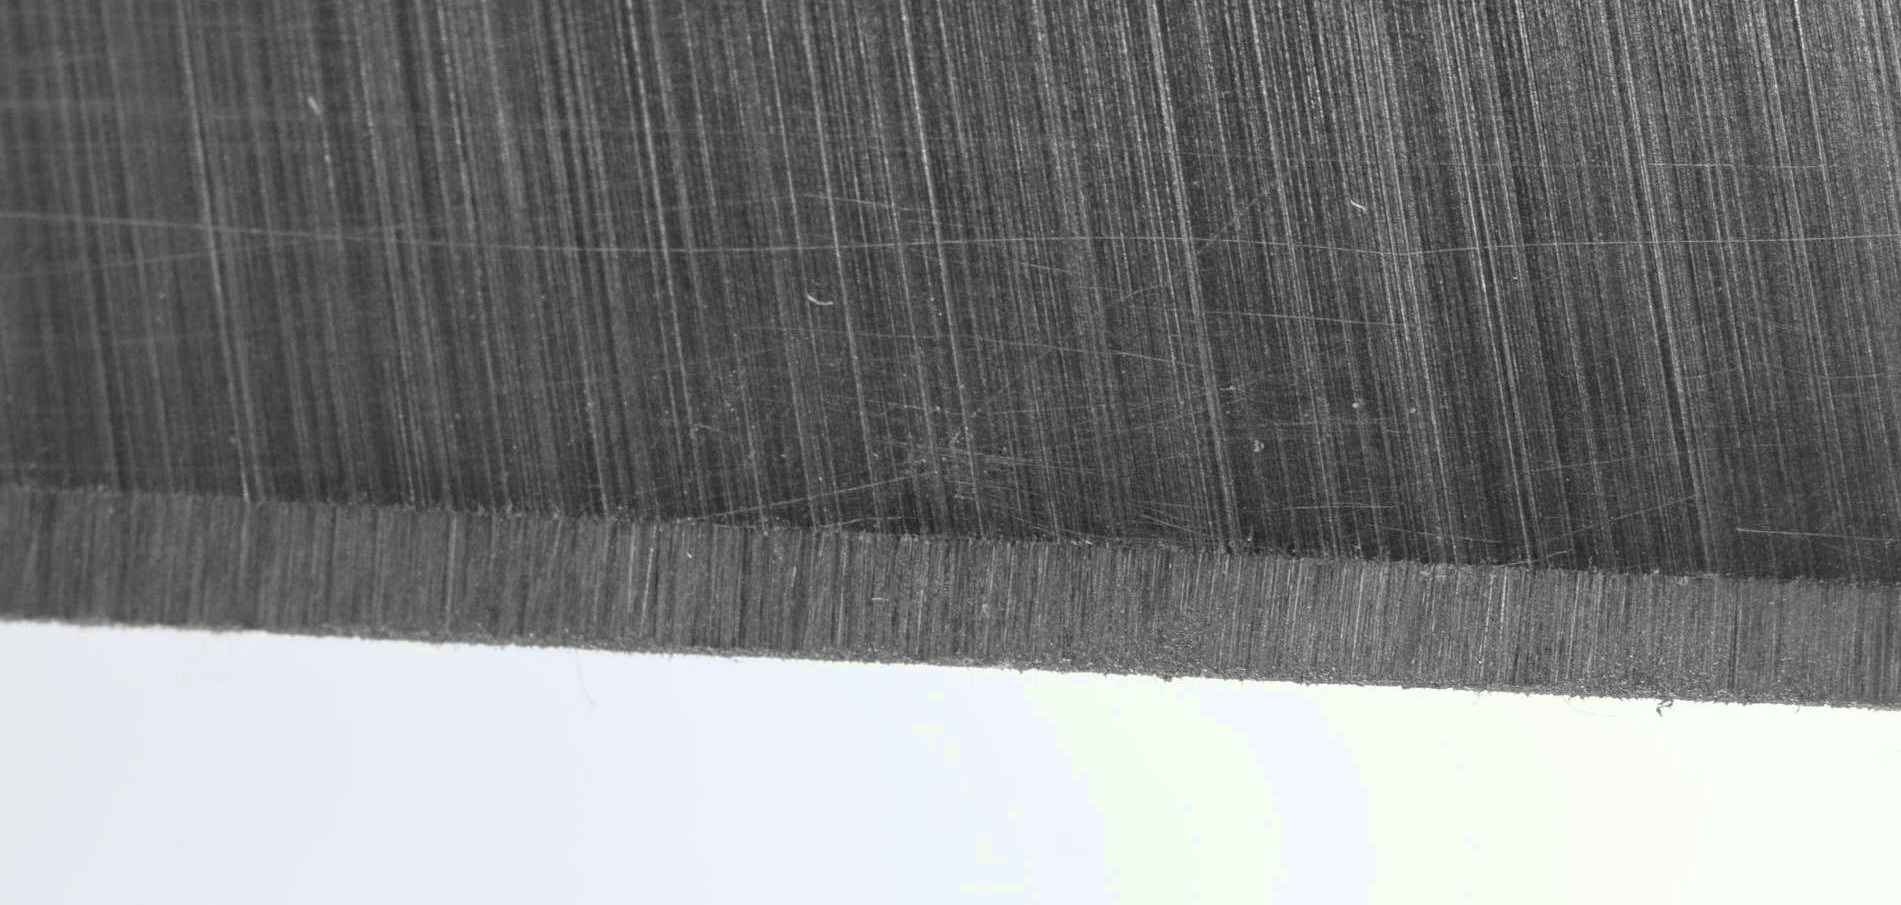
This is a view through the microscope of the apex with the light source directed along the edge to maximise surface contrast. This is on the side where I had just finished with the 80-100µm stone. The dark edges are the back of the burr. This unevenness is not easily seen by the unaided eye at least not by my eyes.
By flipping the blade over to the reverse side, the burr can be best seen by getting it to catch the light with the angle just right. It can be more easily felt on a fingernail than seen.
Here is a look at part of that burr from the 80-100µm stone on the reverse side through the microscope.
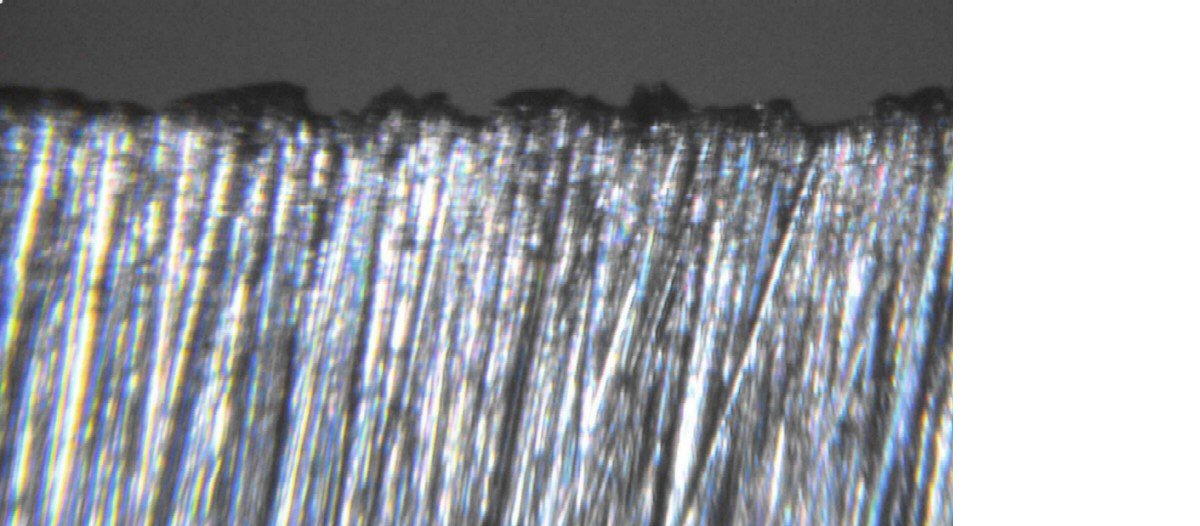
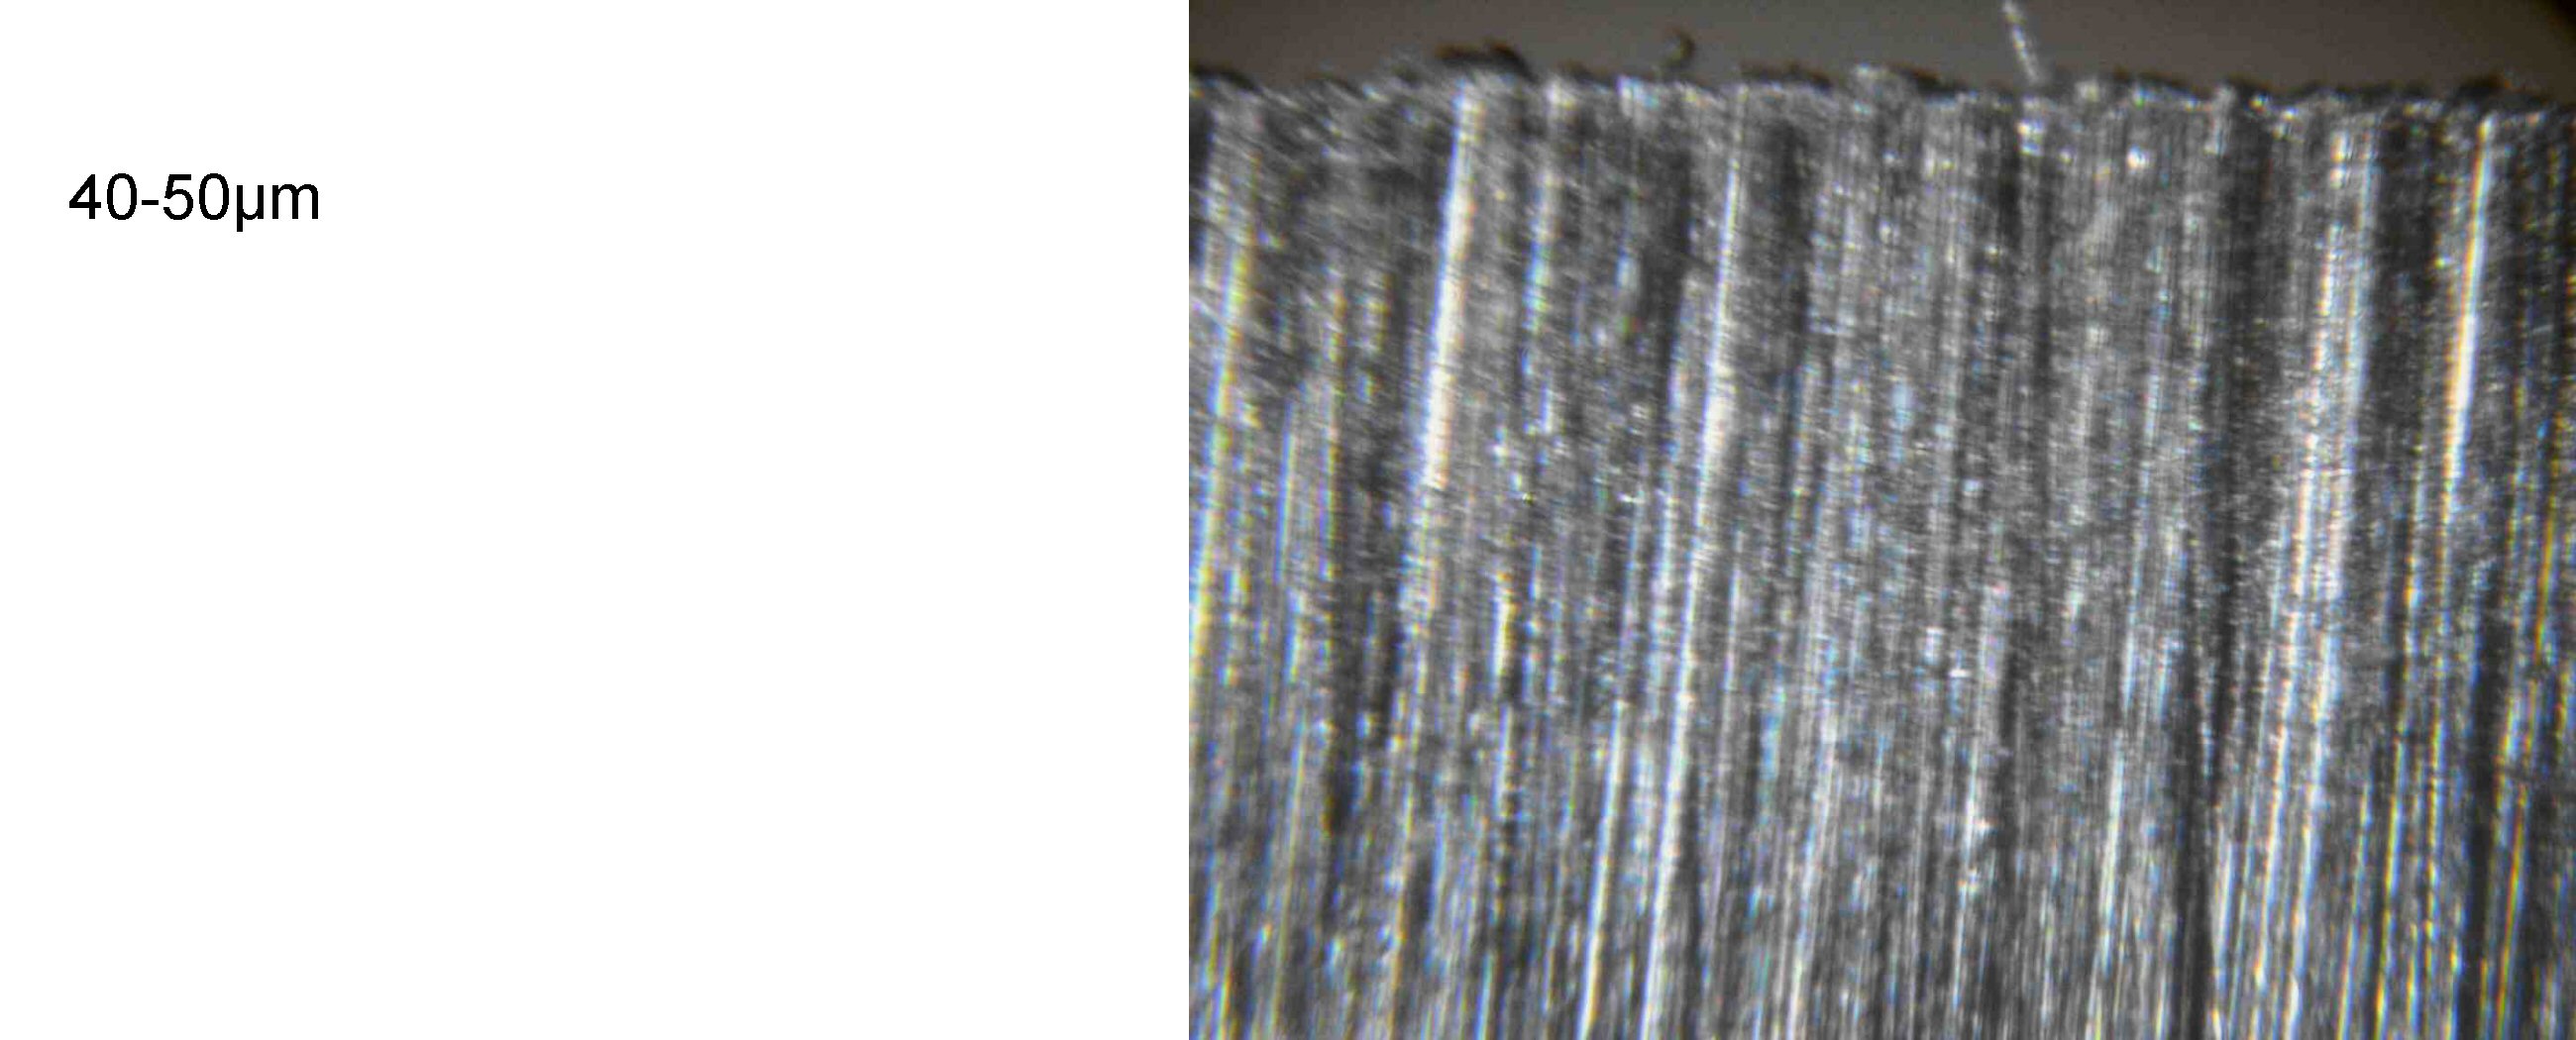
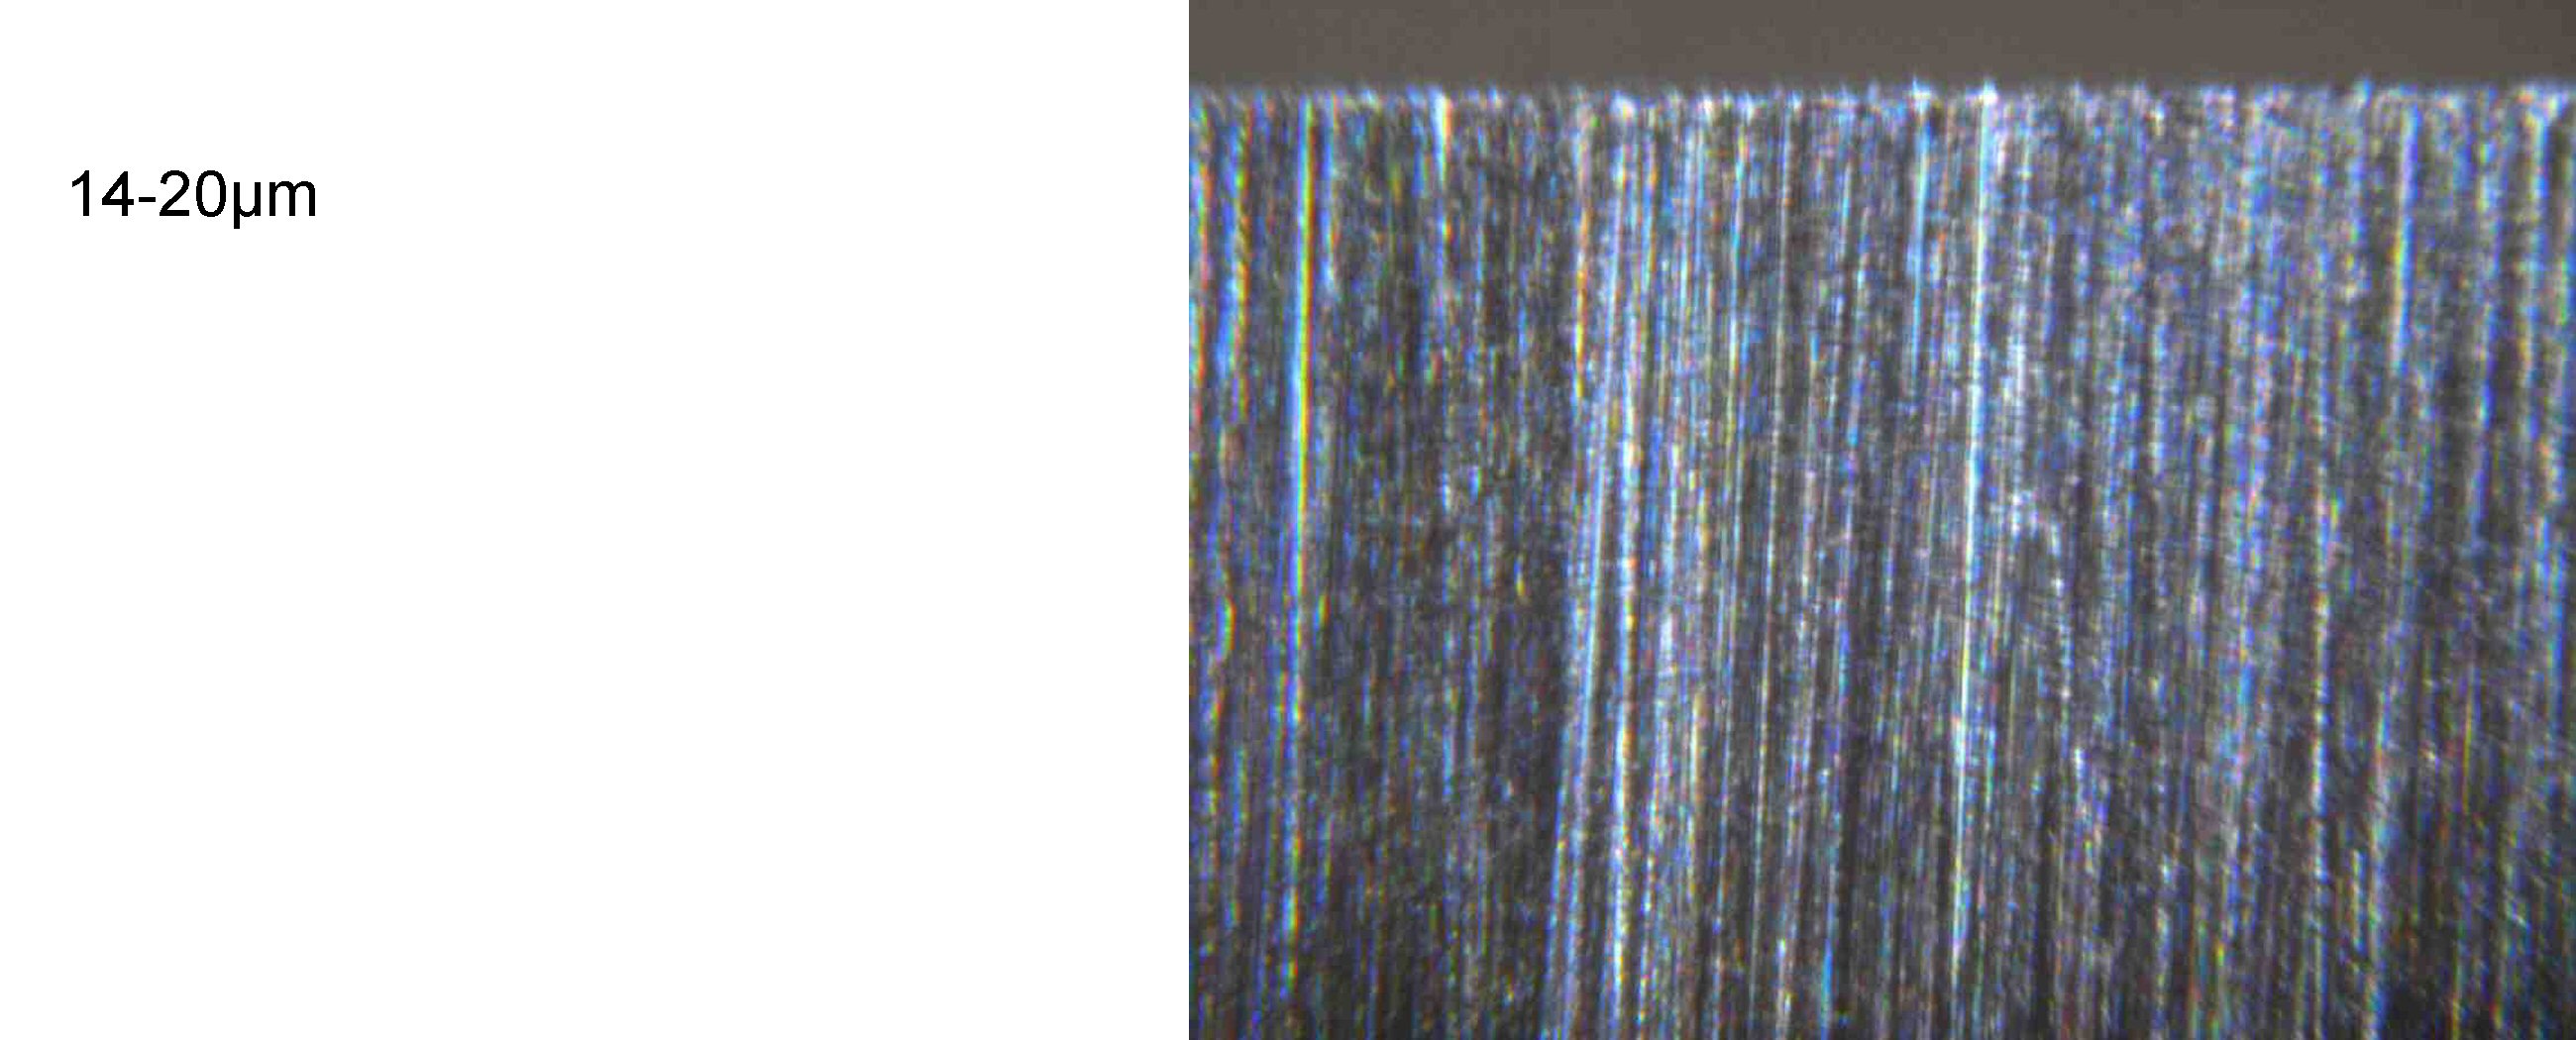
I then took the edge through the 40-50µm and 14-20µm stones. 14-20µm is where something approaching a reflection begins to be seen off the edge.
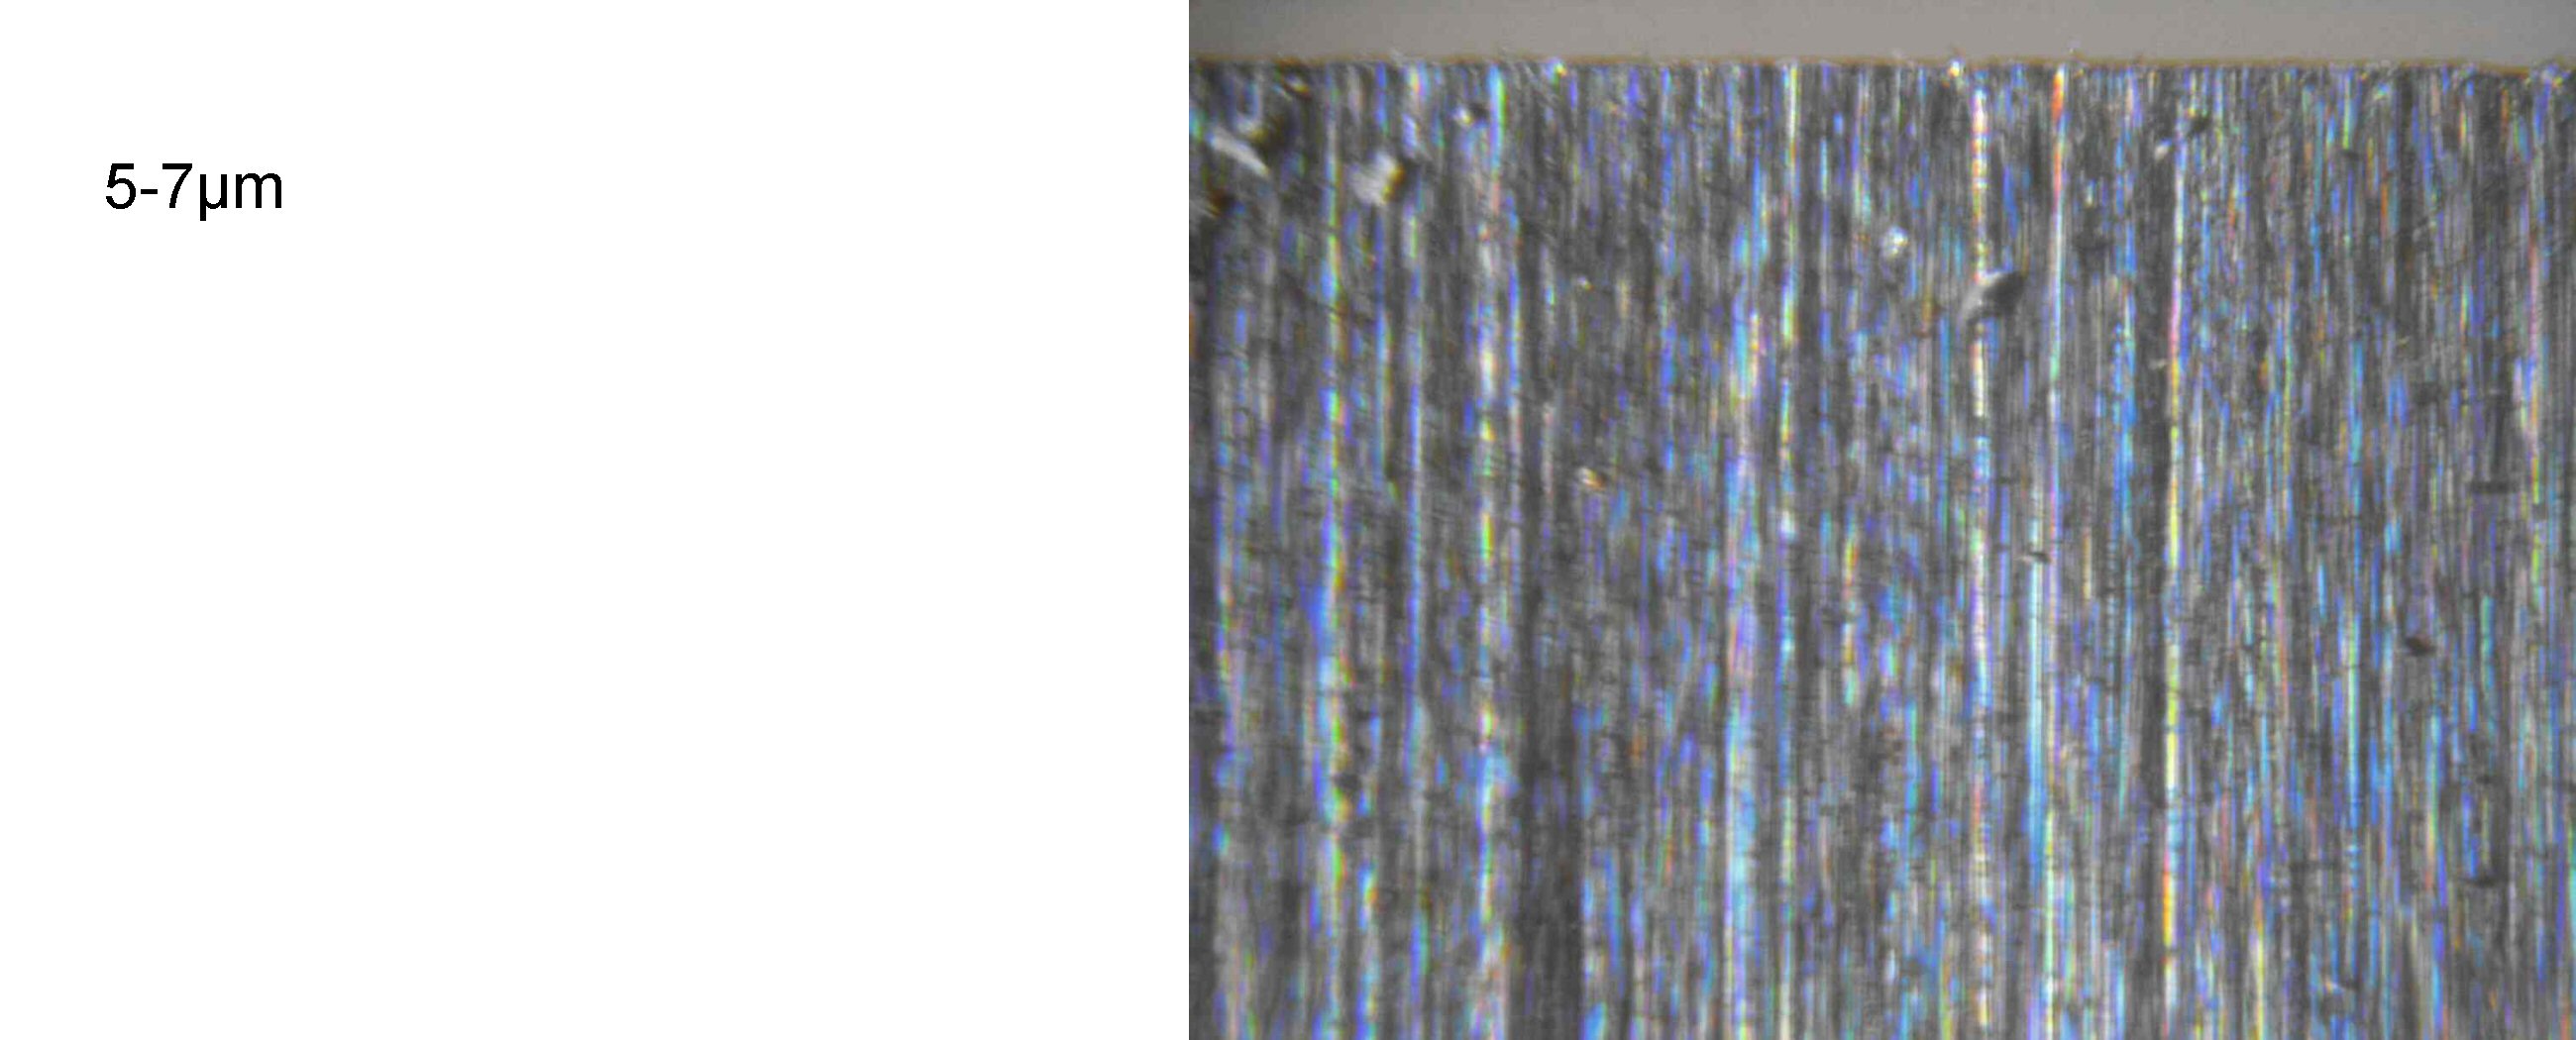
The 5-7µm abrasive is where the magic begins, as below
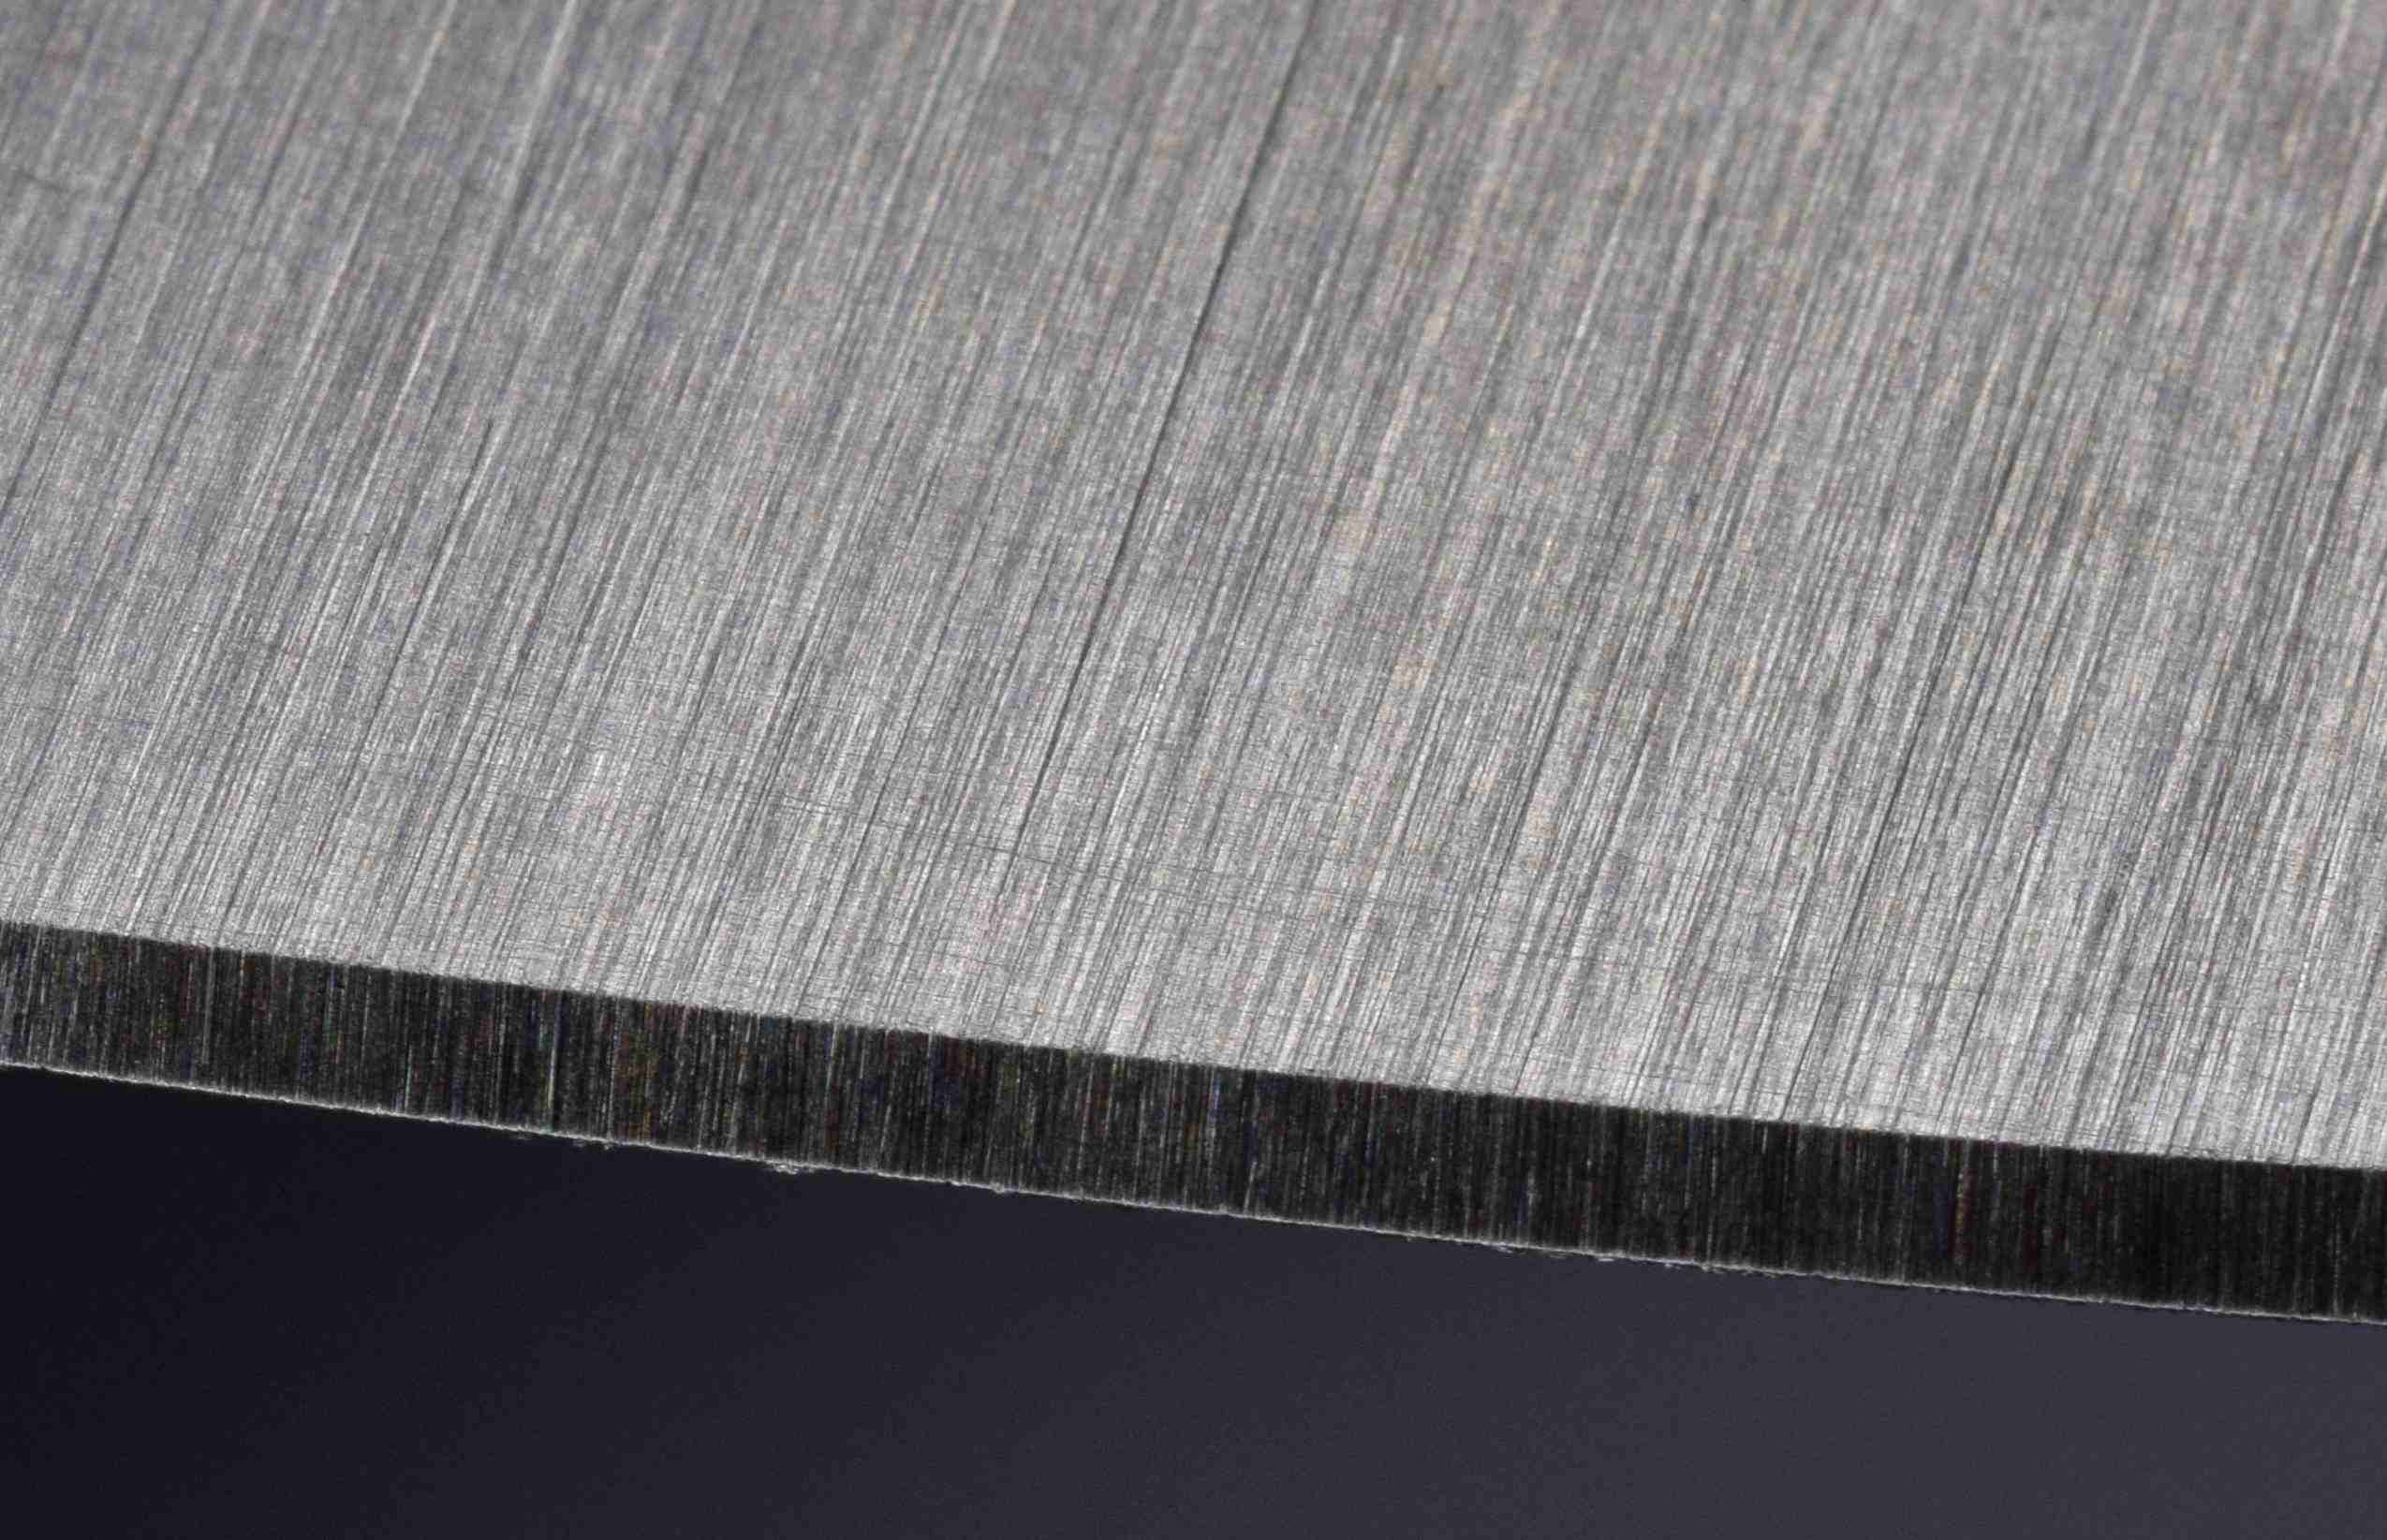
I refined the edge further using the 2-3µm stone. I might do a follow-up post showing any change to the finish from then using a 1 micron diamond stone followed by 1 and ¼ micron diamond emulsion on strops, but for now here are additional scratch patterns under the microscope for the different abrasive sizes, as before with the edge illumination at right-angles to the pattern unless otherwise mentioned.
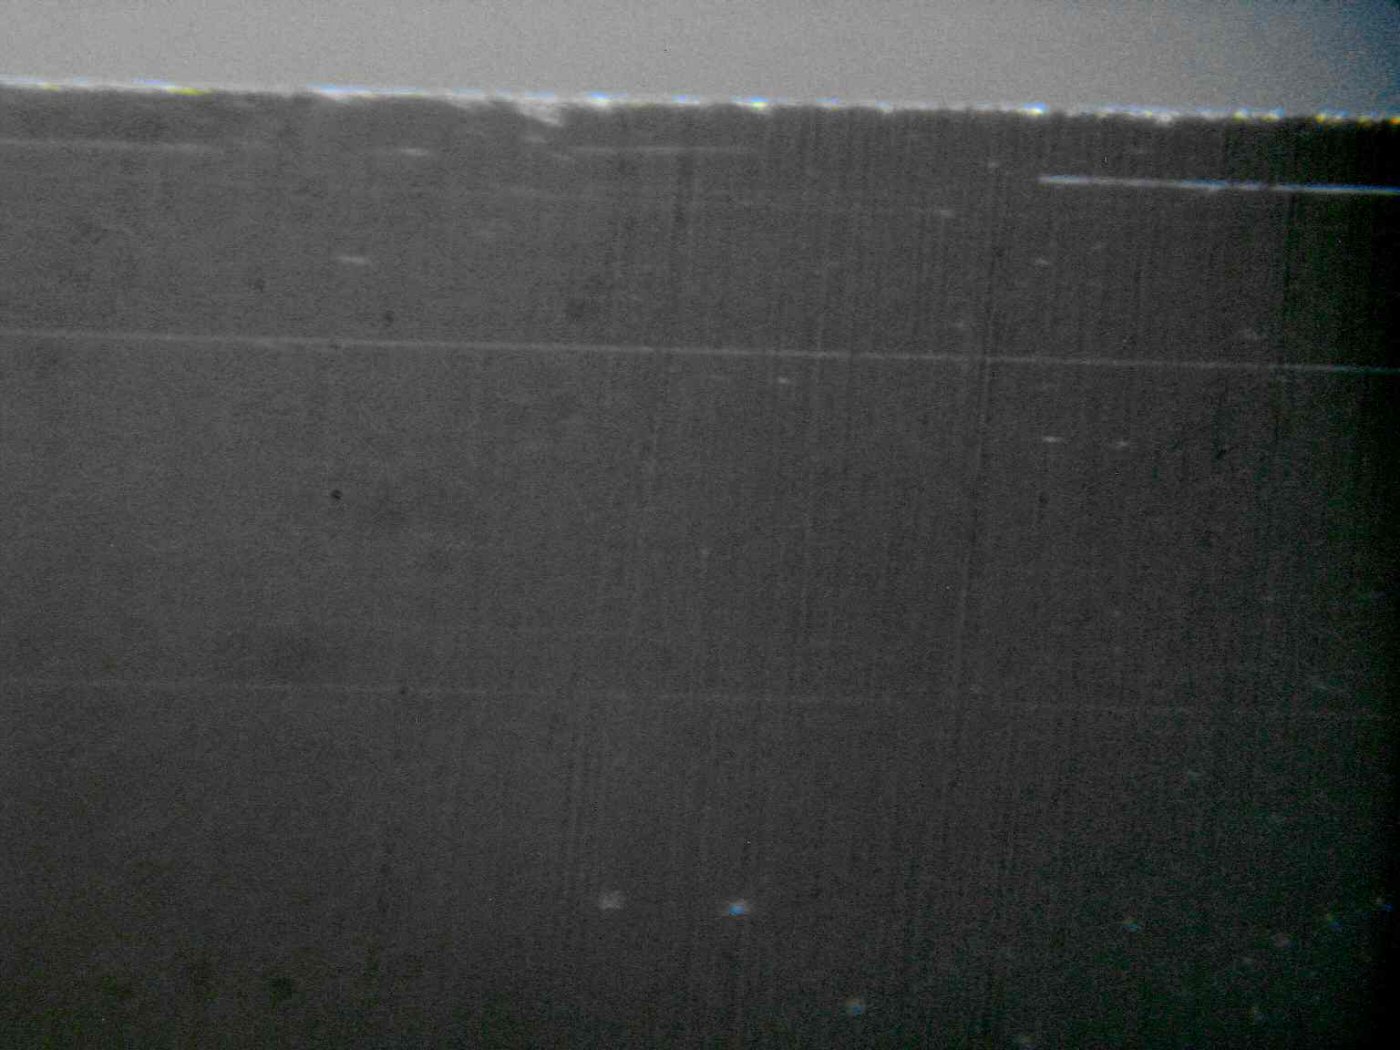
Even with the finer finishes, there is nothing mirror-like to the surface when it is viewed with magnification. That said, the illumination angle used makes a big difference to how the surface appeared. Below is when the same 2-3µm finish is viewed with the light shining straight onto the edge at right-angles rather than shone along the blade. Little sign of the scratch pattern shows up at all. Even with the edge being shaving sharp, the imperfections right at the apex may now be clearly seen. The horizontal lines I think have been added when wiping the edge clean, probably from the odd loose piece of abrasive picked up on the cloth. Diamond is still merciless on steel with a HRC hardness in the low sixties!
Observations or opinion? Ive found a microscope to be very helpful for seeing what the effect has been of each abrasive. While an expert may be able to hand sharpen, and do this by feel, I need a guided system, and even with a guided system there are pitfalls that high magnification can identify that would otherwise go unnoticed by me.
I have mentioned this in other posts, but I think it is worth noting again: it is essential in a guided system that every abrasive contacts the knife apex at EXACTLY the same angle as every other. Each successively finer stone is less able to remove sufficient material to correct for an error in applied angle than the previous. Any system where the knife is repeatedly flipped to progress through the grits must restore the blade to an absolutely identical position following each rotation. Even in systems like the Wicked Edge where the blade is held fixed through the entire process; any slop or flexing in the slide rods, or the different grades of stone being of an uneven thickness or wear, will change the angle of application. It is surprising how often I thought I had worked the edge fully with a particular stone only to see under the microscope areas where the scratch pattern of the previous abrasive remained untouched because of a slight angle difference. I would never see this by eye.
Welcome guest, is this your first visit? Create Account now to join.
Welcome to the NZ Hunting and Shooting Forums.
Search Forums


User Tag List
Results 16 to 30 of 36
Threaded View
-
22-05-2020, 11:22 AM #1Member


- Join Date
- May 2012
- Location
- Porirua
- Posts
- 1,040
Sharpening a D2 knife blade: some photos, observations, and opinions


 Reply With Quote
Similar Threads
-
Knife Sharpening
By Paua Pete in forum HuntingReplies: 7Last Post: 11-01-2020, 09:36 PM -
EXCHANGE A BLADE KNIFE
By bigbear in forum Gear and EquipmentReplies: 9Last Post: 16-03-2019, 05:09 PM -
making a knife and a sheath, part 5 - attaching the handle to the blade
By Shelley in forum Gear and EquipmentReplies: 2Last Post: 18-07-2015, 08:23 PM -
Old school replacement blade knife
By ChrisF in forum Gear and EquipmentReplies: 2Last Post: 17-06-2015, 11:27 AM
Tags for this Thread
 Posting Permissions
- You may not post new threads
- You may not post replies
- You may not post attachments
- You may not edit your posts
Welcome to NZ Hunting and Shooting Forums! We see you're new here, or arn't logged in. Create an account, and Login for full access including our FREE BUY and SELL section Register NOW!!
All times are GMT +13. The time now is 05:04 PM.

Bookmarks